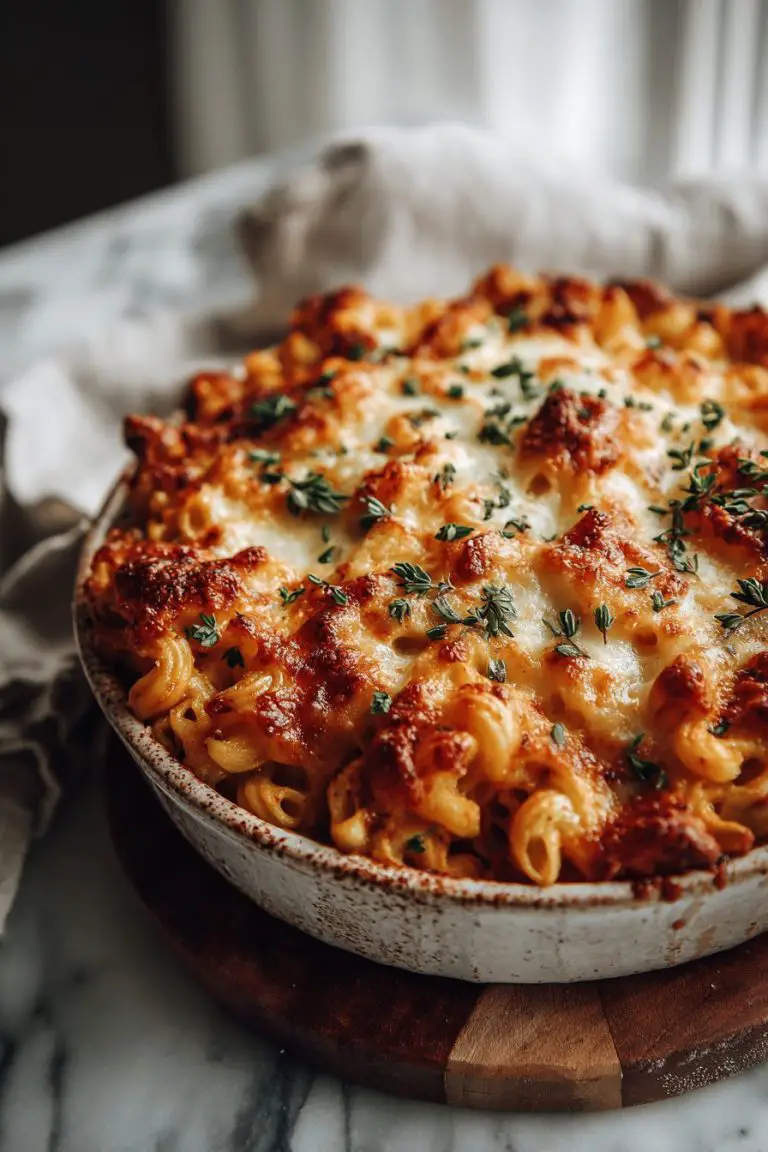
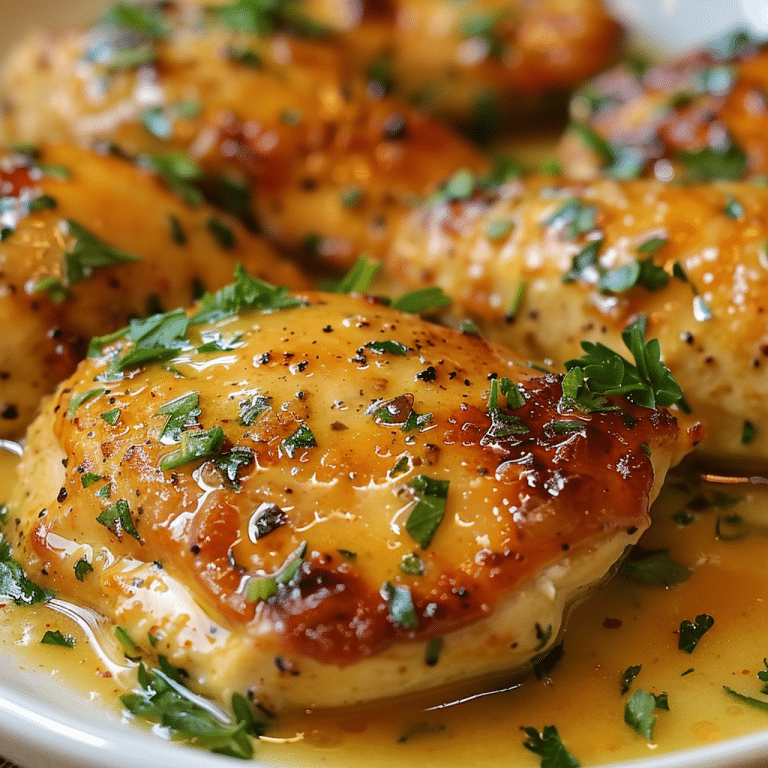
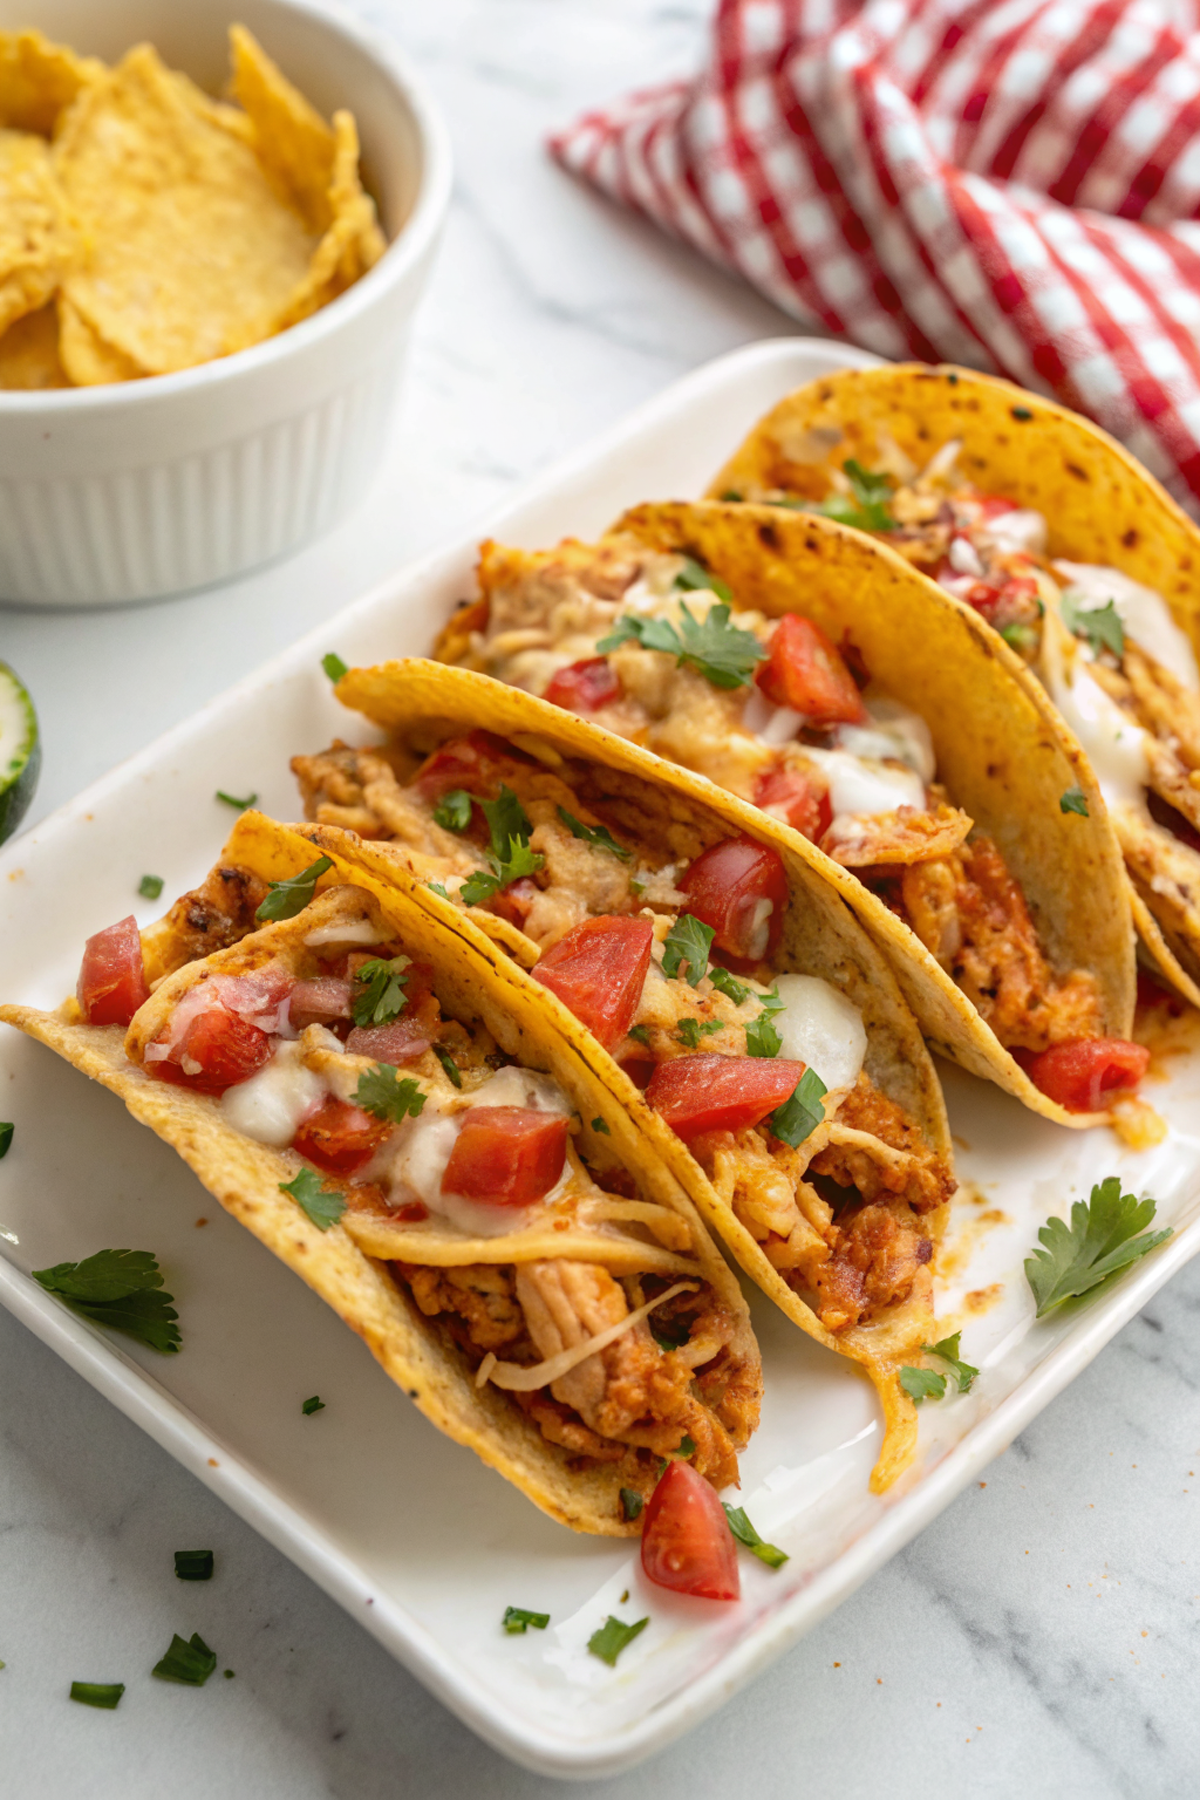
Cheesy Baked Chicken Tacos
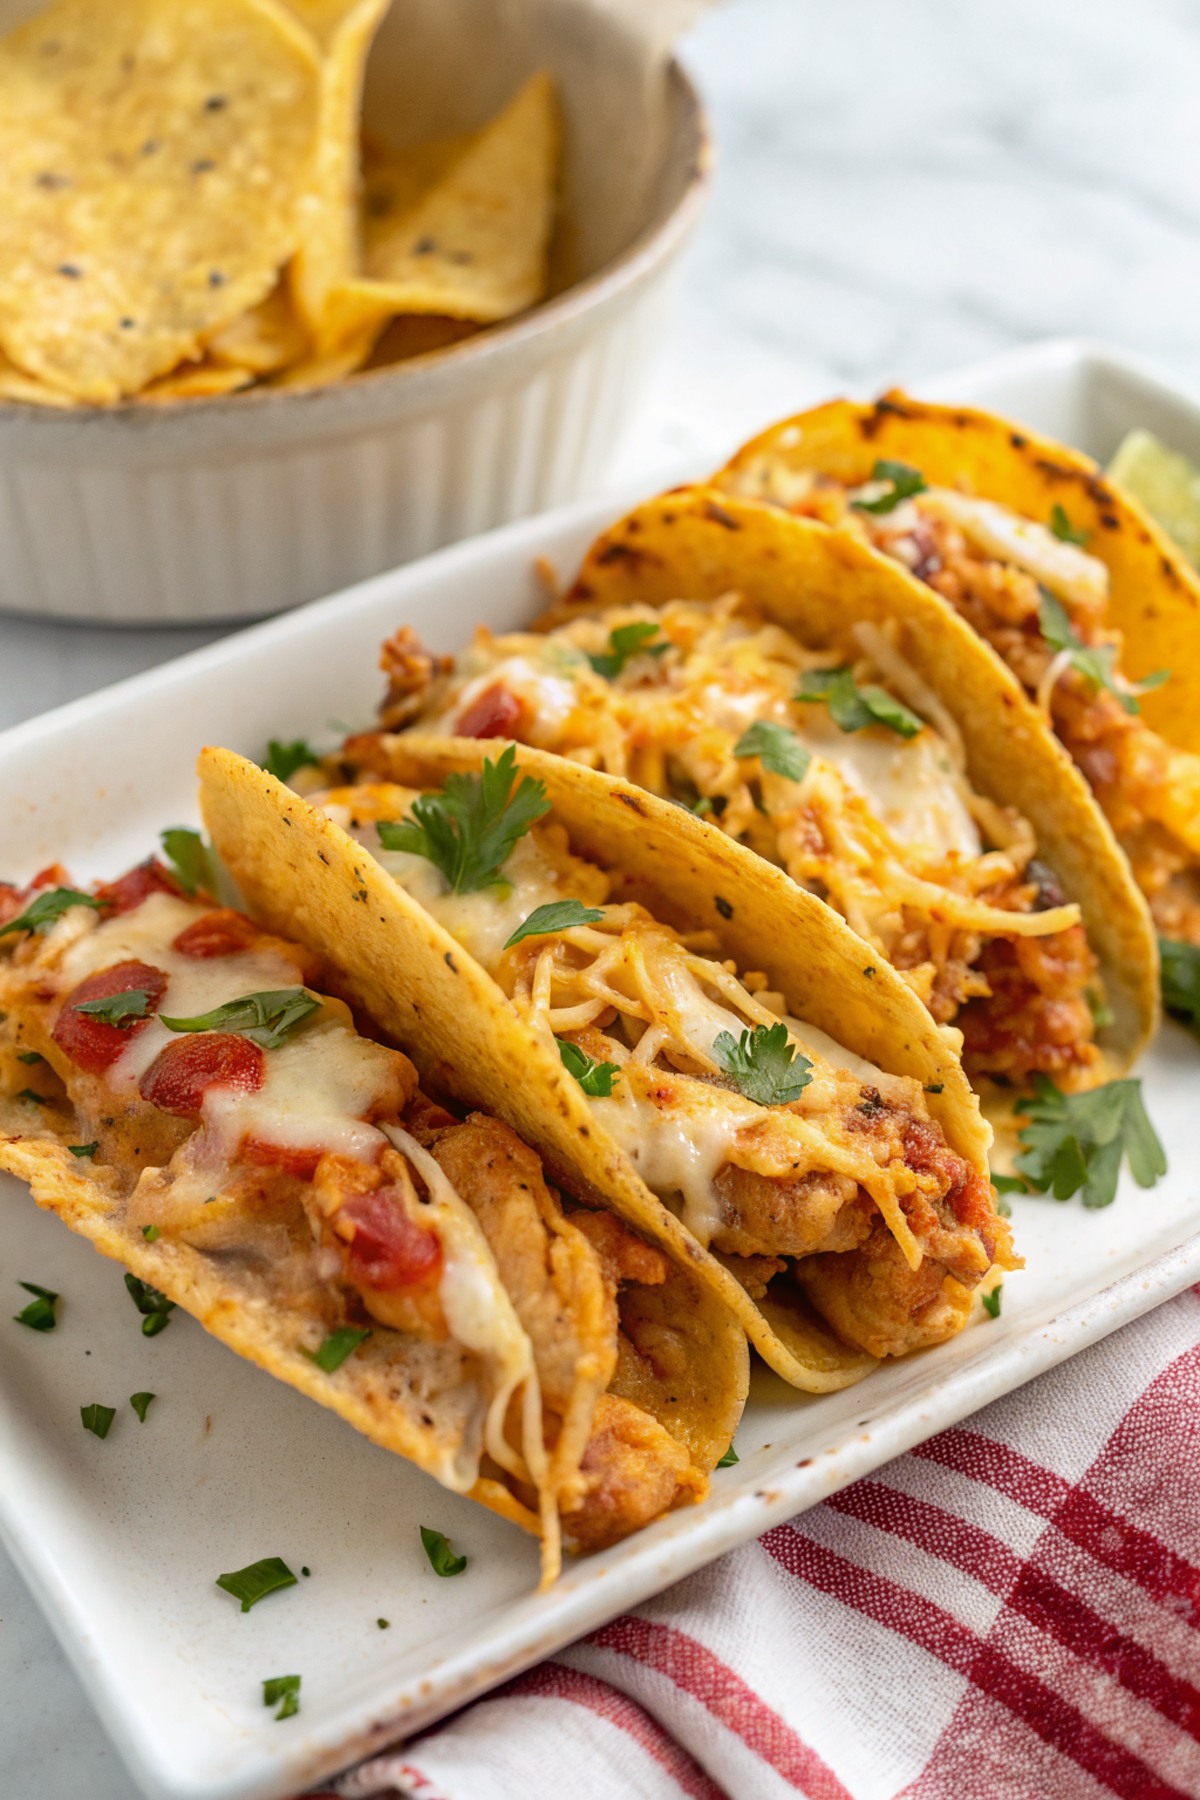
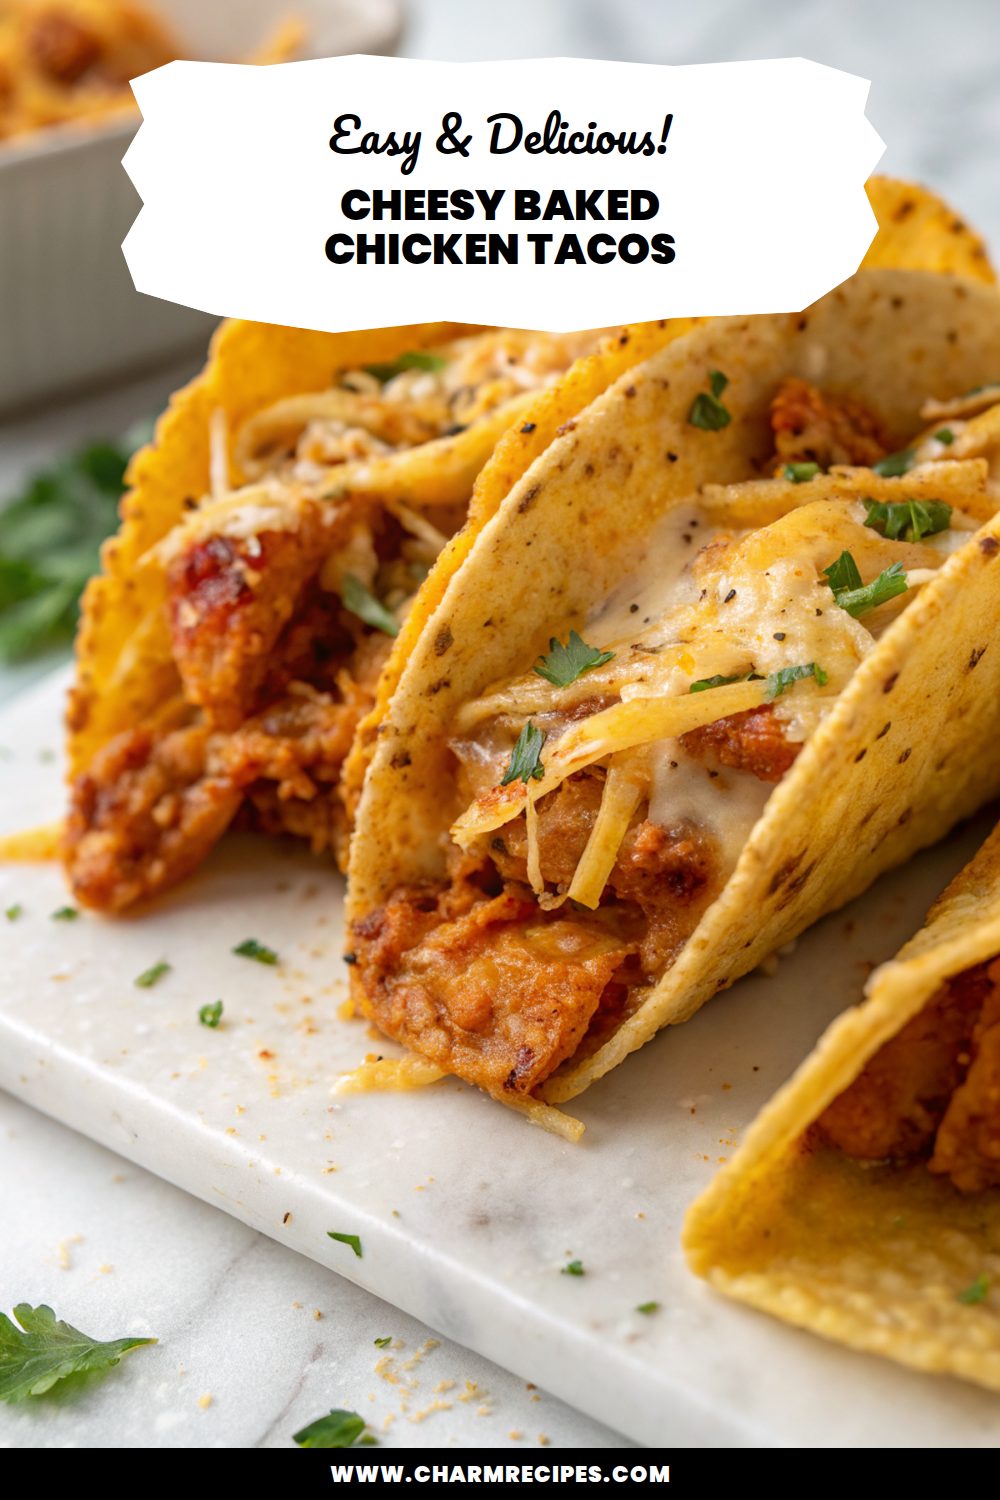
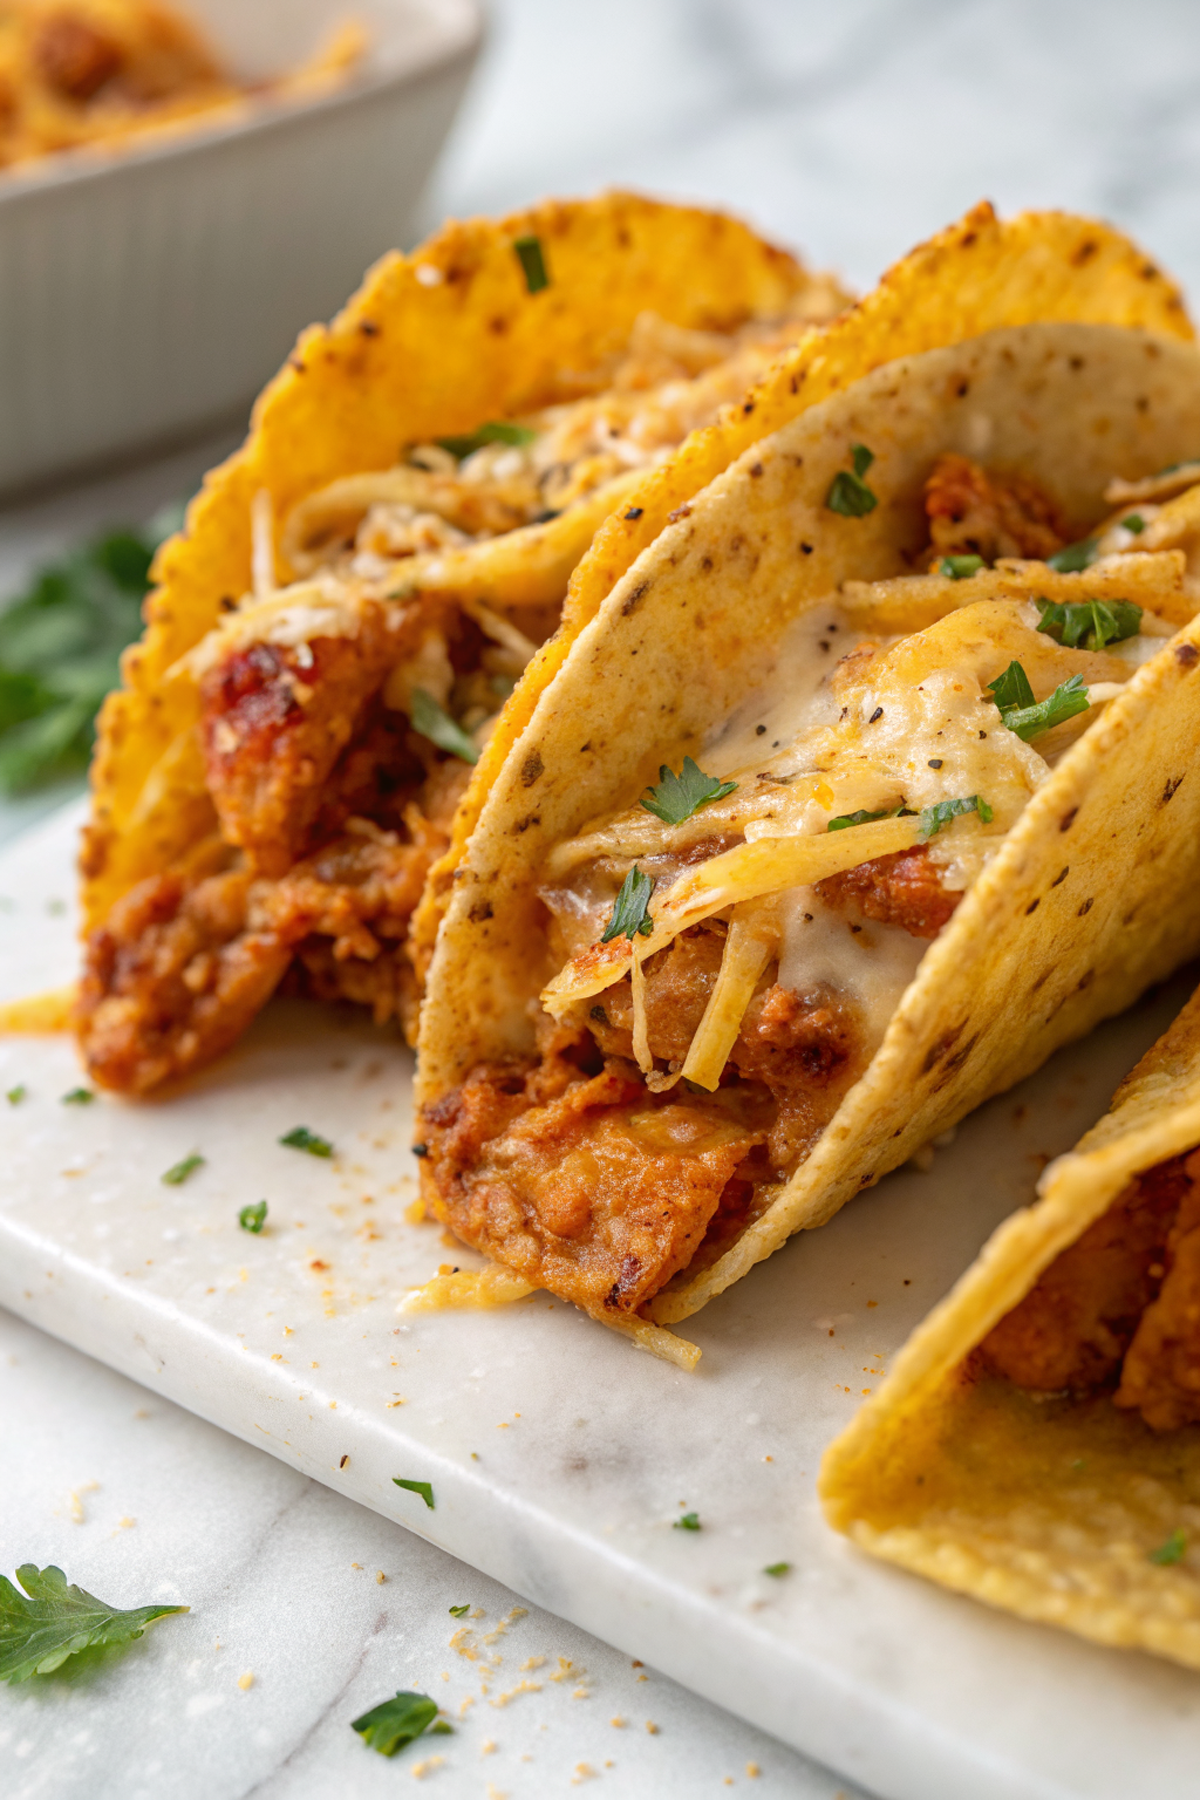
These cheesy baked chicken tacos are warm tortillas filled with seasoned shredded chicken, plenty of melty cheese, and baked until the edges are crisp and the filling is bubbly. The result is a satisfying mix of creamy, savory cheese and tender, flavorful chicken with a bit of crunch from the toasted tortilla edges—easy to put together and great for weeknights or casual entertaining.
They come together quickly if you use leftover or rotisserie chicken, and they stand up well to different toppings so you can keep things simple or dress them up. I like making a double batch of filling so there’s enough for quick lunches later in the week.
Why This Cheesy Baked Chicken Tacos Works
1. Melty cheese binds the filling and crisps on the edges for contrast between soft interior and crunchy tortilla.
2. Pre-cooked shredded chicken soaks up seasoning and salsa, giving big flavor without long cooking.
3. Baking keeps everything warm and lets you make several tacos at once—faster than individually frying.
4. Easy to customize with different cheeses, sauces, or add-ins to match what you have on hand.
Ingredients
A quick look at the main components and what to pick for best results.
MORE OF OUR FAVORITE…
– Cooked shredded chicken: Rotisserie or leftover roasted chicken works great—shred finely so it mixes well with sauce.
– Tortillas (corn or flour): Soft flour tortillas are easier to roll; corn gives more authentic flavor but warm them first to prevent cracking.
– Shredded cheese: A Mexican blend or sharp cheddar melts well—use a mix for flavor and stretch.
– Taco seasoning: Store-bought or a simple mix of chili powder, cumin, garlic powder, and salt to season the chicken.
– Salsa or enchilada sauce: Adds moisture and flavor—choose thicker salsa to avoid soggy tacos.
– Oil or melted butter: Lightly brush tortillas for crisp, golden edges while baking.
– Optional add-ins: Diced onion or bell pepper, canned black beans, or corn to bulk up the filling.
Substitutions and Variations
– Swap chicken for cooked ground beef or turkey—texture becomes slightly denser and beefy, adjust seasoning.
– Use shredded Monterey Jack or pepper jack for a creamier, spicier melt.
– Replace salsa with green enchilada sauce for a tangier, saucier filling—may need to drain a bit to prevent sogginess.
– Make vegetarian: swap chicken for seasoned roasted sweet potato and black beans; texture is chunkier and sweeter.
– Use corn tortillas for a gluten-free option; warm and steam them briefly so they fold without cracking.
– Add a squeeze of lime and cilantro after baking for a fresher, brighter finish.
How to Make Cheesy Baked Chicken Tacos
This is a summary—refer to the full recipe card for exact amounts and oven times.
1. Preheat the oven to 425°F (220°C) and lightly oil a rimmed baking sheet or shallow baking dish.
2. Mix shredded chicken with taco seasoning and a few tablespoons of salsa or enchilada sauce until evenly coated. Taste and adjust salt/heat.
3. Warm tortillas briefly in a dry skillet or microwave to make them pliable. Spoon a few tablespoons of chicken mixture onto each tortilla and fold or roll seam-side down.
4. Arrange tacos close together on the baking sheet; brush tops with a little oil or melted butter for crisping.
5. Sprinkle shredded cheese generously over each taco, covering seams to help them stay closed.
6. Bake until cheese is melted and edges are golden, about 10–12 minutes; broil 1–2 minutes if you want extra browning—watch closely.
7. Let rest 2–3 minutes, then garnish with cilantro, lime, diced onion, or sour cream before serving.

Tips for the Best Results
1. Warm tortillas before filling to prevent cracking and help them fold neatly.
2. Don’t overfill—use a modest amount of filling so seams stay closed and tacos crisp properly.
3. Use a shallow pan or rimmed baking sheet so heat circulates and edges can brown.
4. Choose a thicker salsa or drain very saucy mixes to avoid soggy tacos.
5. Watch closely if broiling for browning—cheese can go from golden to burnt quickly.
6. Let tacos rest a couple minutes after baking so filling settles and cheese firms slightly.
Common Mistakes
– Using cold tortillas that crack when folded — warm them briefly to make them flexible.
– Overfilling each tortilla so seams burst — reduce filling per taco or double up tortillas if you want a bigger portion.
– Adding too much thin salsa or sauce — use thicker sauce or drain excess liquid to prevent sogginess.
– Crowding the pan so tacos steam instead of crisp — leave a little space or use two pans.
– Skipping the oil/butter brush — without it tortillas won’t brown evenly; lightly brush for best texture.
– Broiling too long to “finish” them — short bursts only; watch the cheese.
Storage
Storing: Cool completely, then store baked tacos in an airtight container in the refrigerator for up to 3 days. Keep fresh toppings (sour cream, avocado, cilantro) separate until ready to serve.
Freezing: For best texture, freeze the cooked filling in a freezer-safe container for up to 3 months and assemble/bake later. You can freeze fully baked tacos wrapped tightly, but they may soften when thawed.
Reheating or serving later: Reheat in a 350°F (175°C) oven for 8–12 minutes to restore crispness, or re-crisp in an air fryer or skillet for a few minutes. Add fresh toppings just before serving.
How to Serve Cheesy Baked Chicken Tacos
– Serve with lime wedges, chopped cilantro, and diced red onion for brightness.
– Pair with Mexican rice and black beans for a fuller meal.
– Offer quick toppings bar—sour cream, shredded lettuce, pickled jalapeños, and avocado slices.
– Serve with a simple cabbage slaw for crunch and acidity.
More Helpful Notes
– Rotisserie chicken speeds this up and adds good flavor with minimal effort.
– Shred chicken finely so the filling packs neatly into tortillas without large clumps.
– If using corn tortillas, brush both sides lightly with oil and warm to reduce breakage.
– Leftover filling is great folded into quesadillas or used in burrito bowls.
– Adjust spice level by adding cayenne or a dash of hot sauce to the chicken mixture.
Frequently Asked Questions
Cheesy Baked Chicken Tacos
Ingredients
For the baked chicken tacos
- 3 cups cooked shredded chicken
- 2 1/2 tbsp taco seasoning
- 1 (14.5-oz) can fire-roasted diced tomatoes with green chiles, well drained
- 1 1/4 cups refried black beans
- 10 oz shredded Mexican blend cheese
- 12 crisp taco shells (stand-up style if possible)
- 1 small yellow onion, finely diced
- 2 cloves garlic, minced
- 1 tbsp fresh lime juice
Instructions
Preparation Steps
- Heat the oven to 425°F. Stand taco shells upright in a 9×13-inch baking dish and bake for 3 minutes to lightly toast; set the dish aside and keep the shells in it.
- Make the chicken filling: In a large nonstick skillet over medium heat, add the drained fire-roasted tomatoes and diced onion. Cook, stirring often, until the onion softens and most of the liquid cooks off, 4–5 minutes. Stir in the garlic and cook 30 seconds until fragrant.
- Sprinkle in the taco seasoning and add the shredded chicken. Toss to coat and cook until the chicken is hot and steamy, 2–3 minutes. Turn off the heat and stir in the lime juice. For extra cohesion, fold in about 1/2 cup of the shredded cheese to lightly bind the filling.
- Warm the refried black beans in a small saucepan or microwave until spreadable (45–60 seconds), stirring once. If very thick, loosen with a teaspoon of water.
- Assemble: Spread a thin layer of warm beans in each toasted shell. Spoon in the chicken mixture (a generous 1/4 cup per shell), then top evenly with the remaining cheese.
- Bake at 425°F for 7–9 minutes, until the cheese is fully melted and the shell edges are golden. For spotty browning, broil 30–60 seconds, watching closely.
- Let the tacos rest 2 minutes to set, then serve hot. Add your favorite toppings if you like.
Notes
Featured Comments
“Made this last night and it was will make again. Loved how the al dente came together.”
“New favorite here — turned out amazing. vibrant was spot on.”
“New favorite here — absolutely loved. fun was spot on.”
“This cheesy recipe was turned out amazing — the satisfying really stands out. Thanks!”
“Impressed! Clear steps and family favorite results. Perfect for busy nights.”
“New favorite here — will make again. loaded was spot on.”
“This golden recipe was will make again — the crunchy really stands out. Thanks!”
“New favorite here — so flavorful. quick was spot on.”
“Made this last night and it was turned out amazing. Loved how the grilled came together.”
“This warm hug recipe was will make again — the crispy crust really stands out. Thanks!”