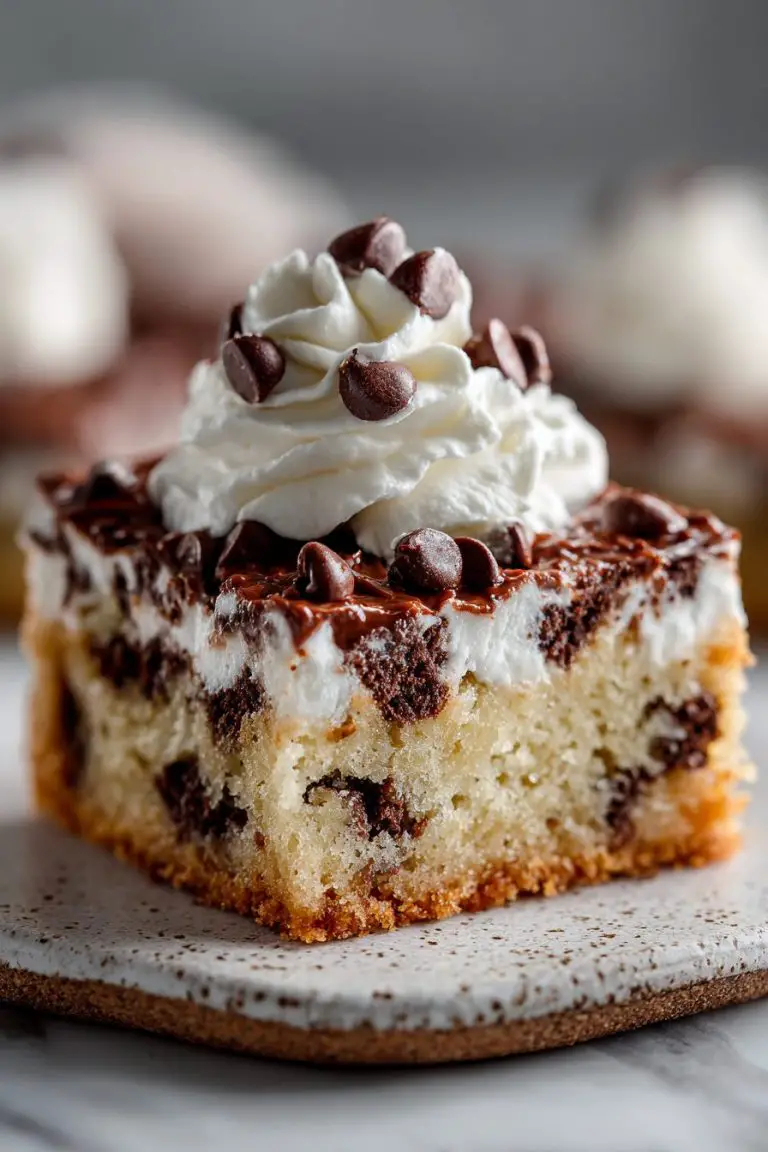
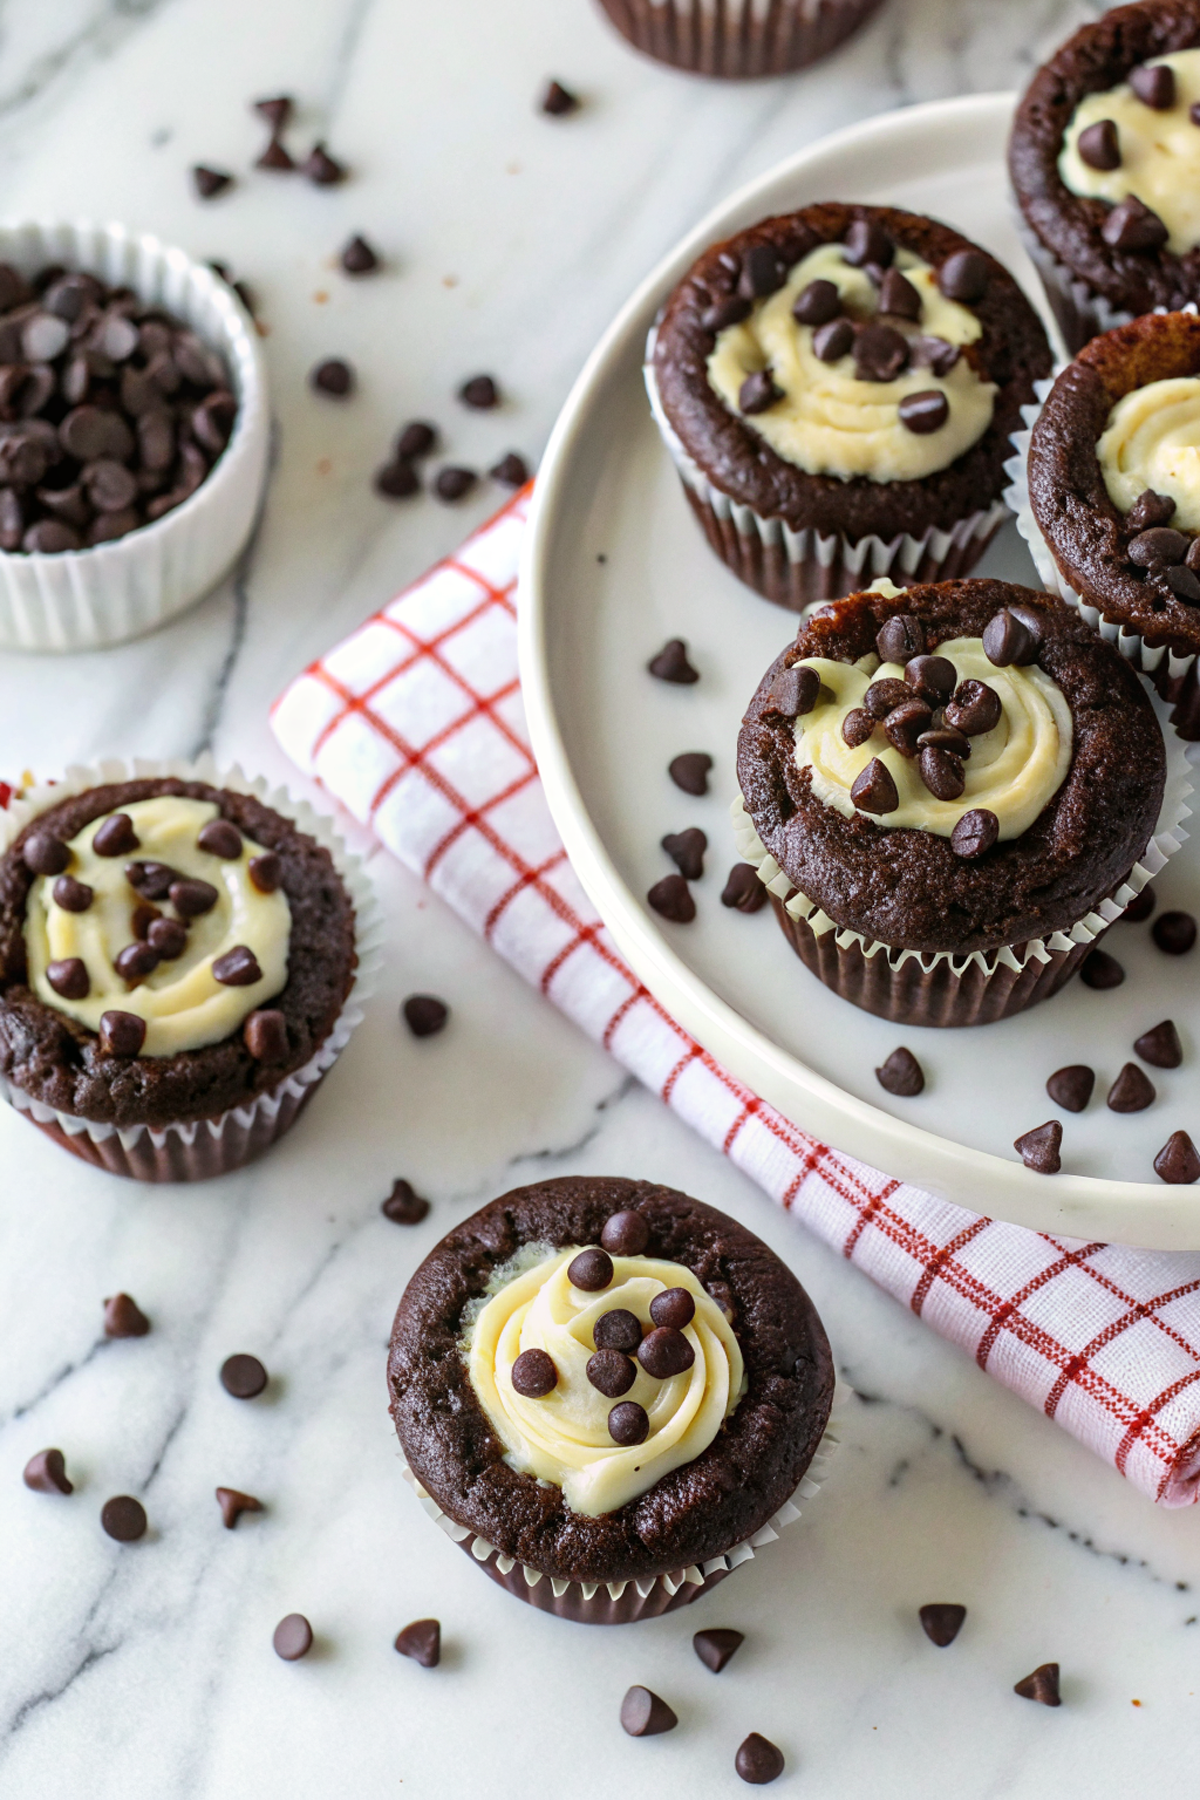
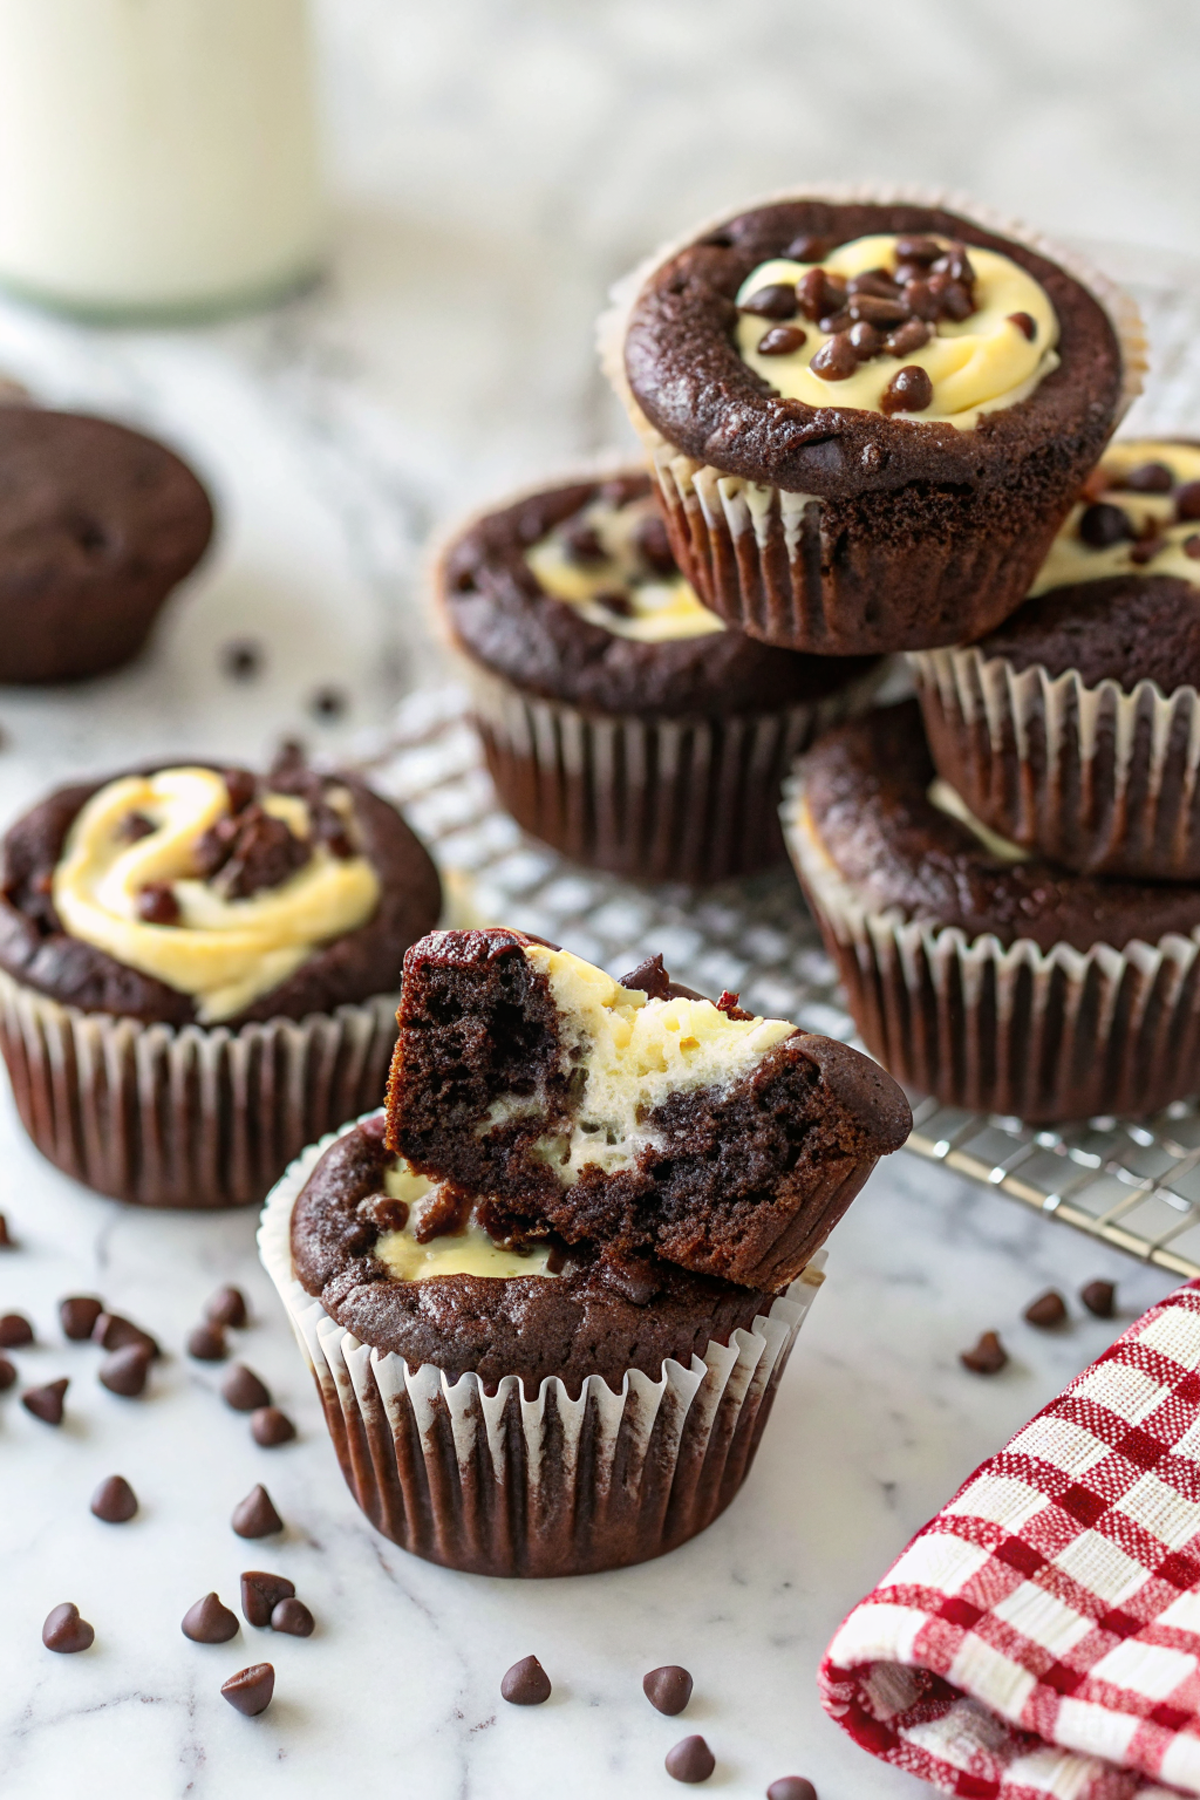
Black Bottom Chocolate Cupcakes
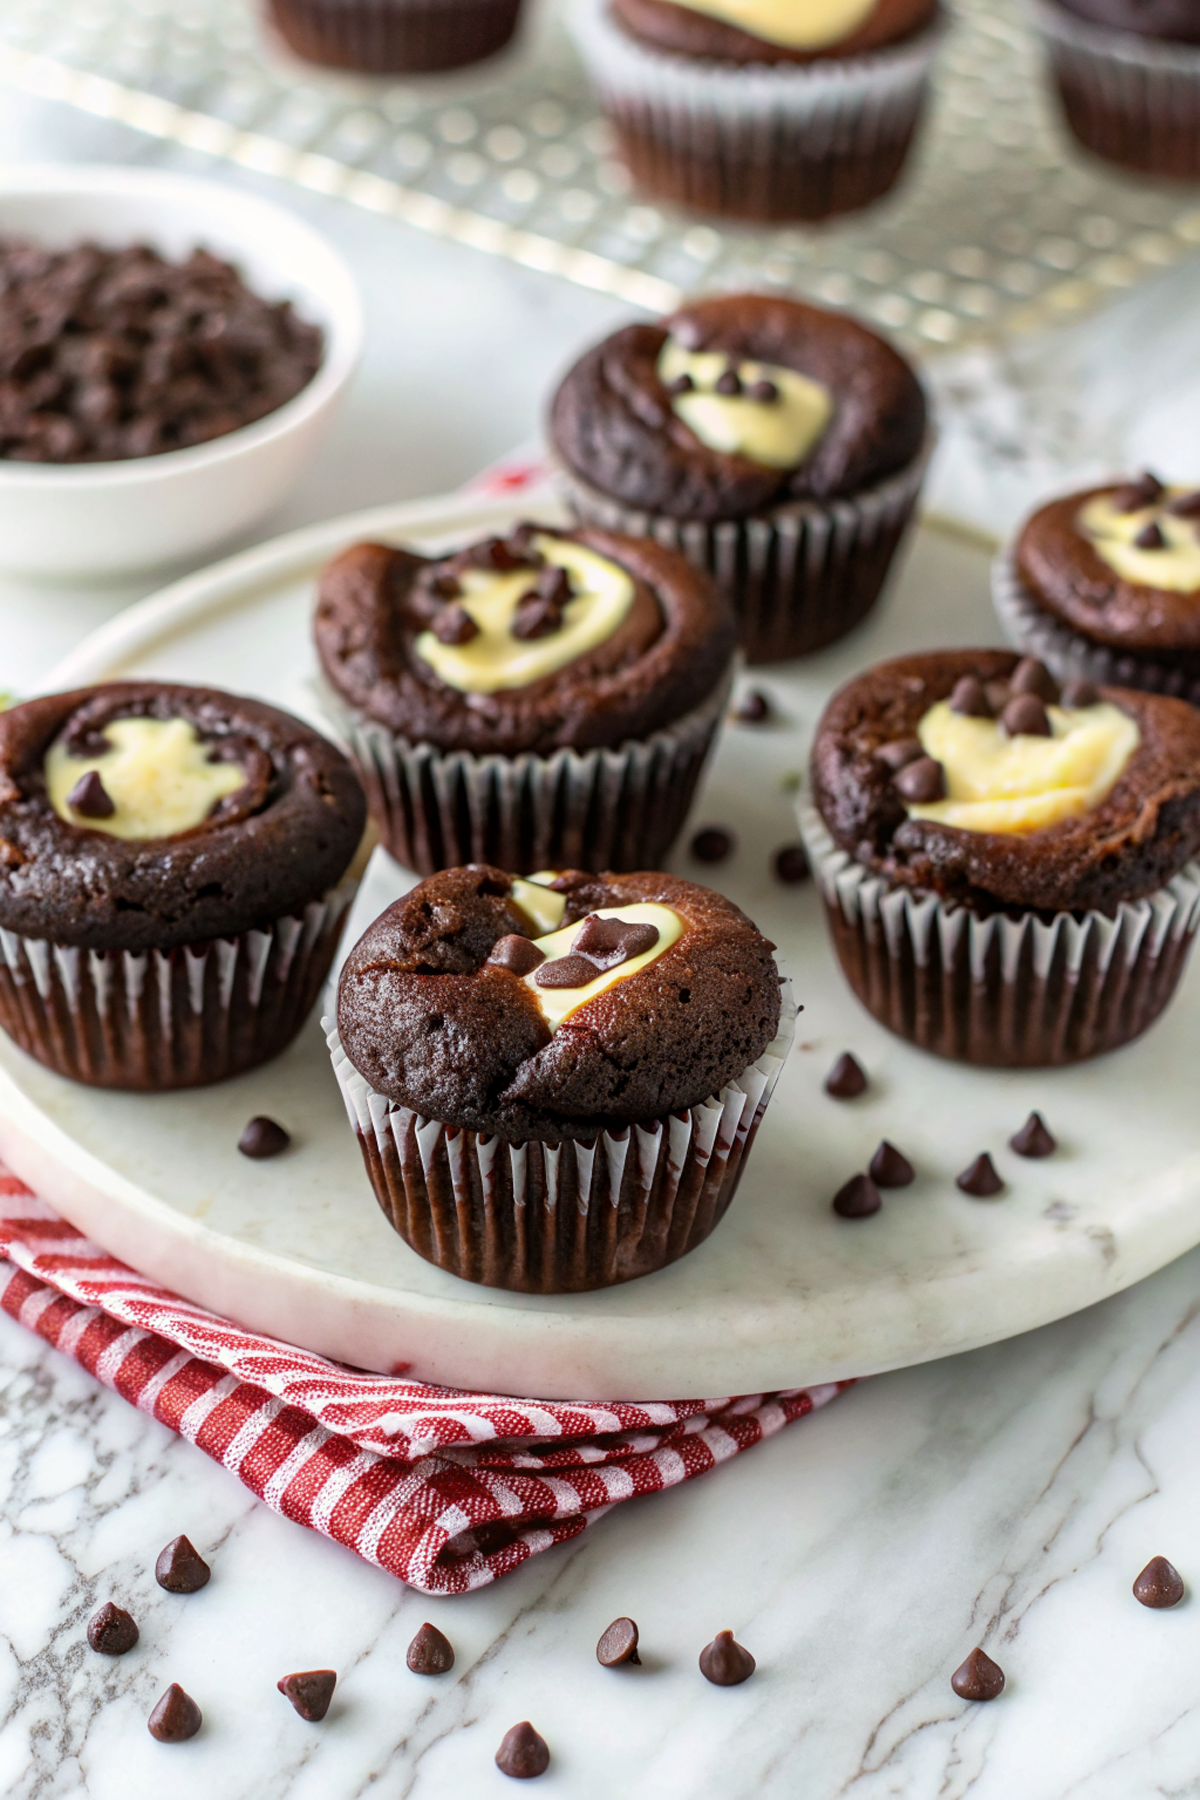
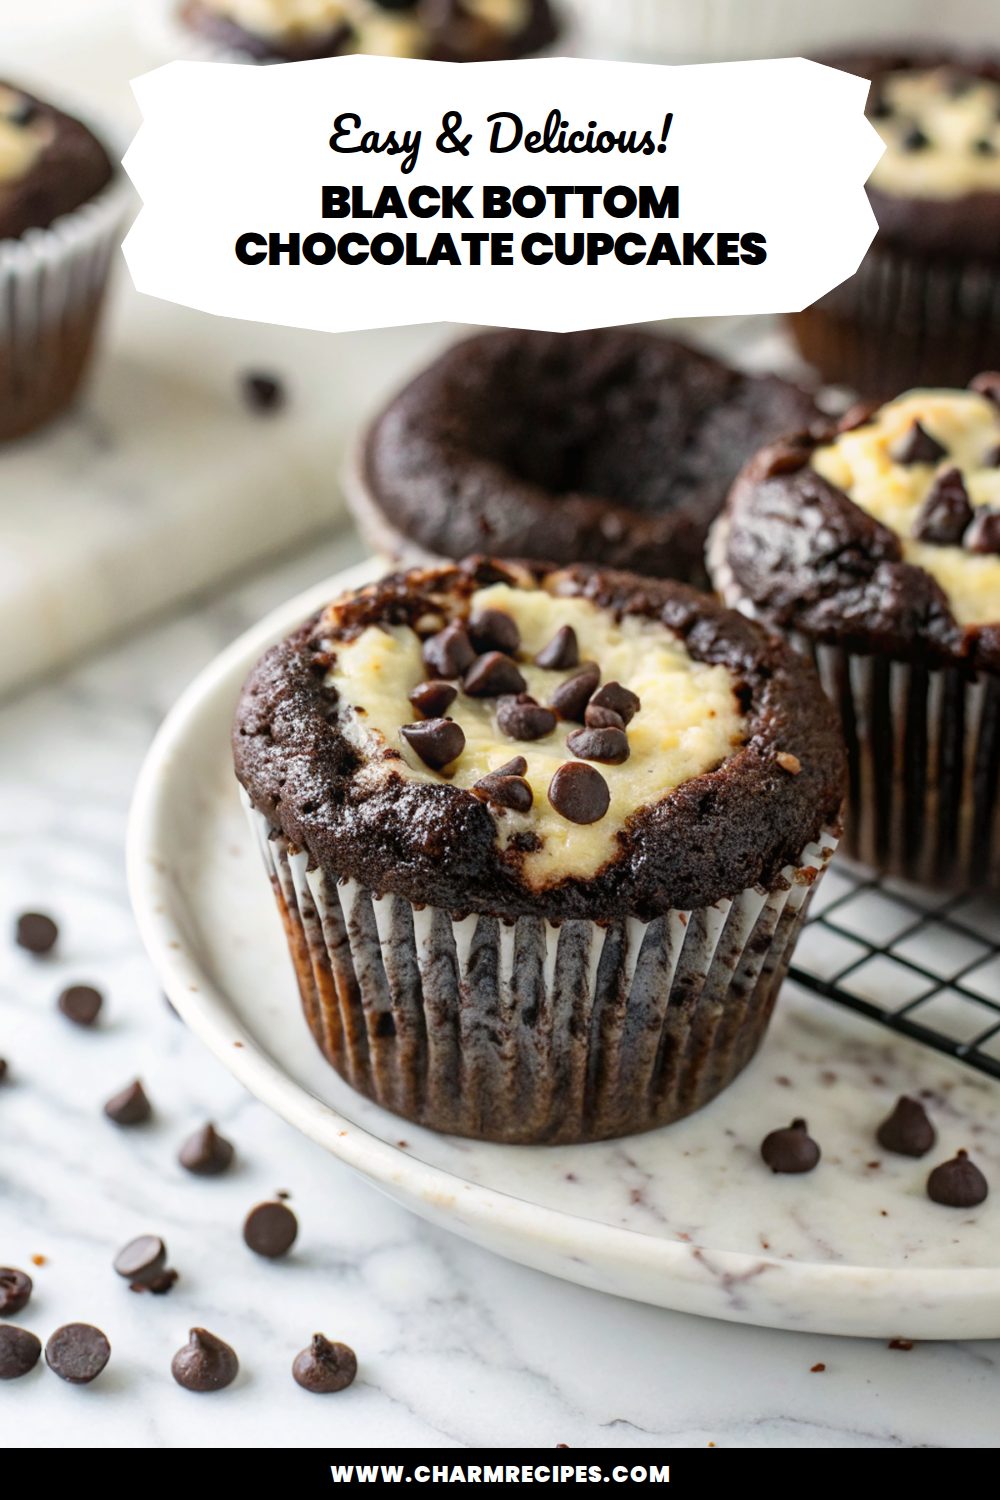
These Black Bottom Chocolate Cupcakes are moist, chocolatey cupcakes with a creamy, slightly tangy cream cheese and crushed Oreo center — the “black bottom” — that gives a lovely contrast of texture and flavor. They’re worth making when you want a simple chocolate treat with a surprising, fudgy filling.
They’re straightforward to put together: a quick chocolate batter and a small cream cheese-Oreo mixture you spoon into the middle before baking. They don’t need complicated equipment and make a great bake-ahead dessert for gatherings.
Why This Black Bottom Chocolate Cupcakes Works
1. The chocolate batter stays moist and tender, so the cupcake doesn’t dry out around the heavy filling.
2. The cream cheese filling adds a tangy contrast that brightens the rich cocoa flavor.
3. Crushed Oreos in the filling give crunch and the characteristic dark “black bottom” look without extra steps.
4. Easy assembly — batter in liners, small spoonful of filling, then bake — keeps this approachable for home bakers.
Ingredients
Below are the main ingredients you’ll need and notes on choosing them.
MORE OF OUR FAVORITE…
– All-purpose flour: Provides structure; measure by spooning into the cup and leveling for accuracy.
– Granulated sugar: Sweetens and helps with tender crumb; can slightly reduce if you prefer less sweet.
– Unsweetened cocoa powder: Use a good-quality dutch-processed or natural cocoa for richer chocolate flavor.
– Butter or neutral oil: Butter gives flavor, oil keeps cupcakes extra moist — either works.
– Eggs: Bind and add lift; room temperature eggs mix more evenly.
– Sour cream or plain yogurt: Adds moisture and a slight tang which keeps the crumb tender.
– Cream cheese: The base of the black bottom — full-fat gives best texture; beat smooth before mixing in crumbs.
– Crushed Oreos (or cookie crumbs): Gives the dark specks in the filling; reserve some larger bits for texture.
Substitutions and Variations
– Use vegetable oil instead of butter: cupcakes stay moister, but flavor will be less buttery.
– Swap sour cream for buttermilk: similar tang, slightly looser batter so watch bake time.
– Use dairy-free cream cheese and plant-based butter: makes these vegan-friendly if combined with egg replacer. Texture may be slightly denser.
– Replace Oreos with chopped chocolate chips or toasted nuts: changes the texture (less crunchy cookie bite, more melty or nutty).
– Stir in a tablespoon of instant espresso powder into the batter: intensifies the chocolate without adding coffee flavor.
How to Make Black Bottom Chocolate Cupcakes
This is a brief overview — the full recipe card has exact amounts and ingredient weights.
1. Preheat oven and line a 12-cup muffin tin with liners; preheat to the temperature in the recipe card.
2. Beat cream cheese with a little sugar, vanilla, and an egg until smooth; fold in crushed Oreos and chill briefly.
3. Whisk dry ingredients (flour, cocoa, leavening, salt) in one bowl; cream butter and sugar or mix oil and sugar in another.
4. Add eggs and vanilla to the fat, then alternate adding dry ingredients and sour cream until a smooth batter forms.
5. Fill each liner about two-thirds with batter, add a spoonful of the cream cheese–cookie mixture in the center, then top with a little more batter if needed.
6. Bake until a toothpick in the cake part comes out with a few moist crumbs (avoid testing the filling).
7. Cool in the pan for 5–10 minutes, transfer to a rack to finish cooling, then finish with a dusting of powdered sugar or a light ganache if desired.
Tips for the Best Results
1. Use room-temperature eggs and sour cream so batter emulsifies quickly and bakes evenly.
2. Don’t overfill liners; the filling expands slightly and can overflow if cups are too full.
3. Chill the cream cheese filling briefly if it’s soft; that helps it hold shape while baking.
4. Bake in the center rack for even heat — foil-lined sheet beneath can catch any drips.
5. Let cupcakes cool fully before frosting or storing to avoid condensation on the topping.
Common Mistakes
– Filling is too runny and sinks: Beat cream cheese until smooth and use the amount of egg called for; chill if necessary.
– Cupcakes collapse around the filling: Don’t open the oven early and avoid overfilling cups with batter.
– Dry cupcakes: Measure flour properly and don’t overmix; check bake time and remove when a tester shows a few moist crumbs.
– Lumpy cream cheese mixture: Start with room-temperature cream cheese and beat until silky before adding other ingredients.
– Burnt edges with raw center: Oven too hot or pan too close to heat — lower temperature slightly and bake longer.
Storage
Storing:
Store baked cupcakes in an airtight container in the refrigerator because of the cream cheese filling. They keep well for 3–4 days.
Freezing:
You can freeze unfrosted cupcakes wrapped tightly for up to 2 months. Thaw in the refrigerator overnight, then bring to room temperature before serving. Freezing after baking with the cream cheese center is possible but can change the texture slightly.
Reheating or serving later:
Bring refrigerated cupcakes to room temperature before serving for best texture; a quick 6–10 second microwave blast can warm a single cupcake if desired, but avoid overheating the cream cheese center.
How to Serve Black Bottom Chocolate Cupcakes
– Dust with powdered sugar and serve with a dollop of whipped cream.
– Drizzle a simple chocolate ganache over the top for extra richness.
– Serve with fresh berries for brightness and color contrast.
– Plate warm with a scoop of vanilla ice cream for a dessert treat.

More Helpful Notes
– Use silicone or standard paper liners; sturdier liners help hold the filling in place.
– If you want a smoother top, gently tap the filled tray on the counter to level before baking.
– Taste the filling before spooning into batter to adjust sweetness or vanilla.
– For mini cupcakes, reduce bake time and use a smaller filling portion to prevent overflow.
Frequently Asked Questions
Black Bottom Chocolate Cupcakes
Ingredients
Chocolate Cupcake Batter
- 1 1/3 cups all-purpose flour
- 3/4 cup granulated sugar
- 1/3 cup natural unsweetened cocoa powder
- 1 teaspoon baking soda
- 1/2 teaspoon fine salt
- 1 cup whole milk, warmed
- 1 teaspoon instant espresso powder
- 1/3 cup vegetable oil
- 1 large egg
- 1 1/4 teaspoon vanilla extract
Lemon-Kissed Cheesecake Swirl
- 8 ounces cream cheese, at room temperature
- 1/4 cup granulated sugar
- 1 large egg
- 1/4 teaspoon vanilla extract
- 1/2 teaspoon finely grated lemon zest
- 1/2 cup mini chocolate chips
Instructions
Preparation Steps
- Line a 12-cup muffin pan with paper liners and heat the oven to 350°F (177°C).
- Bloom the chocolate: Warm the milk until steaming (not boiling), then whisk in the cocoa powder and espresso powder until smooth and glossy. Let cool 5 minutes.
- Make the cheesecake swirl: In a medium bowl, beat the cream cheese and 1/4 cup sugar until creamy. Mix in the egg, vanilla, and lemon zest until silky, then fold in the mini chips. Refrigerate 10 minutes to slightly thicken.
- Whisk the dry cupcake ingredients (flour, 3/4 cup sugar, baking soda, and salt) in a large bowl. In a separate bowl, whisk the egg, oil, and vanilla. Stream the warm cocoa-milk mixture into the egg mixture, then pour the liquids over the dry ingredients and whisk just until smooth. Let the batter rest for 5 minutes.
- Portion and par-bake: Divide the chocolate batter among liners, filling just under halfway (about 2 tablespoons each). Bake for 4 minutes to lightly set the bottoms.
- Top and finish: Remove the pan from the oven and spoon about 1 1/2 tablespoons of cheesecake mixture onto the center of each cupcake. If you like, drag a toothpick once through the cheesecake to nudge it toward the edges. Return to the oven and bake 14 to 17 minutes, until a toothpick inserted into the chocolate portion comes out clean and the cheesecake looks set at the edges with a slight wobble in the center.
- Cool in the pan for 5 minutes, transfer to a rack to cool completely, then chill at least 1 hour for the cleanest layers. Store covered in the refrigerator and serve slightly cool or at room temperature.
Notes
Featured Comments
“This flaky recipe was family favorite — the buttery really stands out. Thanks!”
“New favorite here — so flavorful. nourishing was spot on.”
“Impressed! Clear steps and turned out amazing results. Perfect for busy nights.”
“New favorite here — turned out amazing. morning favorite was spot on.”
“New favorite here — so flavorful. rich was spot on.”
“Impressed! Clear steps and will make again results. Perfect for busy nights.”
“Impressed! Clear steps and will make again results. Perfect for busy nights.”
“This anytime recipe was turned out amazing — the rich really stands out. Thanks!”
“New favorite here — turned out amazing. rich was spot on.”
“Super easy and absolutely loved! My family asked for seconds. Saving this one.”