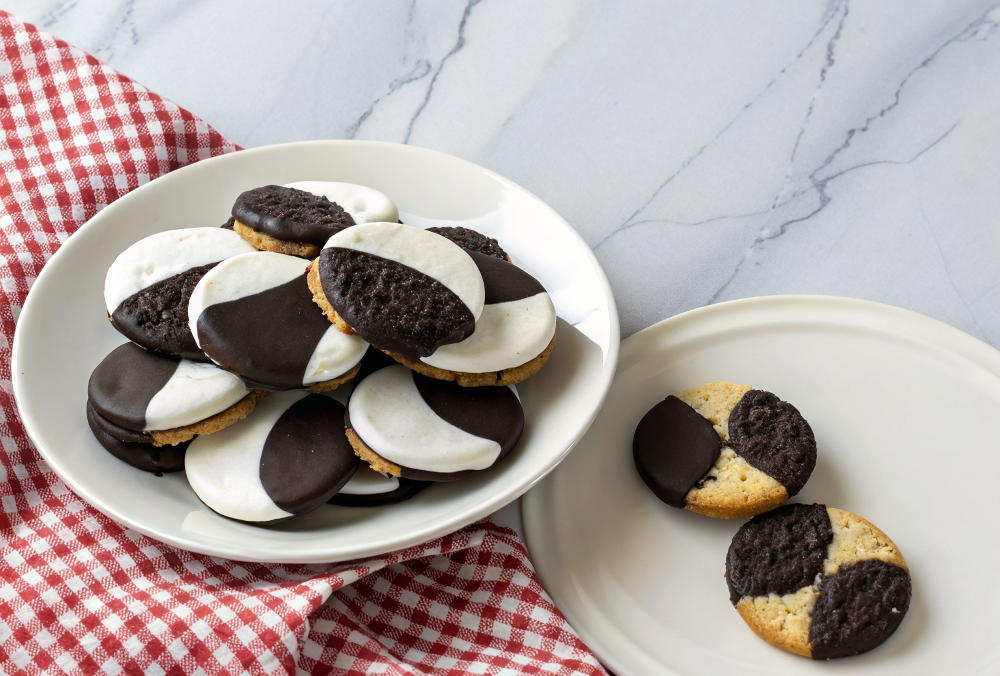
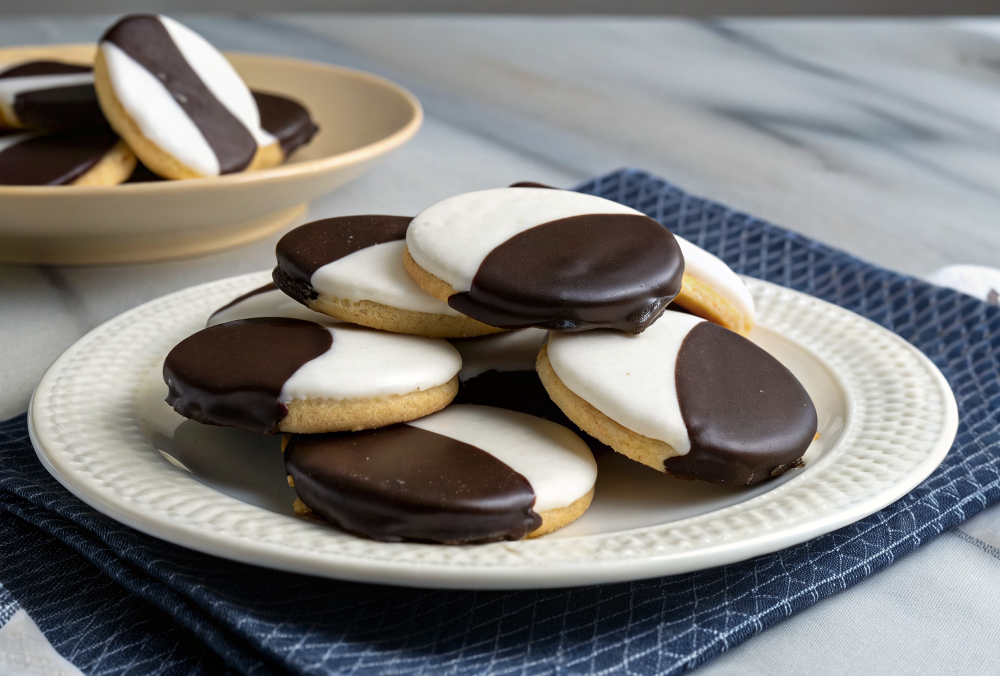
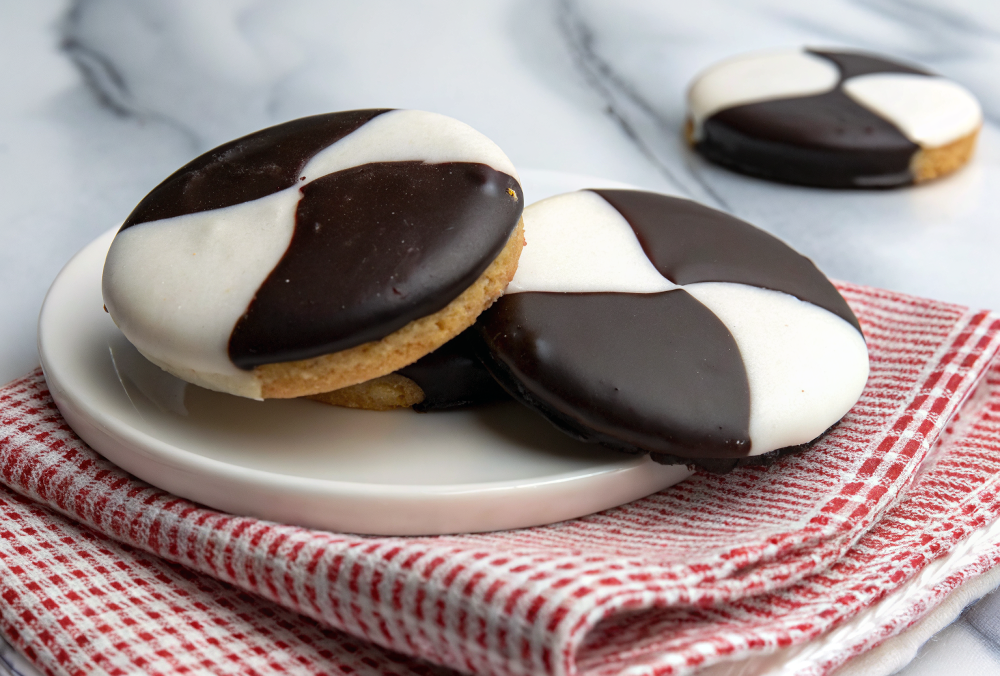
Black and White Cookies
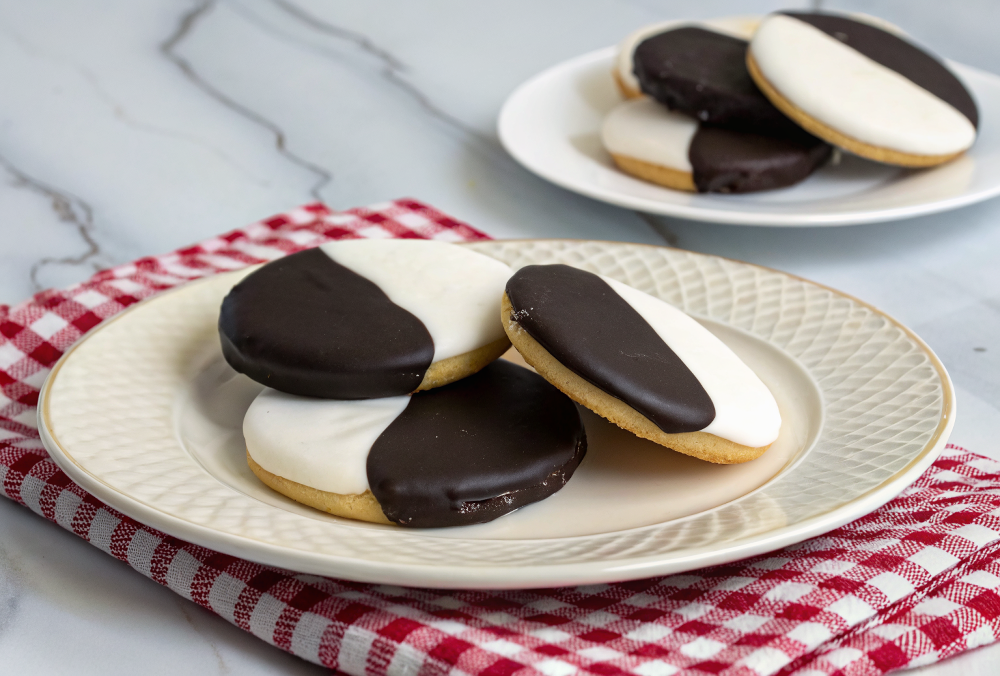
This cookie is everything I want late at night: cakey, slightly doughy, and dressed in a half-chocolate, half-vanilla glaze that looks like you tried to be fancy but really just wanted to eat dessert with your hands. Black and white cookies are classic New York-ish treats — soft cake base, bright vanilla glaze on one side, bittersweet chocolate on the other — and this version is forgiving, small-batch friendly, and somehow still nostalgic even if you grew up nowhere near a deli.
My husband is the official black-and-white critic in our house. He refuses to eat store-bought ones because they’re too cakey/too flat/too smug. After a messy first attempt (I overbeaten the batter and we had chewy hockey-puck impostors for a week), I tweaked the mixing, slowed my oven, and suddenly he declared them “exactly right” while eating two with his hands in the kitchen. Our kiddo loves the chocolate side and will trade you anything for the vanilla. It’s turned into our neighborhood peace treaty: whoever slices the last one has to make the next batch.
Why You’ll Love This Black and White Cookies
– They feel fancy but are actually low-drama: no tempering, no special pans, no intimidating technique.
– The texture hits that perfect middle ground — cakey, but tender and moist — so you can stack two together or eat one like a little cake.
– The glazes set up quickly and don’t crack, so you can make them ahead for a party and still look heroic.
– You can easily half the recipe for two people or double it when you need to win over a crowd.
Kitchen Talk
I always mess with the mixer settings like I’m improvising jazz. Don’t be me. The batter needs a gentle hand once you add the flour — overmixing will give you tough cookies (learned that the hard way). Also, pipe or scoop the batter into fairly large rounds; these cookies spread a bit and want to be thick, not thin. One time I swapped half the butter for oil because I was out — the texture was fine but the flavor missed that buttery comfort, so I’ve stopped trying to be clever unless desperate.
MORE OF OUR FAVORITE…
Shopping Tips
– Baking Basics (Flour/Sugar/Leaveners): Use all-purpose flour and a fresh baking powder — check the date; expired leavening is the sneaky reason cakes and cookies fall flat.
– Dairy: Real butter gives the tastiest cookies; if using unsalted, salt to the recipe’s call. Room-temperature butter mixes more evenly.
– Eggs: Use large eggs at room temperature so they incorporate smoothly; cold eggs can make the batter clumpy.
– Fats & Oils: Stick with butter or a butter/oil combo if you need extra tenderness, but don’t use only oil unless you like cookie impostors.
– Chocolate: Choose a good-quality cocoa powder for the glaze and a decent dark chocolate or cocoa-based glaze for the chocolate half — it makes a noticeable difference.
Prep Ahead Ideas
– Batter can be mixed and kept in the fridge for up to 24 hours; let it warm slightly before scooping so it spreads properly.
– Make the glazes a day ahead and keep them in airtight containers in the fridge; reheat gently and thin with a teaspoon of milk if they thicken.
– Store scooped rounds on a parchment-lined tray covered with plastic wrap in the fridge for an hour if you want sturdier edges before baking — great for prepping the night before and baking the next day.
Time-Saving Tricks
– Use a cookie scoop to get even rounds quickly; the dough is forgiving so perfect piping isn’t required.
– Bake on two sheets at once, rotating halfway through, if your oven bakes hot spots; saves an extra batch time.
– Make the glazes while the cookies cool — they set quickly and you can double-dip without waiting hours.
Common Mistakes
– Overmixing the batter: I did this once and ended up with dense, leathery cookies. Fix: stop as soon as flour is incorporated.
– Baking too thin: If you scoop too little batter, cookies come out flat and dry. Rescue: press a tiny ball of fresh dough on top and bake a minute more — not perfect, but edible.
– Glaze too runny: Happens if you add too much liquid. Fix: stir in more powdered sugar a tablespoon at a time until it thickens.
What to Serve It With
– A mug of strong coffee or a milky latte (classic pairing).
– Fresh berries or a simple fruit salad to cut the sweetness.
– Cracked open a cold glass of milk for dunking — yes, please.
– For brunch, serve alongside scrambled eggs and toast for a chaotic, delightful spread.
Tips & Mistakes
– Use a medium cookie scoop for consistent size; baking time will be predictable.
– Salt matters: a pinch in the batter boosts flavor, don’t skip it.
– If the tops brown too fast, lower oven temp by 25°F and bake a little longer.
– If your cookies come out gummy in the center, they were underbaked; pop them back in for 2–3 minutes.
Storage Tips
Keep leftover cookies in an airtight container at room temp for 2–3 days; they’re fine slightly chilled but the glaze can firm up — still delicious for breakfast, no shame. For longer storage, freeze baked cookies (glaze and all) layered between parchment in an airtight bag for up to 2 months. Thaw at room temp or microwave 10 seconds for that fresh-baked vibe.
Variations and Substitutions
– Swap half the all-purpose flour for cake flour if you want an ultra-tender, pillow-soft cookie.
– Vanilla glaze can be flavored with a little almond extract, but go light — it’s strong.
– For a dairy-free version: use vegan butter and a nondairy milk in the glaze; texture changes slightly but it’s still very good.
– Tried adding lemon zest to the vanilla glaze once; it was bright and unexpected — do it if you want citrus zing.
Frequently Asked Questions
Black and White Cookies
Ingredients
Cookie Dough
- 2/3 Cup unsalted butter, softened
- 3/4 Cup granulated sugar
- 1 large egg
- 1 large egg yolk
- 1/3 Cup whole milk, at room temperature
- 1 1/2 Teaspoons pure vanilla extract
- 1/2 Teaspoon finely grated lemon zest
- 2 1/4 Cups all-purpose flour
- 1 1/4 Teaspoons baking powder
- 1/4 Teaspoon fine sea salt
Two-Tone Icing
- 2 3/4 Cups powdered sugar, sifted
- 1/4 Cup whole milk, at room temperature
- 1 Teaspoon pure vanilla extract
- 3 Tablespoons unsweetened cocoa powder, sifted
- 1-3 Teaspoons additional whole milk (as needed for consistency)
Instructions
Preparation Steps
- Line two sheet pans with parchment paper and heat the oven to 360°F (182°C).
- Whisk together the flour, baking powder, and salt in a medium bowl; set aside.
- In a large mixing bowl, beat the softened butter, sugar, and lemon zest on medium-high until very light and creamy, 2 to 3 minutes.
- Beat in the egg, then the yolk, followed by the vanilla, scraping the bowl as needed.
- On low speed, add the dry ingredients in two additions, alternating with the milk (begin and end with dry). Mix just until no dry streaks remain; do not overmix.
- Let the dough rest for 10 minutes to hydrate. Meanwhile, prepare a large 2–3 tablespoon scoop and a small bowl of water for smoothing.
- Scoop 12–14 mounds onto the prepared pans, spacing about 3 inches apart. Lightly dampen your fingertips and smooth each mound into a gentle dome about 2 1/2 to 3 inches wide.
- Bake 12 to 14 minutes, rotating pans halfway, until the cookies are set and just barely golden at the edges while still pale on top.
- Cool on the pans for 5 minutes, then transfer to a wire rack. For a classic flat surface, flip each cookie upside down so the flat side faces up and let cool completely.
- Make the icings: In a bowl, whisk the powdered sugar, 1/4 cup milk, and vanilla until smooth and thick but spreadable. Scoop half into a second bowl and whisk in the cocoa, adding 1–3 teaspoons more milk until the chocolate matches the white icing in consistency.
- Using an offset spatula, spread white icing over one half of the flat side of each cookie. Let stand 10 minutes (or chill briefly) to set the first half.
- Finish with the chocolate icing on the other half, slightly overlapping the white edge for a crisp line. Allow cookies to set at room temperature for 30 minutes before serving.
Notes
Featured Comments
“Super easy and will make again! My family asked for seconds. Saving this one.”
“Made this last night and it was will make again. Loved how the versatile came together.”
“Super easy and so flavorful! My family asked for seconds. Saving this one.”
“Super easy and will make again! My family asked for seconds. Saving this one.”
“Super easy and so flavorful! My family asked for seconds. Saving this one.”
“This guilt-free recipe was so flavorful — the shareable really stands out. Thanks!”
“New favorite here — absolutely loved. summer-ready was spot on.”
“This effortless recipe was family favorite — the fresh catch really stands out. Thanks!”
“New favorite here — turned out amazing. colorful was spot on.”
“Made this last night and it was will make again. Loved how the fizzy came together.”