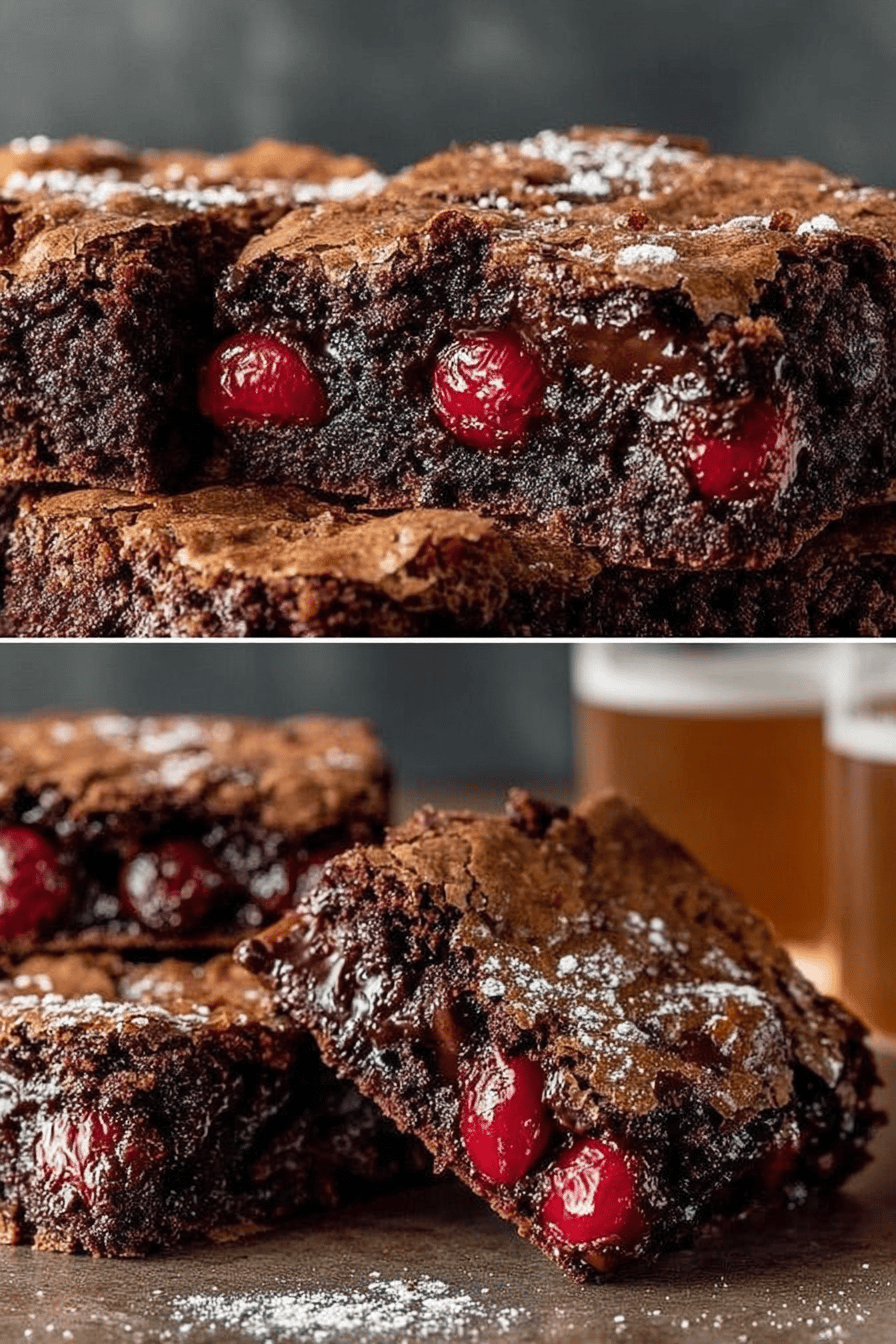
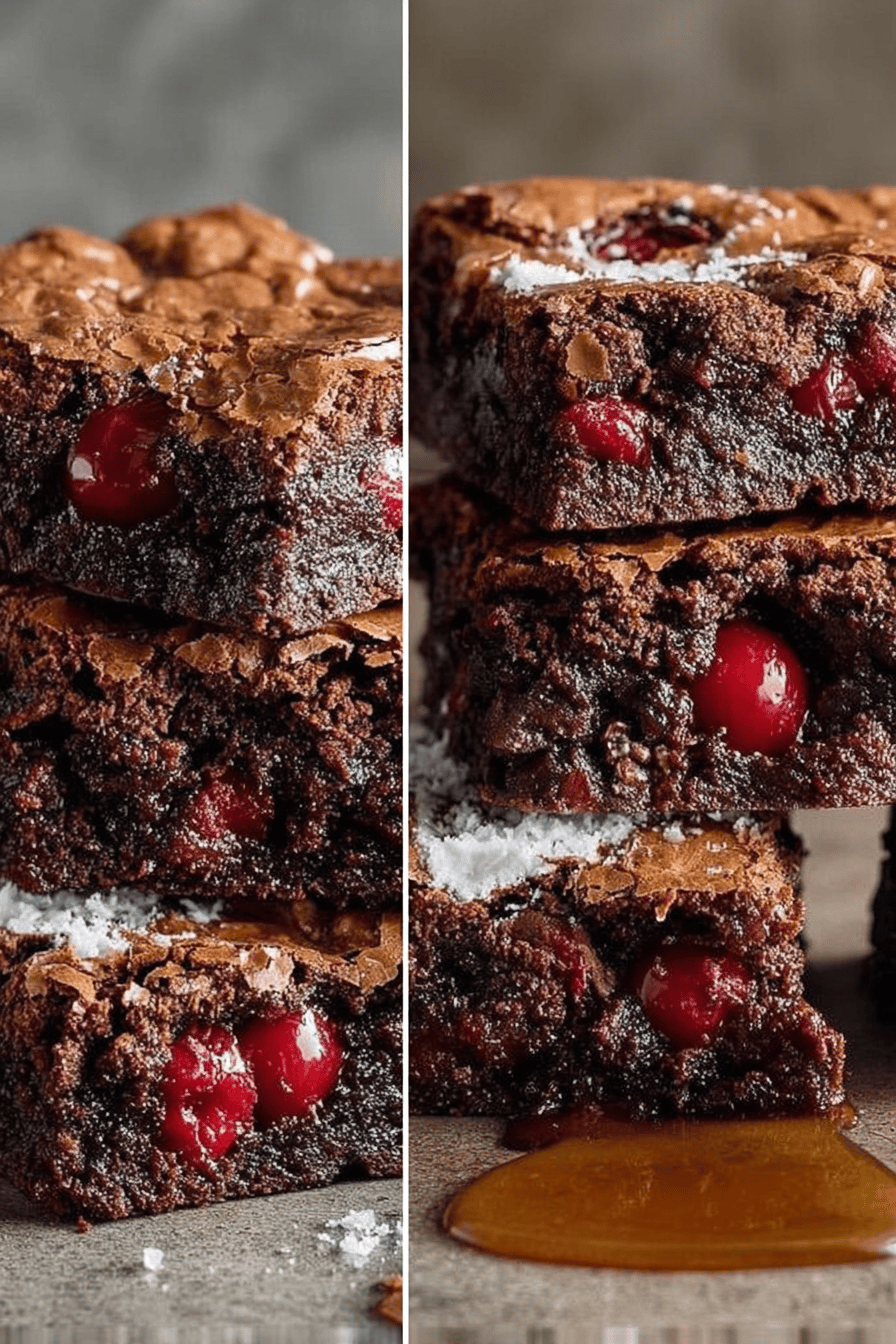
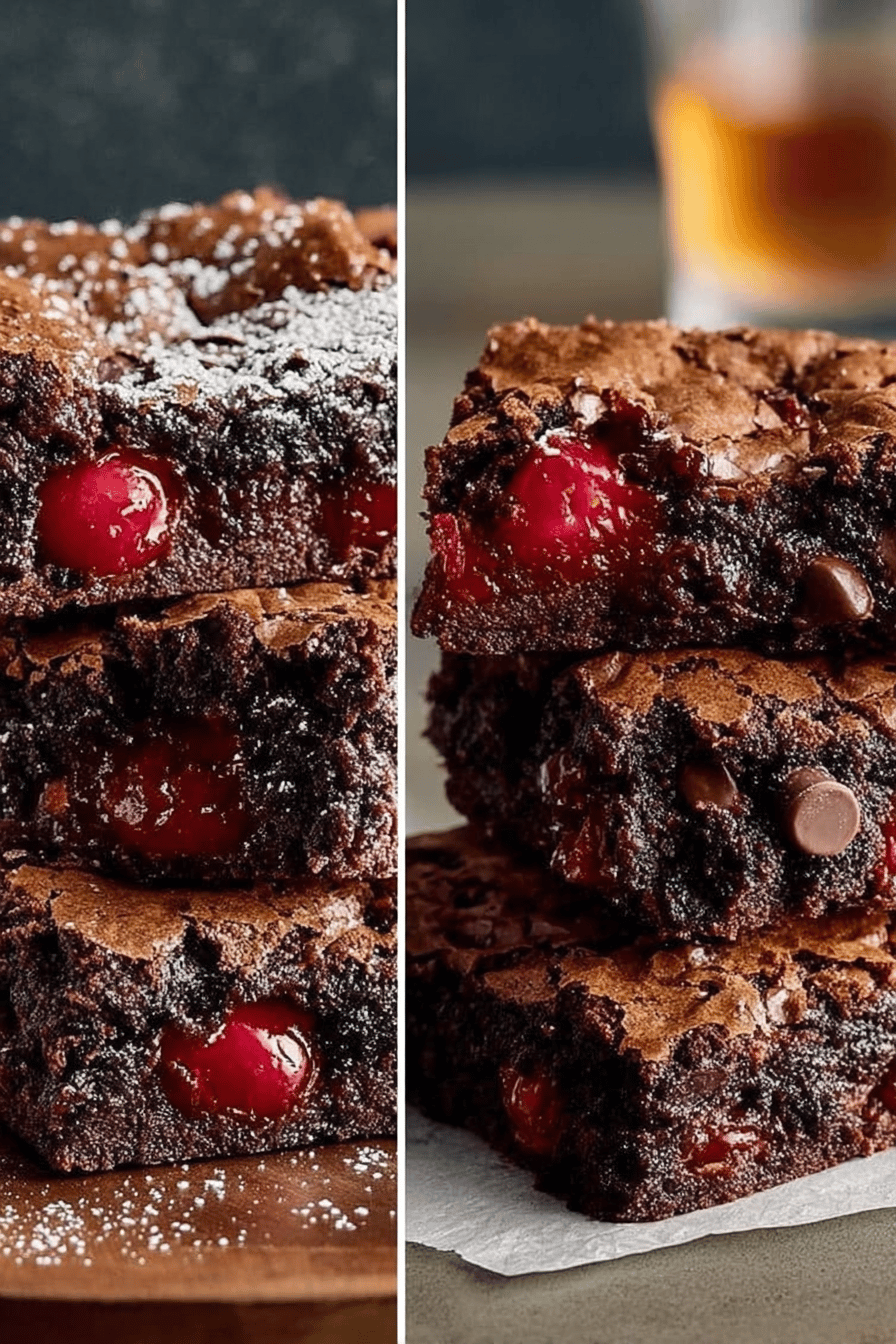
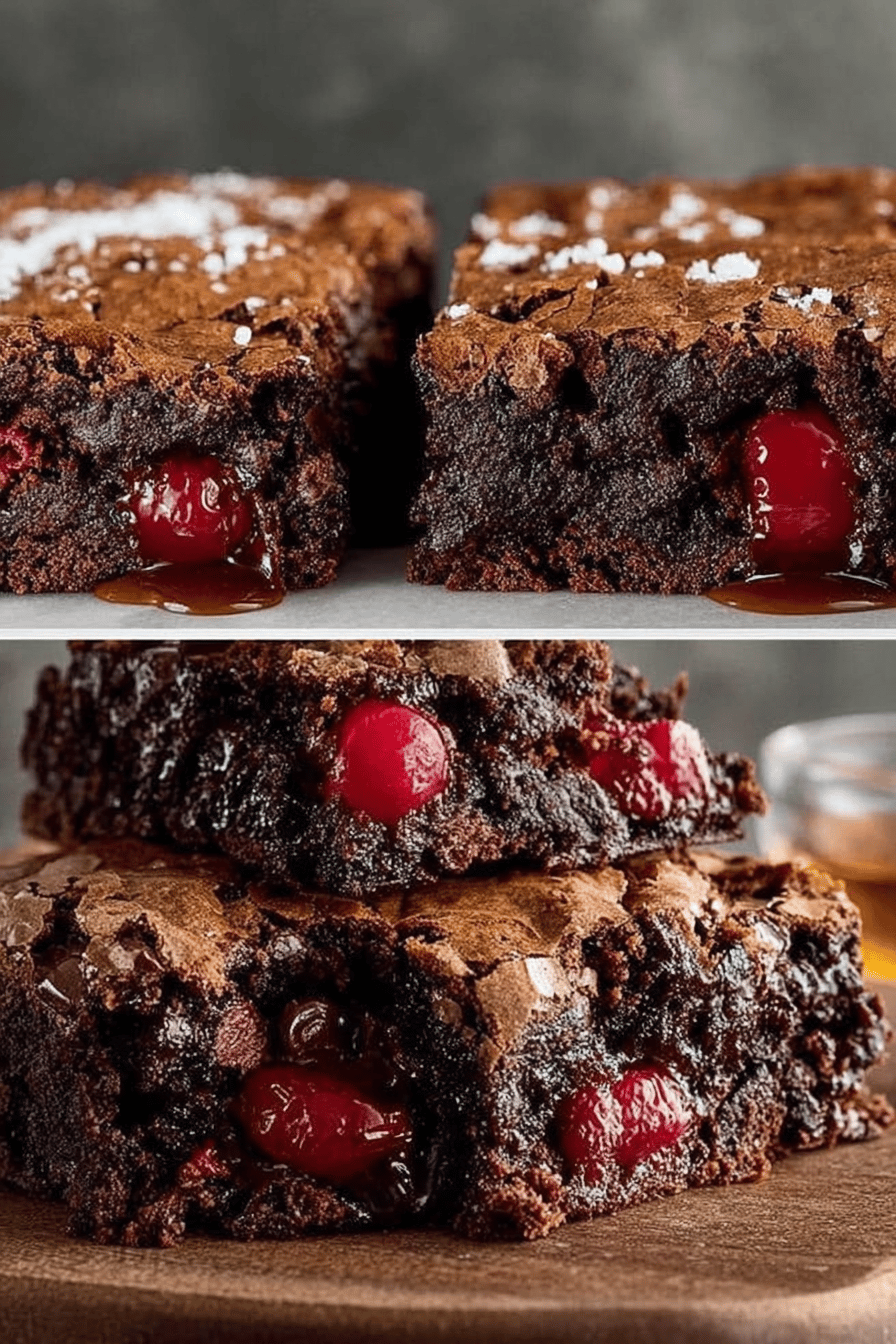
Black Forest Brownies Recipe
Okay, here we go! Let’s turn this perfectly good recipe into something actually relatable. I’m thinking chocolate, cherries, what’s not to love? It’s basically a decadent brownie that thinks it’s a fancy dessert. You know, the kind that’s perfect for impressing, or just eating straight from the pan when nobody’s looking.
My family? Obsessed. Seriously, I swear my husband starts hinting about these a week in advance. Last time I made them, my youngest tried to hide one IN HIS SOCK. I mean, I get it, kid. Chocolate worth fighting for. I usually make a double batch because, let’s be real, they disappear fast. This is now my go-to for potlucks and bake sales. It’s easy, delicious, and people rave about it. Prepare to be a star, people.
Why You’ll Love This Black Forest Brownies Recipe
- Hellooo chocolate + cherry combo! It’s like a party in your mouth, but a sophisticated party.
- They’re fudgy, gooey, and basically everything a brownie should be, times ten.
- Super easy to make, even if you’re, like, not a baker. Trust me, I burn water sometimes.
- You can totally pretend you’re being all fancy when you bring these somewhere. Black Forest, baby!
- They just MAKE people happy. Seriously, watch what happens when you pull these out of the oven.
How to Make It
Alright, here’s the deal. First, we gotta melt the butter and chocolate together. I usually do this in the microwave because I’m lazy, but you can use a double boiler if you’re feeling fancy. Just keep an eye on it, you don’t want to scorch the chocolate! Stir it until it’s smooth and glossy. Mmm, that’s the good stuff.
MORE EASY DESSERT RECIPES...


Next, whisk together the sugar, eggs, and vanilla in a separate bowl. Now, pour the melted chocolate mixture into the egg mixture and stir until it’s all combined. Don’t overmix it! Overmixing is the enemy of fudgy brownies!
MORE OF OUR FAVORITE…
In another bowl, whisk together the flour, cocoa powder, and salt. Gradually add the dry ingredients to the wet ingredients, mixing until just combined. Again, don’t overmix! I usually stop when I still see a few streaks of flour.
Now, fold in the cherries. I like to use fresh cherries when they’re in season, but canned cherries work just fine too. Just make sure to drain them well! Nobody wants soggy brownies.
Pour the batter into a greased and lined baking pan. Bake in a preheated oven until a toothpick inserted into the center comes out with moist crumbs attached. Let the brownies cool completely before cutting into squares.
I know, I know, waiting is the hardest part. But trust me, it’s worth it. These brownies are even better the next day, if they last that long!
Ingredient Notes
- Unsalted Butter: Don’t even THINK about using salted butter unless you’re into weirdly salty brownies. Also, gotta be melted, not just softened. Learned that the hard way…
- Semi-Sweet Chocolate: You can use milk chocolate if you’re a wimp, but semi-sweet gives it that grown-up edge. I sometimes throw in a handful of dark chocolate chips too, just to be rebellious.
- Granulated Sugar: I’ve swapped this for coconut sugar before and it was still good, just a bit…earthier?
- Eggs: Gotta have ’em. They’re what bind everything together. I use large, but honestly, I doubt it makes a huge difference.
- Vanilla Extract: Don’t skip this! It adds that little something-something that makes everything taste better. I’ve used almond extract in a pinch, and it was… interesting.
- All-Purpose Flour: I haven’t tried gluten-free flour yet, but I’m sure it would work fine. Let me know if you try it!
- Cocoa Powder: Unsweetened, please. We’re already adding enough sugar. Plus, it gives it that intense chocolatey flavor.
- Salt: Just a pinch! It enhances the sweetness and balances everything out.
- Fresh or Canned Cherries: Fresh are amazing when they’re in season, but canned work just fine too. Make sure to drain them well! Nobody likes soggy brownies.
Recipe Steps:
- Melt butter and chocolate until smooth.
- Whisk sugar, eggs, and vanilla in a separate bowl.
- Combine melted chocolate mixture with egg mixture.
- Whisk flour, cocoa powder, and salt together.
- Add dry ingredients to wet ingredients until just combined.
- Fold in cherries.
- Pour batter into a greased and lined baking pan.
- Bake until a toothpick comes out with moist crumbs.
- Cool completely before cutting.
What to Serve It With
Vanilla ice cream. Duh. Whipped cream and a cherry on top if you’re feeling extra. Or just eat them plain, straight from the pan. I won’t judge. Also, a strong cup of coffee is never a bad idea.
Tips & Mistakes
- Don’t overbake them! Slightly underbaked brownies are way better than dry, crumbly ones.
- Use a good quality chocolate. It makes a difference!
- Let them cool completely before cutting. I know it’s hard, but trust me. They’ll be much easier to cut and they’ll taste better too.
- Don’t be afraid to experiment! Add some chocolate chips, nuts, or even a swirl of peanut butter. Get creative!
- I once tried to make these with white chocolate instead of semi-sweet. It was… a disaster. Don’t do it.
Storage Tips
Store these bad boys in an airtight container at room temperature. They’ll stay good for about 3-4 days. If you want to keep them longer, you can freeze them. Just wrap them individually in plastic wrap and then place them in a freezer bag. They’ll last for up to 2 months. And yes, eating them cold straight from the fridge is totally acceptable. I may or may not have done that for breakfast. Multiple times.
Variations and Substitutions
- Nuts: Throw in some chopped walnuts or pecans for a little crunch.
- Chocolate Chips: Add some chocolate chips (milk, dark, or white) for extra chocolatey goodness.
- Peanut Butter Swirl: Swirl in some peanut butter for a decadent treat.
- Espresso Powder: Add a teaspoon of espresso powder to the batter to enhance the chocolate flavor.
- I once tried to use honey instead of sugar because I was “being healthy.” They were… interesting. Not bad, but definitely not the same. Also, I skipped the cherries once because I was out. They were still good, just not Black Forest brownies, you know?
Frequently Asked Questions
Black Forest Brownies Recipe
Ingredients
Main Ingredients
- 1.5 cups all-purpose flour
- 1 cup unsalted butter melted
- 2 cups granulated sugar
- 1 cup cocoa powder
- 4 large eggs room temperature
- 1 tsp vanilla extract
- 1 tsp baking powder
- 0.5 tsp salt
- 1.5 cups cherry pie filling
- 0.5 cup chopped dark chocolate
Instructions
Preparation Steps
- Preheat the oven to 350°F (175°C) and grease a 9x13 inch baking pan.
- In a large bowl, combine melted butter and sugar until smooth.
- Add eggs and vanilla extract, and mix until fully incorporated.
- Sift in flour, cocoa powder, baking powder, and salt. Mix until just combined.
- Pour the batter into the prepared pan, then spread the cherry pie filling evenly on top.
- Sprinkle chopped dark chocolate over the cherry layer.
- Bake in preheated oven for 35 minutes or until a toothpick inserted in the center comes out clean.
Notes
Nutrition
Featured Comments
“Impressed! Clear steps and absolutely loved results. Perfect for busy nights.”
“Impressed! Clear steps and absolutely loved results. Perfect for busy nights.”
“New favorite here — absolutely loved. bold was spot on.”
“Super easy and turned out amazing! My family asked for seconds. Saving this one.”
“Impressed! Clear steps and will make again results. Perfect for busy nights.”
“New favorite here — turned out amazing. indulgent was spot on.”
“Super easy and will make again! My family asked for seconds. Saving this one.”
“Super easy and so flavorful! My family asked for seconds. Saving this one.”
“Super easy and so flavorful! My family asked for seconds. Saving this one.”
“Made this last night and it was family favorite. Loved how the family-style came together.”