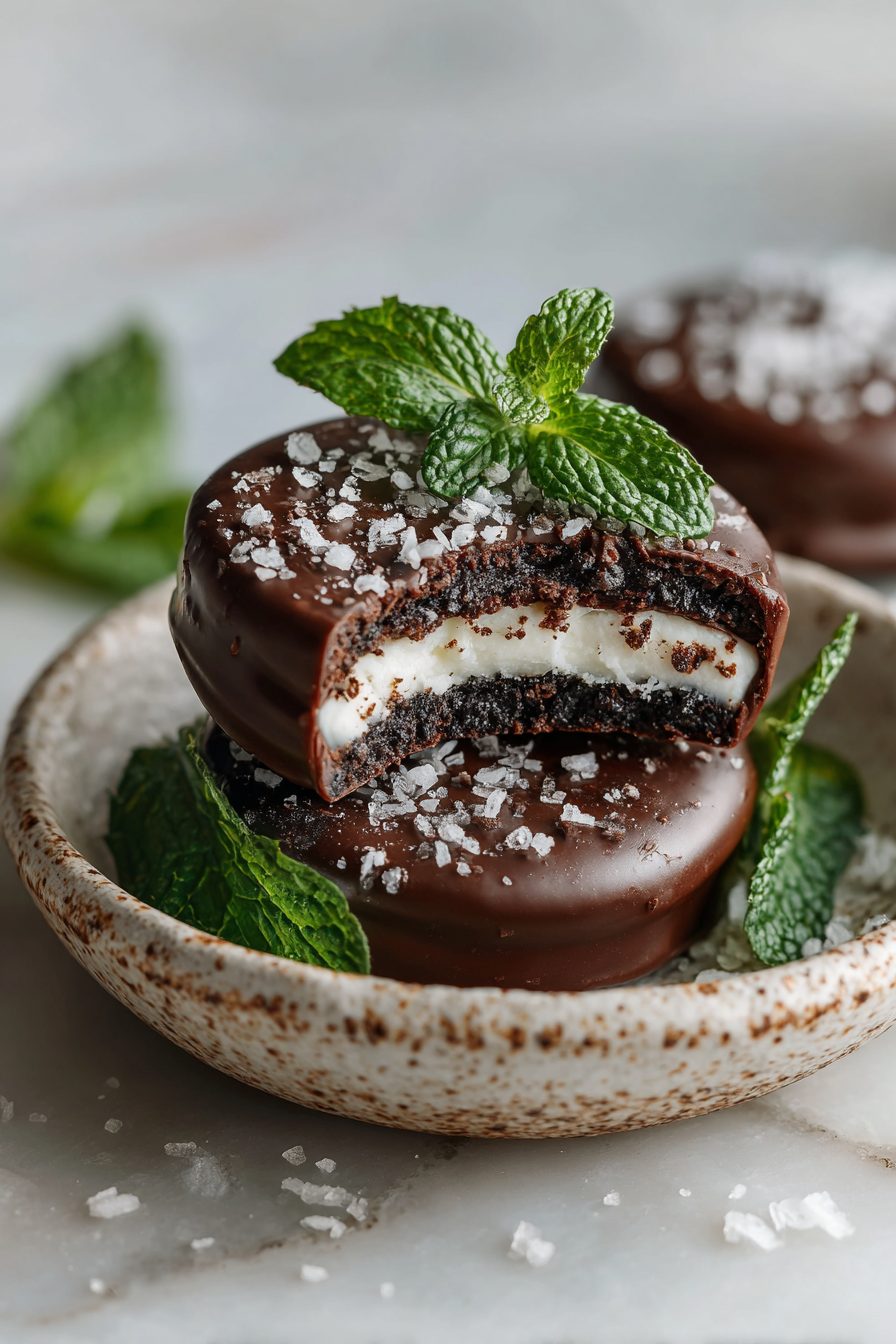
Peppermint Patties Made Easy
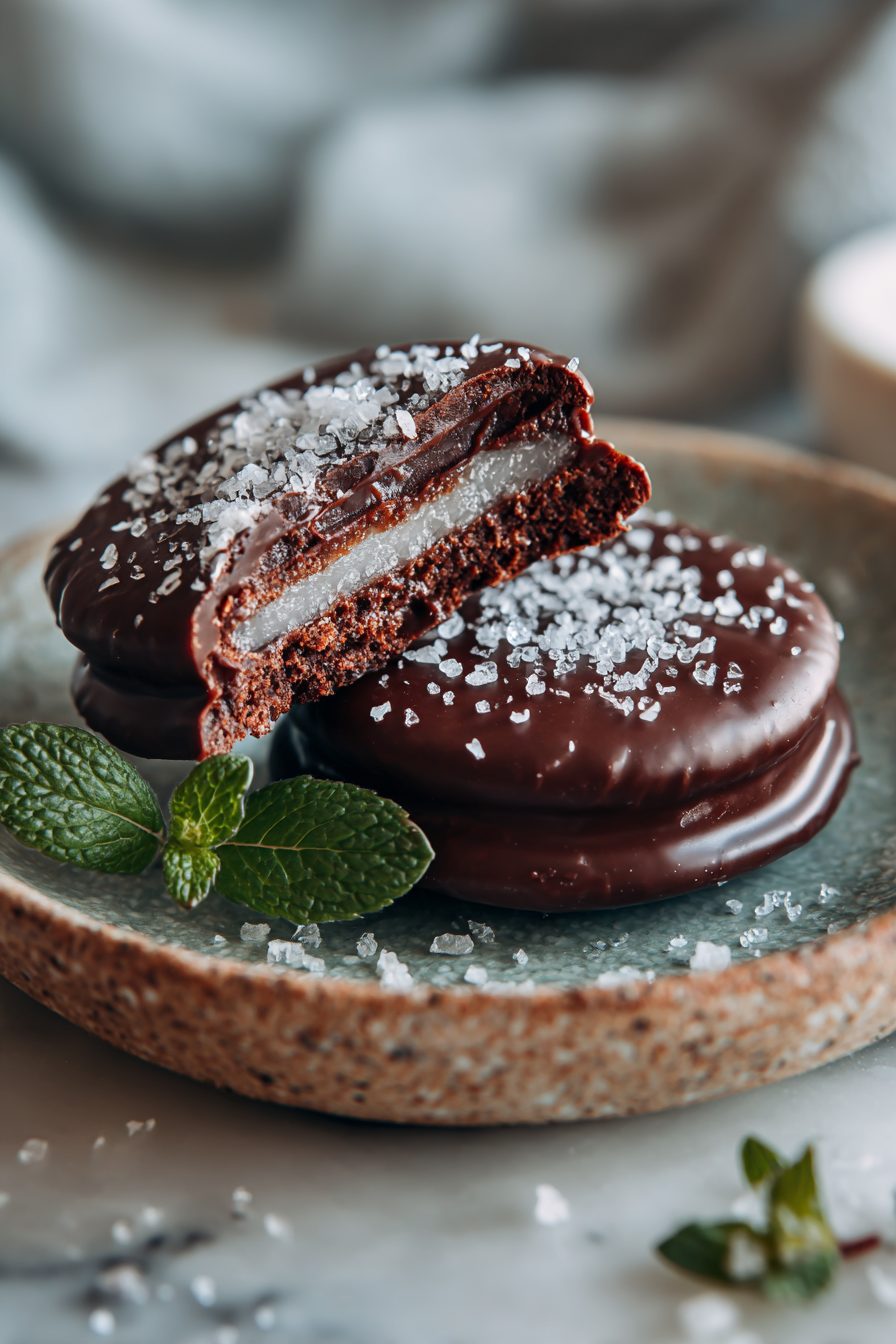
This recipe is basically a homemade shortcut to those peppermint patties you loved as a kid, but softer, fresher, and way more satisfying because you can control the chocolate and the peppermint zing. It’s a simple two-part deal: a creamy, minty center that you chill and dip, and a smooth chocolate coating. No candy thermometer drama. No weird preservatives. Just a little pantry magic and a couple of easy tricks to make them look like you worked harder than you did.
My husband treats these like they’re contraband. He’ll hover in the kitchen while I dip the last few, making “that face” like he’s calculating how many he can hide before the kids notice. The kids think they’re special holiday candy and I let them—mostly because they somehow volunteer to help roll the centers into balls. One year I forgot to put them in the freezer first and we ended up with patty-shaped puddles of chocolate; lesson learned, laughed about, and still delicious. These have become our “surprise guests” dessert—easy to stash in the freezer and pull out when someone drops by.
Why You’ll Love This Peppermint Patties Made Easy
– Nostalgic candy vibes without the candy-jar price or weird ingredients.
– Fast to make when you want a treat but don’t want to fight with tempering chocolate.
– Customizable—dark, milk, or smashingly minty; you pick the level of sass.
– Crowd-pleaser at parties and a sneaky way to get the kids to help in the kitchen without burning anything.
Kitchen Talk

Listen, these feel fancy but they are very forgiving. The filling is forgiving if you overwork it a little, and the chocolate will temper itself into something pretty if you keep your bowl cozy and not too hot. My biggest kitchen fail was trying to dip them with a fork and ending up with chocolate claws and one very sticky toddler. Since then I use a skewer or a little dipping tool and that changed everything. Also, I swapped butter for coconut oil once because I forgot the butter and OH—different texture, slightly softer filling, surprisingly delicious. Don’t be afraid to experiment a little; peppermint patties are resilient.
I made these peppermint patties last weekend and they turned out absolutely perfect—crispy chocolate coating with that smooth, minty filling that tastes just like the store-bought ones but so much better! The recipe was straightforward and didn't require any special equipment, and my whole family devoured them before I could even hide them in the pantry. Definitely making these again next holiday season!
MORE OF OUR FAVORITE…
Shopping Tips
– Baking Basics: Grab a good powdered sugar—sifted is best for a silky filling. If the bag looks clumpy from humidity, sift extra at the store or at home.
– Fats & Oils: Use unsalted butter for control, or swap in coconut oil for a dairy-free vibe; keep an eye on package size so you don’t buy three sticks by accident.
– Chocolate: Choose a coating chocolate you actually like eating—chips are fine, but a good bar chopped up melts smoother and tastes better.
– Sweeteners: If a syrup (corn syrup/condensed milk) is called for as a binder, pick whichever you prefer—corn syrup keeps things glossy, condensed milk makes the filling richer.
– Specialty Item: Peppermint extract is stronger than oil; a little goes a long way—look for pure extract, not “natural flavor” if you want consistent zing.
Prep Ahead Ideas
– Make the mint filling a day or two ahead and keep it chilled in an airtight container; it firms up beautifully and makes rolling easier.
– Dip the patties and freeze them on a sheet before transferring to a container—this keeps them from sticking together.
– Use small containers or cupcake liners to separate layers when storing in the freezer so you don’t lose half to a chocolate avalanche.
– Pre-chop the coating chocolate and set up your dipping station the morning you plan to serve so it’s grab-and-go for quick entertaining.
Time-Saving Tricks
– Use a food processor to blitz the filling smooth fast—less kneading, less mess.
– Melt chocolate in short bursts and stir between, or use a double-boiler to avoid burning; add a little neutral oil if the chocolate seizes.
– Freeze the centers briefly so you can dip faster and get cleaner shapes.
– If you’re in a rush, roll the filling into thicker coins and press them flat—less dipping time and still delicious.
Common Mistakes
– Don’t skip chilling the filling; I once tried to dip room-temp centers and they fell apart into sad blobs. Fix: pop them in the freezer until firm.
– Overheat the chocolate—if it looks grainy, pull it off heat and stir slowly; add a teaspoon of oil to smooth it out if needed.
– Using too much extract: a little peppermint goes a long way. If it’s too strong, add a touch more powdered sugar to balance.
– Trying to stack wet patties—wait for a full set, or they’ll stick and you’ll cry a little and then eat the mistakes.
What to Serve It With
– Hot coffee or espresso for adults—those bitter notes make the patty sing.
– A mug of hot chocolate for the kids; it’s extremely festive.
– Simple shortbread or butter cookies on the side if you’re making a dessert platter.
– Serve with tea for a lighter pairing when you don’t want sugar overload.
Tips & Mistakes
– Chill the filling until firm—this is the single best tip to stop sticky disasters.
– Use a skewer or dipping fork for cleaner edges; kitchen tongs = chaos.
– Salt balances sweetness—if your filling tastes flat, a very tiny pinch can help.
– If your chocolate gets thick, stir in a teaspoon of oil or warm it gently; don’t blast it in the microwave.
Storage Tips
Store these in an airtight container in the fridge for short-term or the freezer for longer. If frozen, let them sit out for a few minutes before serving so the chocolate stops cracking. Eating one straight from the fridge is perfectly fine—chewier center, slightly firmer chocolate—and no one should judge breakfast peppermint patties if that’s your vibe.
Variations and Substitutions
– For vegan patties, use coconut oil in the filling and choose dairy-free chocolate; texture will be a touch softer but still delightful.
– Want them stronger? Add a drop more peppermint extract or a little finely grated fresh mint for texture—taste as you go.
– Swap powdered sugar for a mix of powdered sugar and a little cornstarch if your climate is humid; it helps prevent sogginess.
– Dipped in white chocolate? Yes, but use good quality so it doesn’t taste waxy; dark chocolate gives the best contrast.
Frequently Asked Questions

Peppermint Patties Made Easy
Ingredients
Main Ingredients
- 3.25 cup powdered sugar
- 2.5 tbsp unsalted butter, softened
- 6 tbsp sweetened condensed milk
- 1 tbsp light corn syrup
- 1.25 tsp peppermint extract
- 0.5 tsp pure vanilla extract
- 0.13 tsp kosher salt
- 12 oz semisweet chocolate, chopped
- 1 tbsp refined coconut oil or a spoonful of shortening
Instructions
Preparation Steps
- Line a large baking sheet with parchment and clear space in the fridge.
- Beat condensed milk, butter, corn syrup, peppermint, vanilla, and salt until smooth and creamy.
- Mix in powdered sugar gradually, then knead briefly until a soft, non-sticky dough forms.
- Scoop 1-tbsp portions, roll into balls, and flatten into 1/4-inch disks on the prepared sheet.
- Chill the peppermint disks until firm, about 20 minutes.
- Melt chocolate with coconut oil in 30-second microwave bursts, stirring until glossy and smooth.
- Dip each peppermint disk in chocolate, let excess drip off, and return to the sheet.
- Chill until the chocolate sets, about 10 minutes, then serve or store.
Notes
Featured Comments
“Made this last night and it was turned out amazing. Loved how the quick bite came together.”
“This family favorite recipe was family favorite — the creamy really stands out. Thanks!”
“Super easy and so flavorful! My family asked for seconds. Saving this one.”
“This golden recipe was absolutely loved — the tasty really stands out. Thanks!”
“New favorite here — absolutely loved. crunchy was spot on.”
“This light recipe was family favorite — the shareable really stands out. Thanks!”
“This delicate recipe was absolutely loved — the zesty really stands out. Thanks!”
“New favorite here — family favorite. crispy crust was spot on.”
“Made this last night and it was will make again. Loved how the family-style came together.”
“New favorite here — family favorite. clean was spot on.”