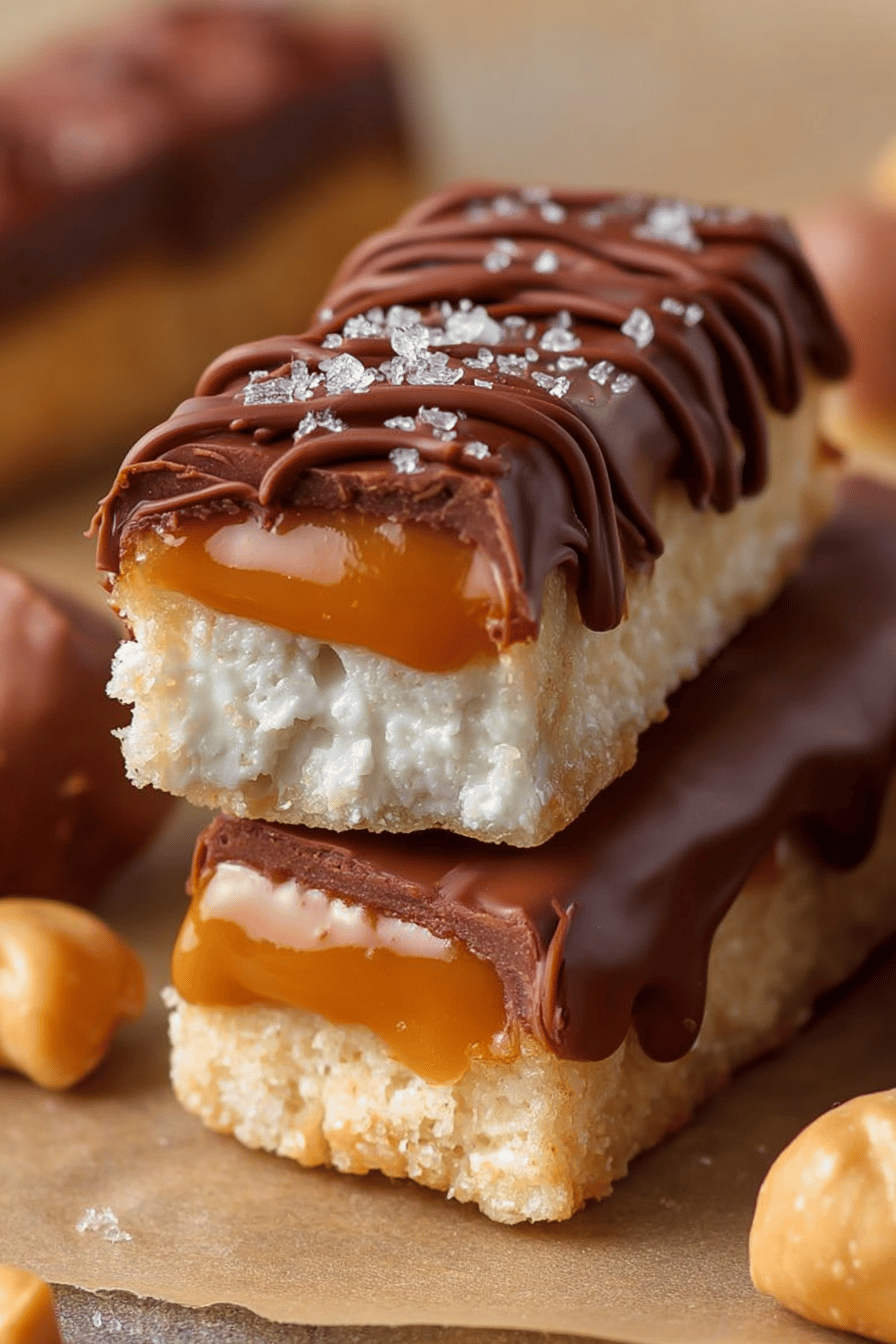
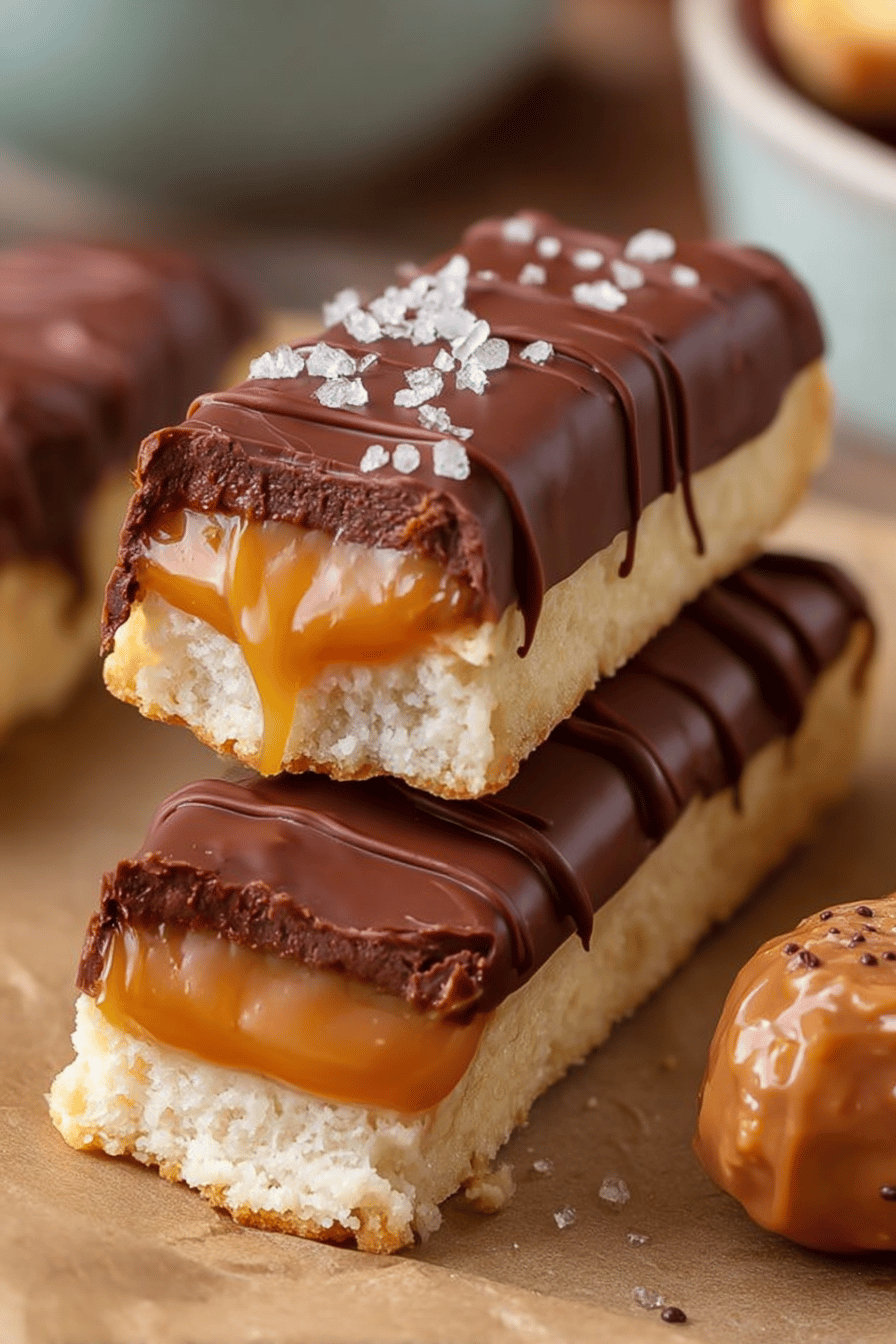
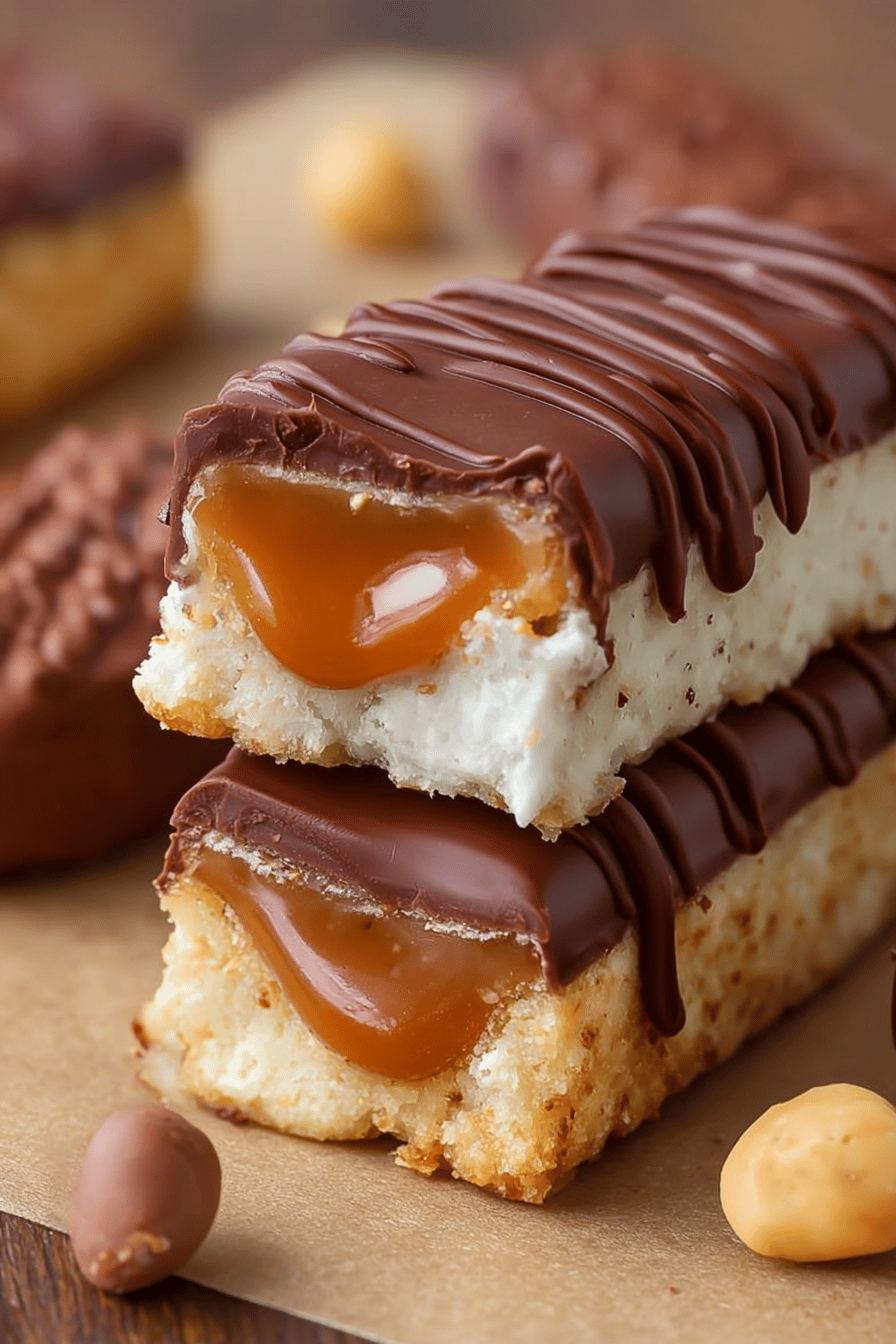
Easy Homemade Twix Bars Recipe
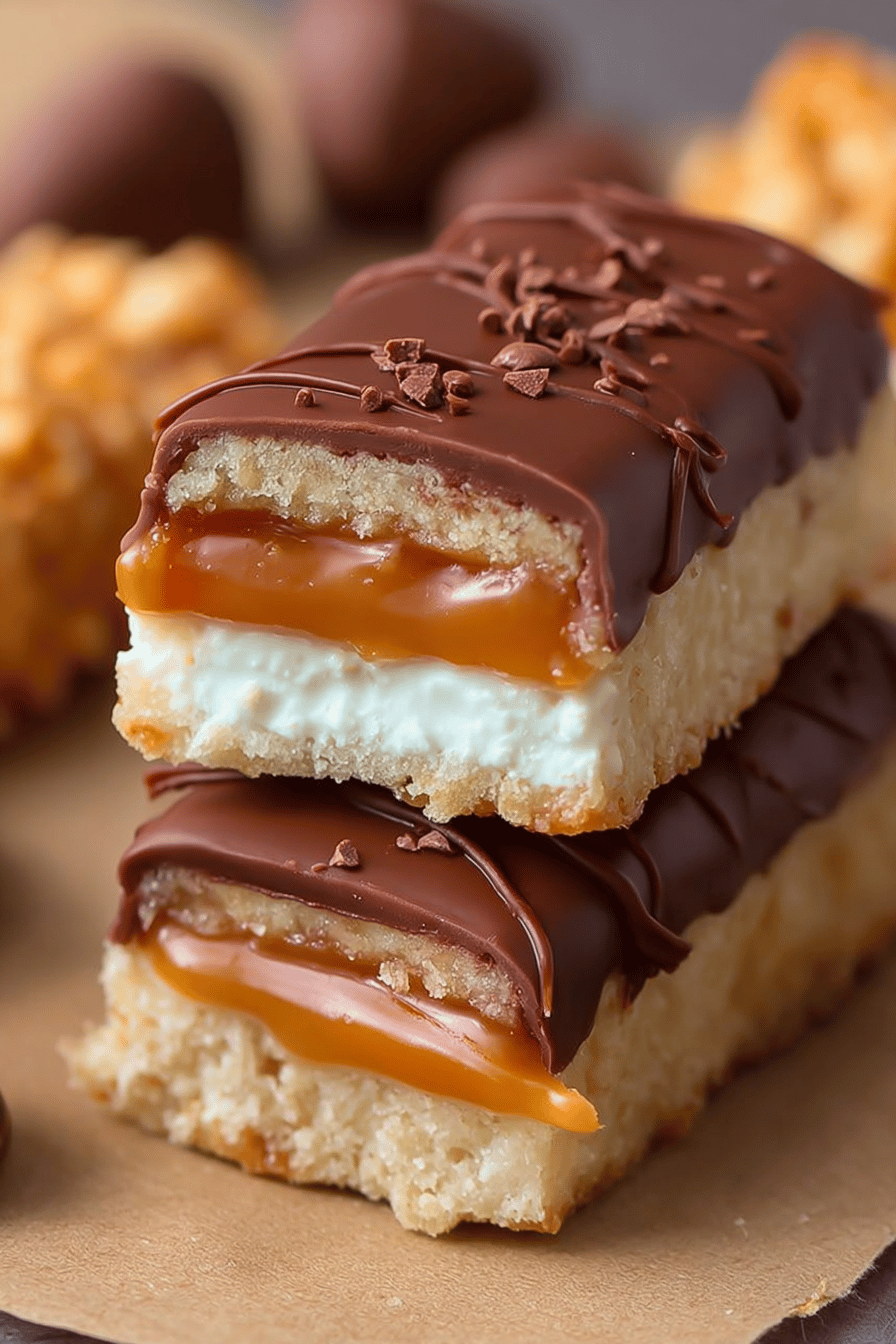
Okay, buckle up, buttercups, because we’re diving headfirst into a little piece of heaven: Easy Homemade Twix Bars Recipe! Yeah, you heard right. Twix. At home. This isn’t some “kinda like Twix” thing, either. This is the real deal, but BETTER because YOU made it. And honestly, who can resist that glorious combo of crunchy, caramelly, chocolatey goodness? Nobody, that’s who.
So, story time. Remember that one time my husband, bless his heart, tried to “surprise” me by baking something? It was… memorable. Mostly because the kitchen looked like a bomb went off, and whatever he attempted tasted vaguely of sadness. After that, I figured I’d better up my game, so I landed on this recipe. It’s become a legit family favorite. Now, instead of kitchen disasters, we get these freaking amazing Twix bars. Even the kids help now – mostly licking the spoons, but hey, I’ll take it! It’s a win-win!
Why You’ll Love This Easy Homemade Twix Bars Recipe
Okay, lemme lay it on you why this is about to become your new obsession:
- They’re freaking Twix bars, duh! I mean, who doesn’t love a Twix?
- Way better than store-bought. Seriously, the homemade caramel is life-changing.
- Therapeutic to make. Smashing cookies is excellent stress relief, just saying.
- Major brag-worthy. You can casually drop “Oh, these? I just whipped them up!” and watch jaws DROP.
How to Make It
MORE EASY DESSERT RECIPES...


Alright, listen up, because we’re about to get our bake on! First, we’re smashing up those cookies. I use a food processor because, well, I’m lazy efficient. But a baggie and a rolling pin work just as well. Just whack at it until you have crumbs, not dust. Then, you mush those crumbs with butter and press it into your pan. Pop that in the freezer.
MORE OF OUR FAVORITE…
Now, the caramel! This is where it gets fun, but also where you need to PAY ATTENTION. Melt the butter and brown sugar together. Don’t burn it! Stir in the cream, and let it bubble away until it thickens up. This takes a bit, so be patient. Once it’s gorgeous and golden, pour it over the cookie base, and back in the freezer it goes.
Finally, melt your chocolate. I like to add a teeny bit of coconut oil to make it extra shiny. Pour it over the caramel, spread it out, and BOOM. Back to the freezer one last time. Once it’s solid, slice ’em up and try not to eat the whole batch in one sitting. Good luck with that, though. I never manage it.
Ingredient Notes
[This module dynamically pulls in recipe-specific ingredients. Make sure when generating the recipe, the ingredient notes follow this tone and layout:]
- Shortbread Cookies: Okay, I usually use those Keebler ones. They’re just… right. But you can use any shortbread. Just promise me you won’t use, like, Oreos or something.
- Butter: Unsalted is best, but if you only have salted, just skip adding any extra salt to the crust or caramel, capiche?
- Brown Sugar: Dark or light, honestly, whatever you have on hand. Dark gives it a richer, molasses-y vibe, which I dig.
- Heavy Cream: Don’t skimp on this. It’s what makes the caramel luxuriously creamy. Half-and-half just won’t cut it. Trust me, I tried once. It was sad.
- Chocolate Chips: Milk chocolate is classic Twix, but dark chocolate is my personal fave. Experiment and see what YOU like!
- Coconut Oil: This is totally optional, but it gives the melted chocolate a beautiful shine. If you don’t have it, don’t sweat it.
Recipe Steps:
- Crush shortbread cookies into fine crumbs.
- Combine cookie crumbs and melted butter; press into a pan.
- Freeze the crust for 15 minutes.
- Melt butter and brown sugar for the caramel.
- Stir in heavy cream; cook until thickened.
- Pour caramel over crust; freeze again for 30 minutes.
- Melt chocolate (add coconut oil for shine).
- Spread chocolate over caramel; freeze until solid.
- Slice into bars and enjoy!
What to Serve It With
Honestly? Nothing. These are perfect on their own. But if you really want to get fancy, a scoop of vanilla ice cream never hurt anyone. Or maybe a big glass of cold milk. Yeah, milk. Perfect.
Tips & Mistakes
- Don’t overbake the caramel! It will become hard and sad. Keep an eye on it.
- Freezing is your friend! Don’t rush the freezing process. It helps everything set up properly.
- Slice with a warm knife. Run your knife under hot water and dry it off before slicing. This will give you nice, clean cuts.
- I once used salted butter for the crust. Mistake. The crust was way too salty. Learn from my pain.
Storage Tips
Okay, so, if you somehow manage to NOT eat these all in one go (which, let’s be real, is a Herculean feat), store them in an airtight container in the fridge. They’ll last for a few days… assuming you don’t sneak into the fridge at midnight for “just one more.” And if you DO eat them cold for breakfast? No judgment here. I’ve totally done that. Actually, I might be doing that tomorrow.
Variations and Substitutions
- Different Cookies: I’ve tried graham crackers for the crust, but it’s not the same. Shortbread really is key.
- Nut Butter: If you’re feeling adventurous, swirl a little peanut butter into the melted chocolate. It’s kinda like a Twix meets Reese’s thing. Not bad, not bad at all.
- Salted Caramel: Sprinkle a little sea salt on top of the chocolate before it sets. Sweet and salty perfection!
- I skipped the coconut oil once ’cause I was out. It was still fine. Just not quite as shiny. Don’t sweat it if you don’t have it.
Frequently Asked Questions
Easy Homemade Twix Bars Recipe
Easy Homemade Twix Bars Recipe
Ingredients
Main Ingredients
- 1.5 cups all-purpose flour
- 0.5 cup unsalted butter softened
- 0.25 cup granulated sugar
- 0.25 teaspoon salt
- 1 cup caramel candies unwrapped
- 2 tablespoons heavy cream
- 1 cup milk chocolate chips
- 1 teaspoon vegetable oil
Instructions
Preparation Steps
- Preheat your oven to 350°F (175°C). Line an 8x8 inch baking dish with parchment paper.
- In a mixing bowl, cream together the butter, sugar, and salt until light and fluffy.
- Gradually add the flour and mix until a crumbly dough forms.
- Press the dough evenly into the prepared baking dish. Bake for 15-20 minutes until lightly golden.
- While the crust is baking, melt the caramel candies with the heavy cream in a microwave or double boiler until smooth.
- Pour the melted caramel over the hot shortbread crust and let it cool completely.
- Melt the chocolate chips with the vegetable oil until smooth, then spread over the cooled caramel layer.
- Refrigerate the bars until the chocolate is set. Cut into bars and enjoy!
Notes
Nutrition
Featured Comments
“Impressed! Clear steps and so flavorful results. Perfect for busy nights.”
“Super easy and absolutely loved! My family asked for seconds. Saving this one.”
“Made this last night and it was will make again. Loved how the stacked came together.”
“New favorite here — so flavorful. sweet treat was spot on.”
“New favorite here — so flavorful. crispy crust was spot on.”
“Super easy and will make again! My family asked for seconds. Saving this one.”
“Super easy and absolutely loved! My family asked for seconds. Saving this one.”
“Impressed! Clear steps and absolutely loved results. Perfect for busy nights.”
“This simple recipe was turned out amazing — the foolproof really stands out. Thanks!”
“Made this last night and it was will make again. Loved how the hands-off came together.”