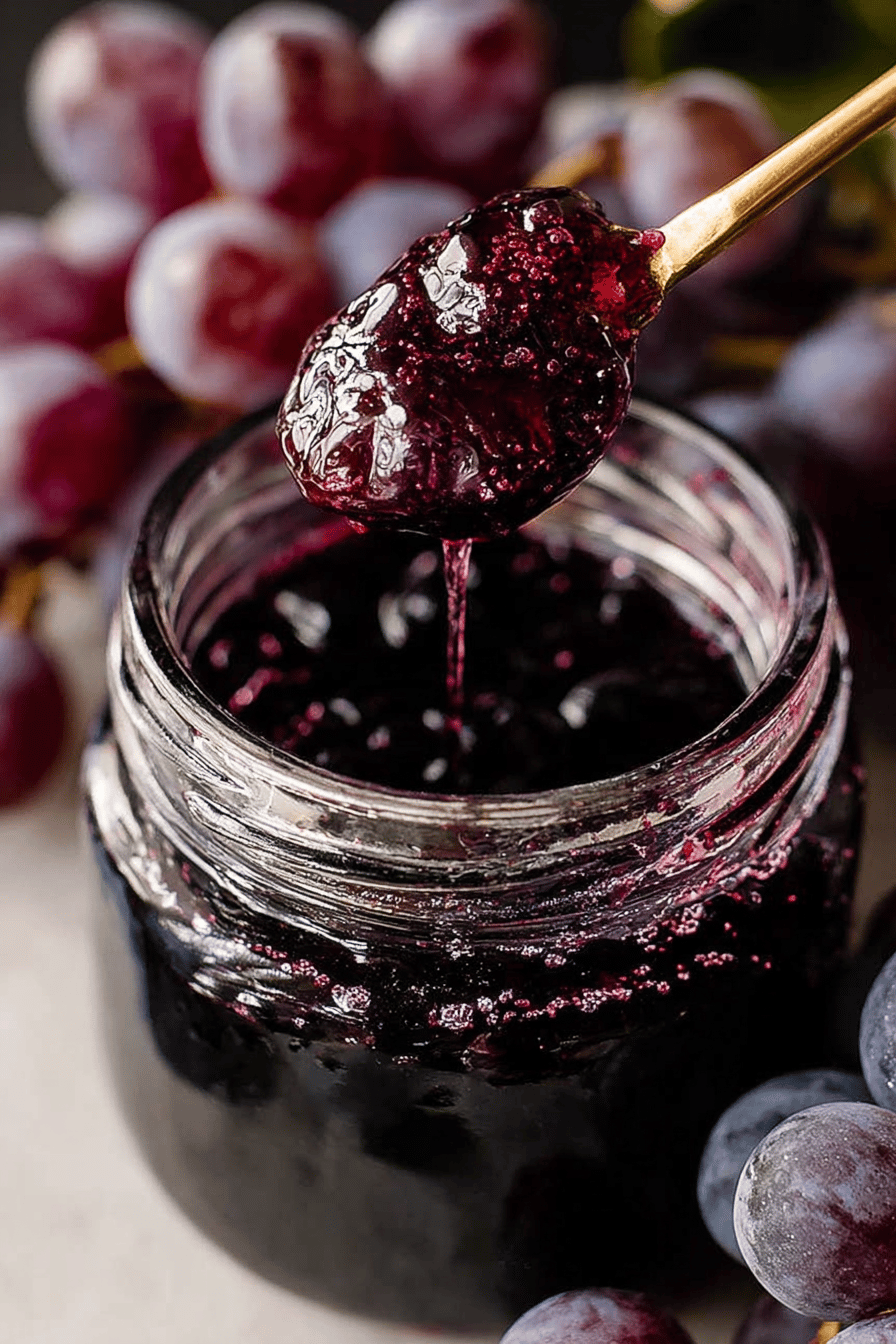
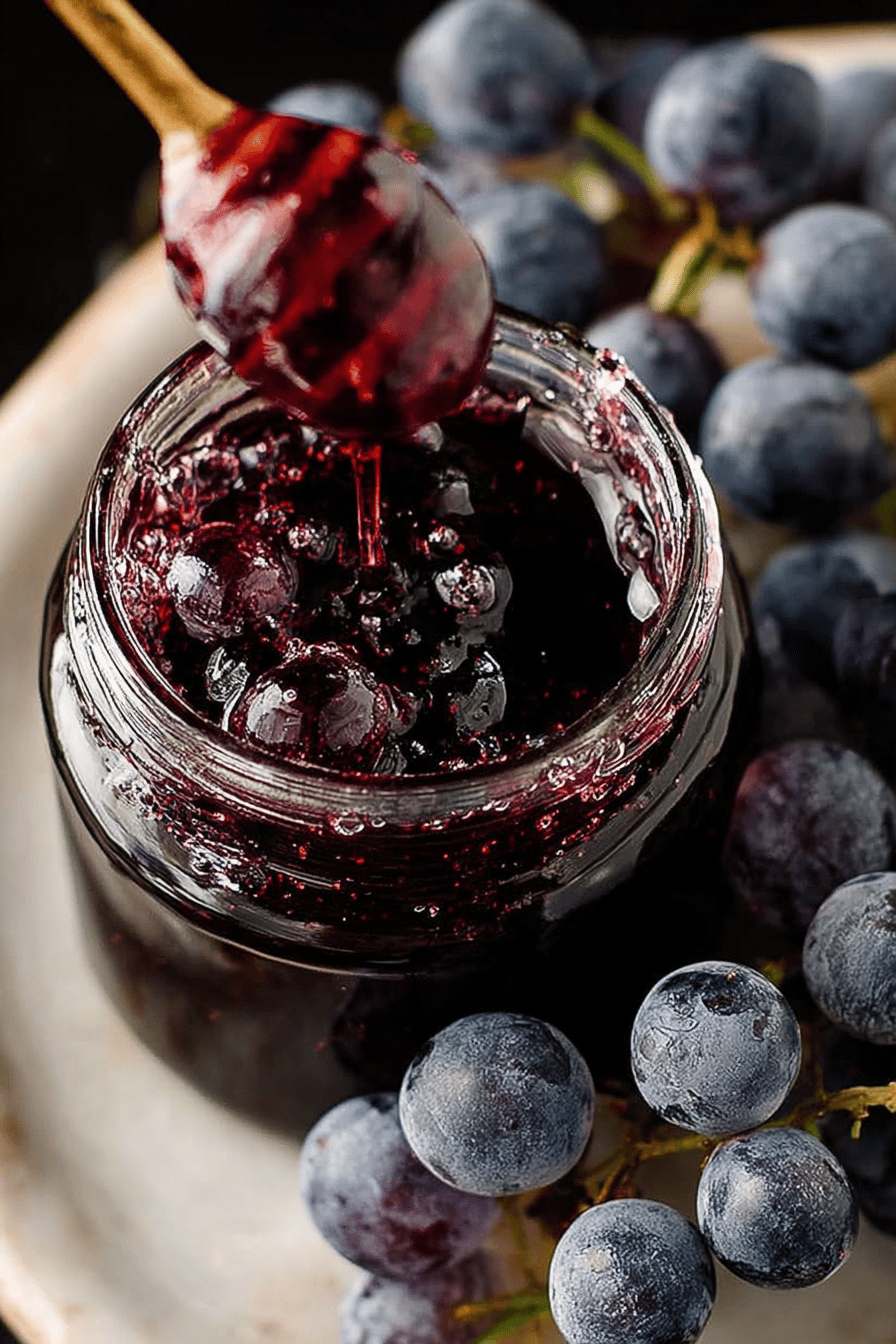
Easy Homemade Grape Jelly Recipe
We’re making grape jelly. Not just any grape jelly, but the kind that makes you wanna slap your grandma (with a high-five, of course) it’s so good. This is the real deal, no weird preservatives, just pure, unadulterated grapey goodness. Trust me, once you make this, you’ll never buy that store-bought stuff again. It’s easier than you think, and WAY tastier.
My family is OBSESSED with this jelly. My husband, bless his heart, puts it on everything from toast to…well, I once caught him sneaking a spoonful straight from the jar! And my kids? They think I’m basically a culinary genius when I whip up a batch. Seriously, it’s a staple in our house, and it’s the secret ingredient to some killer PB&Js. I even used it in thumbprint cookies last Christmas, and they were GONE in like, 20 minutes!
Why You’ll Love This Easy Homemade Grape Jelly Recipe
- It tastes like sunshine and happiness in a jar. Seriously, it’s that good.
- It’s way cheaper than buying the fancy organic stuff at the store. More money for shoes!
- You get to feel all smug and self-sufficient because you MADE GRAPE JELLY FROM SCRATCH. Booyah!
- It’s a great way to use up those extra grapes you bought because they looked so good at the farmer’s market (and then you forgot about them in the fridge…oops!).
How to Make It
Okay, so first things first, grab your grapes! We’re gonna wash them good, like REALLY good. No one wants gritty jelly. Then, chuck those little guys into a big pot, add a splash of water – not too much, just enough to get things going – and let ’em simmer. We’re talking low and slow, people. Let those grapes release their juicy magic.
MORE EASY DESSERT RECIPES...


Once they’re all soft and mushy (about 10-15 minutes), it’s time to strain them. Now, you can use a fancy jelly bag if you have one, but honestly, a cheesecloth-lined colander works just fine. Just let it drip, drip, drip. Don’t squeeze it, or your jelly will be cloudy. Nobody wants cloudy jelly, okay?
MORE OF OUR FAVORITE…
Now, measure that juice! This is important. For every 4 cups of juice, you’re gonna add about 3 cups of sugar. Yeah, it’s a lot of sugar, but hey, it’s jelly! Pour the juice and sugar back into the pot, add your lemon juice (don’t skip this, it helps with the setting), and crank up the heat.
We’re looking for a rolling boil here, people. Stir it constantly so it doesn’t burn. And trust me, you’ll know when it’s ready. It’ll start to thicken up, and when you put a little bit on a cold plate, it’ll gel. If it doesn’t, just keep boiling it a little longer.
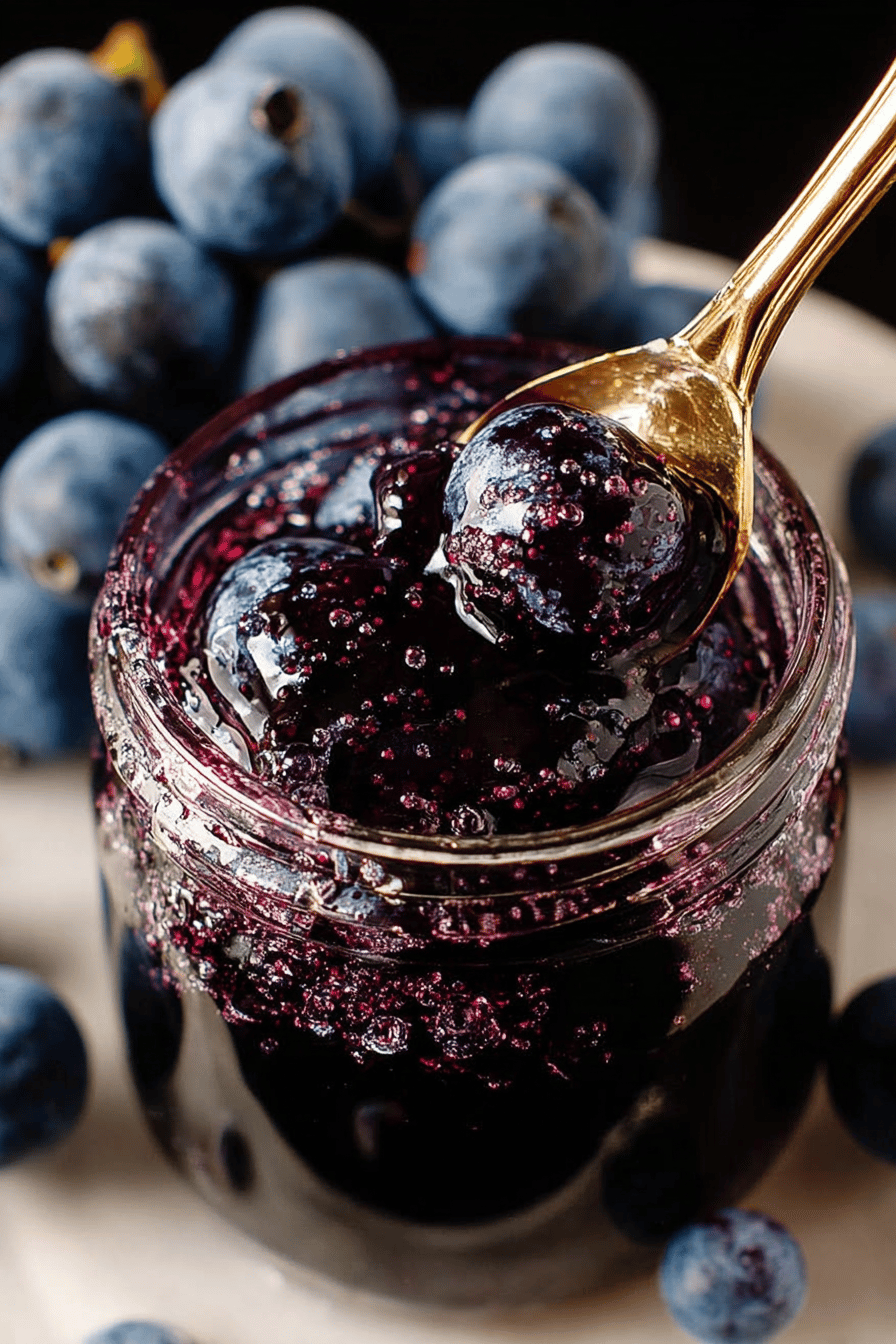
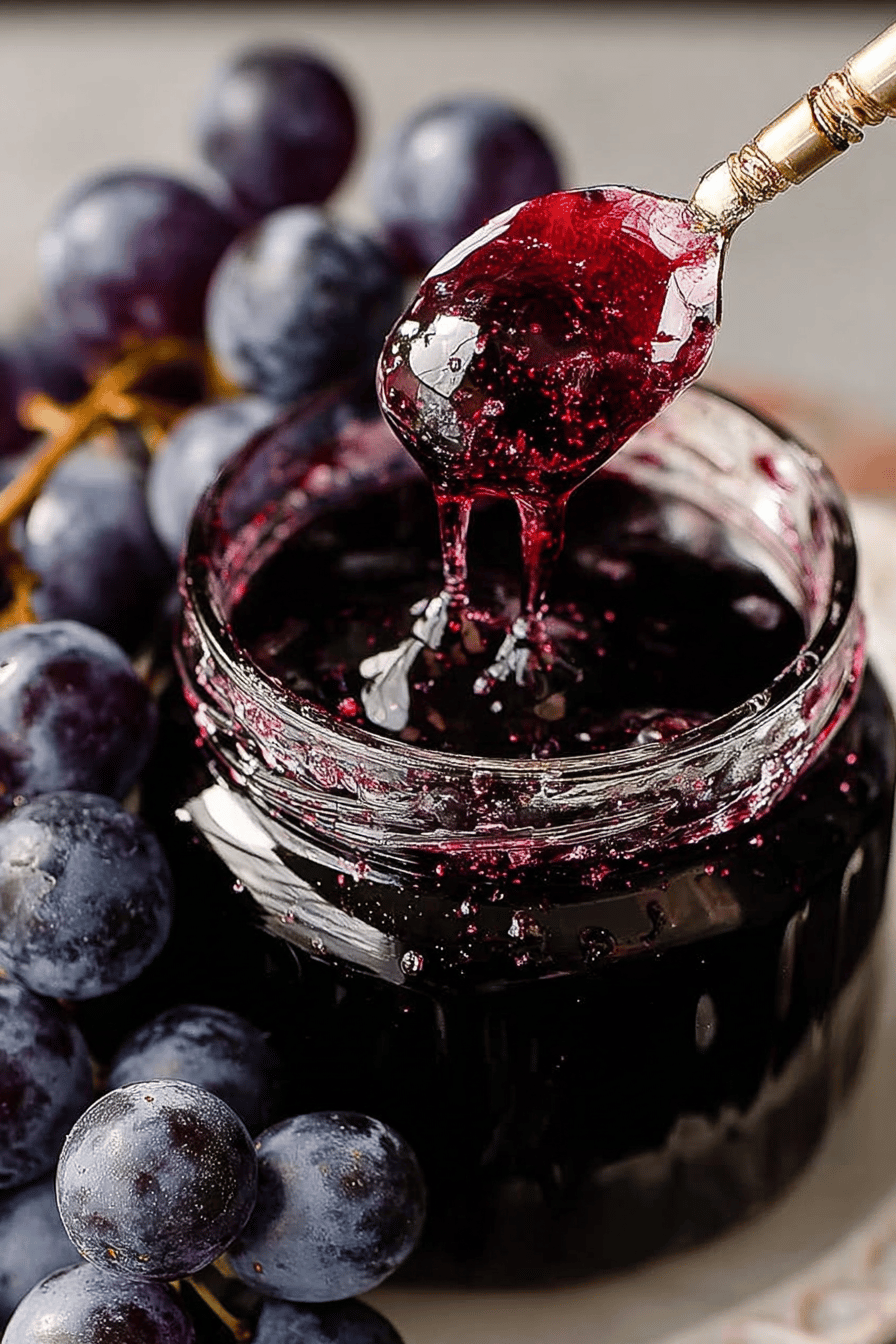
Then, carefully pour that liquid gold into your sterilized jars. Leave a little headspace, wipe the rims clean (very important!), and pop on the lids and rings. Process them in a boiling water bath for about 10 minutes to make sure they’re sealed tight. And that’s it! You made jelly!
Ingredient Notes
- Grapes: Use whatever grapes you like! I usually go for Concord grapes because they’re super grape-y, but any kind will work. Just make sure they’re ripe and juicy!
- Sugar: You can use regular white sugar, but I sometimes use a mix of white and brown sugar for a little extra depth of flavor. Don’t judge me.
- Lemon Juice: Don’t skip this! It helps the jelly set properly and adds a little bit of zing. Plus, it balances out the sweetness.
- Water: Honestly? I usually just eyeball it. A splash. Enough to get things moving. Don’t overthink it!
Recipe Steps:
- Wash grapes thoroughly and place in a large pot with a splash of water.
- Simmer grapes over low heat for 10-15 minutes until soft and mushy.
- Strain grape mixture through a cheesecloth-lined colander or jelly bag.
- Measure the grape juice. For every 4 cups of juice, add 3 cups of sugar to the pot.
- Add lemon juice to the pot with the juice and sugar.
- Boil the mixture over high heat, stirring constantly, until it reaches a rolling boil.
- Test for setting by placing a small amount on a cold plate to see if it gels.
- Pour the hot jelly into sterilized jars, leaving a little headspace.
- Wipe the rims of the jars clean and place lids and rings on tightly.
- Process the jars in a boiling water bath for 10 minutes.
What to Serve It With
Okay, obvious answer: toast! But also, try it on:
- Peanut butter and jelly sandwiches (duh!)
- English muffins with cream cheese
- Scones (especially if you’re feeling fancy)
- As a glaze for pork or chicken
- In thumbprint cookies (like I said, game changer!)
Tips & Mistakes
- Don’t overcook the jelly! It’ll get too thick and gummy. No bueno.
- Make sure your jars are sterilized! Nobody wants moldy jelly.
- Don’t squeeze the grape pulp when straining! It’ll make your jelly cloudy.
- If your jelly doesn’t set, don’t panic! Just pour it back into the pot and boil it a little longer. You got this!
- Accidentally burned the bottom of the pot? Don’t stir it in! Just carefully pour the good jelly off the top and leave the burnt stuff behind. Crisis averted!
Storage Tips
Store your sealed jars of jelly in a cool, dark place (like your pantry) for up to a year. Once you open a jar, keep it in the fridge. And yes, you can eat it straight from the fridge with a spoon. I won’t judge. Especially at breakfast. Cold jelly on a spoon? Don’t knock it ’til you try it!
Variations and Substitutions
- Want to use less sugar? Try substituting some of the sugar with honey or maple syrup. Just keep in mind that it might affect the setting.
- Out of lemon juice? A little bit of apple cider vinegar will work in a pinch.
- Don’t have a jelly bag? Use a clean pillowcase! Just make sure it’s not one you really care about.
- Accidentally added too much water? Just boil it down a little longer until it reaches the right consistency. I’ve totally done this, no shame.
- Trying to be fancy? Throw in a sprig of rosemary or a few peppercorns while it’s simmering for a unique flavor twist.
Frequently Asked Questions
Easy Homemade Grape Jelly Recipe
Ingredients
Main Ingredients
- 4 cups grape juice freshly squeezed if possible
- 0.5 cup water
- 1 box pectin Sure-Jell or similar
- 7 cups sugar granulated
- 0.25 tsp butter optional, to reduce foaming
Instructions
Preparation Steps
- Sterilize jars and lids in boiling water for at least 5 minutes. Keep the jars in the hot water until ready to use.
- In a large pot, combine grape juice and pectin. Stir in water and bring to a rapid boil over high heat, stirring frequently.
- Add sugar all at once and return to a full rolling boil. Add butter to reduce foaming, if desired.
- Boil for 1 minute while stirring constantly. Remove from heat and skim off any foam.
- Quickly ladle jelly into hot, sterilized jars. Leave 1/4 inch of headspace. Secure lids and rings.
- Process the jars in a water bath canner for 5 minutes. Remove jars and cool completely before storing.
Notes
Nutrition
Featured Comments
“New favorite here — family favorite. crunchy was spot on.”
“Impressed! Clear steps and so flavorful results. Perfect for busy nights.”
“Super easy and so flavorful! My family asked for seconds. Saving this one.”
“Super easy and family favorite! My family asked for seconds. Saving this one.”
“Made this last night and it was turned out amazing. Loved how the perfectly seasoned came together.”
“Super easy and turned out amazing! My family asked for seconds. Saving this one.”
“This chilled recipe was absolutely loved — the colorful really stands out. Thanks!”
“New favorite here — family favorite. stacked was spot on.”
“Made this last night and it was absolutely loved. Loved how the fresh catch came together.”
“This nostalgic recipe was turned out amazing — the shareable really stands out. Thanks!”