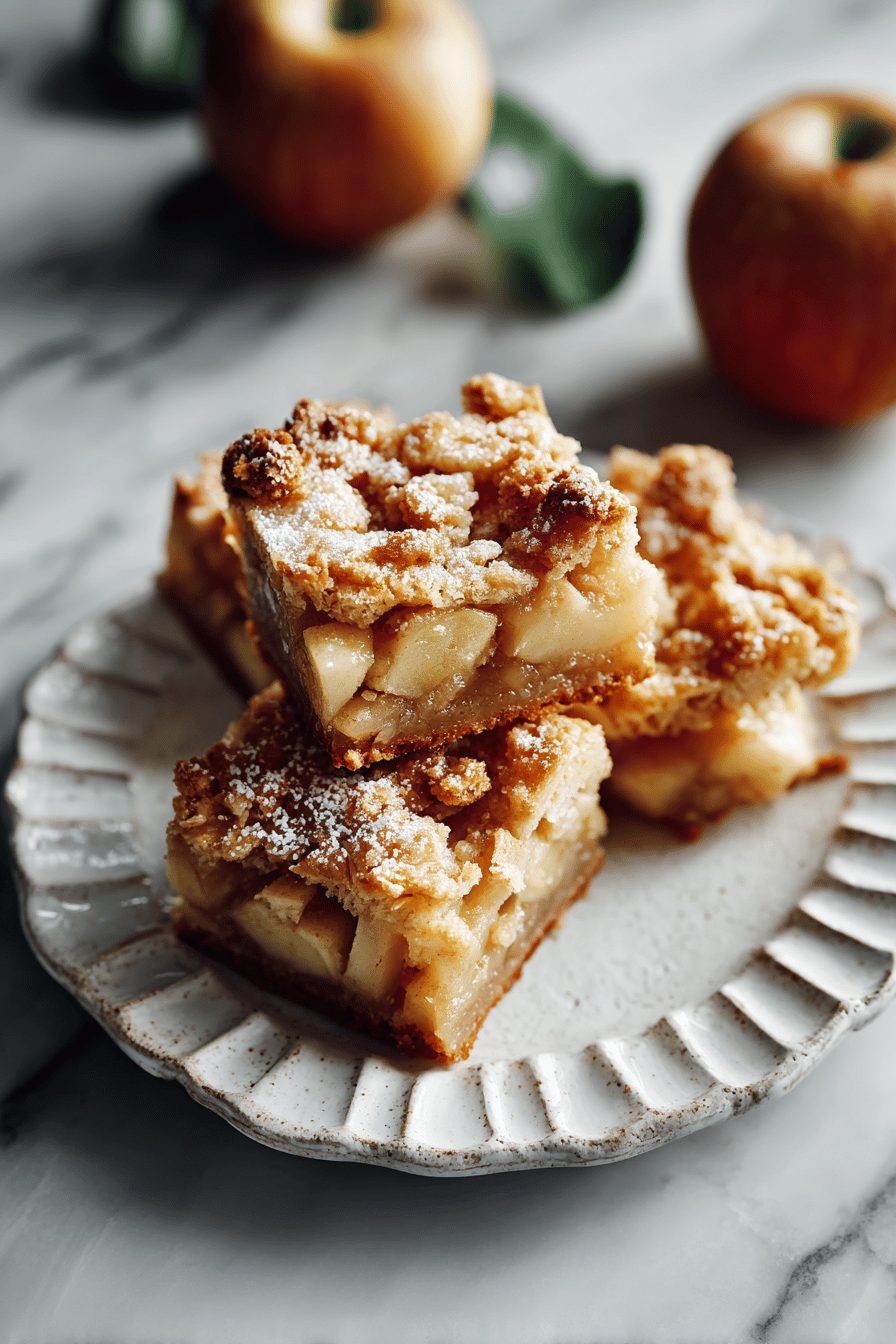
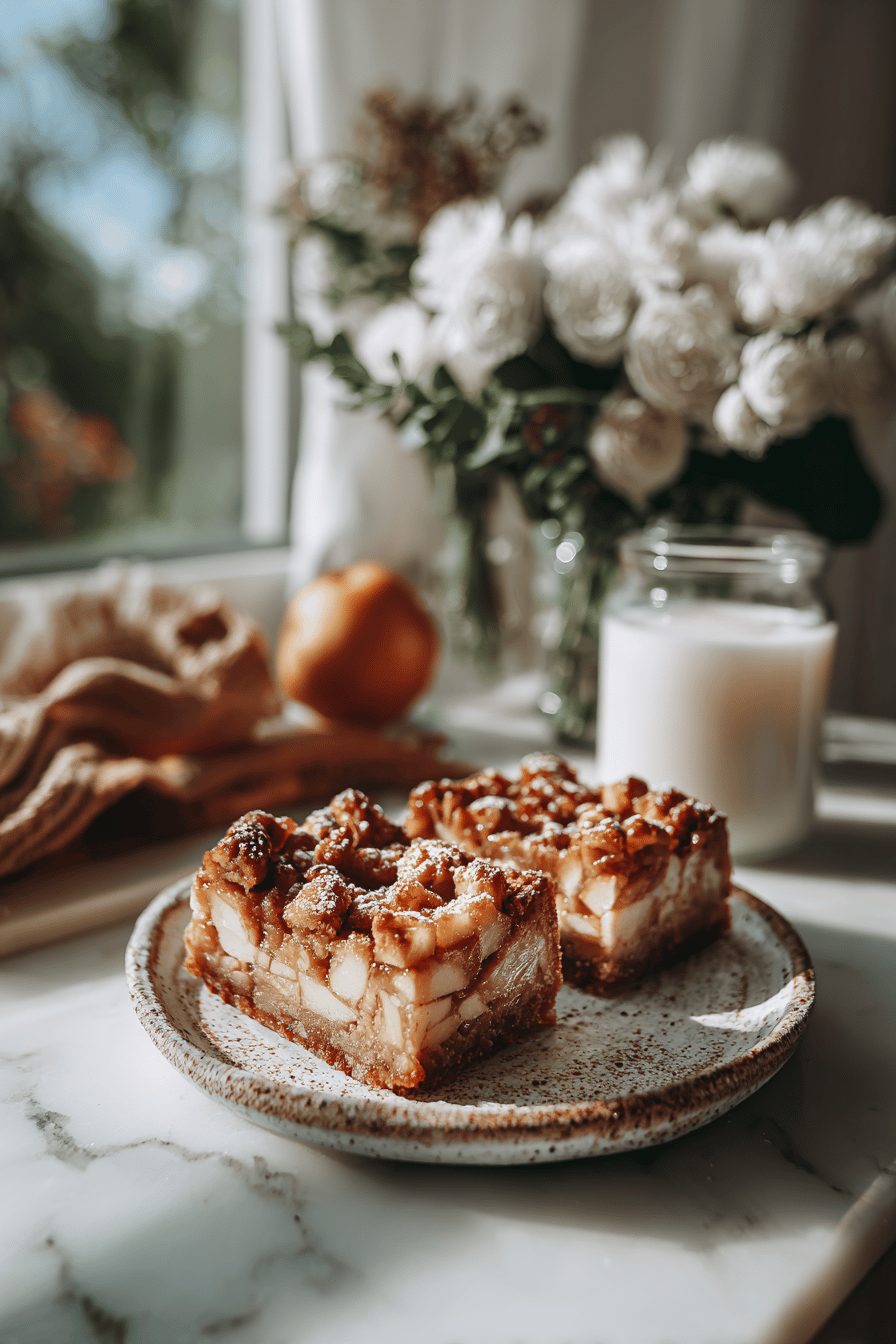
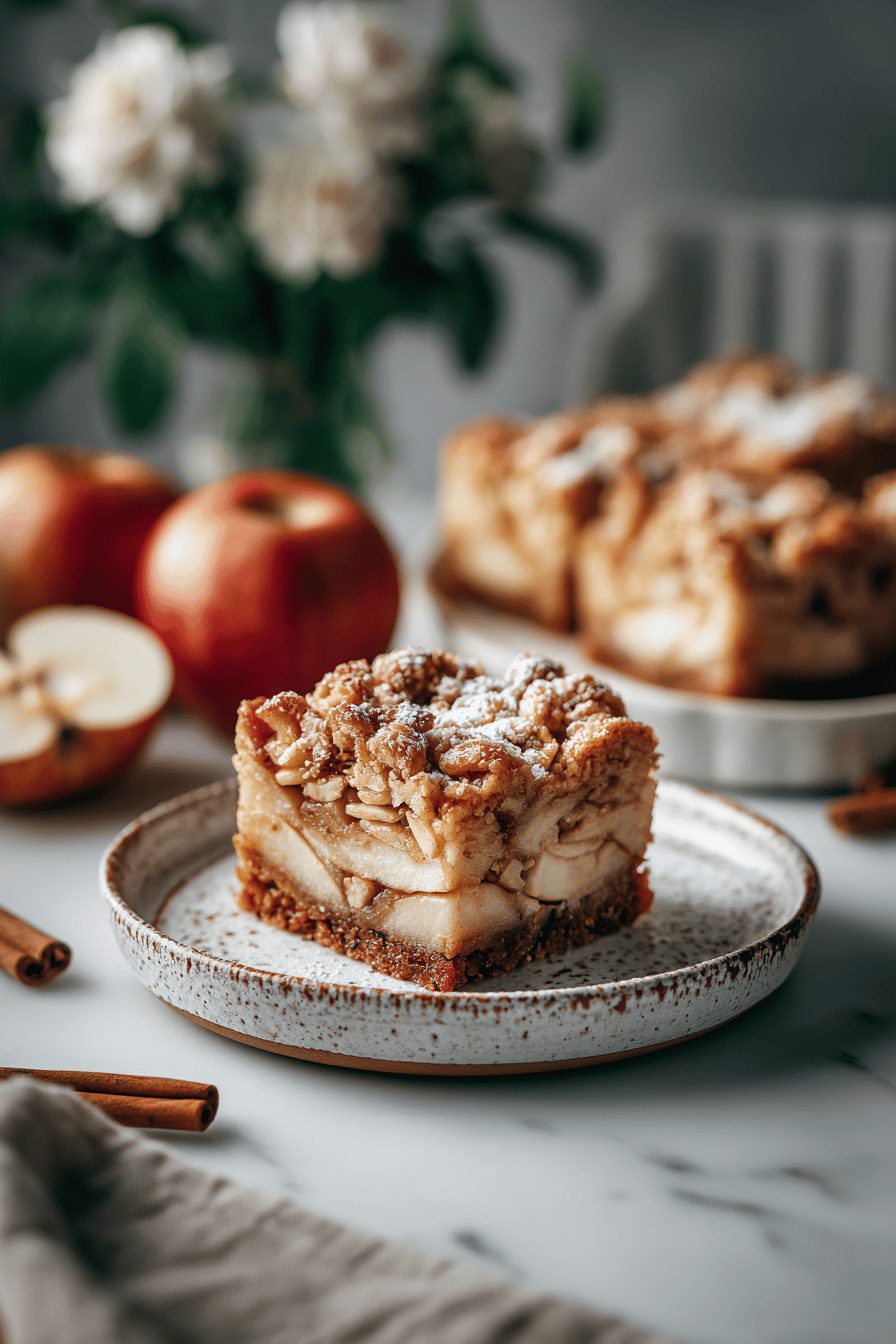
Easy Apple Pie Bars
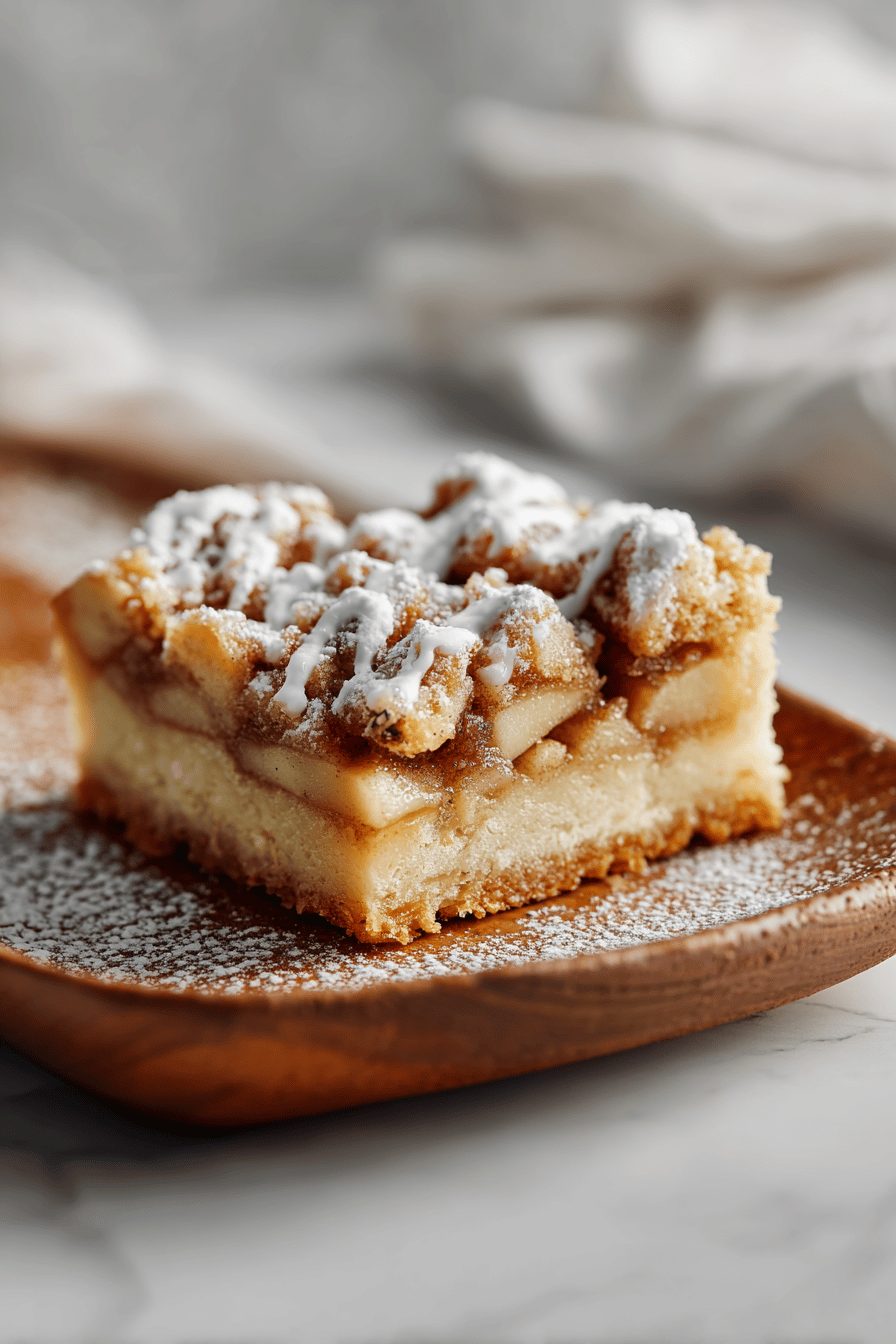
I keep calling these bars “cheater apple pie” because they give you all the warm, cinnamon-spiced comfort of a pie without wrestling with a rolling pin or a judgmental lattice crust. Flaky-ish bottom crust, buttery crumble top, and apple filling that is perfectly tender but not mushy — it’s my weekday-friendly dessert that behaves like a celebration when guests show up.
My kids and my husband treat these like currency. My husband will randomly show up in the kitchen at 10 p.m. and ask if there are any left, then eat two and immediately declare them “the best thing I’ve had all week.” We’ve made them for school bake sales, for a frantic housewarming, and for that one Thanksgiving I didn’t want to deal with pies. True story: once I forgot to drain some extra apple juices and the bars were a little soggy, but a quick reheat in the oven and they came back to life like nothing happened. They’re forgiving, and so are we — which is why I love them.
Why You’ll Love This Easy Apple Pie Bars
– No fussy crust flaking out on you — press, bake, crumble, done.
– Uses everyday pantry ingredients but tastes like you spent all day on it.
– Versatile: skip the nuts for school-safe treats or add them for a grown-up crunch.
– Great for feeding a crowd and easy to cut into squares for potlucks.
Kitchen Talk
I discovered the magic ratio for the crumble topping the hard way — too much flour and it’s cakey, too much butter and it melts into a greasy puddle. The trick is keeping butter cold-ish so it crumbles into little pebbles that brown beautifully. One time I grabbed pears by accident and made pear-bars instead; not the same as apples but still oddly delicious. Also: stirring the apples only until they’re tender keeps the filling from turning into applesauce — texture matters, people.
{"reviewer_name": "Sarah J.", "rating": 5, "review_text": "These Easy Apple Pie Bars were a total hit in my kitchen—super straightforward to whip up with that buttery crust, cinnamon-spiced apples, and crumbly topping that bakes to golden perfection[1][3]. I had fresh apples on hand so peeled and sliced them myself, tossing with lemon juice and brown sugar like the recipe suggested, and they turned out juicy without being soggy[1]. Honest highlight: a little boil-over happened, so next time I'll pop a baking sheet underneath, but the flavor was spot-on apple pie in bar form—perfect for fall snacking!"/review_text}
MORE OF OUR FAVORITE…
Shopping Tips
– Baking Basics (Flour/Sugar/Leaveners): Use all-purpose flour and light brown sugar for the topping — it gives that caramel-y flavor without needing caramel. If you see “bleached” on flour, don’t stress; regular all-purpose is fine.
– Fruit: Choose firm, slightly tart apples like Granny Smith, Honeycrisp, or Braeburn so the slices hold up in the bars and balance the sweetness.
– Fats & Oils: Unsalted butter is best — you control the salt and the flavor is cleaner. If you must use margarine, expect a softer, less flaky top.
– Spices: Ground cinnamon is the star; a pinch of nutmeg or cardamom is a nice upgrade. Buy small containers if you don’t bake often so spices stay lively.
– Nuts & Seeds: If adding walnuts or pecans, toast them quickly in a dry pan for extra crunch and flavor — it makes a big difference.
Prep Ahead Ideas
– Slice and toss the apples with sugar and cinnamon a day ahead, drain off excess liquid into a container, and store chilled until assembly.
– Make the crumble topping and keep it in the fridge in an airtight container for up to 48 hours; it’s ready to go when you are.
– Par-bake the bottom crust and refrigerate; finish with apples and topping right before baking to save 15–20 minutes on the day you need it.
– Use shallow, airtight containers to store prepped components so they don’t get crushed in the fridge.
Time-Saving Tricks
– Use a box grater to shred apples for faster, even cooking if you don’t mind a slightly different texture.
– Pulse the crumble in a food processor to speed up “cutting in” butter when you’re short on time.
– Bake on a lower rack if the topping browns too fast; move to center for the final minutes.
– Make a double batch and freeze extras — they thaw quick and save you future stress.
Common Mistakes
– Over-soggy filling: I once dumped all apple juices back in because I’m optimistic. Don’t. Drain some liquid so the bars set properly.
– Undercooked apples: if you grab a softer apple variety, cook the filling a touch longer on the stove first.
– Burnt topping: butter melts and the top can brown fast — tent foil if it’s getting too dark before the center is set.
– Cutting too early: let the bars cool well or they will crumble. Patience, as always, is underrated.
What to Serve It With
– A scoop of vanilla ice cream or a dollop of whipped cream for pure dessert joy.
– Strong coffee or chai — their spices complement the cinnamon.
– Sharp cheddar slices for the brave and nostalgic (yes, people do love this pairing).
– Serve warm for parties; leftovers make a killer breakfast with yogurt.
Tips & Mistakes
– Press the bottom crust evenly; thin spots burn.
– Keep some apple juices off the pan or the bars will be sloppy.
– Chill the dough if your kitchen is warm — butter needs to stay cool.
– If the topping seems dry after baking, brush with a little melted butter.
Storage Tips
Store cooled bars in an airtight container at room temperature for 1–2 days or in the fridge for up to 5 days. They’re perfectly fine cold (I eat them cold for breakfast) but a quick zap or 8–10 minutes in a 350°F oven brings them back to freshly-baked life. To freeze, wrap slices tightly and freeze up to 3 months; thaw in the fridge overnight and reheat.
Variations and Substitutions
– Make them gluten-free with a 1:1 gluten-free flour blend and chill the dough longer to mimic structure.
– Swap brown sugar for coconut sugar for a slightly deeper, caramel-y flavor but expect different browning.
– Use maple syrup for part of the sweetener if you want a more complex sweetness — reduce other liquids slightly.
– Add oats to the crumble for chew and rustic texture, or toss in raisins for an old-school vibe.
– For vegan bars, use vegan butter and a flax egg if your recipe needs binding — they won’t be as crisp but still comforting.
Frequently Asked Questions
Easy Apple Pie Bars
Ingredients
Main Ingredients
- 2.25 cup all-purpose flour for crust and crumble
- 0.75 cup old-fashioned rolled oats for crumble
- 0.5 cup granulated sugar for crust
- 0.5 cup granulated sugar for filling
- 0.5 cup light brown sugar packed; for crust
- 0.25 cup light brown sugar packed; for filling
- 1 cup unsalted butter, melted slightly cooled
- 1 tsp ground cinnamon for crust
- 1.5 tsp ground cinnamon for filling
- 0.25 tsp ground nutmeg for filling
- 0.5 tsp fine salt for crust
- 0.25 tsp fine salt for filling
- 2 lb tart apples, peeled and diced such as Granny Smith or Honeycrisp
- 1.5 tbsp lemon juice
- 1.5 tsp vanilla extract for filling
- 2.5 tbsp cornstarch
- 0.75 cup powdered sugar for optional glaze
- 1.5 tbsp milk for optional glaze
- 0.25 tsp vanilla extract for optional glaze
Instructions
Preparation Steps
- Heat oven to 350°F. Line a 9×13-inch pan with parchment, leaving overhang.
- Whisk flour, oats, crust sugars, 1 tsp cinnamon, and 1/2 tsp salt in a bowl.
- Pour in melted butter and stir until moist crumbs form. Press about three-quarters into the pan. Reserve the rest for topping.
- Bake crust 12 minutes until set at the edges. Cool 5 minutes.
- Toss apples with lemon juice, filling sugars, 1 1/2 tsp cinnamon, nutmeg, and 1/4 tsp salt. Stir in vanilla, then sprinkle in cornstarch and mix again.
- Spread apple mixture over warm crust. Crumble reserved topping evenly over apples and lightly press.
- Bake 35–40 minutes until the fruit is bubbling and the top is golden.
- Cool in the pan at least 1 hour. Whisk powdered sugar, milk, and a splash of vanilla; drizzle over bars. Chill 30 minutes, then slice.
Notes
Featured Comments
“New favorite here — will make again. nourishing was spot on.”
“Impressed! Clear steps and family favorite results. Perfect for busy nights.”
“Super easy and will make again! My family asked for seconds. Saving this one.”
“Made this last night and it was will make again. Loved how the pressure-cooked came together.”
“Super easy and absolutely loved! My family asked for seconds. Saving this one.”
“Made this last night and it was will make again. Loved how the rich came together.”
“This quick bite recipe was family favorite — the traditional really stands out. Thanks!”
“This nostalgic recipe was so flavorful — the smoky really stands out. Thanks!”
“New favorite here — so flavorful. melt-in-your-mouth was spot on.”
“This versatile recipe was turned out amazing — the charred really stands out. Thanks!”