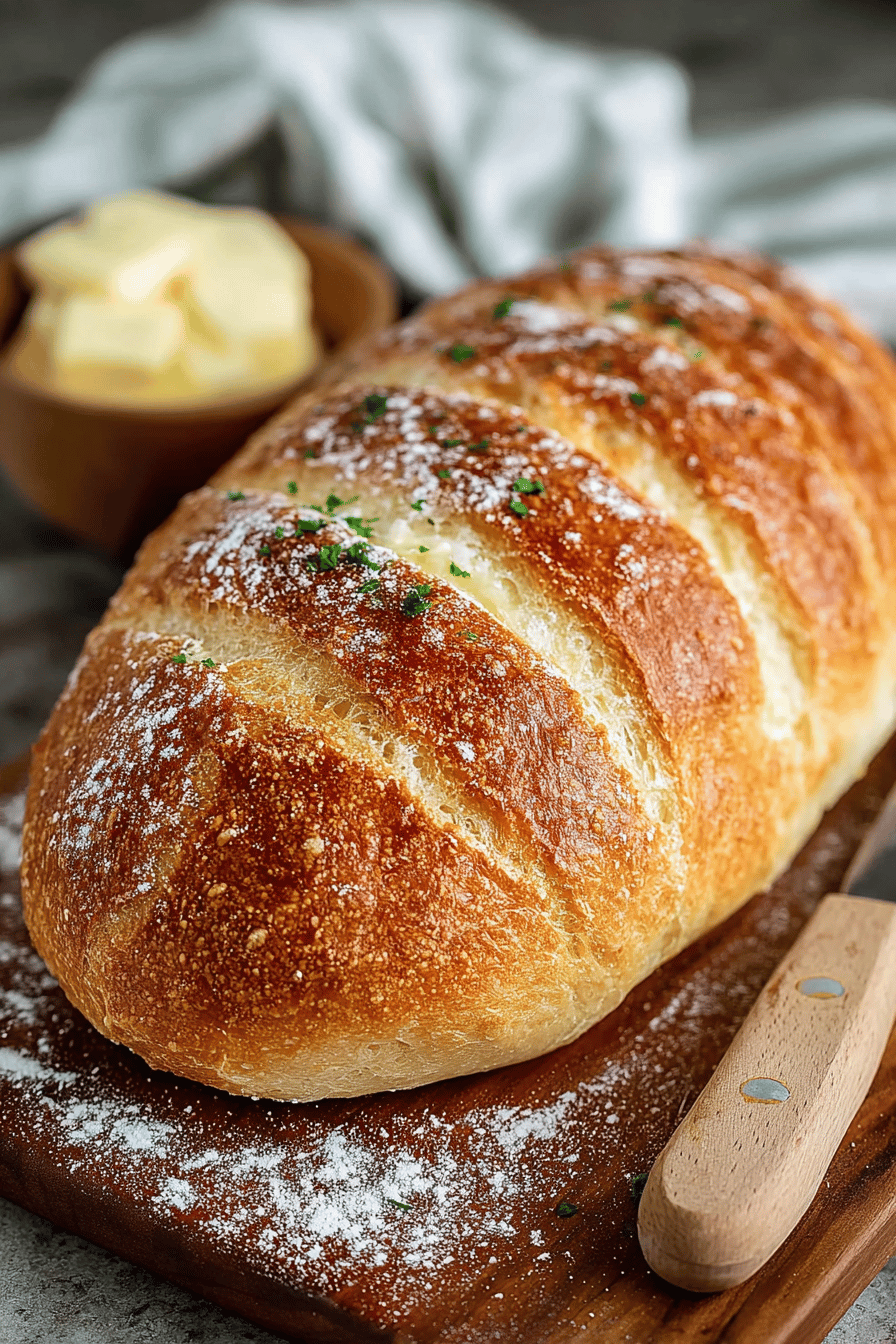
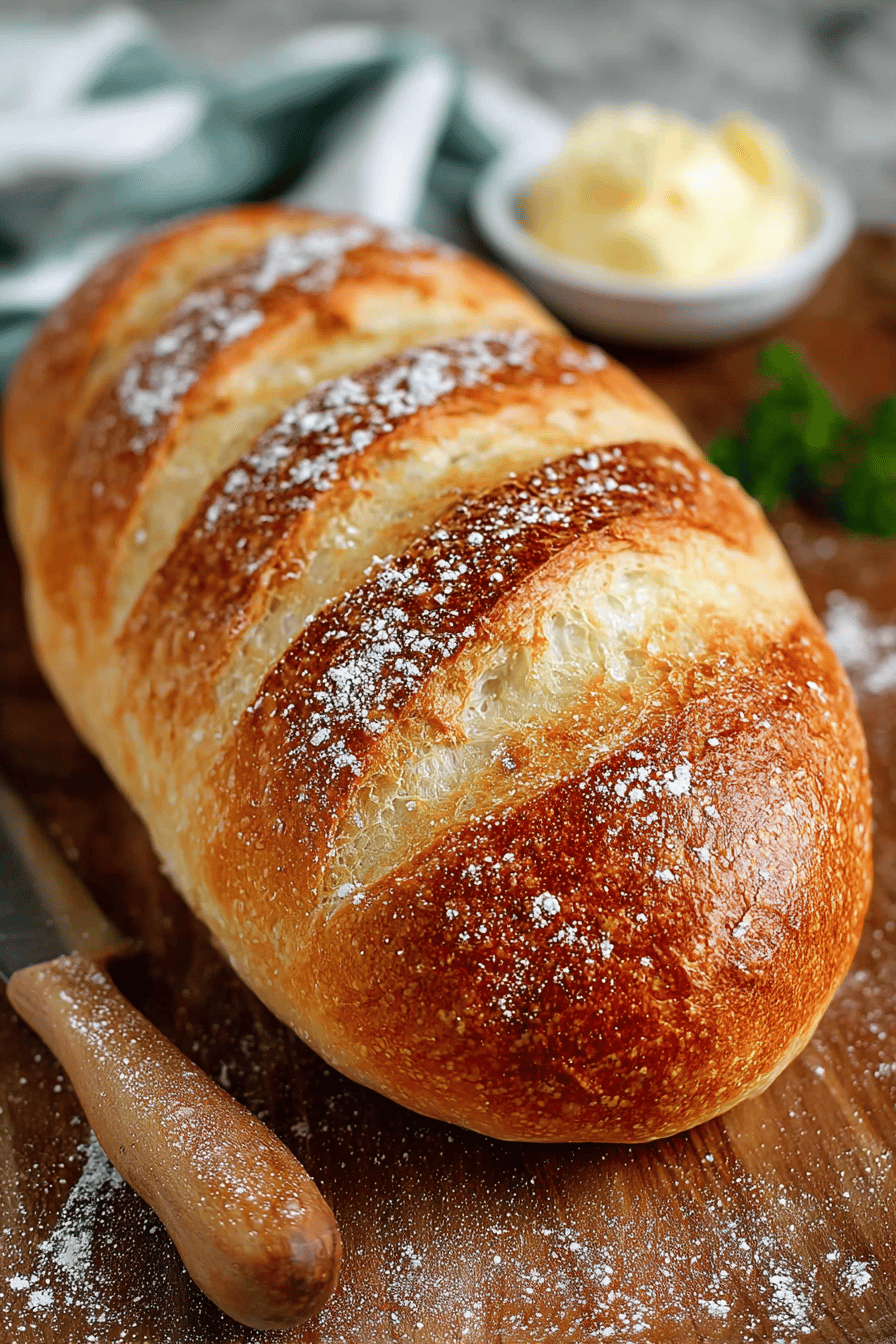
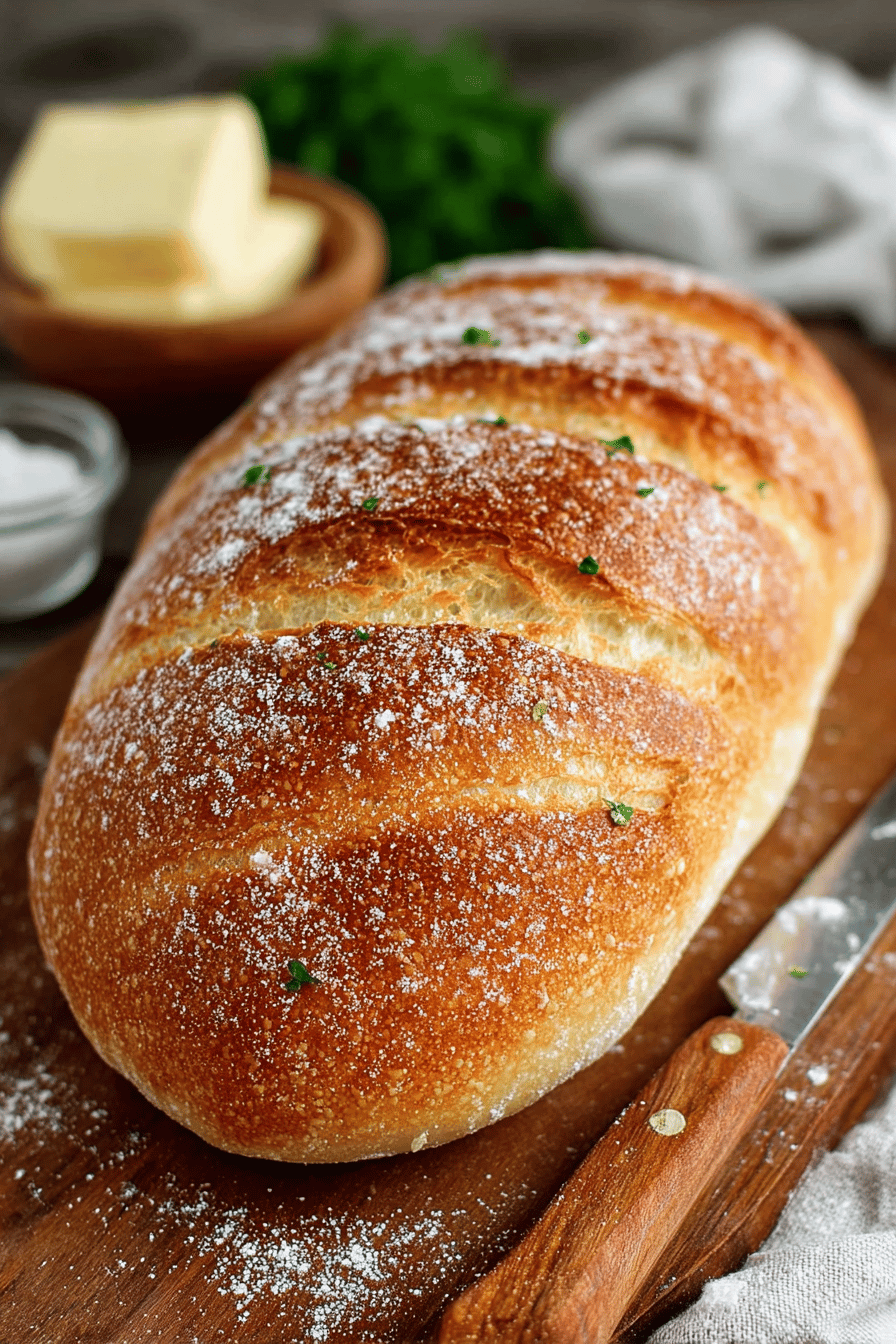
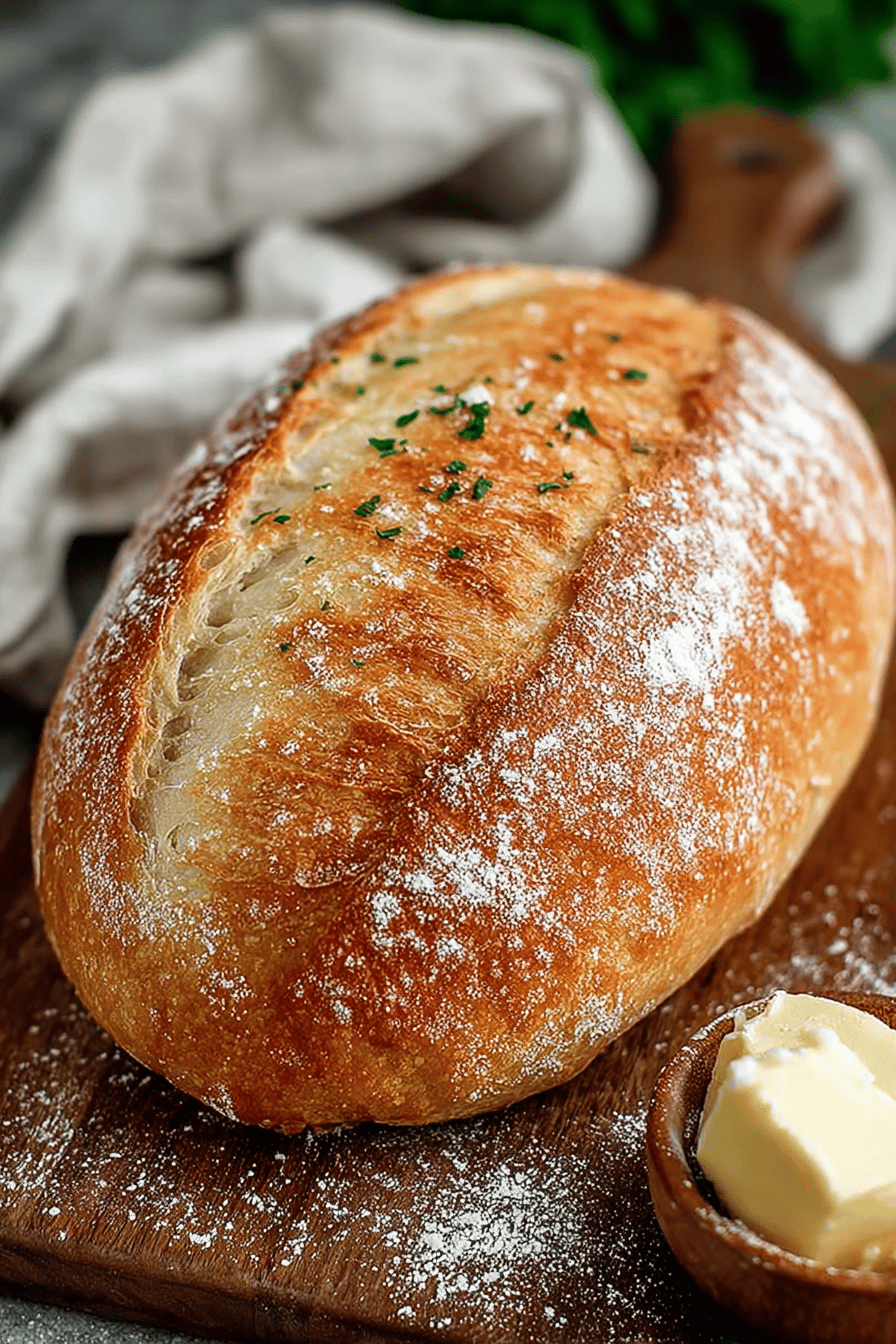
Easy Italian Bread Recipe
This Easy Italian Bread Recipe — it’s not just “a recipe,” it’s a freakin’ lifesaver on busy weeknights when everyone’s hangry. I’m talking soft, chewy, crusty goodness that comes together faster than you can order takeout (and tastes a million times better, promise!). Seriously, ditch the store-bought stuff and let’s get our hands doughy!
Easy Italian Bread Recipe
My husband, bless his heart, is a bread fiend. Like, could eat a whole loaf with just butter kinda guy. I swear, the first time I made this, he practically cried. Okay, maybe not cried, but his eyes got all misty and he kept saying, “This is AMAZING.” Now, whenever he smells that yeasty, baking bread aroma wafting through the house, he knows it’s gonna be a good night. And the kiddo? She just loves tearing off pieces and dipping them in olive oil. Melts my heart every time. This bread has seriously become a Sunday staple in our house. The smell alone makes the whole house cozy, and honestly, it’s just fun to make!
Why You’ll Love This Easy Italian Bread Recipe
- Because you can actually pronounce all the ingredients (unlike that stuff from the grocery store).
- It makes your house smell like a freakin’ Italian bakery. Instant mood booster!
- It’s surprisingly easy. Like, “even I can’t mess it up” easy. And trust me, I’ve had my share of kitchen disasters.
- Fresh bread is the ultimate comfort food, and this recipe delivers. No therapy needed (okay, maybe a little less therapy).
- It’s perfect for dipping, sandwiches, or just slathering with butter and inhaling. No judgment here.
How to Make It
Okay, so first things first: grab your bowl, and let’s get mixing. We are going to combine warm water, yeast, and a pinch of sugar. Now, give it a little whisk and let it sit. You want to see it get all foamy. It means the yeast is alive and kicking. If it doesn’t foam, your yeast is probably dead.


Next, we add the flour, salt, and olive oil to the yeast mixture. Now mix it until it all comes together into a dough. Don’t be afraid to get your hands in there – it’s therapeutic! Once the dough starts to come together, knead it on a lightly floured surface. Don’t go crazy, just for like 5-7 minutes.
MORE OF OUR FAVORITE…
Now, pop the dough into a greased bowl, turn it over, and let it rise in a warm place. I usually just stick it in my oven (turned off, of course!) for about an hour. It should double in size.
After the dough has risen, punch it down (yes, it’s as satisfying as it sounds!). Now, shape it into a loaf and place it on a baking sheet. Let it rest for another 30 minutes.
Okay, almost there! Preheat your oven, then bake the bread until it’s golden brown. It sounds hollow when you tap it.
Let it cool for a few minutes. Try not to eat it all at once, even though you will want to!
Ingredient Notes
- All-Purpose Flour: Okay, so I always use unbleached, but honestly, whatever you have on hand works. Just don’t use cake flour. That would be a disaster.
- Active Dry Yeast: This is the magic that makes the bread rise. Make sure it’s not expired, or you’ll end up with a flat, sad loaf. I learned that the hard way.
- Warm Water: Not too hot, not too cold. Think bathwater for a baby… but, like, for yeast.
- Sugar: Just a pinch! This feeds the yeast and helps it get going. Brown, white, it doesn’t matter. I’ve even used honey when I was out of sugar, worked like a charm.
- Salt: Don’t skip this! It brings out the flavor of the bread. I once forgot the salt and it tasted like cardboard.
- Olive Oil: Adds richness and flavor. Plus, it helps keep the bread soft. Use good quality stuff for the best taste, but don’t sweat it if you only have the cheapo kind.
Recipe Steps:
- Combine: Mix warm water, yeast, and sugar; let sit until foamy.
- Add: Incorporate flour, salt, and olive oil into the yeast mixture.
- Knead: Turn dough onto a floured surface and knead.
- Rise: Place in a greased bowl, turn, and let rise in a warm spot.
- Punch: Deflate risen dough.
- Shape: Form dough into a loaf and place on a baking sheet. Let rest.
- Bake: Preheat oven and bake until golden brown.
- Cool: Let cool before slicing and serving.
What to Serve It With
Oh man, where do I even start? This bread is begging to be dipped in olive oil and balsamic vinegar. It’s amazing with pasta, perfect for sandwiches, and incredible toasted with avocado. Honestly, you can eat it with anything. Or just by itself. I won’t tell.
Tips & Mistakes
- Don’t kill the yeast! Make sure your water isn’t too hot. Think lukewarm, not scalding.
- Kneading is key. Don’t skip the kneading! It develops the gluten and gives the bread its chewy texture.
- Patience, grasshopper. Let the dough rise properly. Don’t rush it!
- Don’t overbake it! Nobody likes dry, crumbly bread.
Storage Tips
Okay, so if you actually have any leftovers (which is a miracle in my house), store the bread in an airtight container at room temperature. It’ll stay fresh for a couple of days. If you want to keep it longer, you can freeze it! Just wrap it tightly in plastic wrap and then foil. And eating it cold? Hey, no shame! I’ve totally grabbed a slice straight from the fridge for breakfast. Just sayin’.
Variations and Substitutions
- Garlic Bread: Add minced garlic and herbs to the dough before baking. Obvious, but necessary.
- Cheese Bread: Sprinkle shredded cheese on top before baking. I’ve used mozzarella, parmesan, cheddar… whatever I had lurking in the fridge.
- Rosemary Bread: Add fresh rosemary to the dough. Smells divine!
- Whole Wheat: Use half whole wheat flour and half all-purpose flour. Makes it a little denser, but still delicious.
- No Olive Oil: I’ve skipped the olive oil when I ran out. It still works, just won’t be as soft.
Frequently Asked Questions
Easy Italian Bread Recipe
Ingredients
Main Ingredients
- 4.5 cups all-purpose flour
- 2 cups warm water around 110°F
- 1 tbsp sugar
- 1.5 tsp salt
- 2 tsp active dry yeast
- 2 tbsp olive oil for brushing
Instructions
Preparation Steps
- In a large bowl, dissolve sugar in warm water. Stir in yeast and let it sit until it bubbles, about 5-10 minutes.
- Mix in the flour and salt until a dough forms. Knead the dough on a lightly floured surface for 10 minutes, until smooth.
- Place the dough in a greased bowl, cover, and let it rise in a warm place until doubled in size, about 1 hour.
- Preheat the oven to 400°F (200°C).
- Punch down the dough, shape into two loaves, and place them on a baking sheet. Cover and let rise for another 30 minutes.
- Brush the loaves with olive oil.
- Bake in the preheated oven for 25-30 minutes, or until golden brown.
Notes
Nutrition
Featured Comments
“Super easy and so flavorful! My family asked for seconds. Saving this one.”
“Impressed! Clear steps and absolutely loved results. Perfect for busy nights.”
“Super easy and so flavorful! My family asked for seconds. Saving this one.”
“Super easy and will make again! My family asked for seconds. Saving this one.”
“This simple recipe was turned out amazing — the flavorful really stands out. Thanks!”
“New favorite here — will make again. simple was spot on.”
“Impressed! Clear steps and absolutely loved results. Perfect for busy nights.”
“Super easy and so flavorful! My family asked for seconds. Saving this one.”
“This simple recipe was family favorite — the anytime really stands out. Thanks!”
“New favorite here — will make again. anytime was spot on.”