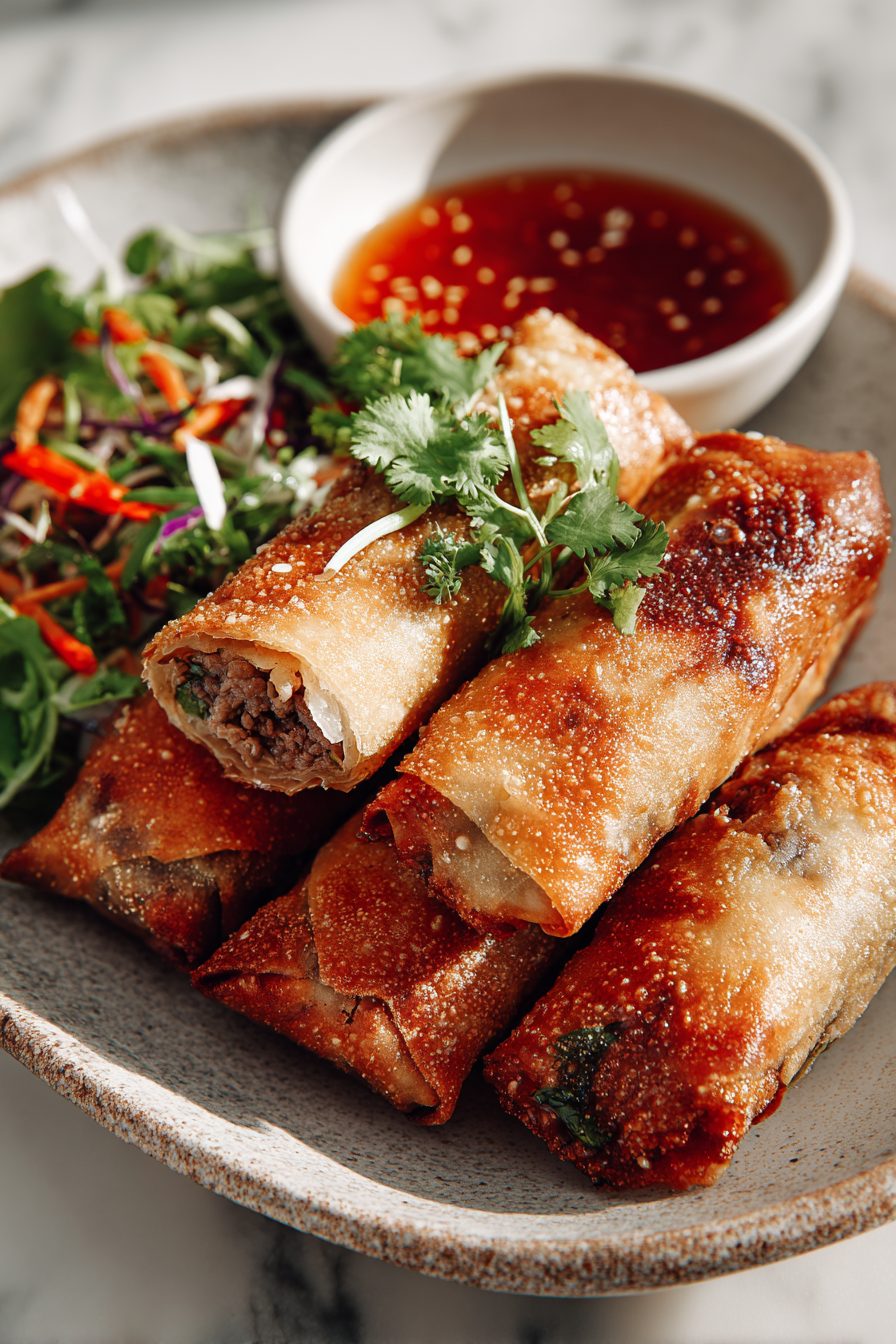
Cheeseburger Spring Rolls Recipe
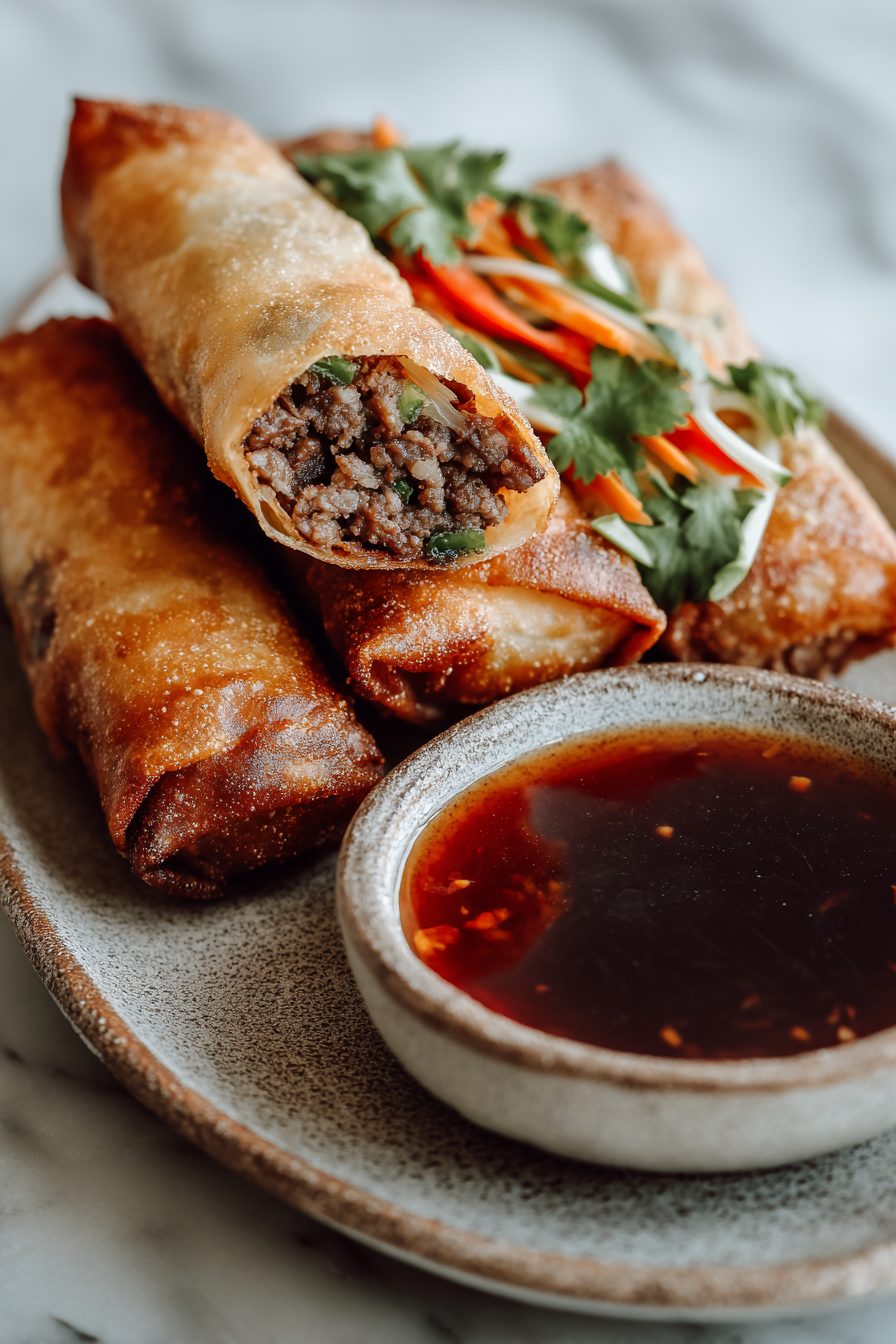
I made these cheeseburger spring rolls on a messy Tuesday because the kids wanted fries and I wanted to invent something that could be eaten with one hand while answering emails. They’re basically a tiny, crispy cheeseburger: seasoned ground beef, melty cheese, pickles, a little onion, and the classic ketchup-mustard vibe, all wrapped in a spring roll wrapper and fried or baked until golden. They’re ridiculous, comforting, and somehow feel fancy-ish when you serve them on a platter.
My husband declared them “dangerously addictive” after the first batch — which is code for “bring more or I hide them under the couch.” The kids call them burger-eggs (don’t ask), and they’ve become the go-to for game nights, quick dinners, and potlucks where I want applause but zero fuss. Once I swapped regular pickles for spicy ones on a whim and now there’s no turning back.
Why You’ll Love This Cheeseburger Spring Rolls Recipe
– Handheld cheeseburger energy with none of the bun-sog problems.
– Melty cheese + crunchy wrapper = immediate joy in every bite.
– Customizable: make them veggie, turkey, or double-cheese depending on how dramatic your cravings are.
– Great for feeding a crowd — people love the novelty and you get to look like the hero.
Kitchen Talk

These are gloriously forgiving. I once over-seasoned the meat with salt and pretended it was intentional by adding extra pickles and a splash of ketchup — nobody noticed. Wrappers can tear; just patch them with a dab of water and keep rolling. I usually brown the beef in a single pan, throw in quick aromatics, and let the cheese do the heavy emotional lifting. If you bake them instead of frying, spray the wrappers with oil so they don’t look like sad little pillows.
MORE OF OUR FAVORITE…
Shopping Tips
– Protein: Pick up lean ground beef or a mix of beef and pork if you want richer flavor; ground turkey works well if you prefer lighter.
– Cheese: Go for a melty cheese—American, cheddar, or even a processed melting cheese slice are all winners. Avoid super aged, crumbly cheeses.
– Vegetables: Use sweet onion or shallot for the best caramelized flavor, and grab crunchy dill pickles rather than soft bread-and-butter style.
– Frozen Aisle: Spring roll wrappers are often in the frozen section — keep them frozen until you’re ready and thaw just enough to handle without ripping.
– Crunch Extras: If you like extra texture, pick up some fried onions or crushed potato chips to sprinkle inside before folding.
Prep Ahead Ideas
– Brown and season the meat a day ahead, cool it, and refrigerate in an airtight container. It actually firms up and is easier to roll.
– Slice pickles and grate cheese the night before; keep them separate so the wrappers don’t get soggy.
– Store prepped filling in the fridge and roll just before cooking — rolled but uncooked spring rolls can be frozen on a sheet pan then transferred to a bag for longer storage.
– Use shallow airtight containers or zip-top bags for organized fridge stacking; label with date so you don’t find mysterious burger blobs later.
Time-Saving Tricks
– Brown the meat while chopping onions to multitask; use one pan for everything to cut cleanup time.
– Use pre-shredded cheese and pre-chopped onions when life is chaotic — it’s fine, we’re not making a wedding cake.
– Bake multiple trays at once in a hot oven instead of frying in small batches if you have company.
– Don’t rush resting time: if you bake, let them sit a minute to firm up so the filling doesn’t spill out when you bite.
Common Mistakes
– Overfilling the wrappers: I stuffed one so full it exploded in the fryer; lesson learned — less is more. If yours split, press the filling back into another wrapper or make a “fix it” pan-fry to reclaim the deliciousness.
– Not drying pickles: watery pickles make the rolls soggy. Pat them dry with a paper towel before using.
– Oiling the pan too much when frying: too much oil makes everything greasy. Use a shallow amount and drain on paper towels.
– Using cold filling: hot filling melts the cheese perfectly; cold filling can lead to uneven cooking. Warm the filling slightly if it’s been refrigerated.
What to Serve It With
– Classic fries or sweet potato wedges for total diner vibes.
– A simple green salad with a bright vinaigrette to cut through the richness.
– Quick slaw (vinegar-based) for crunch and tang.
– Pickle platter and extra dipping sauces — ketchup, mustard, and a spicy mayo are obvious winners.
Tips & Mistakes
– Heat levels: medium-high for browning meat, medium for frying wrappers — too hot and they burn fast.
– Pan size: don’t crowd the skillet; cook in batches so each roll crisps evenly.
– Salt timing: season the meat while cooking, not after — it develops flavor as it browns.
– Oops fix: if a roll bursts, press it back together in the pan and keep cooking — it’ll still taste great.
Storage Tips
Store leftovers in an airtight container in the fridge for a couple of days. Re-crisp in a hot oven or air fryer so the wrapper comes back to life; the microwave will make them floppy, but hey — sometimes cold cheeseburger spring rolls are a sad, soggy breakfast and you’ll survive. For longer storage, freeze uncooked rolls on a sheet pan, then bag them once solid; cook from frozen adding a few extra minutes.
Variations and Substitutions
– Swap ground beef for ground turkey, chicken, or even seasoned lentils for a vegetarian take.
– Try different cheeses: pepper jack for heat, Swiss for nuttiness, or mozzarella for pull. Avoid crumbly cheeses like feta for this one.
– Add mix-ins like shredded cabbage, chopped cooked bacon, or a spoonful of caramelized onion for extra depth.
– For a low-carb option, wrap in large lettuce leaves (no crisp, but still tasty) or use low-carb wrappers if you find them.
Frequently Asked Questions

Cheeseburger Spring Rolls Recipe
Ingredients
Main Ingredients
- 1 lb ground beef
- 0.75 cup finely diced yellow onion
- 2 tsp minced garlic
- 0.75 tsp kosher salt
- 0.5 tsp black pepper
- 0.25 cup ketchup
- 1.5 tbsp yellow mustard
- 1 tbsp Worcestershire sauce
- 0.5 cup chopped dill pickles
- 1.5 cup shredded sharp cheddar cheese
- 8 oz egg roll wrappers about 12 wrappers
- 2 tbsp water for sealing wrappers
- 3 cup vegetable oil for frying
Instructions
Preparation Steps
- Warm a large skillet over medium-high heat. Brown the beef, breaking it up as it cooks.
- Drain excess fat. Stir in onion and cook until softened, about 3–4 minutes. Add garlic and cook 30 seconds.
- Season with salt and pepper. Stir in ketchup, mustard, and Worcestershire. Simmer 1 minute to thicken.
- Remove from heat. Fold in pickles and cheddar. Let the mixture cool until warm, not hot.
- Set a wrapper on a diagonal. Spoon about 2–3 tablespoons filling near the bottom corner.
- Roll the corner over the filling, fold in sides, and roll tight. Brush the top corner with water to seal.
- Repeat with remaining wrappers and filling. Keep rolled pieces covered with a towel.
- Heat oil to 350°F in a deep pot. Fry rolls in batches until golden, 3–4 minutes, turning once.
- Drain on a rack or paper towels. Rest 2 minutes before serving so the cheese sets.
Notes
Featured Comments
“This shareable recipe was absolutely loved — the flavorful really stands out. Thanks!”
“Impressed! Clear steps and so flavorful results. Perfect for busy nights.”
“Made this last night and it was family favorite. Loved how the bite-sized came together.”
“New favorite here — turned out amazing. bite-sized was spot on.”
“This flavorful recipe was will make again — the bite-sized really stands out. Thanks!”
“Impressed! Clear steps and will make again results. Perfect for busy nights.”
“This shareable recipe was absolutely loved — the flavorful really stands out. Thanks!”
“Super easy and family favorite! My family asked for seconds. Saving this one.”
“New favorite here — family favorite. bite-sized was spot on.”
“Made this last night and it was absolutely loved. Loved how the shareable came together.”