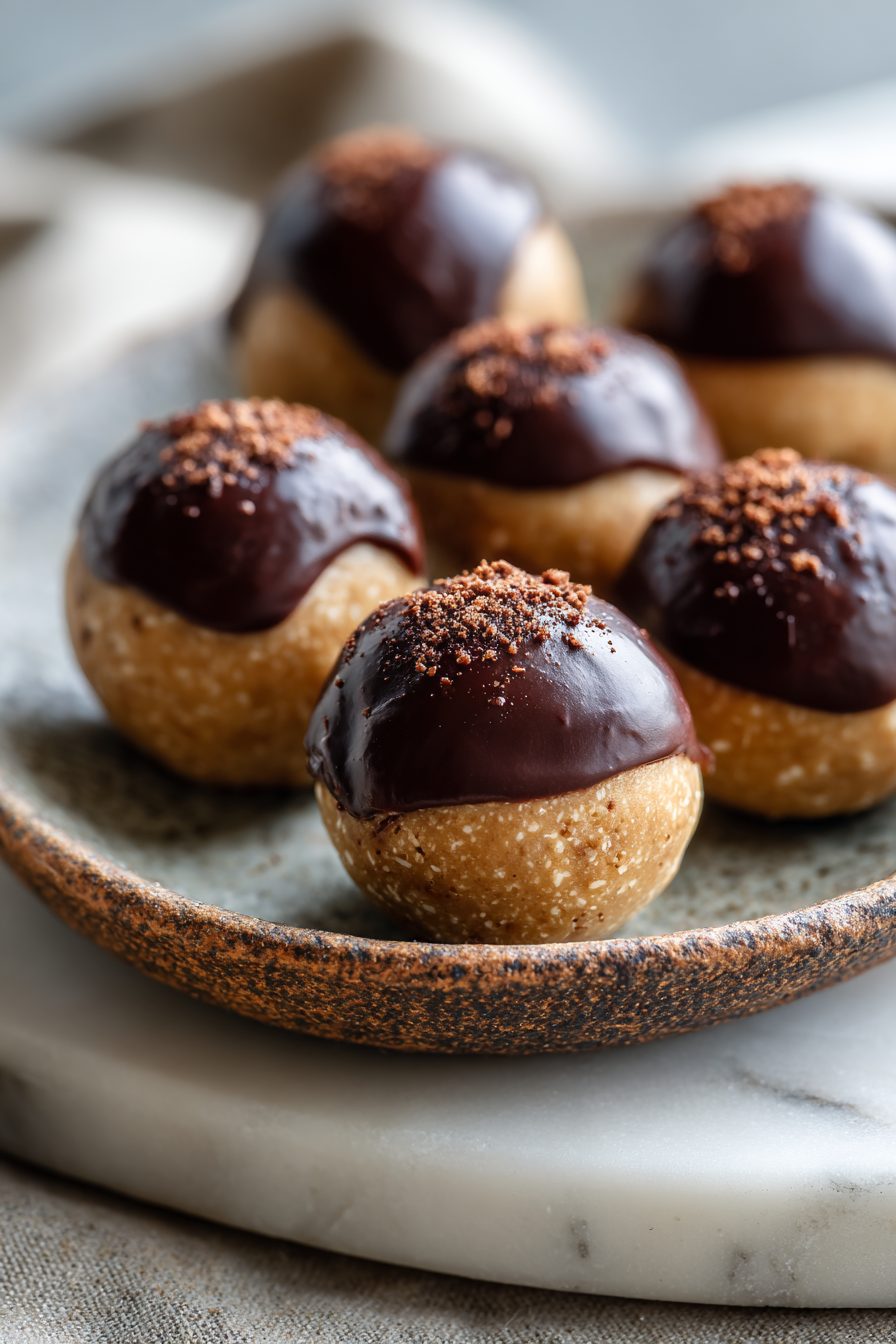
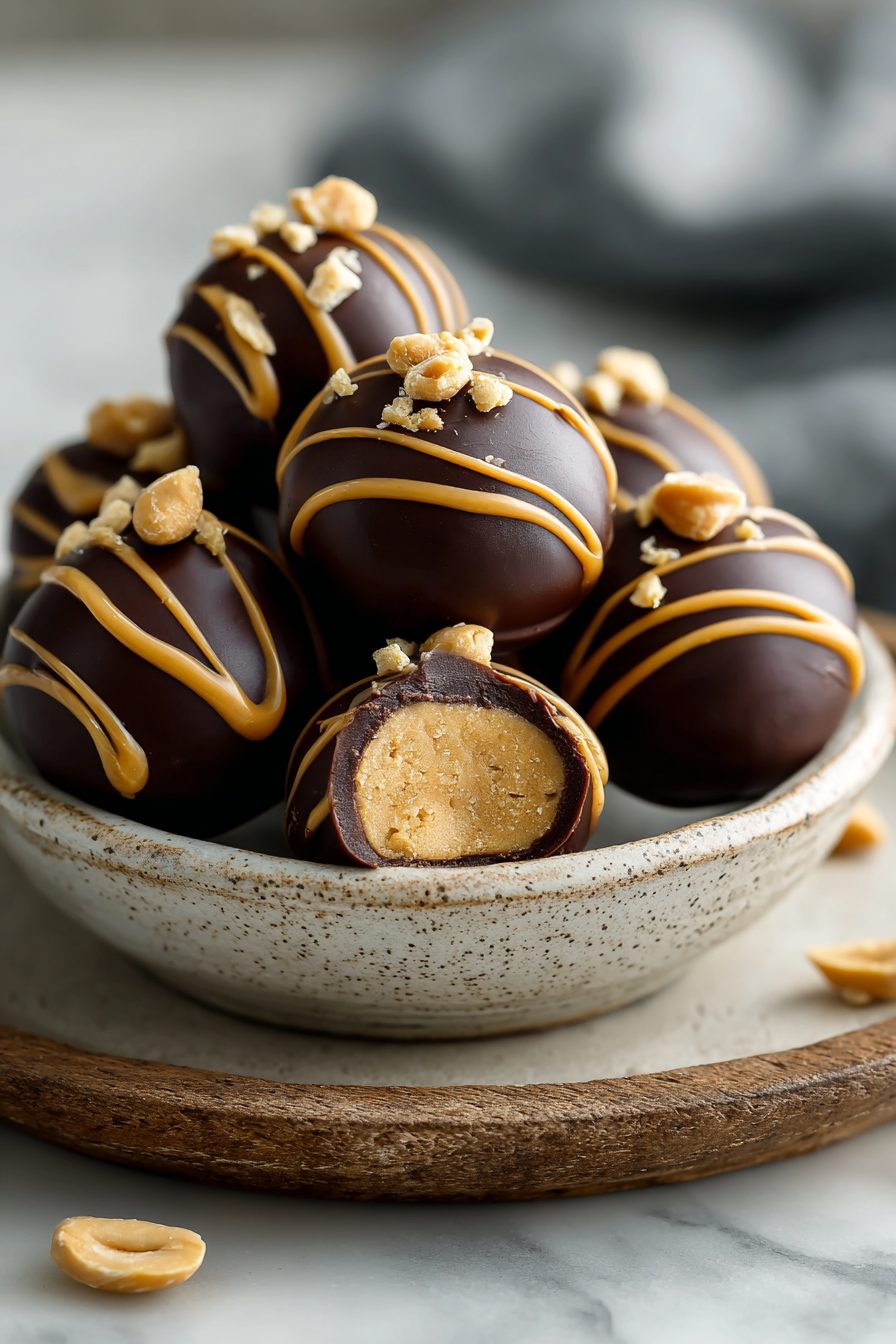
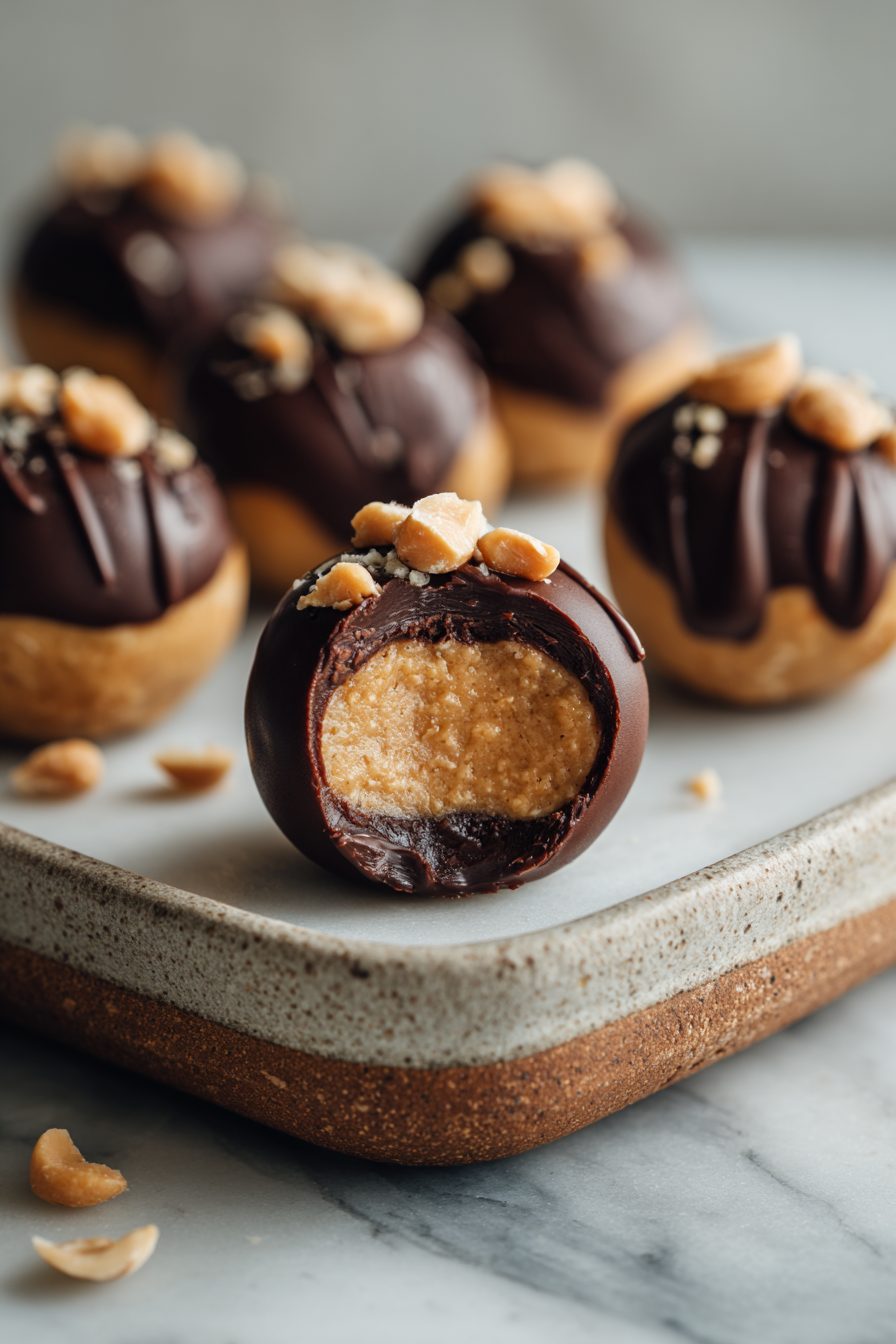
No-Bake Chocolate Peanut Butter Buckeyes
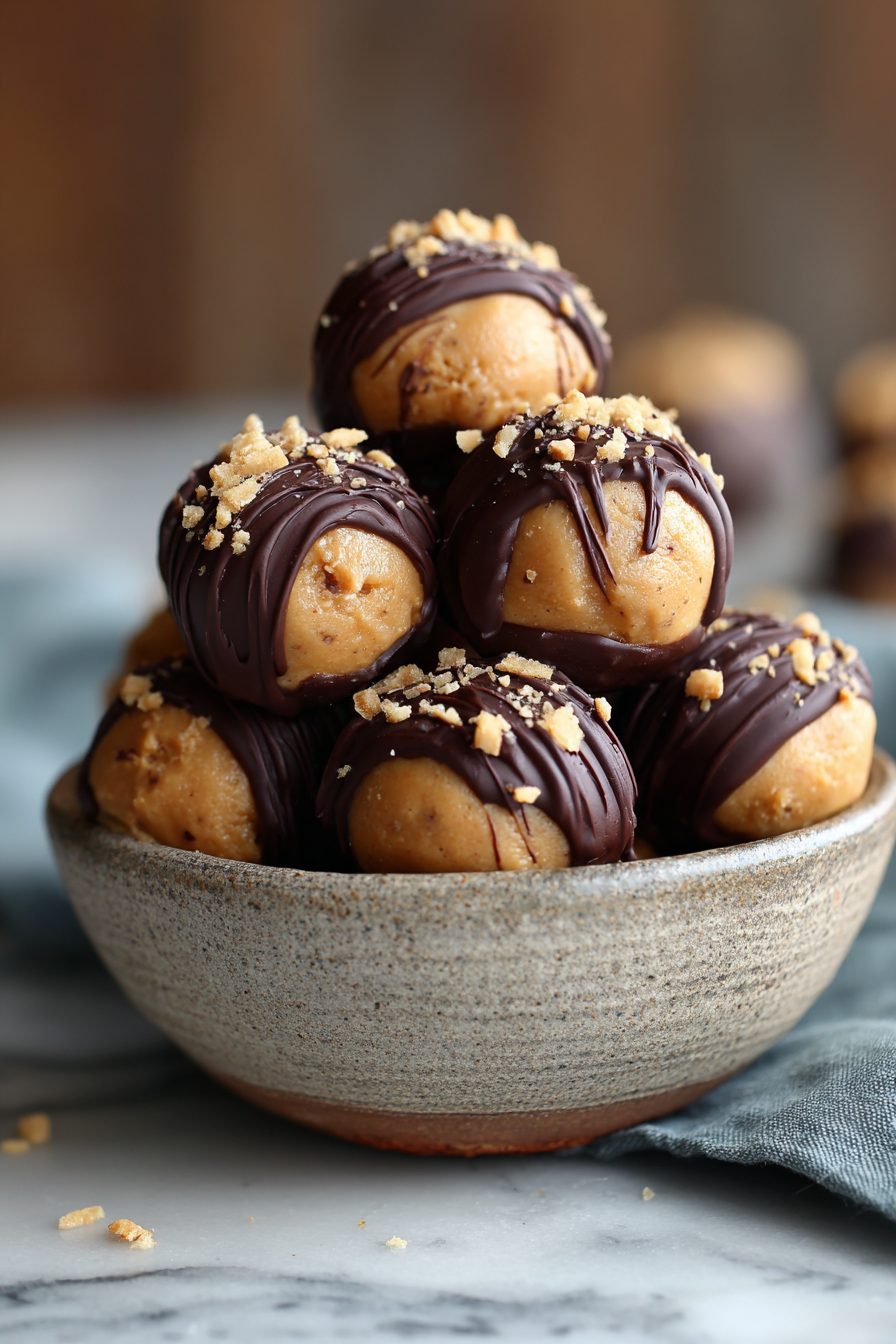
I’ll be honest: I keep a secret stash of these No-Bake Chocolate Peanut Butter Buckeyes in the freezer for emergency dessert moments. They’re the peanut-buttery, chocolate-dipped little rounds that feel like a bite-sized hug — no oven, no drama, just a spoon, a bowl, and a little patience while the chocolate sets.
My husband calls them “the things that make him stop mid-sentence.” Our kiddo refuses to share them at playdates (rude, but also smart). I first made them when we were moving apartments and had one pot and a microwave — they saved the day and became our weekend ritual. We tuck a few into lunchboxes, hand them out at holiday parties, and sometimes eat them for breakfast with coffee when nobody’s watching. They travel well, disappear fast, and somehow make everything feel a little celebratory.
Why You’ll Love This No-Bake Chocolate Peanut Butter Buckeyes
– Tiny, indulgent, and perfectly portioned candy that doesn’t require baking.
– Quick to pull together with pantry staples — peanut butter, powdered sugar, a little butter, and chocolate.
– Freezer-friendly and great for gifting; they look fancy but are impossibly simple.
– Crowd-pleaser for kids, adults, and anyone who believes chocolate + peanut butter fixes most problems.
Kitchen Talk
MORE EASY DESSERT RECIPES...


Okay, real talk: making these feels like you’re playing with edible play-dough. I’ve rolled peanut butter balls on the counter, in my hands, on the dog’s blank stare — apparently the dog judges me for the shape. A couple of times I made the dough too dry and it crumbled; a splash of milk or a tiny extra bit of butter fixed it right up. Also, if you dip everything straight from the freezer, the chocolate can crack — let them warm a bit on the counter before the final dunk. Lastly, use a fork or toothpick for dipping so you don’t obliterate the cute round shape with your fingers.
These No-Bake Chocolate Peanut Butter Buckeyes came together super easily with just a handful of ingredients, and the creamy peanut butter filling paired perfectly with the smooth chocolate coating—no oven needed! I followed the simple steps, chilled them briefly, and they turned out firm and delicious, just like a homemade Reese's. They're a total crowd-pleaser for holiday treats, and I'll definitely make them again!
MORE OF OUR FAVORITE…
Shopping Tips
– Baking Basics: Pick up powdered (confectioners’) sugar — it’s what gives the filling that smooth, melt-in-your-mouth texture. Sift if it looks clumpy.
– Chocolate: Use semi-sweet chocolate chips or a bar you like eating; higher cocoa content gives a less-sweet, more grown-up shell.
– Nuts & Seeds: Smooth peanut butter is the classic; choose one with just peanuts and salt if you can for that pure flavor.
– Fats & Oils: A little butter or coconut oil helps the filling be pliable and helps the chocolate set with a shiny finish.
– Specialty Item: If you want to jazz these, get quality flaky sea salt for sprinkling — it makes a big difference for texture and flavor.
Prep Ahead Ideas
– Make the peanut butter filling the day before and keep it in a covered bowl in the fridge; it firms up and is way easier to roll cold.
– Portion rolled balls onto a parchment-lined tray, cover, and refrigerate or freeze until firm—this saves dipping time when guests arrive.
– Store finished buckeyes in airtight containers between layers of parchment — they stack nicely in the fridge or freezer for up to a month.
– If you’re prepping for an event, dip them the morning of so the shells stay shiny and fresh-looking.
Time-Saving Tricks
– Use a cookie scoop for uniform balls — much faster and the parts look professional even if your hair isn’t.
– Microwave chocolate in short bursts (20–30 seconds), stirring in between so it doesn’t seize. Add a teaspoon of coconut oil if needed to loosen it.
– Freeze balls for 10–15 minutes before dipping so they hold shape and the chocolate sets faster.
– Skip toothpicks: dip with two forks back-to-back for faster turnaround and fewer holes to patch.
Common Mistakes
– Not chilling the filling: I did this once and the balls flattened into sad blobs. Chill for at least 15–30 minutes before rolling.
– Chocolate that’s too hot: melting directly over high heat can burn it. Always low heat or microwave in short bursts.
– Overworking the dough: mixing too long makes it greasy. Stir until combined and stop.
– Dipping straight from freezer: chocolate can crack when it meets a very cold surface — let the balls sit 5 minutes at room temp before dipping.
What to Serve It With
– Strong coffee or espresso — the bitterness offsets sweetness perfectly.
– A simple platter of mixed nuts and fresh fruit for contrast (apples or grapes work great).
– Vanilla ice cream — chop a couple buckeyes on top for instant sundae joy.
– Whiskey or bourbon for grown-up pairing if you’re feeling celebratory.
Tips & Mistakes
– Always taste your peanut butter mixture before rolling; a pinch more salt can make it sing.
– Use parchment paper for easy cleanup and non-stick dipping.
– If chocolate seizes, stir in a teaspoon of neutral oil to smooth it out.
– Don’t double-dip into your melted chocolate — you’ll end up with weird textures and fewer good ones to share.
Storage Tips
Pop finished buckeyes into an airtight container in the fridge for up to 2 weeks, or freeze them for a month. If you eat them cold straight from the fridge, they’re firmer and almost chewy — still delicious. If you want them softer (for breakfast — no judgment), let them sit at room temp for 10–15 minutes before eating.
Variations and Substitutions
– Almond butter or sunflower seed butter work if you’re avoiding peanuts; add a touch more powdered sugar if they’re runny.
– Swap some powdered sugar for cocoa powder if you want a darker-chocolate peanut filling vibe.
– Use dark chocolate for a less-sweet shell, or milk chocolate for classic candy-bar nostalgia.
– Add a teaspoon of vanilla or a pinch of cinnamon to the filling for a subtle flavor lift.
Frequently Asked Questions
No-Bake Chocolate Peanut Butter Buckeyes
Ingredients
Main Ingredients
- 1.75 cup creamy peanut butter
- 7 tbsp unsalted butter, softened
- 2 tsp vanilla extract
- 0.5 tsp fine salt
- 3.25 cup powdered sugar sift if lumpy
- 11 oz semi-sweet chocolate chips or chopped bar chocolate
- 2 tsp coconut oil or vegetable shortening, to thin chocolate
Instructions
Preparation Steps
- Line a baking sheet with parchment or wax paper.
- Beat peanut butter, softened butter, vanilla, and salt until smooth and creamy.
- Add powdered sugar gradually and mix until a soft, moldable dough forms.
- Scoop 1-tablespoon portions and roll into smooth balls. Arrange on the prepared sheet.
- Chill the peanut butter balls until firm, about 25 minutes.
- Melt chocolate chips with coconut oil in short microwave bursts, stirring until glossy.
- Insert a toothpick into each ball. Dip two-thirds into chocolate, leaving a peanut butter “eye.”
- Set dipped buckeyes back on the sheet, smooth the toothpick hole, and chill until set.
Notes
Featured Comments
“Super easy and absolutely loved! My family asked for seconds. Saving this one.”
“Super easy and absolutely loved! My family asked for seconds. Saving this one.”
“Super easy and so flavorful! My family asked for seconds. Saving this one.”
“Super easy and family favorite! My family asked for seconds. Saving this one.”
“Super easy and family favorite! My family asked for seconds. Saving this one.”
“New favorite here — family favorite. hearty was spot on.”
“Super easy and absolutely loved! My family asked for seconds. Saving this one.”
“Impressed! Clear steps and will make again results. Perfect for busy nights.”
“New favorite here — absolutely loved. nutty was spot on.”
“Impressed! Clear steps and turned out amazing results. Perfect for busy nights.”