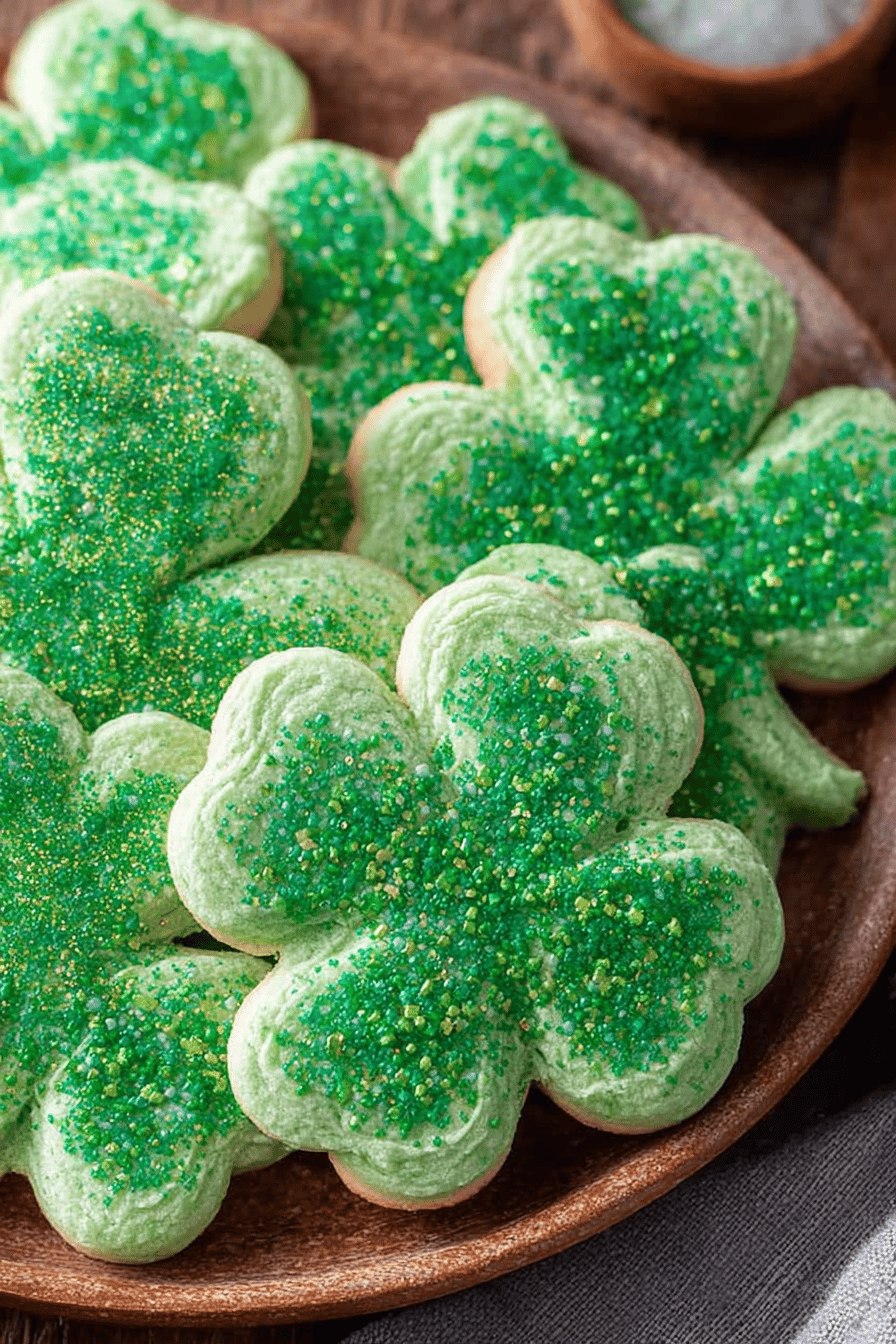
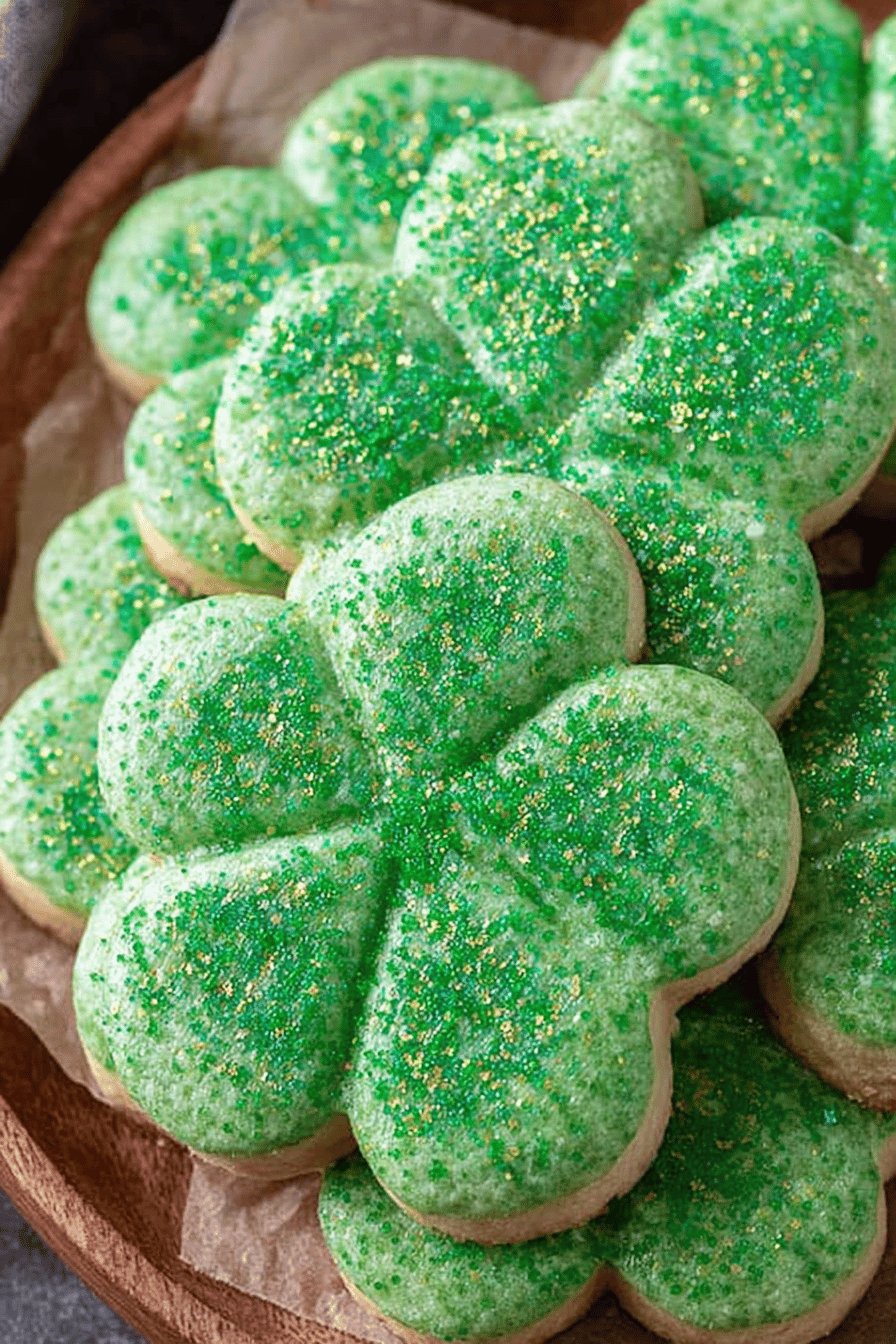
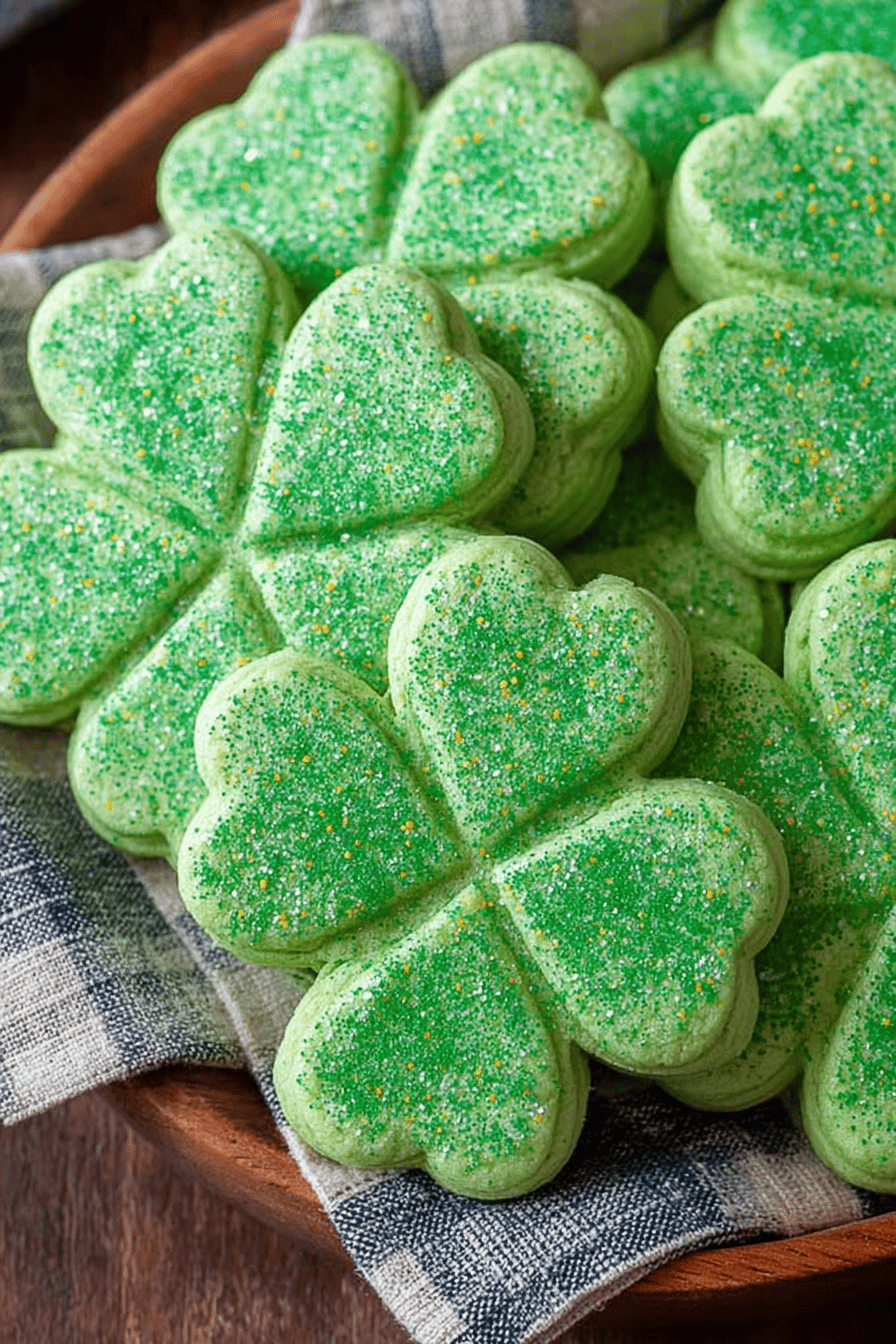
Easy Shamrock Cookies Recipe
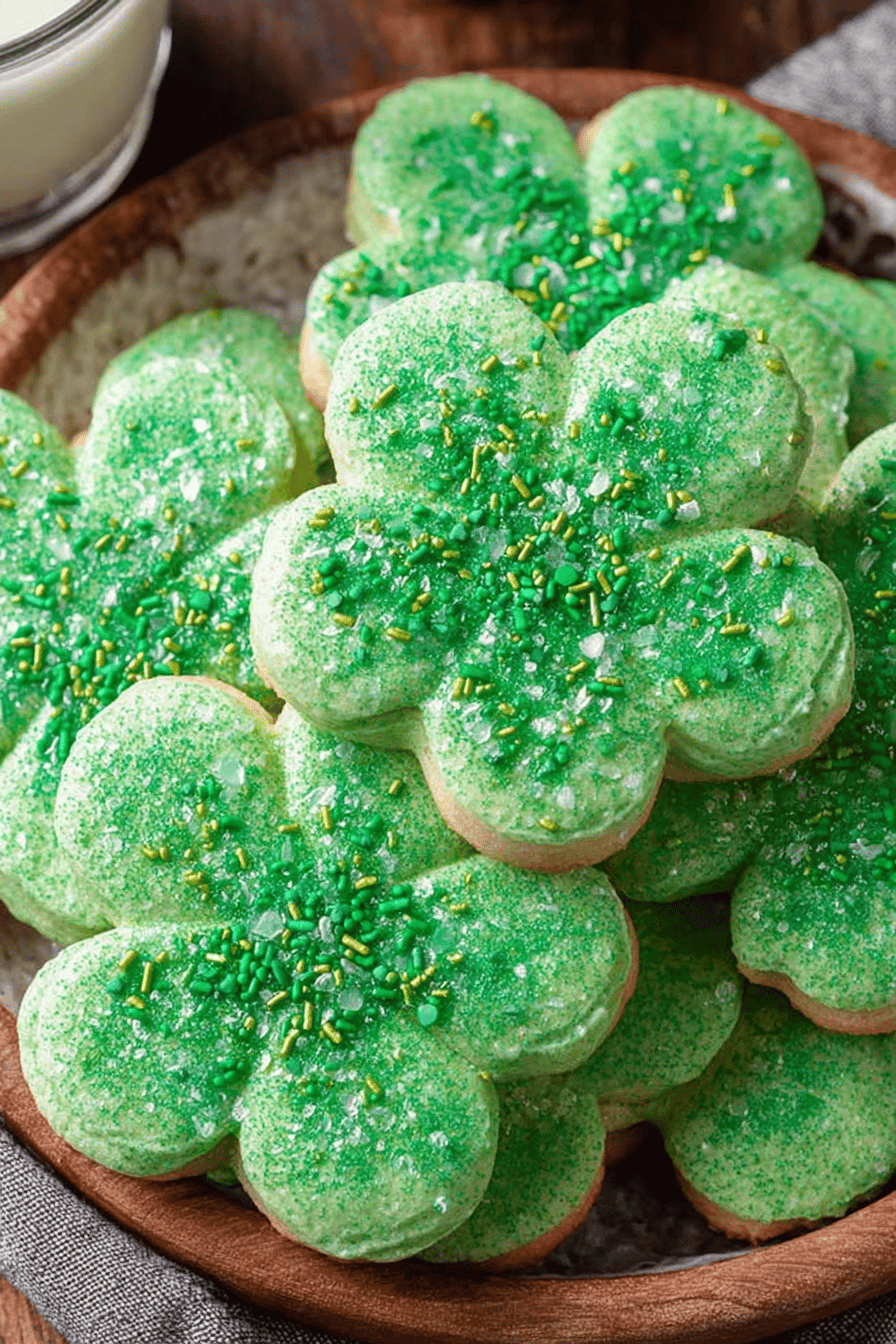
These Easy Shamrock Cookies Recipe are the perfect way to celebrate St. Patrick’s Day, or, like, any day you just need a little green in your life. They’re simple, festive, and honestly, pretty darn cute. Plus, who can resist a sugar cookie with a little extra something special? Trust me, these will become a family favorite in no time. They’re so easy even I can’t mess them up… usually.
My husband, bless his heart, is a total cookie monster. But he’s also the pickiest eater on the planet. So when I first made these Easy Shamrock Cookies Recipe, I was bracing myself for a critique. But then, silence. Just the sound of nom-nom-nom. He ate, like, five in a row! Now, every year when March rolls around, he starts dropping not-so-subtle hints about wanting “those green cookies” again. The kids love helping decorate them too, which usually ends with more sprinkles on the floor than on the cookies, but hey, that’s part of the fun! It’s become a legit tradition, and I wouldn’t trade it for anything.
Why You’ll Love This Easy Shamrock Cookies Recipe
- They’re ridiculously easy to make. Seriously, if you can stir, you can make these.
- They’re SO FREAKING CUTE. Like, Instagram-worthy cute. (If I ever get around to posting them, haha)
- They’re perfect for getting the kids involved. (Just be prepared for a sprinkle explosion.)
- They taste amazing. Buttery, sweet, and just a hint of vanilla… what’s not to love?
- You get to use cookie cutters. Who doesn’t love cookie cutters?
How to Make It
Okay, so first things first, you’re gonna wanna cream together your butter and sugar. I usually use my stand mixer because, let’s be honest, my arms get tired. But you can totally do it by hand if you’re feeling ambitious (or if your mixer is MIA like mine was last week – don’t ask). You want it nice and fluffy, like you’re whipping up a cloud of sugary goodness.

Then, you’re gonna beat in your egg and vanilla extract. Don’t overmix! Overmixing leads to tough cookies, and nobody wants tough cookies. Gently does it.
MORE OF OUR FAVORITE…
Next, slowly add in your flour and baking powder. Key word: slowly. Otherwise, you’ll end up with a flour explosion all over your kitchen. (Trust me, I’ve been there.) Mix until just combined. The dough will be a little sticky, and that’s okay.
Now comes the fun part: Divide the dough in half and add your green food coloring to one half. I usually use gel food coloring because it gives a more vibrant color, but the liquid stuff works too. Just don’t add too much, or your cookies will taste like chemicals.
Wrap both doughs in plastic wrap and chill in the fridge for at least 30 minutes. This is important! Chilling the dough prevents the cookies from spreading too much in the oven. I’ve skipped this step before, and my cookies ended up looking like sad, flat pancakes. Learn from my mistakes!
After chilling, roll out the dough and use your shamrock cookie cutter to cut out shapes. Place the cookies on a baking sheet lined with parchment paper.
Bake in a preheated oven at 350°F (175°C) for 8-10 minutes. Keep a close eye on them! They should be lightly golden around the edges.
Let the cookies cool completely on a wire rack before decorating with frosting and sprinkles. And then, devour!
Ingredient Notes
- Butter: Gotta be softened, not melted! Unless you want a greasy mess. I usually take mine out of the fridge like an hour before, but sometimes I forget and microwave it for a few seconds. Don’t tell anyone.
- Sugar: I use granulated sugar, but you could probably use caster sugar if you’re feeling fancy. I haven’t tried it, though, so don’t blame me if it doesn’t work!
- Egg: One large egg is all you need. Make sure it’s not rotten… that’s happened to me way more than I’d like to admit.
- Vanilla Extract: Don’t skip this! It adds so much flavor. I once used almond extract by accident, and it was… interesting. Not bad, just not shamrock cookie-ish.
- Flour: All-purpose flour is your friend here. Don’t try to get all fancy with bread flour or something. It won’t work.
- Baking Powder: Makes the cookies nice and puffy. Make sure it’s not expired! Expired baking powder = flat cookies.
- Green Food Coloring: Gel is best for vibrant color, but liquid works too! Just be careful not to add too much! Nobody wants to eat Kermit cookies.
- Frosting & Sprinkles: Go wild! This is where you can really get creative. I usually just buy store-bought frosting because, let’s face it, I’m lazy. But homemade is always better if you have the time and energy.
Recipe Steps:
- Cream together softened butter and sugar until fluffy.
- Beat in egg and vanilla extract until combined.
- Gradually add flour and baking powder, mixing until just combined.
- Divide dough in half and add green food coloring to one half.
- Wrap doughs in plastic wrap and chill for at least 30 minutes.
- Roll out dough and cut out shamrock shapes.
- Place cookies on a baking sheet lined with parchment paper.
- Bake at 350°F (175°C) for 8-10 minutes.
- Let cool completely before decorating.
What to Serve It With
Okay, so obviously, these are perfect with a big glass of milk. But they’re also pretty amazing with a cup of coffee or tea. Or, if you’re feeling extra festive, a Baileys Irish Cream. Don’t judge me!
Tips & Mistakes
- Don’t overmix the dough! I said it before, and I’ll say it again. Overmixing leads to tough cookies.
- Chill the dough! This is crucial for preventing spreading. Trust me on this one.
- Don’t overbake the cookies! They should be lightly golden around the edges.
- If your dough is too sticky, add a little extra flour, one tablespoon at a time.
- If you don’t have a shamrock cookie cutter, you can use any shape you want! Hearts, stars, circles… whatever floats your boat. They’ll still taste delicious.
- I’ve totally forgotten the baking powder once. They’re edible, but…dense. Don’t do that.
Storage Tips
Store these bad boys in an airtight container at room temperature. They’ll stay good for about a week, but let’s be real, they’ll probably be gone way before then. And if you happen to have any left over for breakfast… well, I won’t judge you. Cold cookies for breakfast are a totally acceptable life choice.
Variations and Substitutions
Okay, so here’s where you can get a little crazy. I’ve tried a few different variations of these cookies, some successful, some… not so much.
- Mint Chocolate Chip: Add some mint extract and chocolate chips to the dough for a minty, chocolatey twist. This one is a winner!
- Lemon Glaze: Instead of frosting, try a lemon glaze. It adds a nice tanginess to the cookies.
- Gluten-Free: I haven’t tried this one myself, but I’m sure you could substitute the all-purpose flour with a gluten-free blend. Just be sure to use a blend that’s designed for baking.
- No food coloring: Skip the green and make them vanilla cookies. I did that last year when I ran out and the kids still demolished them.
- I once tried using honey instead of sugar when I was trying to be healthy. They tasted like honey cookies, not shamrock cookies. So, uh, proceed with caution.
Frequently Asked Questions
Easy Shamrock Cookies Recipe
Easy Shamrock Cookies Recipe
Ingredients
Main Ingredients
- 1.5 cups all-purpose flour sifted
- 0.5 teaspoon baking powder
- 0.25 teaspoon salt
- 0.5 cup unsalted butter softened
- 0.75 cup granulated sugar
- 1 teaspoon vanilla extract
- 1 large egg
- 1 tablespoon green food coloring liquid or gel
- 1 cup powdered sugar for dusting
Instructions
Preparation Steps
- Preheat oven to 350°F (175°C) and line a baking sheet with parchment paper.
- In a bowl, whisk together flour, baking powder, and salt. Set aside.
- In a large bowl, cream together butter and granulated sugar until light and fluffy.
- Beat in egg and vanilla extract until well combined.
- Gradually mix in the dry ingredients until just combined.
- Add green food coloring and mix until the dough reaches the desired shade.
- Roll out dough to about 1/4 inch thickness and cut using shamrock-shaped cookie cutters.
- Place cookies on the prepared baking sheet and bake for 8-10 minutes or until edges are lightly golden.
- Allow to cool on a wire rack and dust with powdered sugar before serving.
Notes
Nutrition
Featured Comments
“Impressed! Clear steps and will make again results. Perfect for busy nights.”
“Made this last night and it was so flavorful. Loved how the quick bite came together.”
“Impressed! Clear steps and will make again results. Perfect for busy nights.”
“New favorite here — absolutely loved. hearty was spot on.”
“Made this last night and it was absolutely loved. Loved how the smoky came together.”
“Impressed! Clear steps and turned out amazing results. Perfect for busy nights.”
“This salty-sweet recipe was so flavorful — the quick really stands out. Thanks!”
“This pressure-cooked recipe was so flavorful — the quick bite really stands out. Thanks!”
“Impressed! Clear steps and turned out amazing results. Perfect for busy nights.”
“Made this last night and it was family favorite. Loved how the satisfying came together.”