Easy Homemade Fudge Recipe
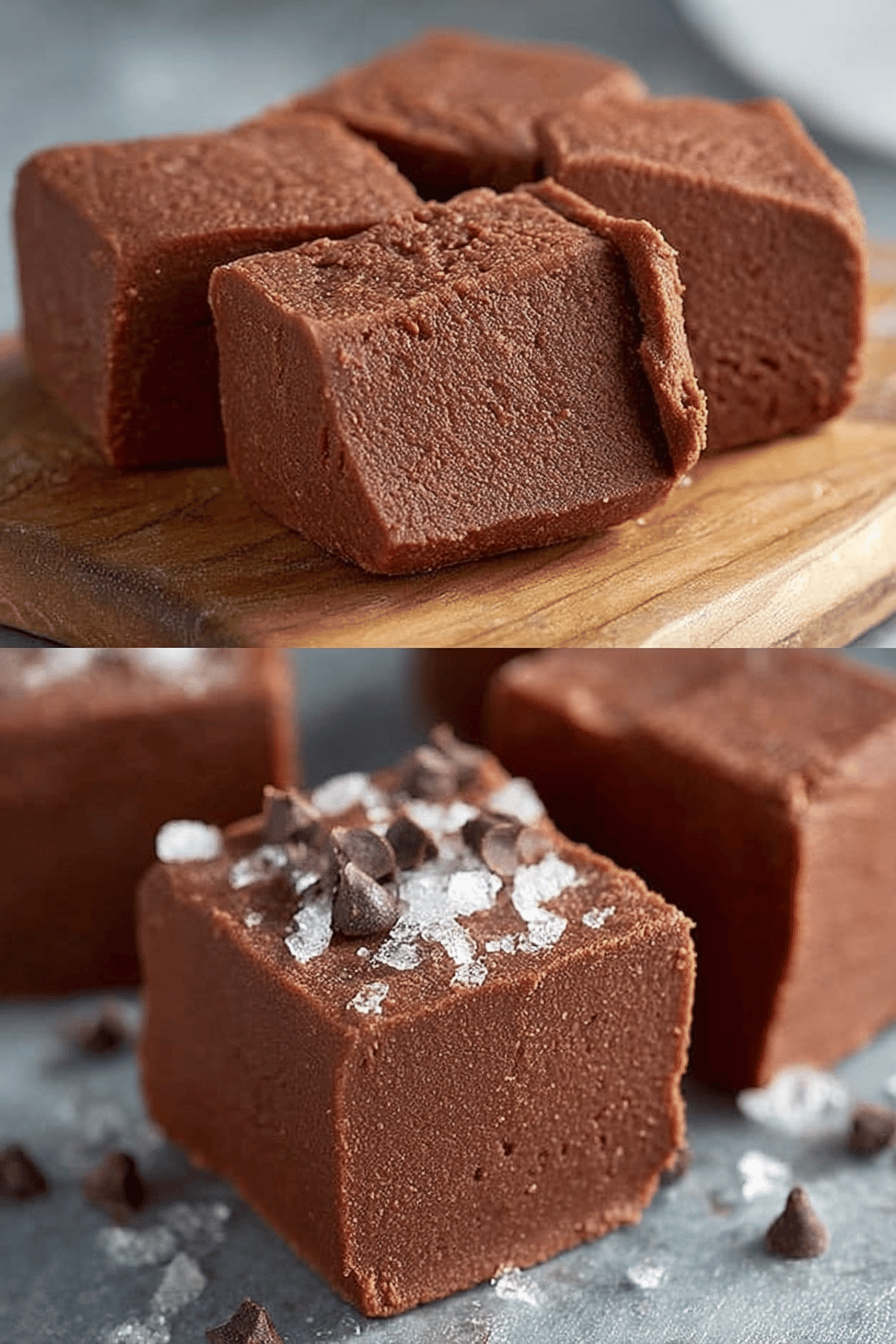
Okay, friends, listen up! We’re diving headfirst into a recipe that’s basically therapy in a square: Easy Homemade Fudge Recipe . This isn’t your grandma’s fussy, thermometer-needed fudge. This is the “oh crap, I need chocolate NOW” fudge. It’s quick, it’s dirty (not literally, you weirdo!), and it’s seriously good. Prepare to enter fudge nirvana!
My husband, bless his heart, is a fudge fiend. I swear, I made a batch of this stuff once when he was having a terrible day at work, and the man ate HALF THE PAN. I wasn’t even mad, just impressed. Now, if I’m feeling generous (or want some peace and quiet), I whip up a batch. The kids are wild about it too. It is so easy, I sometimes have my 7 year old help me make it when we need a fun thing to do!
Why You’ll Love This Easy Homemade Fudge Recipe
- It requires, like, zero skills. If you can stir, you can make this.
- Ready in minutes. Actual minutes. Not the “blogger minutes” that are code for “an hour and a half.”
- It’s cheaper than therapy. Okay, maybe not, but it FEELS like it.
- Perfect for gifting… or hoarding. I won’t judge.
- Seriously, it’s chocolate. Need I say more?
How to Make It
Alright, let’s get down to business. First, grab a saucepan – any old pot will do, no need for fancy stuff. Throw in your butter, sugar, milk, and cocoa. Now, this is important: stir it! Don’t let it burn to the bottom – unless you’re into that charred flavor, which, hey, no judgment. Keep stirring until everything’s melted and smooth.
MORE EASY AIR FRYER RECIPES...


Once it’s all melty and luscious-looking, take it off the heat! Now, throw in your vanilla and that glorious marshmallow creme. Stir like your life depends on it until it’s all combined. Don’t skimp on the vanilla, it really helps cut through the richness!
MORE OF OUR FAVORITE…
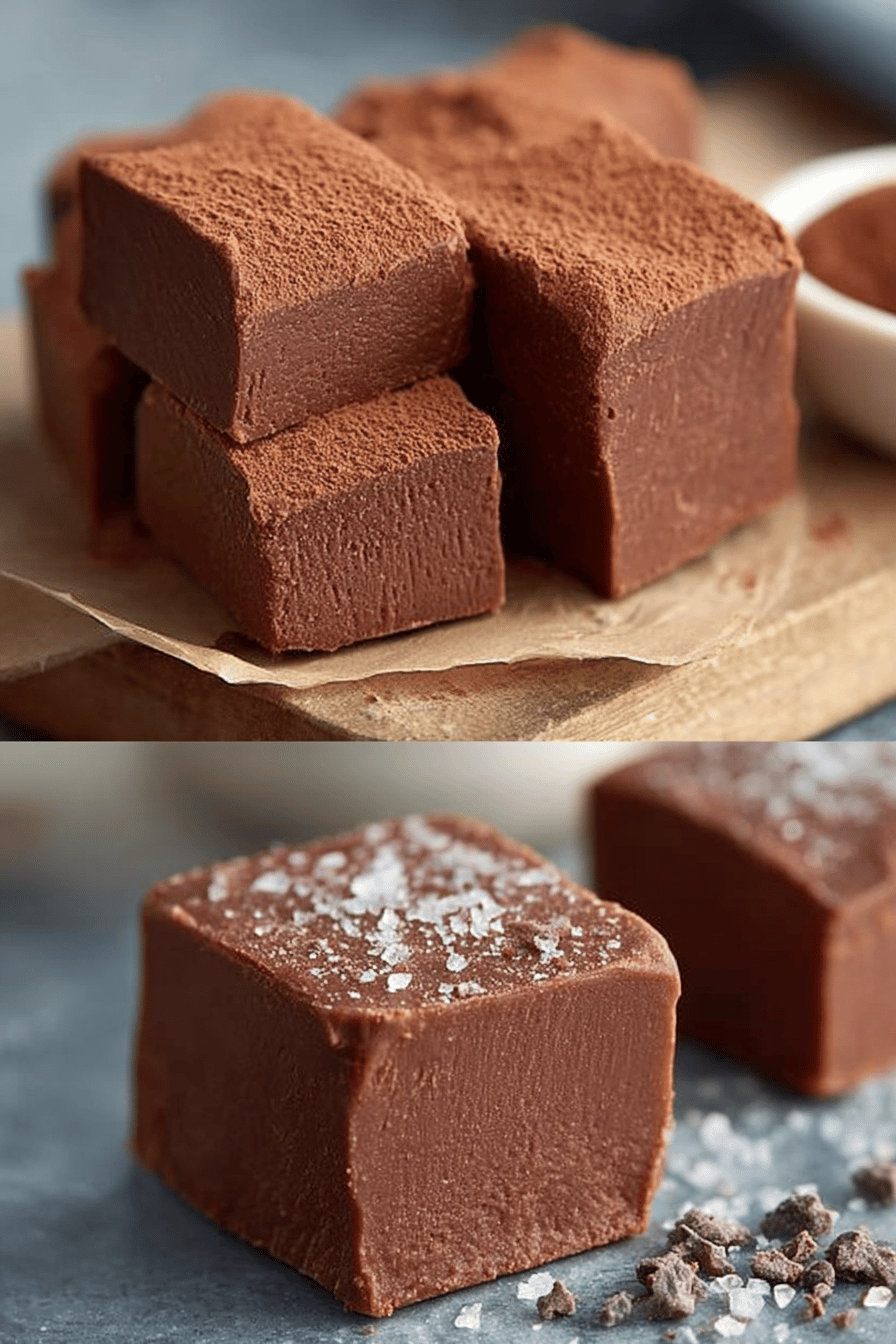
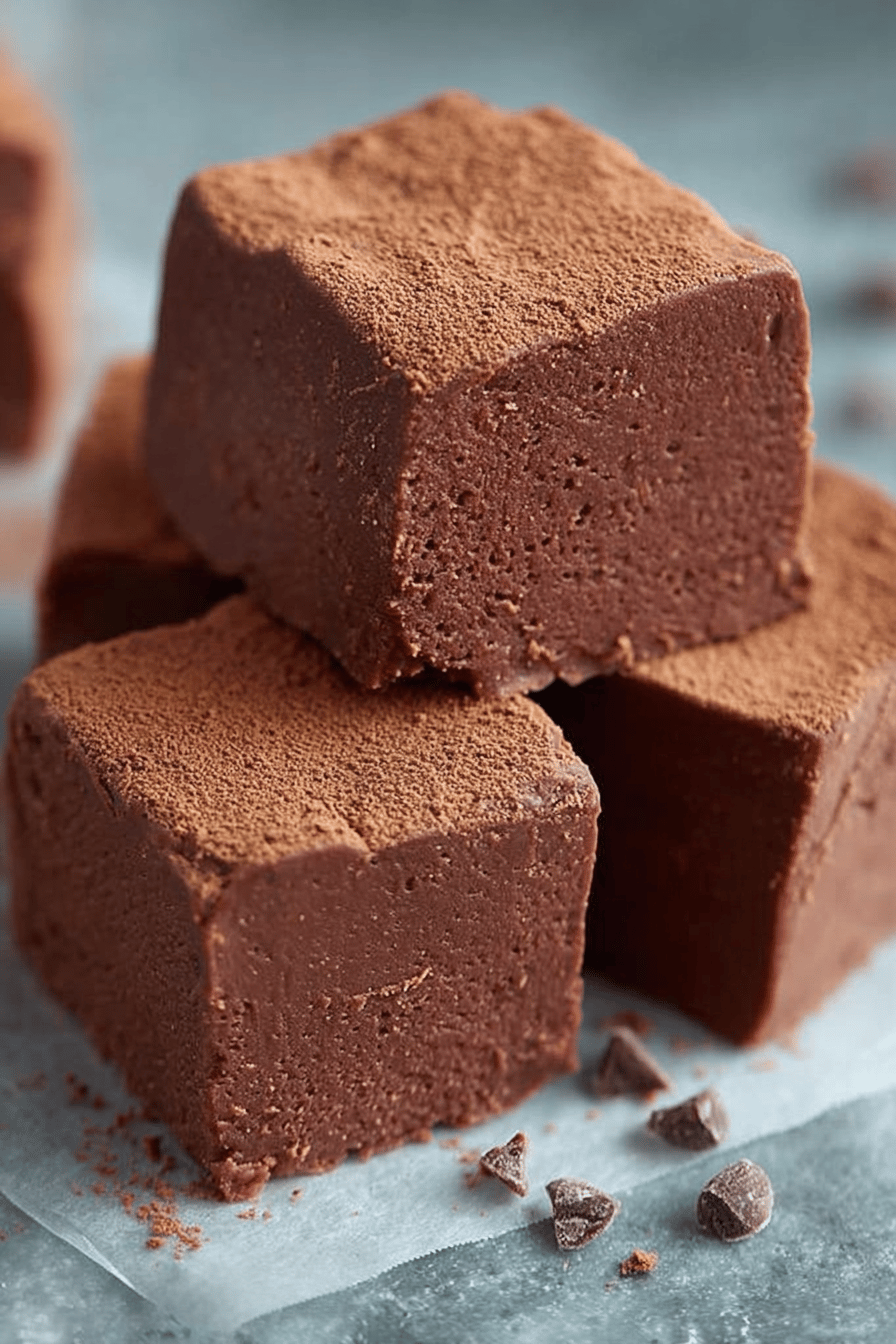
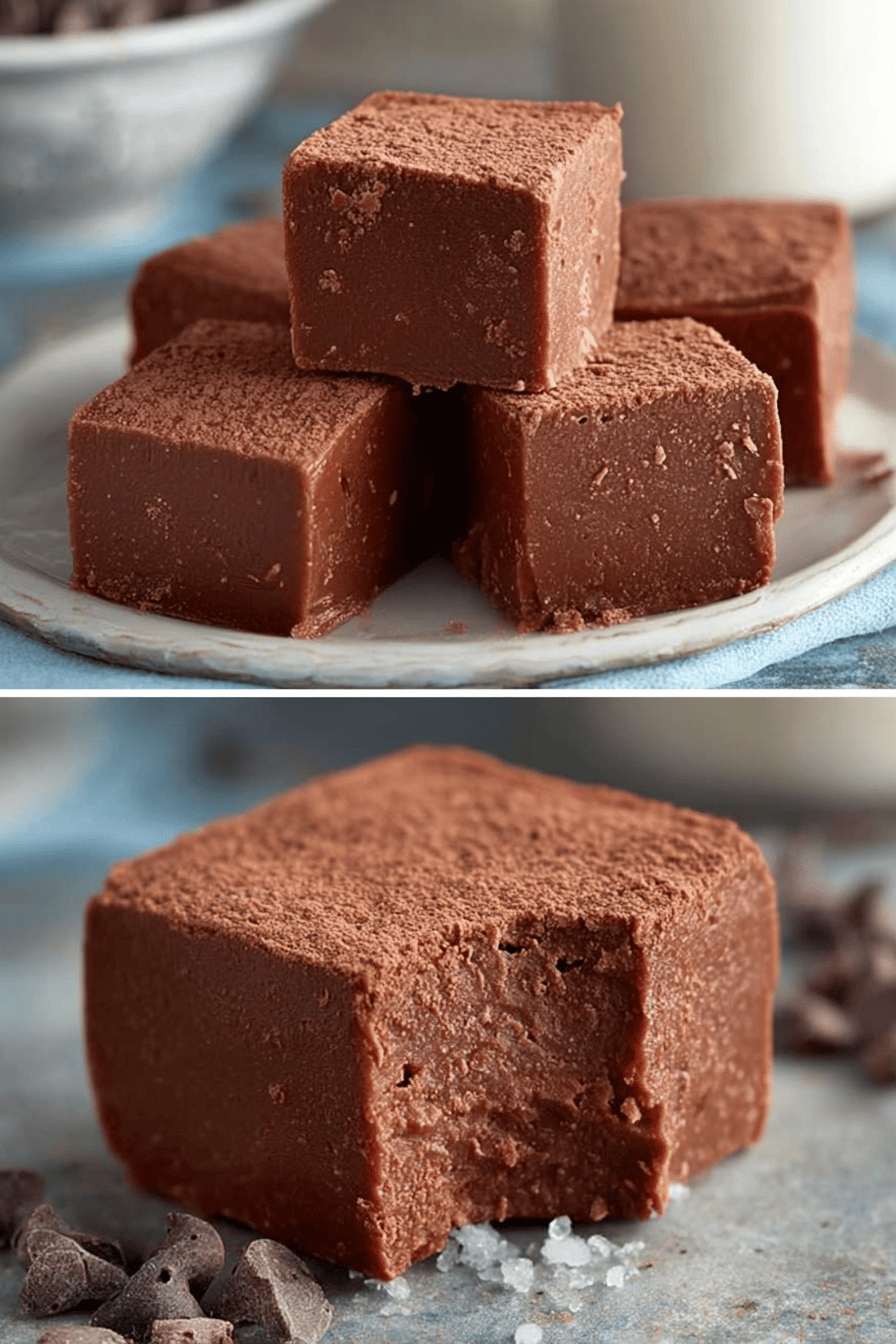
Then, grab a pan, I usually use a square 8×8, spray it down with non stick spray or line it with parchment paper so you can easily take the fudge out to cut it after its chilled! Spread that fudge into the pan and try to get it as smooth as you can. Then, let it chill in the fridge until it’s firm. This usually takes like, 2 hours but I have been known to throw it in the freezer when I’m impatient!
Once it’s firm, cut it into squares and try not to eat the whole thing in one sitting (good luck with that). Enjoy, my friends! You just conquered fudge.
Ingredient Notes
- Butter: I always use salted butter. Why? Because I like the little bit of saltiness it adds. Unsalted works too, but maybe add a tiny pinch of salt to the mix. Up to you. I don’t measure that closely!
- Sugar: Granulated sugar, the white stuff. Brown sugar COULD work in a pinch, but it’ll change the flavor a bit. I’ve done it. It wasn’t terrible.
- Milk: I usually use 2%, because that’s what we have. Whole milk makes it richer, but honestly, you can even get away with skim in a pinch. Just don’t tell anyone I said that.
- Cocoa Powder: Unsweetened cocoa powder. NOT hot chocolate mix. Trust me, I’ve made that mistake. Disaster.
- Vanilla Extract: Don’t skimp on this! It adds so much flavor! Imitation vanilla is fine, I guess, if you’re desperate.
- Marshmallow Creme: This is what makes the fudge, well, fudgy. Don’t try to substitute marshmallows. It won’t work.
Recipe Steps:
- Melt: Combine butter, sugar, milk, and cocoa in a saucepan over medium heat.
- Stir: Continuously stir until the mixture is smooth and fully melted.
- Remove: Take the saucepan off the heat.
- Mix: Stir in vanilla extract and marshmallow creme until well combined.
- Pour: Pour the fudge mixture into a prepared pan.
- Chill: Refrigerate until firm.
- Cut: Cut into squares.
- Serve: Enjoy your homemade fudge!
What to Serve It With
Honestly? A fork. Maybe a napkin. But if you’re feeling fancy:
- Ice cream. Vanilla, chocolate, whatever floats your boat.
- A cup of coffee. The bitterness cuts through the sweetness perfectly.
- A good book. Because sometimes you just need to escape with chocolate.
Tips & Mistakes
- Don’t burn the fudge! Low and slow is the way to go.
- Line your pan with parchment paper! Trust me, it makes cleanup so much easier.
- Let it chill completely! I know it’s tempting to dig in early, but resist!
- If your fudge is grainy, you probably didn’t stir enough. Don’t worry, it still tastes good.
Storage Tips
Store your fudge in an airtight container at room temperature or in the fridge. If you put it in the fridge, it’ll get firmer. I actually like it cold. I’ve also been known to eat it straight from the fridge for breakfast. Don’t judge me. It’s chocolate!
Variations and Substitutions
- Nuts: Add chopped walnuts, pecans, or almonds to the mix. I’m allergic to nuts, so I usually skip this, but I hear it’s good.
- Peanut Butter: Swirl in some peanut butter after you pour the fudge into the pan. Yum!
- Espresso Powder: Add a teaspoon of espresso powder for a mocha flavor.
- Different Extracts: Try peppermint extract for a holiday twist. I actually once used almond extract by accident (grabbed the wrong bottle) and it was surprisingly good!
- No Marshmallow Creme: Uh, don’t. Just don’t. Unless you have a death wish for your fudge.
Frequently Asked Questions
Easy Homemade Fudge Recipe
Ingredients
Main Ingredients
- 3 cups semi-sweet chocolate chips use high quality for best results
- 14 ounces sweetened condensed milk 1 can
- 0.25 teaspoons salt
- 2 teaspoons vanilla extract
- 0.5 cup chopped nuts walnuts or pecans are great choices
Instructions
Preparation Steps
- Line an 8-inch square baking pan with aluminum foil or parchment paper, leaving an overhang on the sides to easily lift the fudge out once set.
- In a medium saucepan, combine the chocolate chips, sweetened condensed milk, and salt over medium heat. Stir continuously with a rubber spatula or wooden spoon until the chocolate chips are completely melted and the mixture is smooth.
- Remove from heat and stir in the vanilla extract and chopped nuts. Spread the fudge mixture into the prepared pan in an even layer.
- Refrigerate for 2 hours or until the fudge is set. Once set, lift the fudge out of the pan using the overhang on the sides and cut into small squares.
Notes
Nutrition
Featured Comments
“Impressed! Clear steps and absolutely loved results. Perfect for busy nights.”
“Made this last night and it was family favorite. Loved how the guilt-free came together.”
“Super easy and will make again! My family asked for seconds. Saving this one.”
“This guilt-free recipe was absolutely loved — the lighter really stands out. Thanks!”
“Impressed! Clear steps and family favorite results. Perfect for busy nights.”
“Super easy and turned out amazing! My family asked for seconds. Saving this one.”
“Super easy and turned out amazing! My family asked for seconds. Saving this one.”
“Made this last night and it was will make again. Loved how the crispy came together.”
“Impressed! Clear steps and family favorite results. Perfect for busy nights.”
“New favorite here — turned out amazing. guilt-free was spot on.”