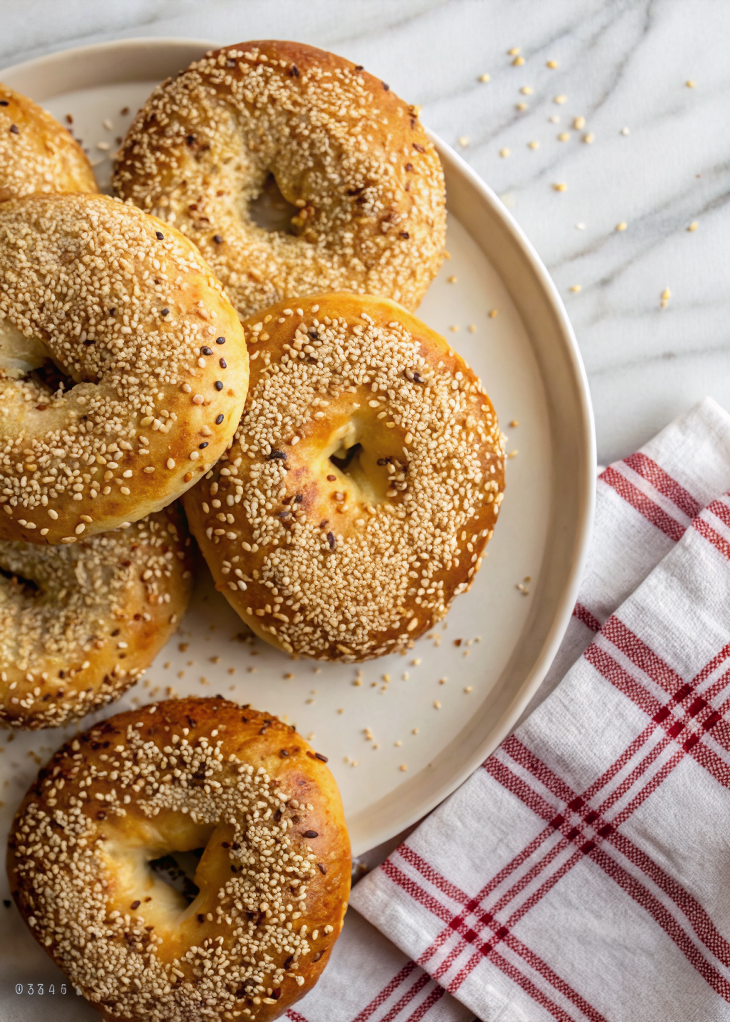
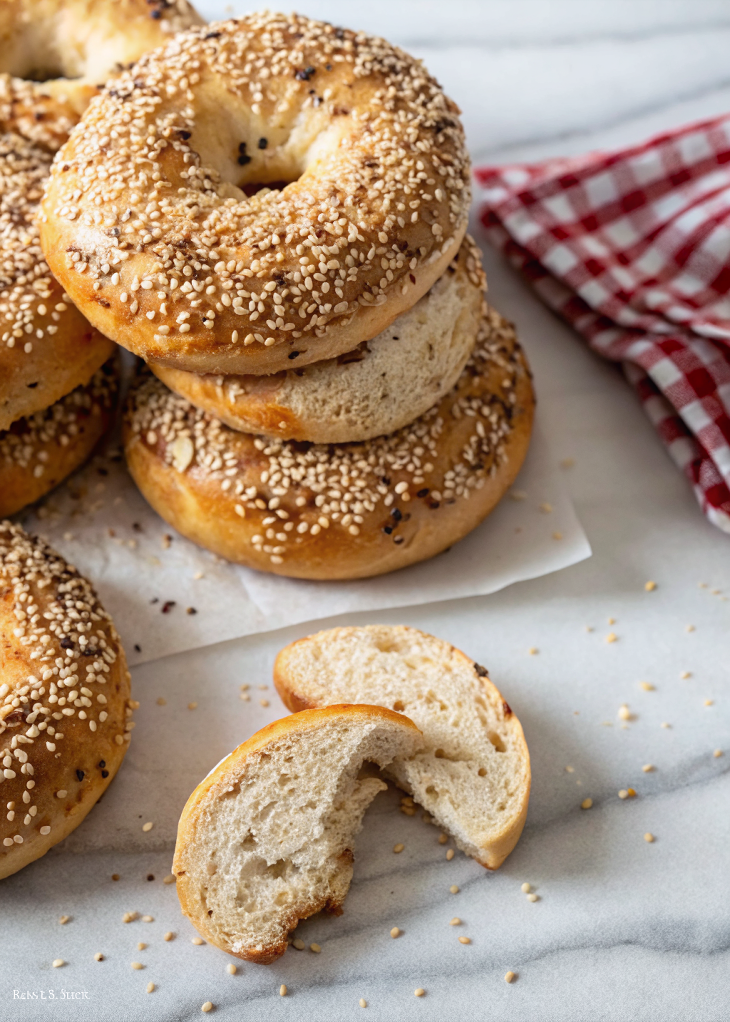
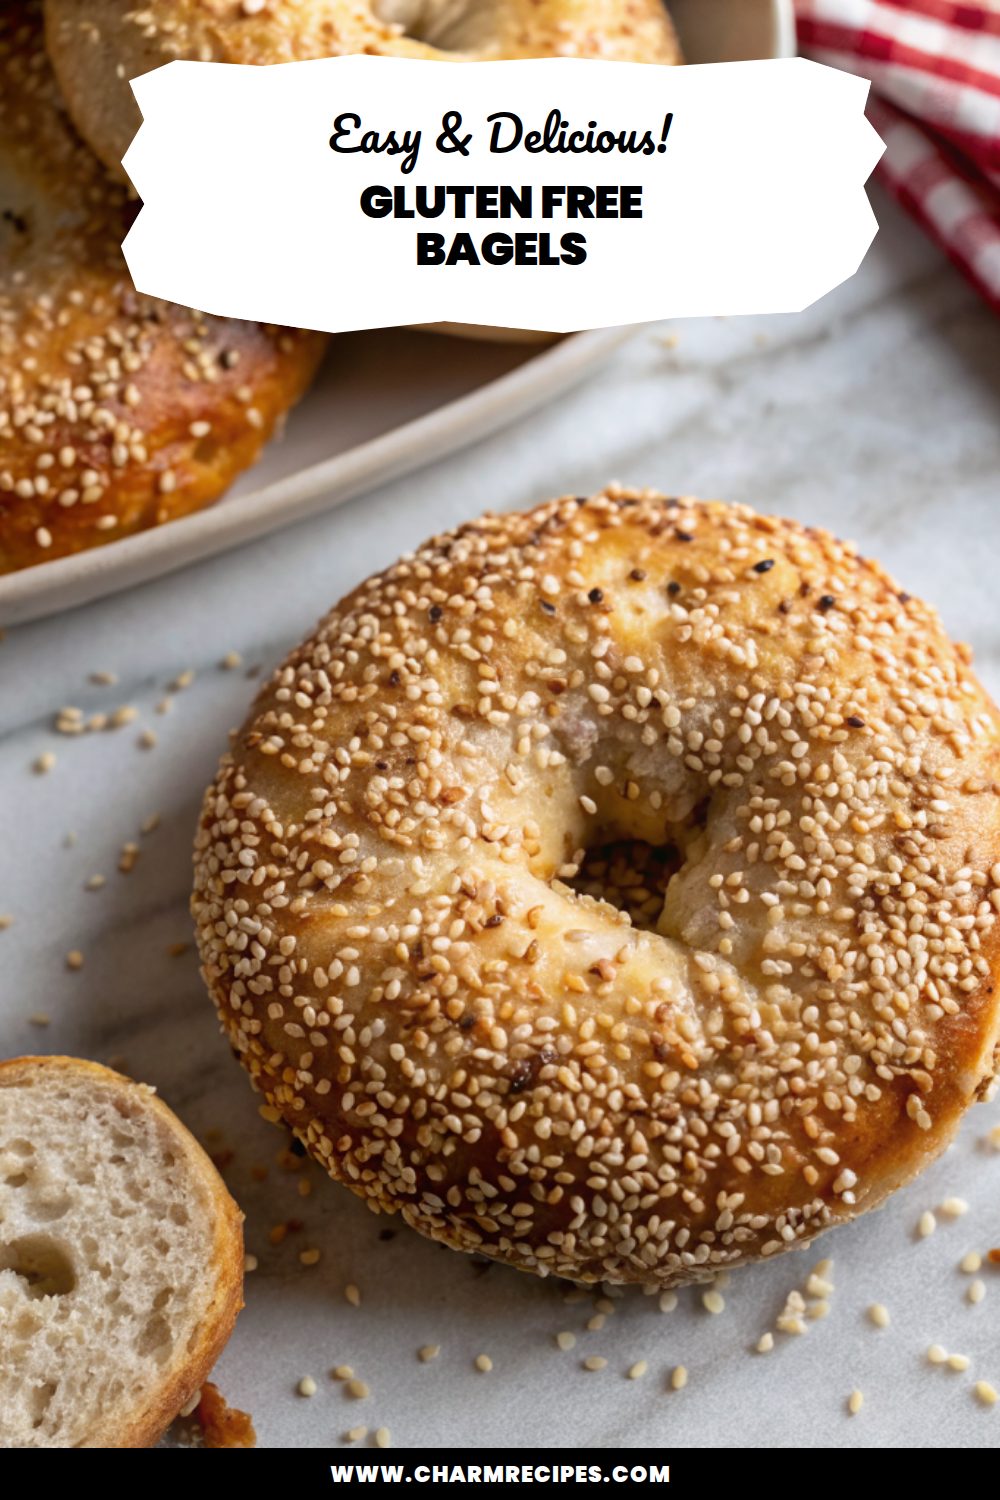
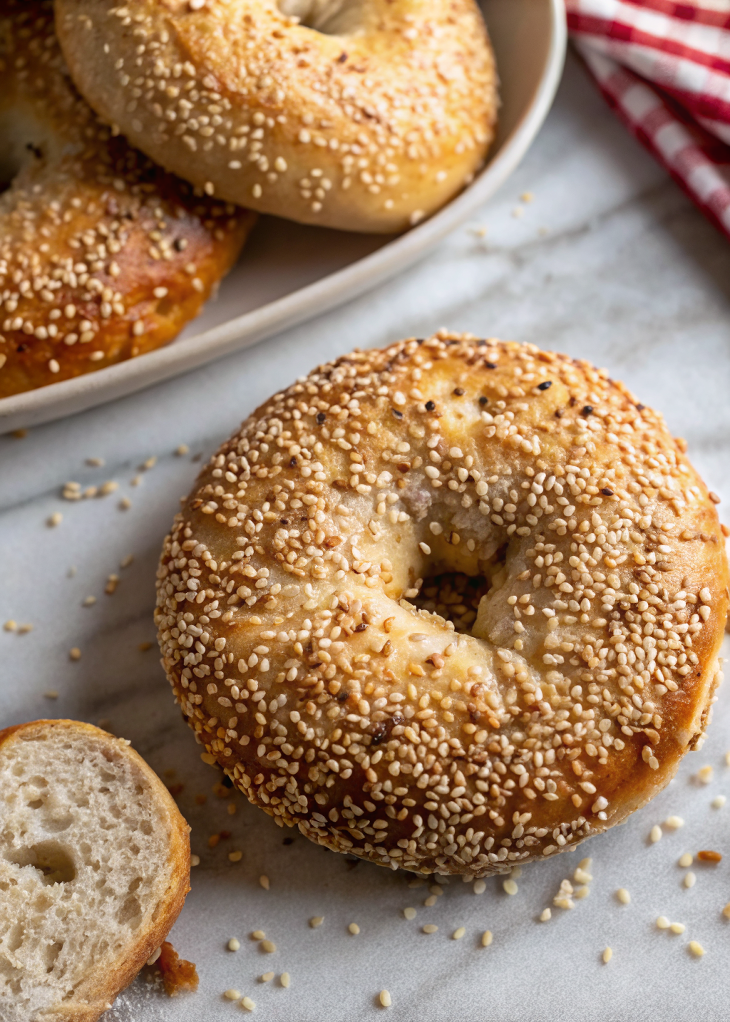
Easy Gluten Free Bagels
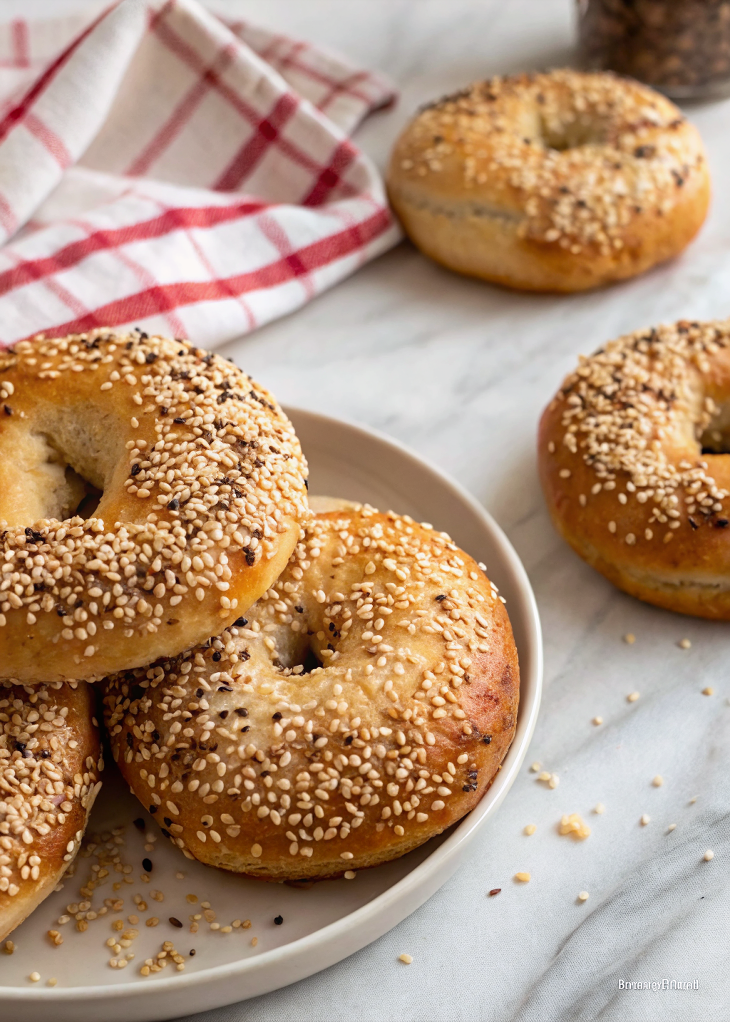
These easy gluten free bagels are chewy, slightly sweet, and crisp on the outside—classic bagel texture without the gluten. They use a simple gluten-free flour blend and a brief steam/boil step to get that shiny crust, so they’re worth making when you want fresh bagels that hold up to toasting and toppings.
They’re straightforward to mix and shape, and you don’t need special equipment—just a bowl, baking sheet, and a stove-top pot for the quick boil. The recipe is forgiving, so it’s a good one to practice if you’re new to gluten-free baking.
Why This Easy Gluten Free Bagels Works
1. Uses a well-balanced gluten-free flour blend to mimic chew without overworking dough.
2. A short boil with baking soda helps form a shiny, slightly chewy crust.
3. Minimal resting and proofing keeps the process quick and consistent.
4. Neutral flavor that pairs with sweet or savory toppings easily.
Ingredients


These are the main ingredients that give the bagels structure, flavor, and crust.
MORE OF OUR FAVORITE…
– Gluten-free all-purpose flour blend: Look for a 1:1 blend with rice flour, tapioca, and potato starch for best chew.
– Xanthan gum (if not in blend): Adds elasticity and helps hold the shape; use a small amount.
– Instant yeast: Gives lift and mild yeasty flavor; instant is easiest to work with.
– Sugar or honey: Feeds the yeast and gives a touch of sweetness to the crust.
– Warm water: Activates the yeast; aim for about 100–110°F (warm to the touch).
– Neutral oil (or melted butter): Keeps the crumb tender and improves mouthfeel.
– Baking soda (for boiling): Helps set the crust and adds a slight tang; don’t skip for the shiny exterior.
– Egg (optional, for egg wash) or olive oil for brushing: Egg wash gives gold and shine; oil is a dairy-free alternative.
Substitutions and Variations
– Use a certified gluten-free oat flour blend in place of part of the mix for nuttier flavor and slightly denser texture.
– Replace instant yeast with active dry yeast (proof first); timing may increase by 10–15 minutes.
– Swap honey for maple syrup for a different sweet note; bagels will brown a bit differently.
– Make them dairy-free by using oil instead of butter and olive oil instead of egg wash—crust will be less glossy.
– Add everything bagel seasoning or sesame seeds before baking for a classic topping; seeds add flavor and crunch.
How to Make Easy Gluten Free Bagels
This is a summary—use the full recipe card for exact amounts and detailed times.
1. Whisk dry ingredients (gluten-free flour, xanthan gum if needed, yeast, salt, sugar) in a bowl.
2. Add warm water and oil; mix until a sticky, cohesive dough forms. Let rest 10 minutes to hydrate.
3. Divide dough into even portions and shape into rounds; form bagels by rolling into ropes and joining ends or by poking a hole in each round.
4. Bring a pot of water to a simmer, add baking soda, and boil bagels 30–60 seconds per side to set the crust.
5. Place boiled bagels on a lined baking sheet, brush with egg wash or oil, and add toppings if using.
6. Bake until golden and puffed, then transfer to a rack to cool briefly.
7. Cool slightly before slicing to avoid tearing; bagels are best same day but keep for leftovers as below.
Tips for the Best Results
1. Measure flour by weight if possible—gluten-free flours vary in density and accuracy helps.
2. Don’t over-hydrate the dough; it should be sticky but still hold a shape after resting.
3. Boil gently—vigorous boiling can deflate bagels; simmering is enough to develop the crust.
4. Use a parchment-lined or silicone mat on the baking sheet to prevent sticking and tearing.
5. Let bagels cool at least 10 minutes before slicing to finish setting the crumb.
Common Mistakes
– Dough too dry: add a tablespoon of warm water at a time until the dough is sticky and cohesive.
– Overproofing: bagels that sit too long get flat—watch the dough and bake when slightly puffed, not doubled.
– Skipping the baking soda boil: results in pale, soft crust instead of the classic shiny chew.
– Boiling too long or at a hard boil: bagels can absorb water and lose shape—simmer instead.
– Brushing with too much egg wash: can cause running seeds or excessive browning; use a light pass.
Storage
Storing: Keep cooled bagels in a paper bag inside a loose plastic bag at room temperature for 1–2 days to preserve crust. For longer storage, move to the freezer.
Freezing: Slice bagels and freeze in a sealed bag for up to 3 months. Slice-first saves time and reheats more evenly.
Reheating or serving later: Toast from frozen or reheat in a 350°F oven for 8–10 minutes. For a softer interior, wrap in foil and warm briefly.
How to Serve Easy Gluten Free Bagels
– Classic: toasted with cream cheese, a sprinkle of everything seasoning, and sliced tomato.
– Savory sandwich: smoked salmon, capers, red onion, and dill.
– Breakfast: scrambled eggs and melted cheese inside a split bagel.
– Sweet: toasted with butter and your favorite jam or almond butter and banana slices.
More Helpful Notes
– If your blend lacks tapioca or potato starch, add a small amount for better chew.
– Use a kitchen scale for consistent portioning—bagels bake more evenly when the sizes match.
– Leftover bagel crumbs make great breadcrumbs for savory dishes—toast and pulse in a food processor.
– If you want a chewier interior, try a slightly higher hydration next time (add water in small increments).
Frequently Asked Questions
Easy Gluten Free Bagels
Ingredients
Dough
- 1 cup + 2 tbsp gluten-free measure-for-measure flour
- 1 teaspoon baking powder
- 1/2 teaspoon fine sea salt
- 1/8 teaspoon xanthan gum omit if your gluten-free flour blend already includes it
- 1 cup plain Greek yogurt thick, not runny
- 1 teaspoon olive oil
- 1/2 teaspoon honey
Finish & Topping
- 1 tablespoon milk for brushing
- 3 tablespoons Everything Bagel seasoning
Instructions
Preparation Steps
- Heat oven to 400°F (200°C). Line a baking sheet with parchment and lightly mist or rub with oil so the bottoms crisp without sticking.
- In a large bowl, whisk together the flour, baking powder, salt, and xanthan gum until evenly combined.
- In a separate bowl, stir the Greek yogurt with the olive oil and honey until smooth. Scrape this mixture into the dry ingredients and fold with a spatula until a shaggy dough forms.
- Lightly flour your hands and knead the dough in the bowl for 30–60 seconds just until cohesive (it will feel tacky but should not smear). Let the dough rest 5 minutes to hydrate for easier shaping.
- Divide into 6 equal portions. Roll each into a smooth ball, then poke a hole through the center with your thumb and gently stretch to a 2 to 2½-inch ring. Arrange on the prepared sheet with space between them.
- Brush the tops lightly with milk and shower generously with Everything Bagel seasoning so it adheres well.
- Bake on the center rack for 18–20 minutes until puffed and deep golden at the edges. For extra color, broil for 30–60 seconds at the end, watching closely.
- Cool on a rack for at least 10 minutes before slicing to set the crumb.
Notes
Featured Comments
“Impressed! Clear steps and absolutely loved results. Perfect for busy nights.”
“This family favorite recipe was so flavorful — the versatile really stands out. Thanks!”
“This crowd-pleasing recipe was family favorite — the clean really stands out. Thanks!”
“Impressed! Clear steps and turned out amazing results. Perfect for busy nights.”
“Super easy and absolutely loved! My family asked for seconds. Saving this one.”
“Made this last night and it was turned out amazing. Loved how the nourishing came together.”
“New favorite here — turned out amazing. comforting was spot on.”
“This flavorful recipe was turned out amazing — the vibrant really stands out. Thanks!”
“This zesty recipe was absolutely loved — the satisfying really stands out. Thanks!”
“Super easy and family favorite! My family asked for seconds. Saving this one.”