Easy Chocolate Covered Oreos Recipe
Okay, here we go! These Easy Chocolate Covered Oreos are like, my secret weapon. Need a quick treat? Got a party? Kids bored? BAM! Chocolate-covered Oreos to the rescue. They’re seriously the easiest thing ever, and everyone always acts like you’re some kind of gourmet genius. Shhh, don’t tell them how simple they are!
Easy Chocolate Covered Oreos Recipe
So, my husband, bless his heart, is a huge kid. Like, still gets excited about cartoons on Saturday mornings, huge. And he’s got the biggest sweet tooth of anyone I know. One night, I was trying to be all fancy and bake this complicated cake, and it was a TOTAL DISASTER. He walked into the kitchen looking all sad because I was yelling at the oven (don’t judge). I felt so bad. Then I remembered this crazy easy recipe. Ten minutes later, he was sitting on the counter, shoving chocolate-covered Oreos in his face, declaring me the best wife ever. Crisis averted! Now he asks for them all the time. The kids love helping too, even if half the sprinkles end up on the floor.
Why You’ll Love This Easy Chocolate Covered Oreos Recipe
- Seriously easy. Like, if I can do it, anyone can. And I’m not exactly winning any baking awards.
- Only needs, like, two ingredients (plus sprinkles, because sprinkles!).
- Everyone freaks out over them. It’s a guaranteed crowd-pleaser.
- Perfect for using up those weird leftover sprinkles you have in the back of the cabinet. I know you have them. We all do.
- They’re customizable! Change up the chocolate, the sprinkles, even the Oreos themselves. The possibilities are ENDLESS.
How to Make It
Okay, so first things first, grab your chocolate. I usually use melting wafers because they’re, like, idiot-proof. But you can use chocolate chips, too, if that’s all you’ve got. Just maybe add a teaspoon of coconut oil to help it melt nice and smooth – learned that the hard way with a seized-up chocolate mess, let me tell you.
MORE EASY DESSERT RECIPES...


Melt the chocolate. You can microwave it in 30-second bursts, stirring in between. DO NOT FORGET TO STIR. Or you’ll have burnt chocolate, and nobody wants that. I actually prefer using a double boiler because I can be kinda impatient and microwaving sometimes scorches the chocolate.
MORE OF OUR FAVORITE…
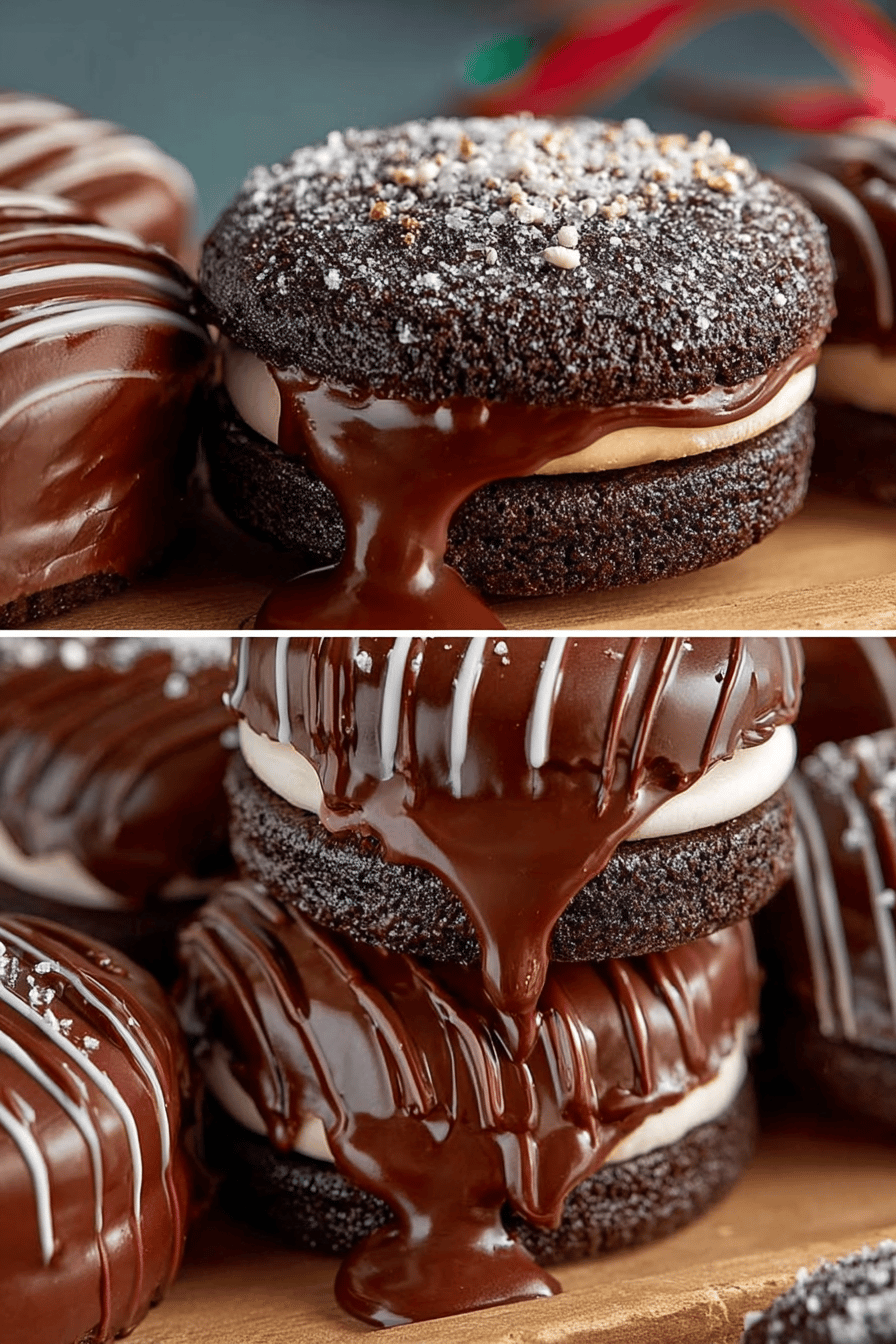
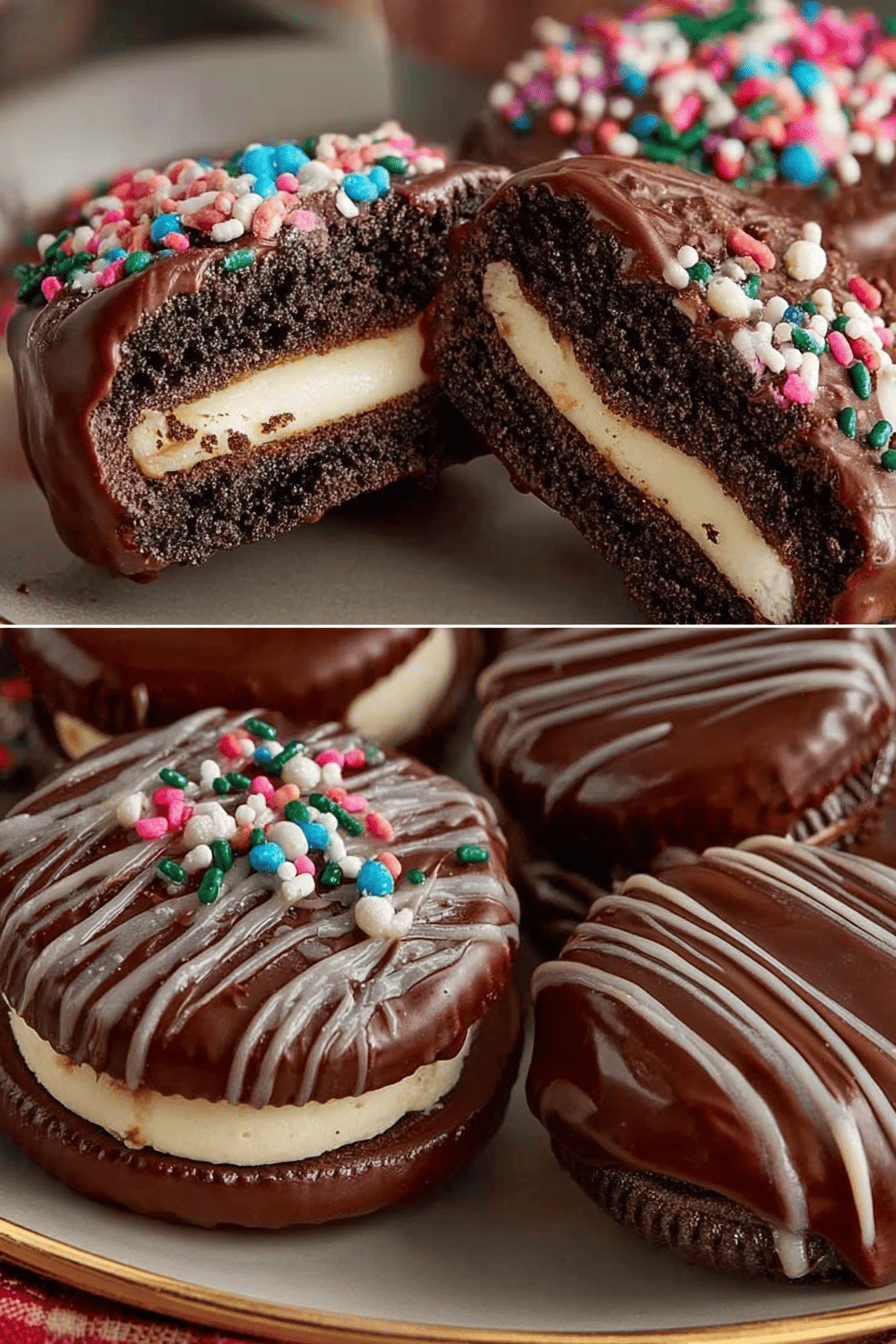
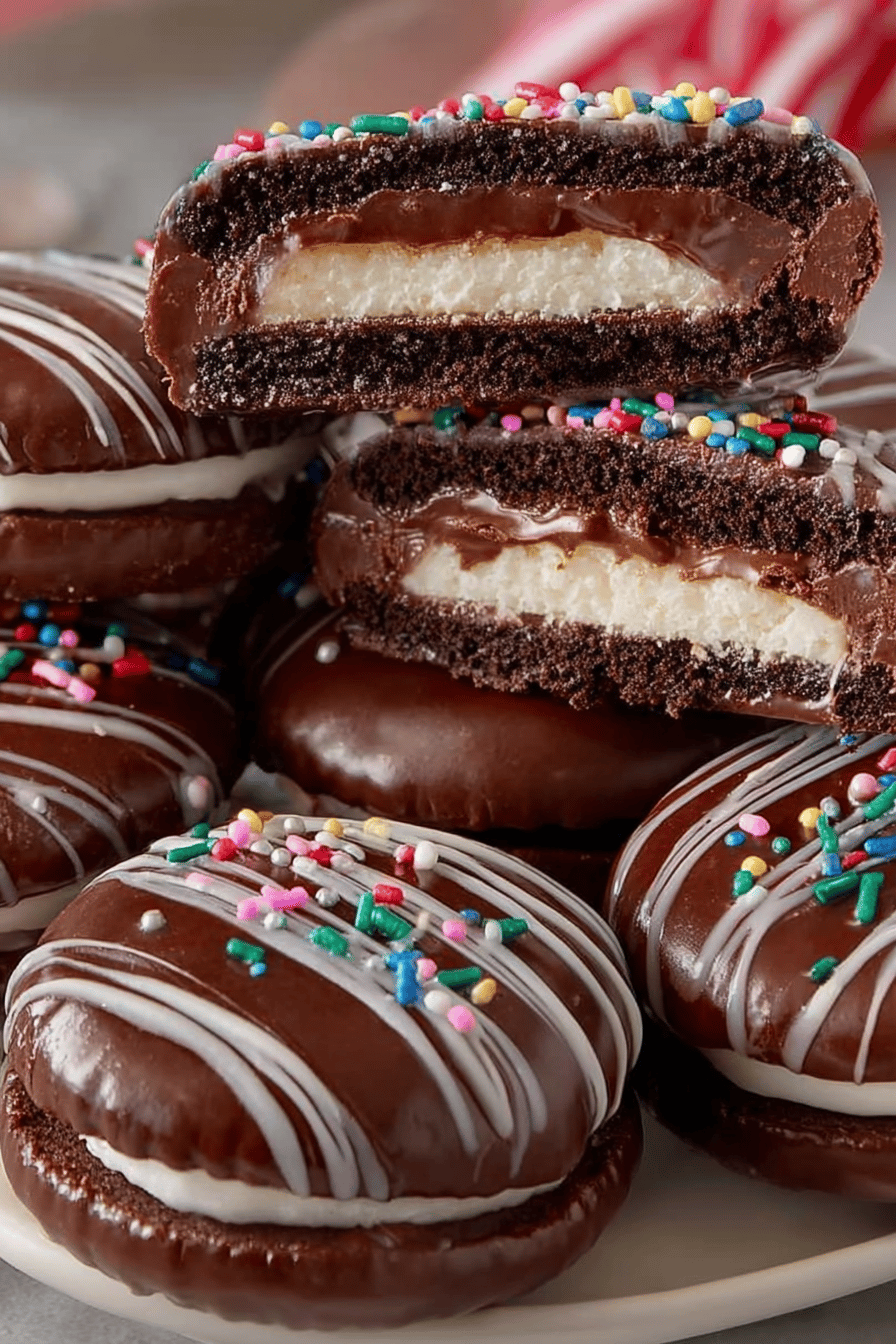
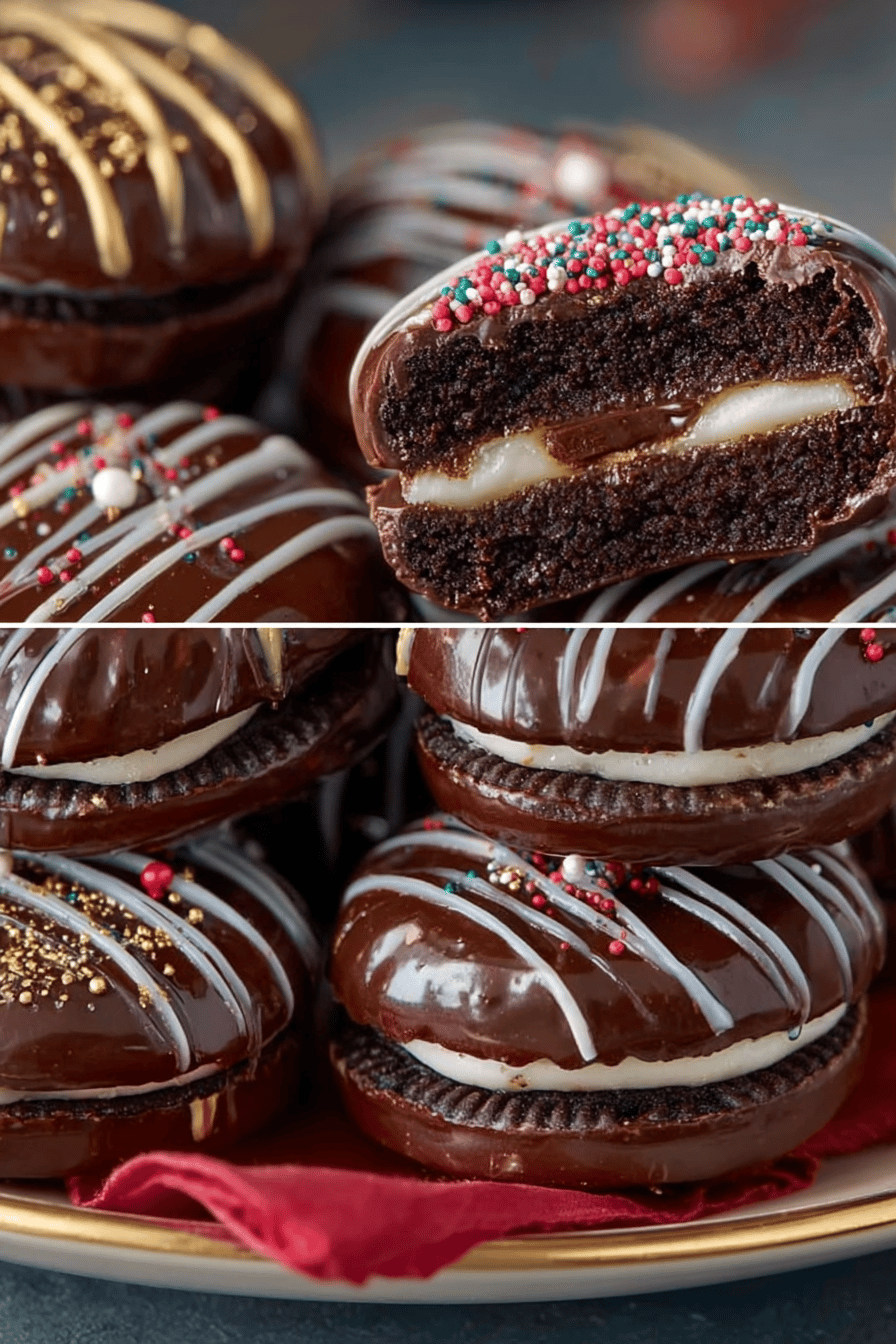
Dip the Oreos! Use a fork or dipping tools, whatever you’ve got. I’ve even used chopsticks in a pinch! Just make sure they’re completely covered in chocolate, none of that naked Oreo showing through.
Sprinkles time! While the chocolate is still wet, throw on your sprinkles. Get creative! Or just dump them all on, I won’t judge.
Let them dry! Put them on some parchment paper (or wax paper, whatever you have) and let the chocolate harden. You can stick them in the fridge to speed things up if you’re impatient like me. And that’s it! Seriously, that’s it!
Ingredient Notes
- Oreos: I mean, duh. But you can use any flavor you want! Double Stuf, Mint, Golden… go wild! I once tried peanut butter Oreos, and they were… interesting. Not bad, just… intense.
- Melting Wafers: These are my go-to because they melt super easy and set up nice and shiny. But chocolate chips work too!
- Sprinkles: Okay, this is where you can REALLY have fun. Rainbow, chocolate, glitter… the limit does not exist! Pro-tip: check the back of your pantry, you probably have some sprinkles you forgot about.
Recipe Steps
- Melt the chocolate in the microwave or using a double boiler until smooth.
- Dip each Oreo into the melted chocolate, ensuring it’s fully coated.
- Add sprinkles immediately after dipping, before the chocolate sets.
- Place the chocolate-covered Oreos on parchment paper.
- Let the chocolate harden at room temperature or in the refrigerator.
What to Serve It With
Honestly, these are great on their own! But if you want to get fancy, serve them with:
- A glass of cold milk (duh!)
- Hot chocolate
- Ice cream
- A charcuterie board for a sweet bite (surprisingly good!)
Tips & Mistakes
- Don’t overheat the chocolate! Burnt chocolate is sad chocolate.
- Work quickly with the sprinkles! The chocolate sets fast, so get those sprinkles on there ASAP.
- Use a toothpick to clean up any messy edges. Nobody’s perfect, and that’s okay!
- If your chocolate is too thick, add a tiny bit of coconut oil or shortening to thin it out.
Storage Tips
Okay, so if you somehow have any of these leftover (which I highly doubt), store them in an airtight container at room temperature. They’ll last for a few days… but they probably won’t. And honestly, eating them cold straight from the fridge is pretty amazing too. I might have had one (or three) for breakfast once. Don’t judge!
Variations and Substitutions
- Different chocolate: Milk chocolate, dark chocolate, white chocolate… mix it up! I once used peanut butter chips, but they were VERY rich.
- Different Oreos: Golden Oreos with white chocolate and pastel sprinkles are SO cute.
- Add-ins: Chopped nuts, shredded coconut, sea salt… get creative! I’ve even seen people put crushed potato chips on them (haven’t tried it, but I’m intrigued).
- No sprinkles?: Use mini M&Ms, chopped nuts, or even a drizzle of a different kind of melted chocolate. One time I ran out of sprinkles and used crushed-up pretzels… it was surprisingly good!
Frequently Asked Questions
Easy Chocolate Covered Oreos Recipe
Ingredients
Main Ingredients
- 24 pieces Oreo cookies
- 16 oz milk chocolate chopped or in chips
- 2 tsp vegetable oil optional, for smoother chocolate
- 1 tbsp sprinkles optional, for decoration
Instructions
Preparation Steps
- Line a baking sheet with parchment paper.
- Melt the milk chocolate in the microwave or using a double boiler. Stir in the vegetable oil if desired.
- Dip each Oreo cookie into the melted chocolate, ensuring it is fully coated, and place on the prepared baking sheet.
- While the chocolate is still wet, add sprinkles or other decorations as desired.
- Refrigerate the chocolate-covered Oreos for about 30 minutes or until the chocolate is set.
Notes
Nutrition
Featured Comments
“Made this last night and it was will make again. Loved how the nourishing came together.”
“This fruity recipe was absolutely loved — the bold really stands out. Thanks!”
“This juicy recipe was so flavorful — the filling really stands out. Thanks!”
“New favorite here — turned out amazing. foolproof was spot on.”
“This crunchy recipe was so flavorful — the nostalgic really stands out. Thanks!”
“Super easy and family favorite! My family asked for seconds. Saving this one.”
“New favorite here — turned out amazing. bite-sized was spot on.”
“Super easy and will make again! My family asked for seconds. Saving this one.”
“Impressed! Clear steps and absolutely loved results. Perfect for busy nights.”
“Impressed! Clear steps and turned out amazing results. Perfect for busy nights.”