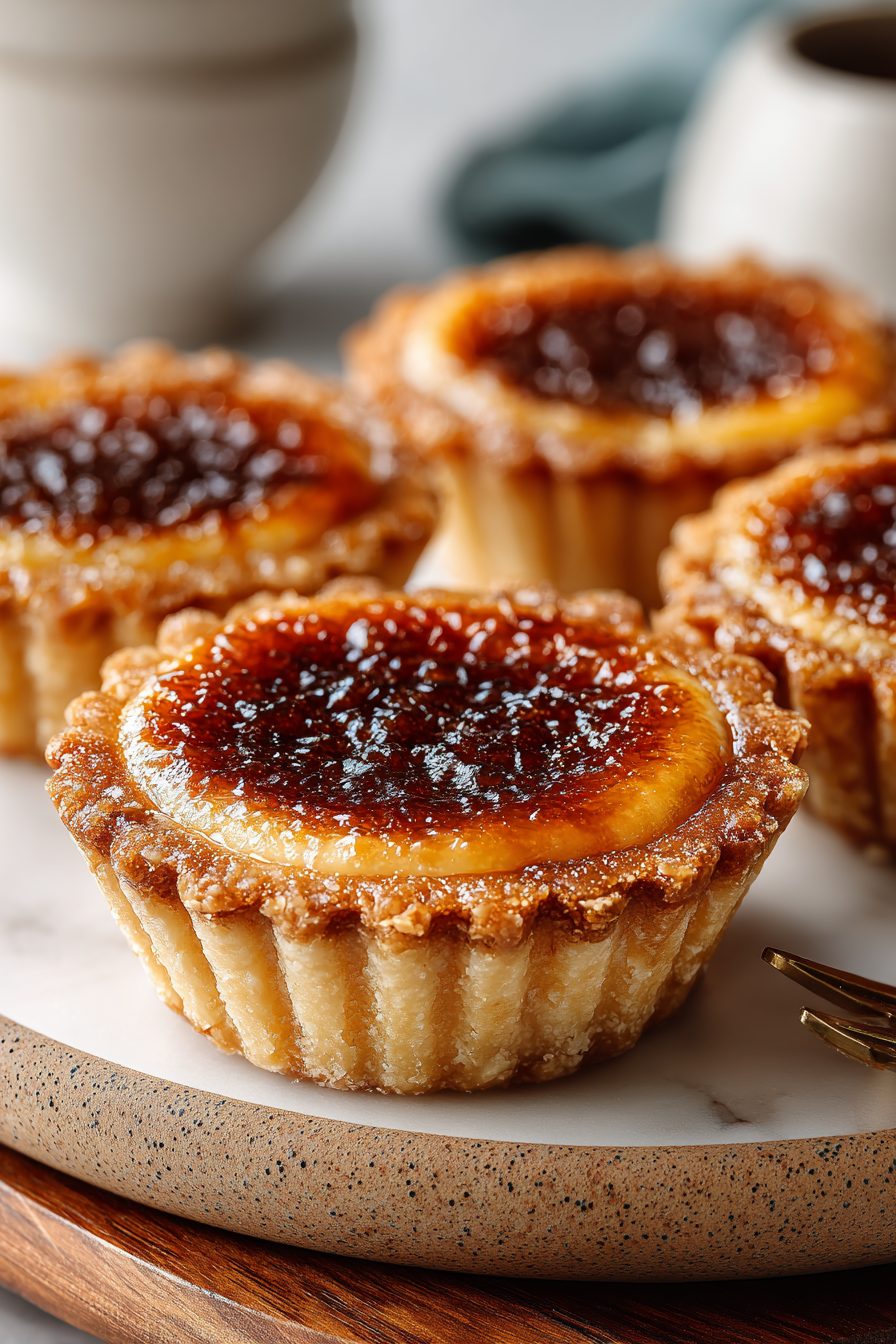
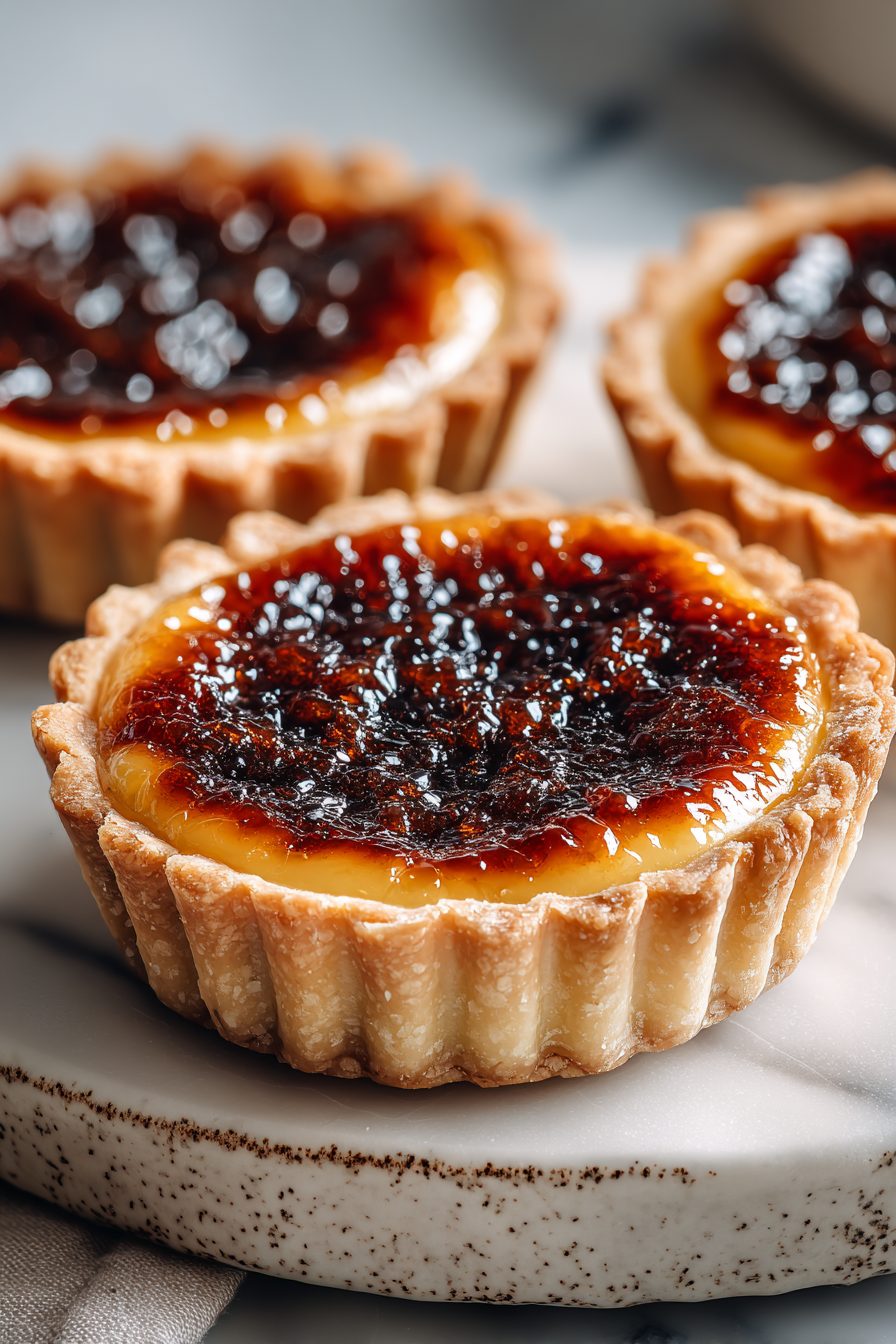
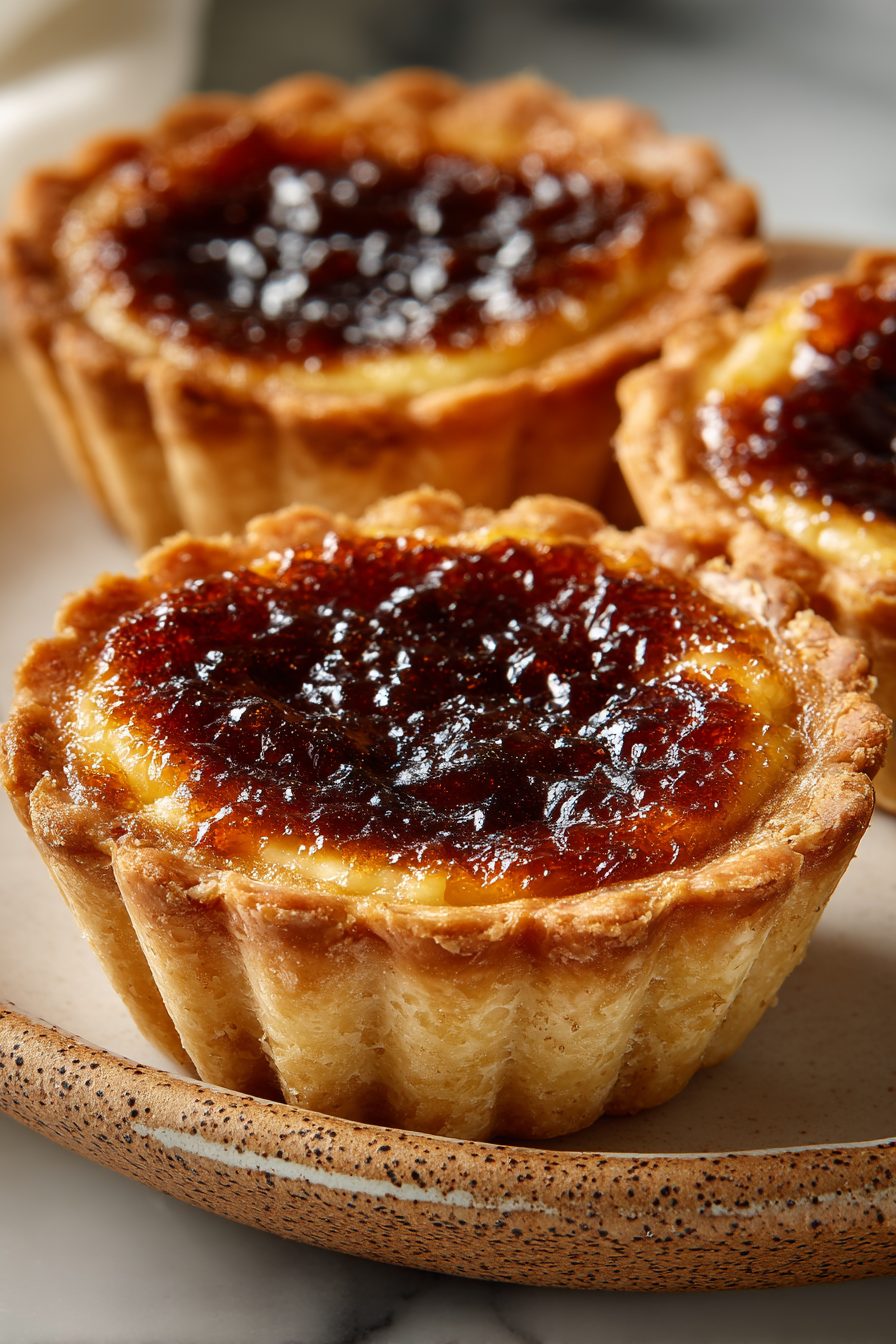
Butter Tart Delights
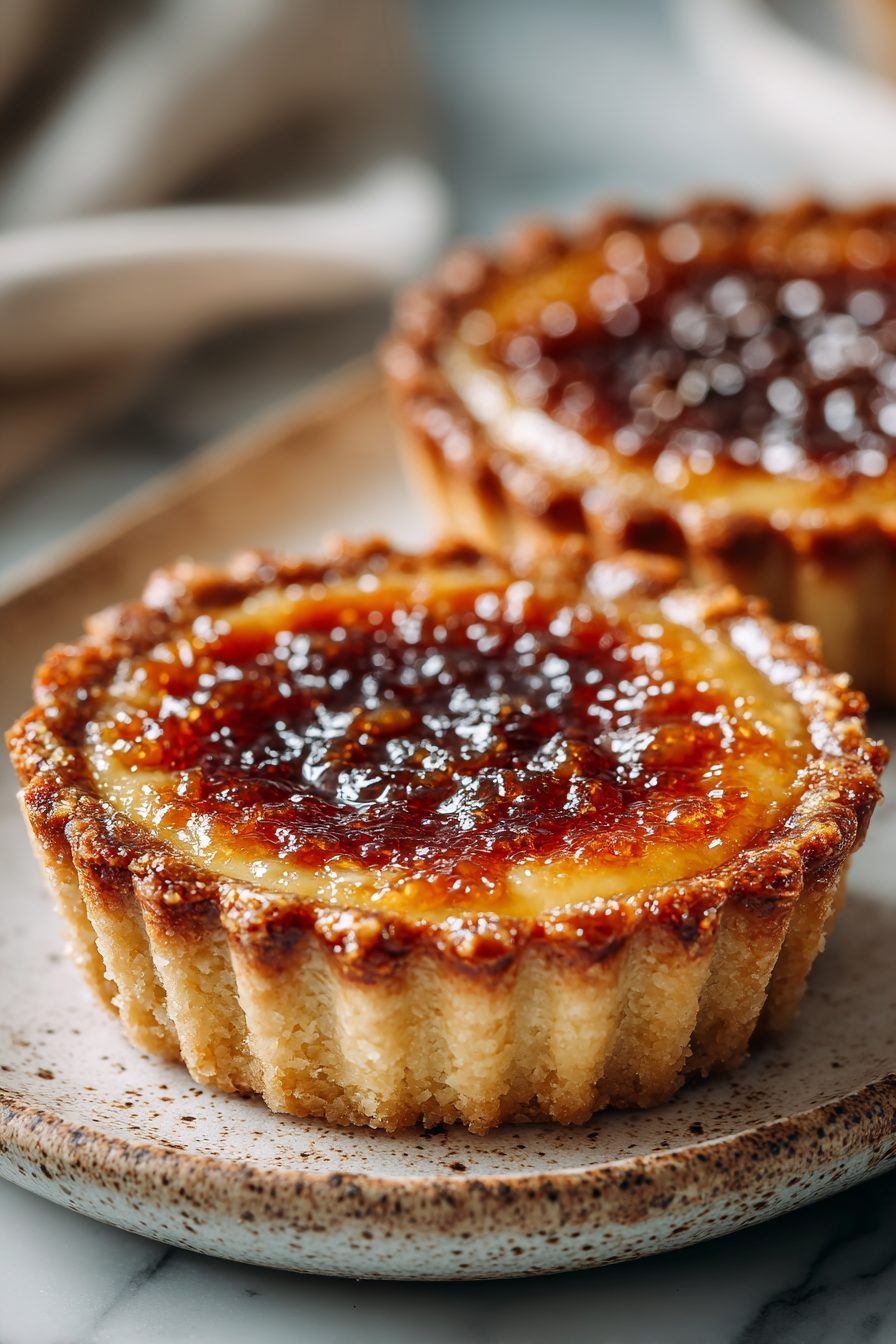
I’ll be honest: butter tarts are my comfort-food kryptonite. These little pie-y pockets of gooey, buttery, slightly tangy filling wrapped in flaky pastry hit nostalgia and chaos in the best way — sticky fingers, quick bites, and a dessert that somehow makes weekday life feel celebratory. This recipe leans into the messy, glorious part of baking where the filling is almost set but still delightfully runny and the crust flakes off in the most satisfying way.
My husband calls them “danger pastries” because he eats three and then acts calm for an hour. Our kiddo demands “the ooey ones” and will reject anything less gooey on sight. They’ve become our grab-and-go dessert after piano practice, a stapled-in-for-holidays offering, and the thing I bake when I need instant praise. One time I forgot to blind-bake the shells (oops) and we ended up with an ultra-chewy crust that the family declared “rustic” and ate anyway—so there’s a lot of grace with these.
Why You’ll Love This Butter Tart Delights
– Tiny, show-off desserts that feel fancy but are shockingly easy.
– Gooey, buttery centers that wobble just enough to make everyone gasp.
– Customizable: nuts, raisins, or nothing but caramel bliss—your call.
– Perfect for stuffing in lunchboxes, stacking on a dessert platter, or eating straight from the tin.
Kitchen Talk
MORE EASY DESSERT RECIPES...

I’ll save you the Pinterest-perfect image: these are not Instagram-straight pastries. Expect a little leaking, a little patching with your thumb, and gloriously inconsistent tops. I’ve overbaked, underbaked, and once swapped in maple syrup instead of corn syrup because I was out (it worked—surprisingly maple-y and a little more complex). My messy secret? I don’t trim every shell perfectly; imperfections help the filling cling and make each tart look homemade. Also, chilling the dough briefly makes it easier to handle, but if the kids are whining you can totally roll faster and call them “rustic tarts.”
MORE OF OUR FAVORITE…
Shopping Tips
– Baking Basics (Flour/Sugar/Leaveners): Use all-purpose flour for the crust unless you love experimenting—too-weak flour makes a crumbly mess. Granulated sugar is fine for the filling; brown sugar adds depth if you like caramel notes.
– Fats & Oils: Butter is where the flavor lives—don’t skimp. Real butter gives that toffee-like finish in the filling and the flaky layers in the crust.
– Flavor Boosts: Vanilla and a little lemon zest brighten the filling; pure vanilla extract tastes worlds better than imitation here.
– Nuts & Seeds: Pecans are classic; walnuts work if that’s what you’ve got. Toast them lightly for more crunch and flavor.
– Fruit: If you like raisins, plump them in warm tea for a few minutes before using—they’ll be juicy instead of leathery.
Prep Ahead Ideas
– Make the dough a day ahead and keep it wrapped in the fridge; it chills and relaxes, which makes rolling easier.
– Toast and chop nuts, or measure out raisins and store them in an airtight container the day before.
– You can mix the filling ingredients and refrigerate for a few hours—bring it back to room temp and stir before filling shells.
– Store crusts (par-baked) in a single layer with parchment in-between; assemble and bake on the day for fresher texture.
Time-Saving Tricks
– Use pre-made pie dough if you’re short on time; the filling does all the heavy lifting flavor-wise.
– Line the tin with a silicone mat to speed up cleanup.
– Toast nuts in a single pan while the oven preheats—one step, two ingredients handled.
– Don’t rush the bake just because they look set; the centers firm up as they cool, so pull them when edges are bubbling and centers slightly jiggly.
Common Mistakes
– Overbaking the filling so it’s rubbery—I did this once and swore off timers for a week; fix: check early and let carryover heat finish the set.
– Using cold filling straight from fridge—cold filling cooks unevenly; bring it to room temp briefly.
– Skipping blind-baking for super-wet fillings—result: soggy bottoms. Quick fix: par-bake shells until they’re faintly golden.
– Adding too many mix-ins (nuts, raisins) so the filling won’t set properly—keep the ratio balanced or people will be eating pulp instead of tarts.
What to Serve It With
– A big scoop of vanilla ice cream or whipped cream for contrast.
– Strong black coffee or a nutty, lightly sweet tea.
– Quick mixed greens with lemon vinaigrette to cut through the sugar if you’re serving alongside a meal.
– Toasted pecans on the side for extra crunch and drama.
Tips & Mistakes
– Don’t trust the oven light—check visually near the end.
– If the tops crack? That’s okay; dust with powdered sugar or drizzle a little melted chocolate.
– Too-sweet for you? Add a pinch of sea salt to the filling next time.
– Filling spreading too much? Chill the filled tray for 10–15 minutes before baking.
Storage Tips
Leftovers live fine at room temp for a day in a covered container, longer in the fridge for up to 3-4 days. They’re actually delightful cold for breakfast (no judgment). If you reheat, a quick zap in the microwave for 6–8 seconds or a minute in a warm oven brings back that gooey center without melting the crust into oblivion.
Variations and Substitutions
– Swap corn syrup for maple syrup or golden syrup for a deeper flavor, but expect a slight texture change.
– Omit raisins and go with chocolate chips or dried cherries for a modern twist.
– Use a gluten-free flour blend in the crust if needed—texture will differ but it can be delicious.
– For vegan-ish options, try a butter substitute and an egg replacer; the result won’t be identical but still cozy and satisfying.
Frequently Asked Questions
Butter Tart Delights
Ingredients
Main Ingredients
- 1.75 cup all-purpose flour for the crust
- 1 tbsp granulated sugar for the crust
- 0.5 tsp kosher salt for the crust
- 0.75 cup unsalted butter, cold and cubed for the crust
- 6 tbsp ice water add a little more if needed
- 0.5 tsp apple cider vinegar for the crust, optional
- 1.25 cup packed brown sugar for the filling
- 0.33 cup maple syrup for the filling
- 0.33 cup unsalted butter, melted cooled slightly; for the filling
- 3.5 fl oz liquid eggs, beaten about 2 large eggs
- 1.25 tsp vanilla extract for the filling
- 0.25 tsp kosher salt for the filling
- 1 tsp white vinegar for the filling; lemon juice also works
- 0.5 cup raisins optional
- 0.33 cup chopped pecans optional; walnuts work too
Instructions
Preparation Steps
- Preheat oven to 375°F. Lightly grease a 12-cup muffin tin.
- Whisk flour, sugar, and crust salt in a bowl. Cut in cold butter until pea-sized.
- Drizzle in ice water and cider vinegar. Stir just until dough clumps together.
- Press dough into a disk, wrap, and chill 20 minutes to relax and firm up.
- Roll dough to about 1/8 inch thick. Cut 4-inch rounds and fit into muffin cups.
- Chill the lined pan 10 minutes while you mix the filling.
- Whisk brown sugar, maple syrup, melted butter, liquid eggs, vanilla, filling salt, and white vinegar until smooth.
- Scatter raisins and pecans into shells if using. Fill each shell about two-thirds full with filling.
- Bake 22–25 minutes, rotating once, until centers puff and edges are set and golden.
- Cool 10 minutes in the pan, then lift out and cool fully on a rack before serving.
Notes
Featured Comments
“Super easy and turned out amazing! My family asked for seconds. Saving this one.”
“Super easy and family favorite! My family asked for seconds. Saving this one.”
“This crowd-pleasing recipe was absolutely loved — the playful really stands out. Thanks!”
“Made this last night and it was absolutely loved. Loved how the picky-eater approved came together.”
“New favorite here — will make again. creamy was spot on.”
“Impressed! Clear steps and family favorite results. Perfect for busy nights.”
“This stacked recipe was turned out amazing — the crunchy really stands out. Thanks!”
“This fresh recipe was so flavorful — the cheesy really stands out. Thanks!”
“Impressed! Clear steps and family favorite results. Perfect for busy nights.”
“Impressed! Clear steps and turned out amazing results. Perfect for busy nights.”