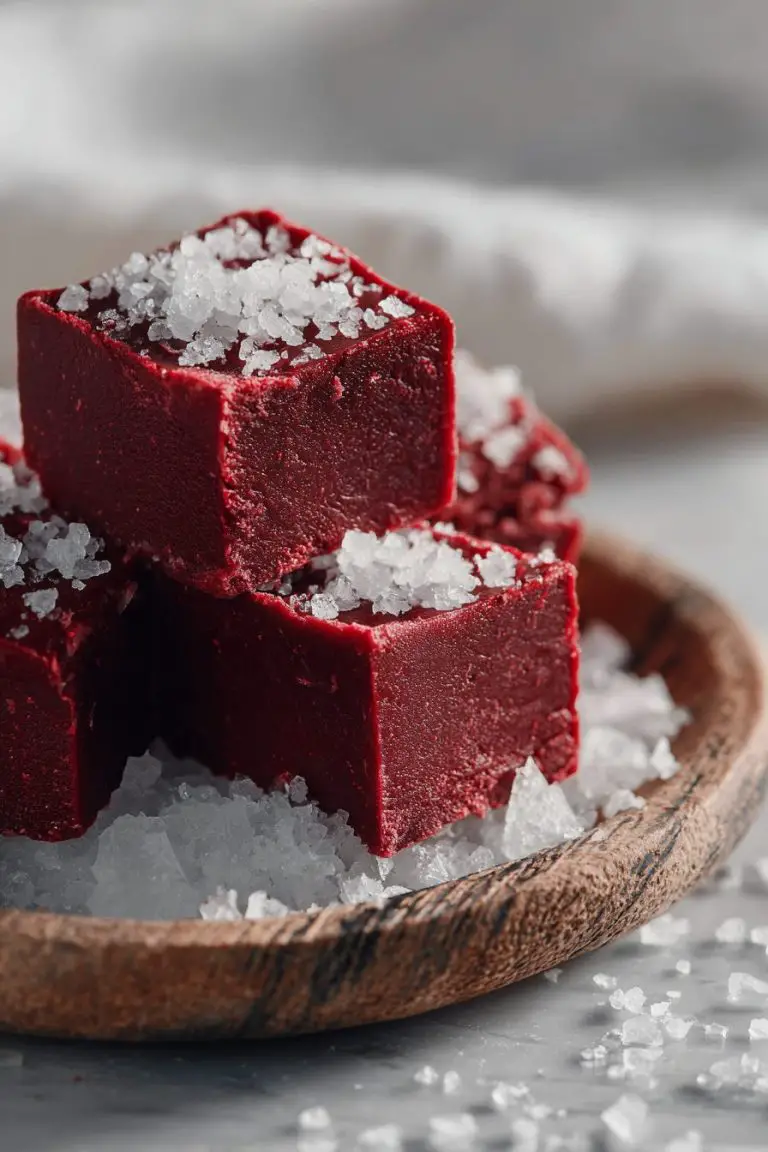
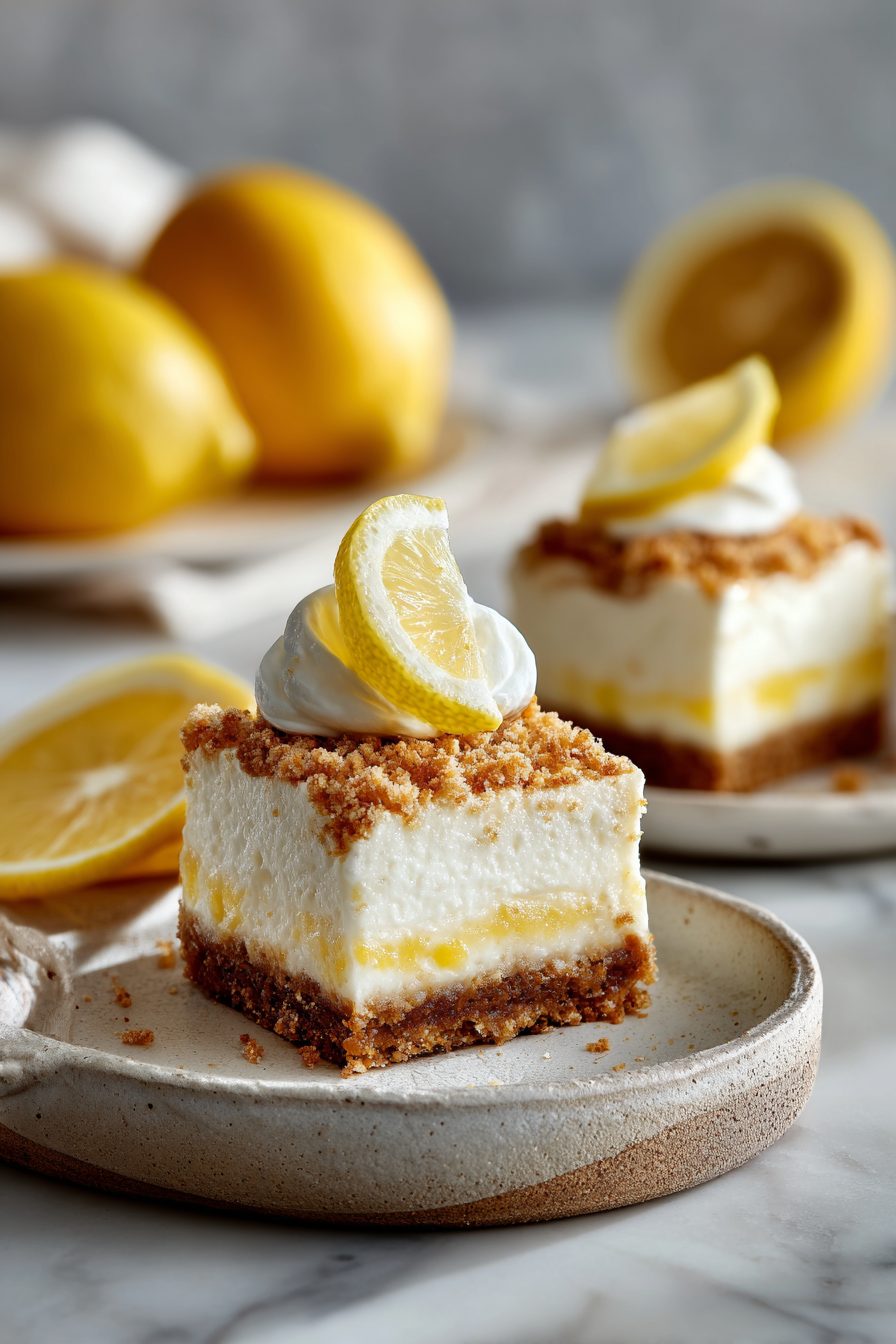
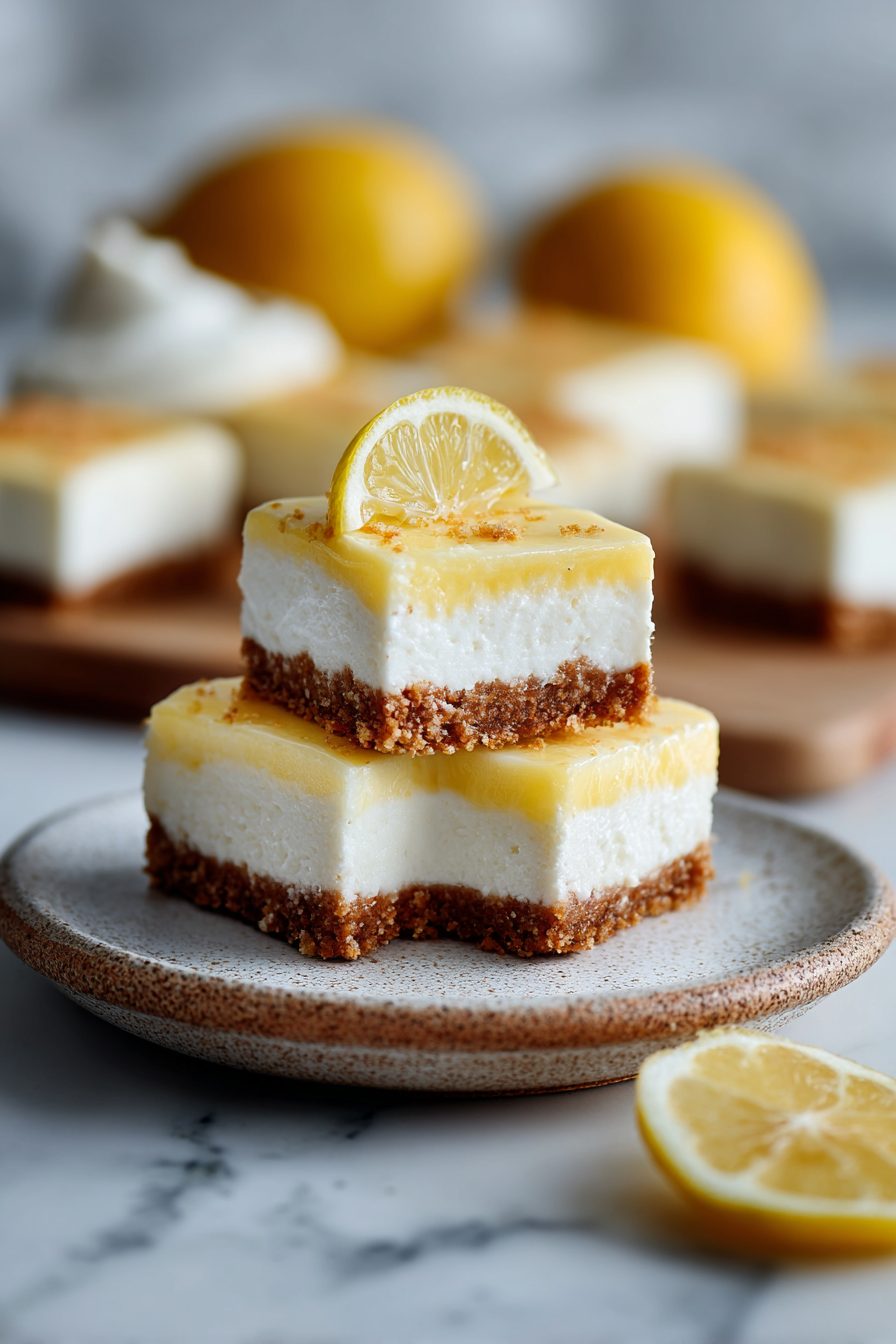
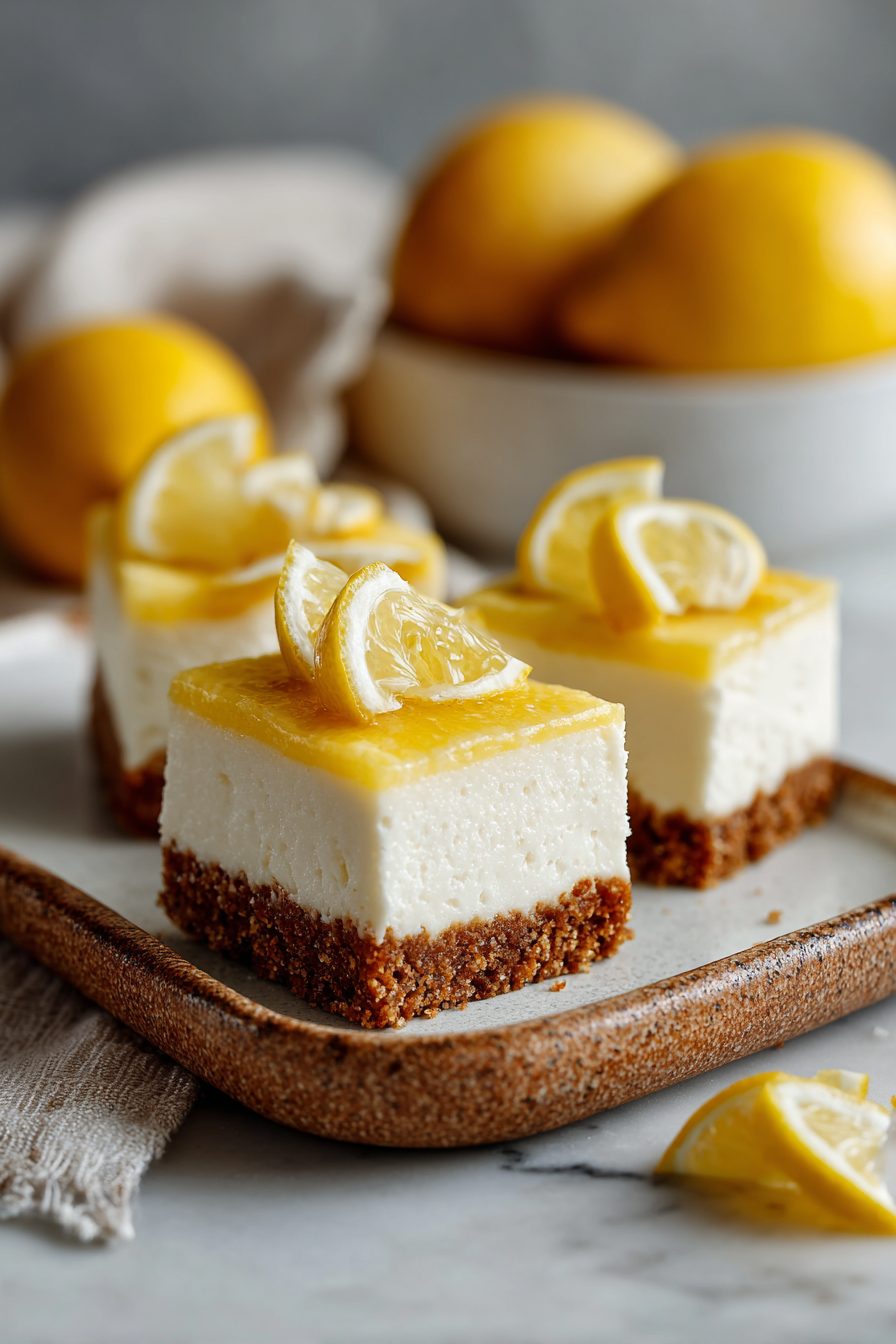
No-Bake Lemon Cheesecake Bars
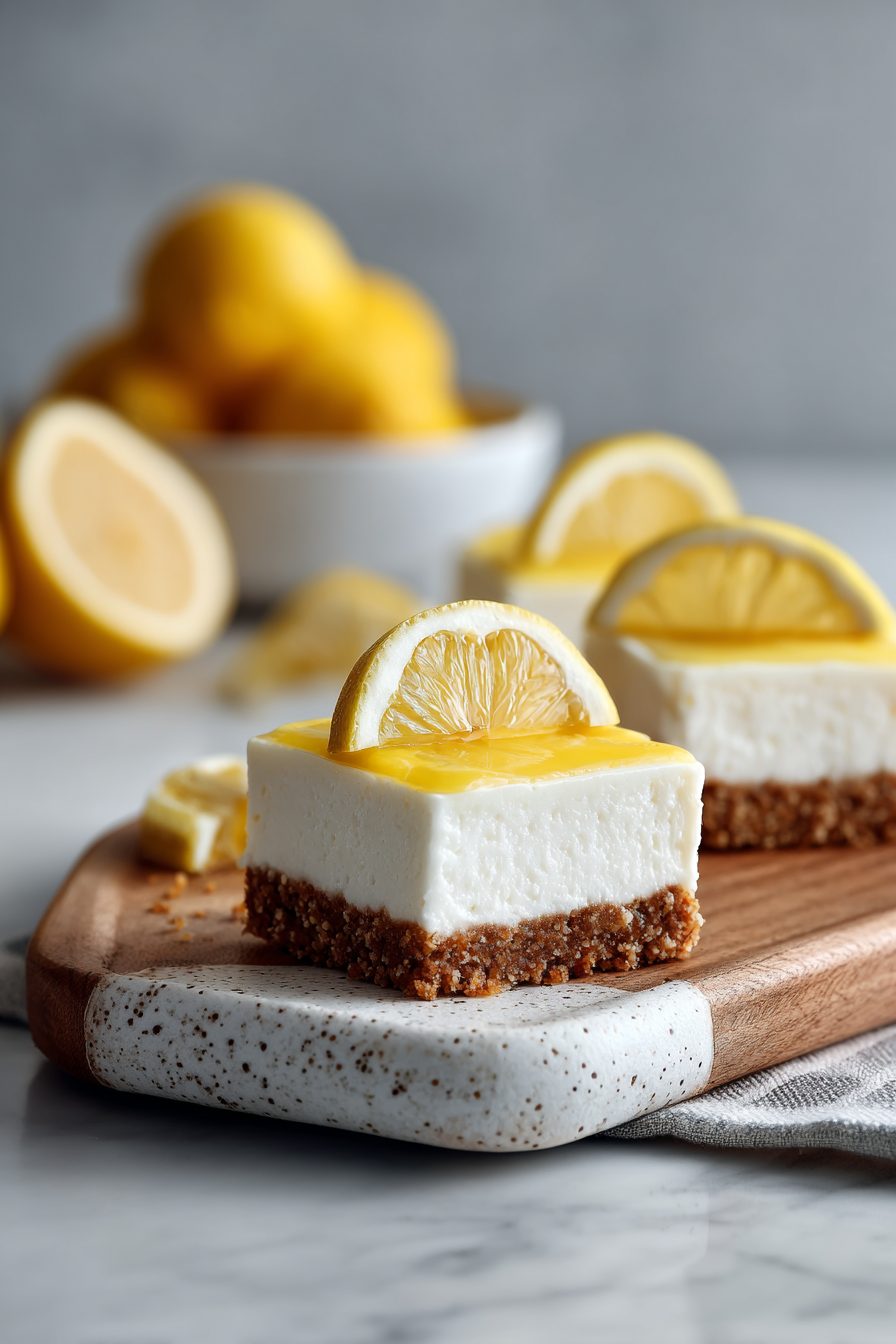
There are days when the oven feels like an enemy and the only thing you want is a cool, zesty treat that basically makes itself. These no-bake lemon cheesecake bars are it: creamy, lush, a little tang that wakes you up, and a buttery, sandy crust that holds every dreamy bite together. They set up in the fridge, slice like a dream, and look way fancier than the level of effort required. Bring them to a backyard thing or just hoard them in the back of your fridge and play “finders keepers” with yourself. I won’t judge.
My husband is a corner-piece bandit. Every time I make these, he sneaks the square with the most crust-to-cream ratio and leaves the faintest little crumb trail like I won’t notice. The kids do the lemon pucker face on the first bite and then go completely silent—like, eerie, beautiful silence—until their plates are suspiciously clean. Last summer we ate them straight from the pan on the porch at 9 p.m., barefoot, listening to the neighborhood sprinklers. It was one of those tiny, ordinary-perfect family nights that makes a recipe stick.
Why You’ll Love This No-Bake Lemon Cheesecake Bars
– No oven, no drama—just whisk, pour, chill.
– Bright, sunny lemon that tastes like a vacation without being too tart.
– Creamy without feeling heavy; the kind of dessert you “accidentally” eat for breakfast.
– They slice pretty for parties but also handle late-night fork attacks straight from the pan.
– Easy to customize the crust—graham, gingersnap, shortbread, you do you.
Kitchen Talk
I’ve learned the hard way that the block-style cream cheese is the move—those fluffy tubs are lovely on bagels, but they made my bars slump like a tired toddler. I zest the lemons over the bowl so the oils rain right in (it smells like a clean kitchen in a bottle). One time I got cocky and skipped chilling the crust before adding the filling… it sort of did a slow tectonic slide when I cut it. Still delicious, just… interpretive. Gingersnaps as a crust were a surprise smash hit: lemon and ginger = besties. And if you’re tempted to rush the chill time, text a friend and set a timer. Patience tastes better.
These no-bake lemon cheesecake bars are a total game-changer—super easy to whip up with just a handful of ingredients like cream cheese, lemon juice, and a buttery shortbread base, no oven required![1] The result is creamy, tangy perfection that chills into refreshing slices everyone raved about at our gathering.[2][3] Honest highlight: they set beautifully overnight, though plan ahead since chilling takes time!
MORE OF OUR FAVORITE…
Shopping Tips
– Citrus: Pick lemons that feel heavy for their size with glossy skin. If you can, go for organic since we’re using the zest.
– Cheese: Get full-fat block cream cheese for maximum creaminess and structure. Let it soften on the counter; cold blocks fight back.
– Dairy: Heavy cream whips best when cold. Grab a carton with the highest fat percentage you can find for a stable, fluffy filling.
– Sweeteners: Granulated sugar sets the clean citrus flavor. Powdered sugar works too but can soften the texture a bit.
– Baking Basics (Flour/Sugar/Leaveners): For the crust, plain graham crackers or shortbread are perfect. Avoid “extra cinnamon” versions unless you want that flavor to take over.
– Fats & Oils: Real butter tastes best in the crust. Salted is fine—just taste before adding extra salt anywhere.
Prep Ahead Ideas
– Make the crust and keep it chilling, covered, up to a day ahead. The filling can be mixed in the morning and poured in at lunch.
– Zest and juice your lemons the day before; stash zest in a tiny airtight container and juice in a jar. Label so no one thinks it’s lemonade. Ask me how I know.
– For easy weeknights, assemble the whole pan the night before and let it set while you sleep. Slice after dinner the next day with zero effort.
– If transporting, keep the pan cold with an ice pack underneath and slice on arrival so edges stay clean.
Time-Saving Tricks
– Use a food processor to blitz the crust and then switch to the whisk attachment for the filling—one bowl to wash is my love language.
– Chill your mixing bowl for a few minutes before whipping cream; it goes faster and holds better.
– Line the pan with a parchment sling so bars lift out cleanly—way quicker than trying to dig out corner pieces.
– Don’t rush the chill. The last hour is where the magic set happens; cutting early = squish city.
Common Mistakes
– Using spreadable cream cheese from a tub. I did it once and the bars drooped like a sunburned sunflower. Fix: pop the pan in the freezer for a quick chill before slicing.
– Skipping lemon zest. The juice gives tang; the zest gives perfume. If you forgot it, microplane a little on top before serving.
– Warm butter in the crust. Too hot and the crumbs get greasy. If it happens, add a handful more crumbs and press again—chill longer.
– Not chilling long enough. If you must cut early, use a very sharp knife, wipe between cuts, and embrace the rustic look.
What to Serve It With
– A bowl of mixed berries or a quick blueberry compote.
– Iced mint tea, sparkling water with a lemon wheel, or a cheeky glass of prosecco.
– Salty snacks on the side—kettle chips or pretzels—for that sweet-salty moment.
– A dollop of whipped cream and a dusting of extra zest if you’re feeling fancy.
Tips & Mistakes
– Use a metal pan for faster chill; glass looks pretty but takes longer.
– Press the crust firmly with the bottom of a measuring cup so it doesn’t crumble on you.
– Room-temp cream cheese + cold cream = smooth filling that still whips lofty.
– For clean squares, hot knife, wipe, repeat. It’s therapeutic, actually.
Storage Tips
These bars are fridge creatures—cover the pan tightly and stash for up to four days. They taste amazing cold, straight from the pan, fork optional. For longer storage, freeze the sliced bars on a sheet, then pack into a container with parchment between layers. Thaw in the fridge for a couple hours or eat them frosty like lemon ice-cream cheesecake. Breakfast? Absolutely yes.
Variations and Substitutions
– Crust: Graham is classic. Gingersnaps add warmth. Shortbread feels fancy. Gluten-free cookies work great—just watch sweetness.
– Sweetener swaps: Honey lends floral vibes but can loosen the filling; go light and chill extra. Coconut sugar works but darkens the color.
– Dairy-free: Use a thick dairy-free cream cheese and whipped coconut cream. Add a smidge more zest to brighten the coconut.
– Flavor boosters: A splash of vanilla softens the lemon’s edges. Pinch of sea salt in the crust wakes everything up.
– Topping: Swirl in a spoonful of lemon curd before chilling or finish with shaved white chocolate and poppy seeds for texture.
Frequently Asked Questions
No-Bake Lemon Cheesecake Bars
Ingredients
Main Ingredients
- 2.25 cup graham cracker crumbs
- 6.5 tbsp unsalted butter, melted
- 2.5 tbsp granulated sugar
- 0.125 tsp fine sea salt
- 24 oz cream cheese, softened blocks work best
- 0.75 cup powdered sugar sift if lumpy
- 0.35 cup fresh lemon juice
- 1.25 tbsp finely grated lemon zest
- 0.75 tsp vanilla extract
- 0.55 cup sour cream room temperature
- 0.8 cup heavy cream cold, for whipping
- 0.6 cup lemon curd optional, for topping
- 1 tsp extra lemon zest optional, for garnish
Instructions
Preparation Steps
- Line an 8- or 9-inch square pan with parchment, leaving overhang for lifting.
- Stir graham crumbs, sugar, and salt in a bowl. Pour in melted butter and mix until evenly moistened.
- Press the crumb mixture firmly into the pan to form an even crust. Chill while you make the filling.
- Beat softened cream cheese and powdered sugar until completely smooth and fluffy.
- Blend in lemon zest, lemon juice, vanilla, and sour cream until creamy with no streaks.
- Whip the heavy cream to medium peaks. Gently fold it into the lemon filling until airy.
- Spread the filling over the chilled crust and smooth the top. Cover and refrigerate at least 4 hours, until set.
- Swirl or spread lemon curd over the set cheesecake. Garnish with extra zest, slice into bars, and serve cold.
Notes
Featured Comments
“This simple recipe was absolutely loved — the family favorite really stands out. Thanks!”
“Made this last night and it was absolutely loved. Loved how the healthy swap came together.”
“Impressed! Clear steps and so flavorful results. Perfect for busy nights.”
“Super easy and family favorite! My family asked for seconds. Saving this one.”
“Made this last night and it was absolutely loved. Loved how the weeknight saver came together.”
“New favorite here — turned out amazing. vibrant was spot on.”
“New favorite here — turned out amazing. anytime was spot on.”
“Impressed! Clear steps and turned out amazing results. Perfect for busy nights.”
“Impressed! Clear steps and will make again results. Perfect for busy nights.”
“Impressed! Clear steps and will make again results. Perfect for busy nights.”