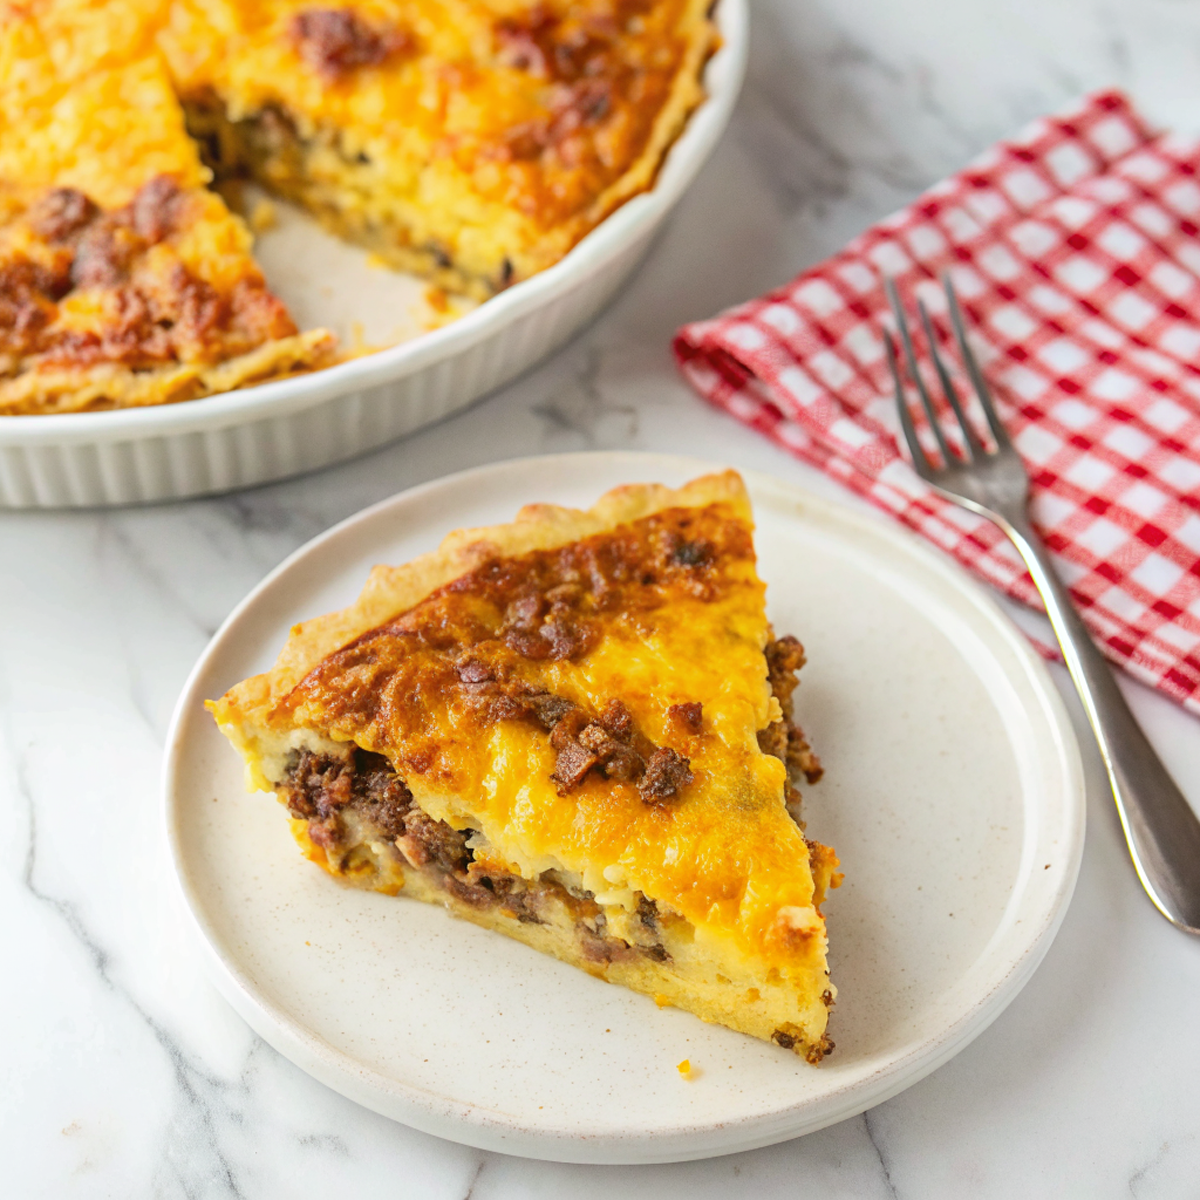
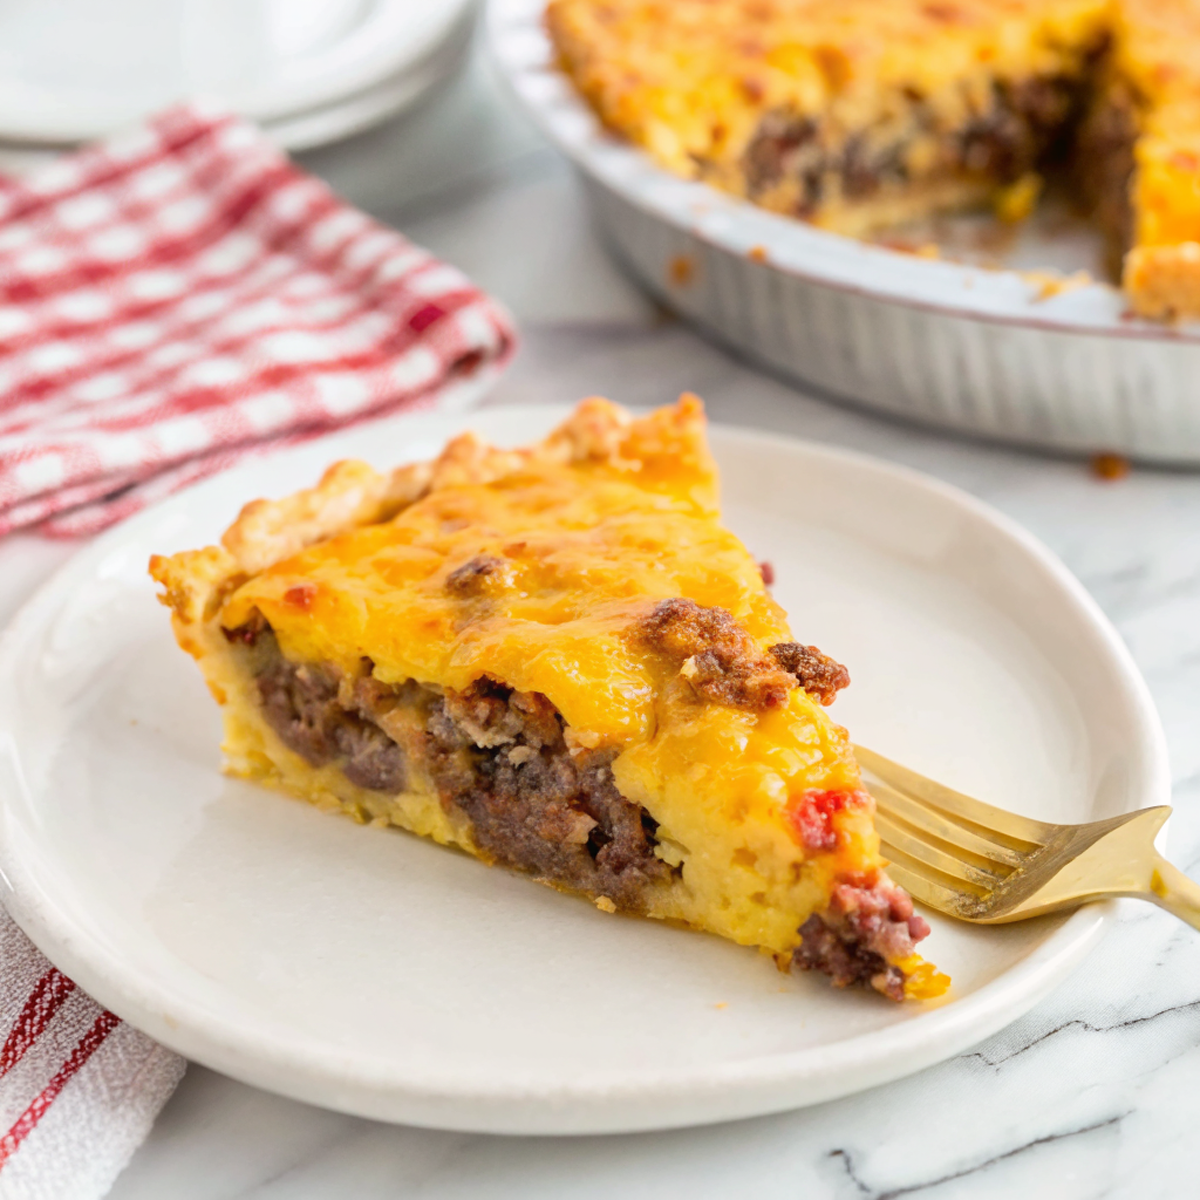
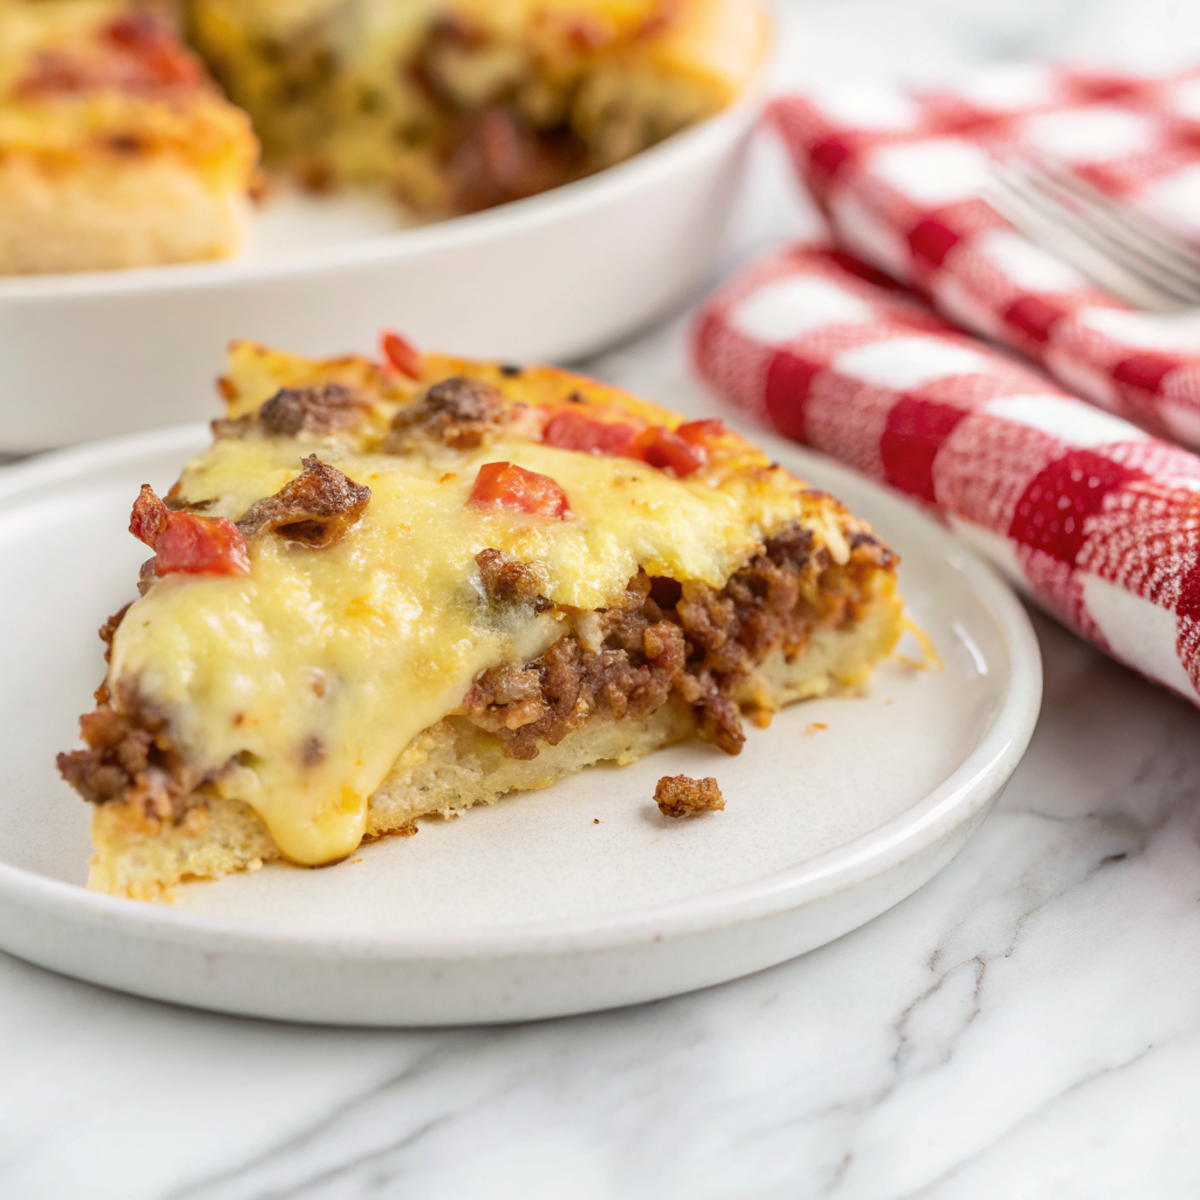
Cheeseburger Pie
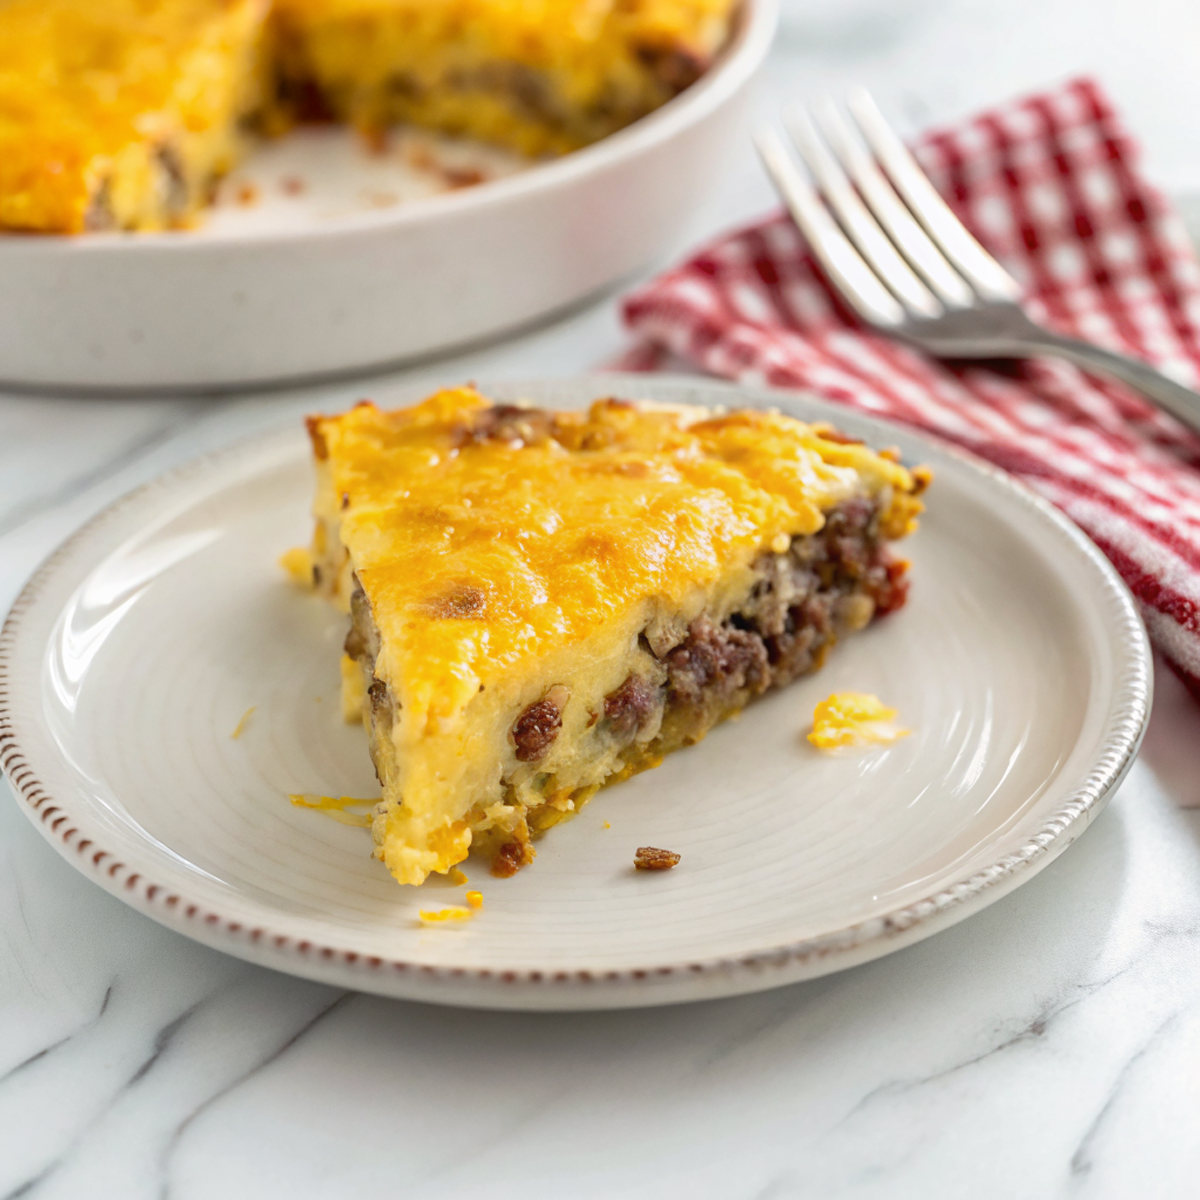
This pie is basically everything good about a burger stuffed into a cozy, cheesy pie — browned ground beef, melty cheese, pickles-if-you-want, and a crust that soaks up all those meaty juices. It’s not fancy. It’s loud, greasy in the best way, and exactly the sort of thing I make when I need everyone fed, fast, and satisfied.
Somewhere between the first time I made it and the hundredth, it became my husband’s official “I survived the week” dinner. He insists on a big scoop with extra pickles (the man loves pickles) and my kid eats it like it’s a personal challenge to finish the whole piece. Once I forgot to preheat the oven and we ate it half-warm straight from the dish — still a hit. It’s one of those family recipes that gets requested when someone needs comfort, celebration, or just plain sustenance.
Why You’ll Love This Cheeseburger Pie
– It tastes exactly like a cheeseburger but with less arguing about napkins and more cheese pull.
– One-pan-ish vibe: filling comes together quickly, then the oven does the rest.
– Super adaptable — swap cheeses, toss in veggies, or go spicy if you’re feeling bold.
– Feeds a crowd, reheats like a dream, and makes excellent breakfast leftovers (no shame).
Kitchen Talk


I’ve ruined one too many pans with extra-saucy versions, so now I brown the meat a touch longer and drain the excess. Once I tried shredding cheddar instead of cubing and honestly, the texture was more melty-love and less chunky-crunch — both are fine, just different vibes. Also, pro tip: if you’re topping with a pastry crust, poke a few holes so the steam escapes. I once forgot and had a small geyser of grease bubble out the sides — funny, messy, lesson learned.
MORE OF OUR FAVORITE…
Shopping Tips
– Protein: Use 80/20 ground beef for flavor and juiciness; leaner meat dries out the filling unless you add extra fat.
– Cheese: A mix of sharp cheddar and a melty cheese (Monterey Jack or American) gives you both flavor and stretch; pre-shredded works in a pinch.
– Vegetables: Yellow onion and a clove or two of garlic are all you need to wake up the filling; dice them small so they disappear into the pie.
– Canned Goods: If using canned tomato sauce or diced tomatoes, pick low-sodium so you control the salt level later.
– Frozen Aisle: Frozen peas or corn can be stirred in if you want a veg boost — no need to thaw fully before adding.
Prep Ahead Ideas
– Brown the meat and sauté the onions a day before, cool, and stash in an airtight container in the fridge. Reheat and assemble when you’re ready.
– Mix the cheese and keep it covered in the fridge so it’s ready to sprinkle; if you shred your own, toss it with a tiny bit of cornstarch to prevent clumping.
– If using a biscuit or pastry topping, you can make the dough the night before and keep it chilled; roll or drop it on before baking.
– Store prepped components in clear tubs or labeled zip bags so family members can assemble quickly on busy nights.
Time-Saving Tricks
– Use pre-shredded cheese and pre-chopped onions if you’re in full lazy-mom mode — it saves 10–15 minutes.
– Make it in a wider, shallower dish so it bakes faster and more evenly.
– Brown the meat while the oven preheats, so everything’s ready to go and you’re not waiting around.
– Quick shortcut: toss frozen mixed veggies straight into the hot meat in the skillet to warm through — no thawing required.
Common Mistakes
– Don’t overload the filling with liquid-y tomatoes or sauce — I did that once and the crust went soggy; remedy: simmer a bit longer to reduce, or drain excess juices before topping.
– If your cheese melts out the sides and burns, either use less on the edges or line the dish with foil to catch drips.
– Overbake the crust? It gets dry fast. Check it a few minutes early and cover with foil if it’s browning too quickly.
– I once used extra-lean beef and the pie was oddly dense — lesson: a little fat = flavor and moisture.
What to Serve It With
– Simple green salad with tangy vinaigrette — cuts through the richness.
– Crispy oven fries or sweet potato wedges for full burger vibes.
– Quick coleslaw for crunch and bright acid.
– Pickles and extra ketchup or mustard on the side for build-your-own bites.
Tips & Mistakes
– Use medium-high heat to brown the meat — flavor lives in those browned bits.
– Salt toward the end if you used low-sodium canned goods; it’s easier to dial in.
– If the filling seems bland after baking, a splash of vinegar or a squeeze of mustard wakes it up.
– One time I forgot the breadcrumbs on top — still tasty, but add them next time for texture.
Storage Tips
Leftovers live fine in the fridge for 3–4 days in an airtight container. Reheat slices in a hot oven or skillet to keep the crust from going rubbery; the microwave is fine in a pinch but sacrifices crisp. Cold slices? Totally edible and weirdly great for breakfast with coffee — no judgment here.
Variations and Substitutions
– Vegetarian version: swap the beef for crumbled tempeh or a seasoned lentil mix — add some umami (soy sauce or miso) so it doesn’t taste sad.
– Spicy: stir in chopped jalapeños or a dash of hot sauce to the filling.
– Crust options: biscuit topping, puff pastry, or a traditional pie crust all work; each changes the texture but keeps the soul.
– Cheese swaps: Swiss or Gruyère give a nuttier note; pepper jack if you want heat.
Frequently Asked Questions
Cheeseburger Pie
Ingredients
Beef layer
- 1 lb ground beef (85–90% lean)
- 3/4 cup diced yellow onion
- 2 cloves garlic, minced
- 3/4 teaspoon burger seasoning
- 1/2 teaspoon kosher salt
- 1/4 teaspoon black pepper
- 1 tablespoon yellow mustard
- 1 teaspoon Worcestershire sauce
- 1/4 teaspoon smoked paprika
Batter and cheese
- 2 large eggs
- 1 cup whole milk
- 2/3 cup Bisquick baking mix
- 1 1/4 cups shredded sharp cheddar cheese, divided
- nonstick spray, for the pie dish
To serve (optional)
- dill pickles, chopped
- ketchup, for drizzling
Instructions
Preparation Steps
- Whisk the eggs and milk in a medium bowl. Sprinkle in the Bisquick and whisk until smooth. Let the batter rest 10 minutes to hydrate while you prepare the filling.
- Set a rack in the middle of the oven and preheat to 385°F. Lightly coat a 9-inch deep pie dish with nonstick spray.
- Warm a large skillet over medium heat. Add the ground beef and onion and cook, breaking up the meat, until the beef is mostly browned and the onion is tender, 6–8 minutes. Stir in the burger seasoning, salt, and pepper. Add the garlic, mustard, Worcestershire, and smoked paprika; cook 30–60 seconds more until fragrant. Drain excess fat and let the mixture cool for 2 minutes off the heat.
- Give the batter a quick whisk. Pour about one-third of it into the prepared pie dish and tilt to coat the bottom in a thin layer. Par-bake this base for 5 minutes to set.
- Spread the beef mixture evenly over the set base. Sprinkle half of the cheddar over the beef. Pour the remaining batter on top, tilting the dish so it flows into the gaps without disturbing the layers.
- Bake until the pie is puffed around the edges and the center just sets, 18–22 minutes. Scatter the remaining cheddar over the top and return to the oven until melted and lightly golden, 3–4 minutes (or broil 1–2 minutes for extra color).
- Rest the pie 10 minutes before slicing. Top with chopped dill pickles and a drizzle of ketchup, if you like.
- Tip: For the cleanest slices, blot any excess fat from the skillet before filling the pie dish and wipe the knife between cuts.
Notes
Featured Comments
“Impressed! Clear steps and absolutely loved results. Perfect for busy nights.”
“Super easy and will make again! My family asked for seconds. Saving this one.”
“Super easy and absolutely loved! My family asked for seconds. Saving this one.”
“Made this last night and it was family favorite. Loved how the flaky came together.”
“New favorite here — so flavorful. flavorful was spot on.”
“Made this last night and it was turned out amazing. Loved how the flavorful came together.”
“This gooey recipe was turned out amazing — the baked really stands out. Thanks!”
“New favorite here — so flavorful. picky-eater approved was spot on.”
“Impressed! Clear steps and family favorite results. Perfect for busy nights.”
“New favorite here — will make again. allergen-friendly was spot on.”