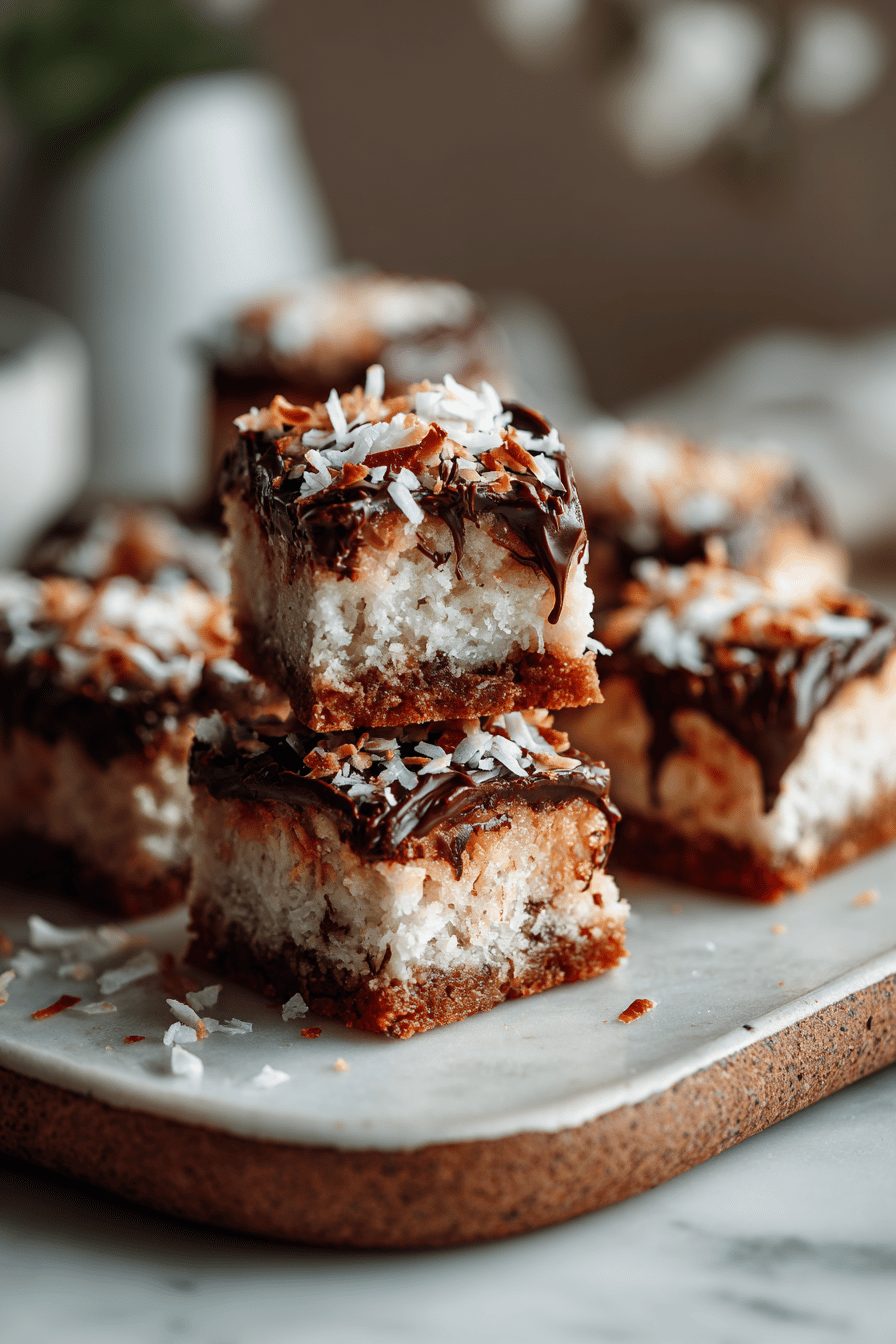
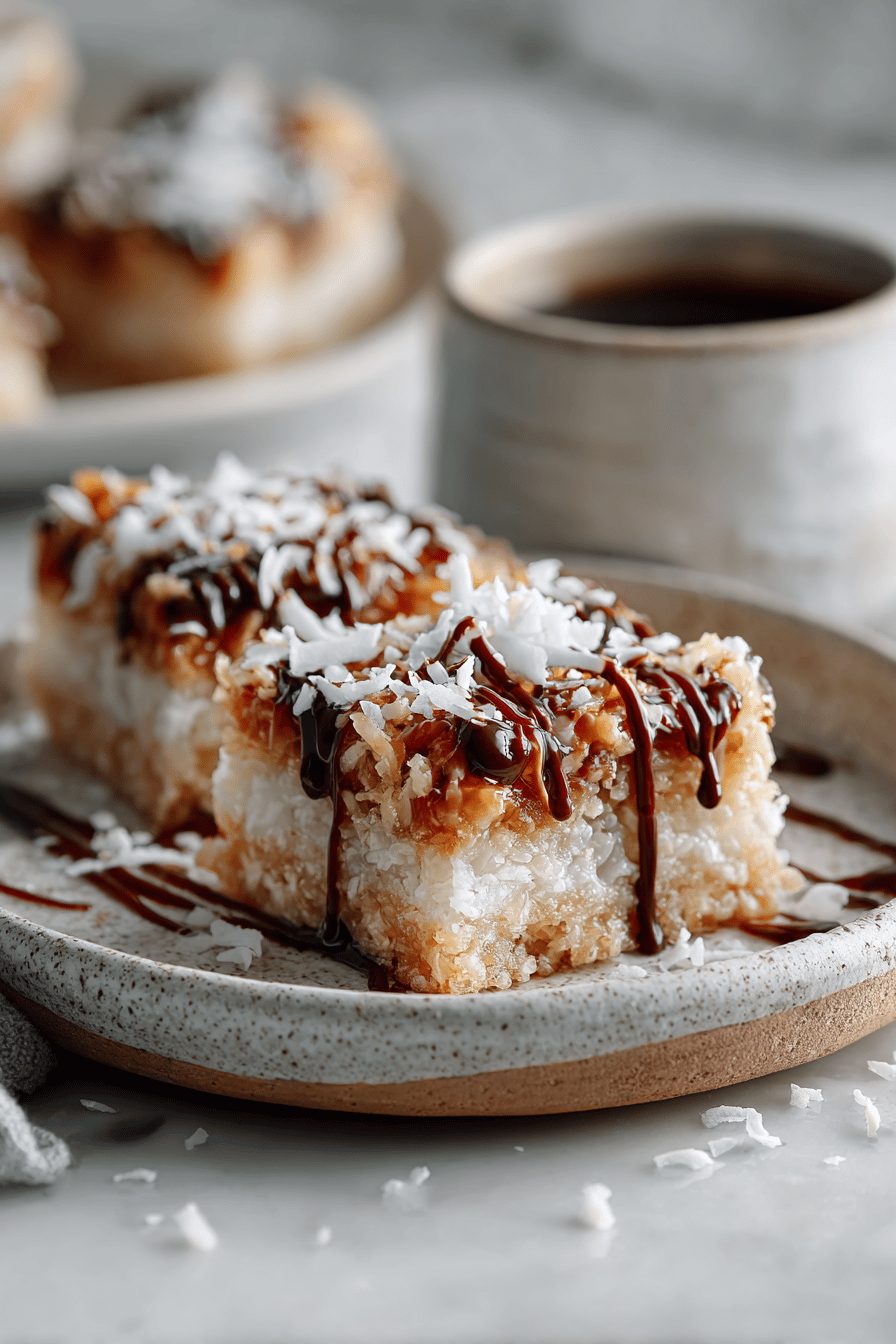
Samoa Cookie Bars Recipe
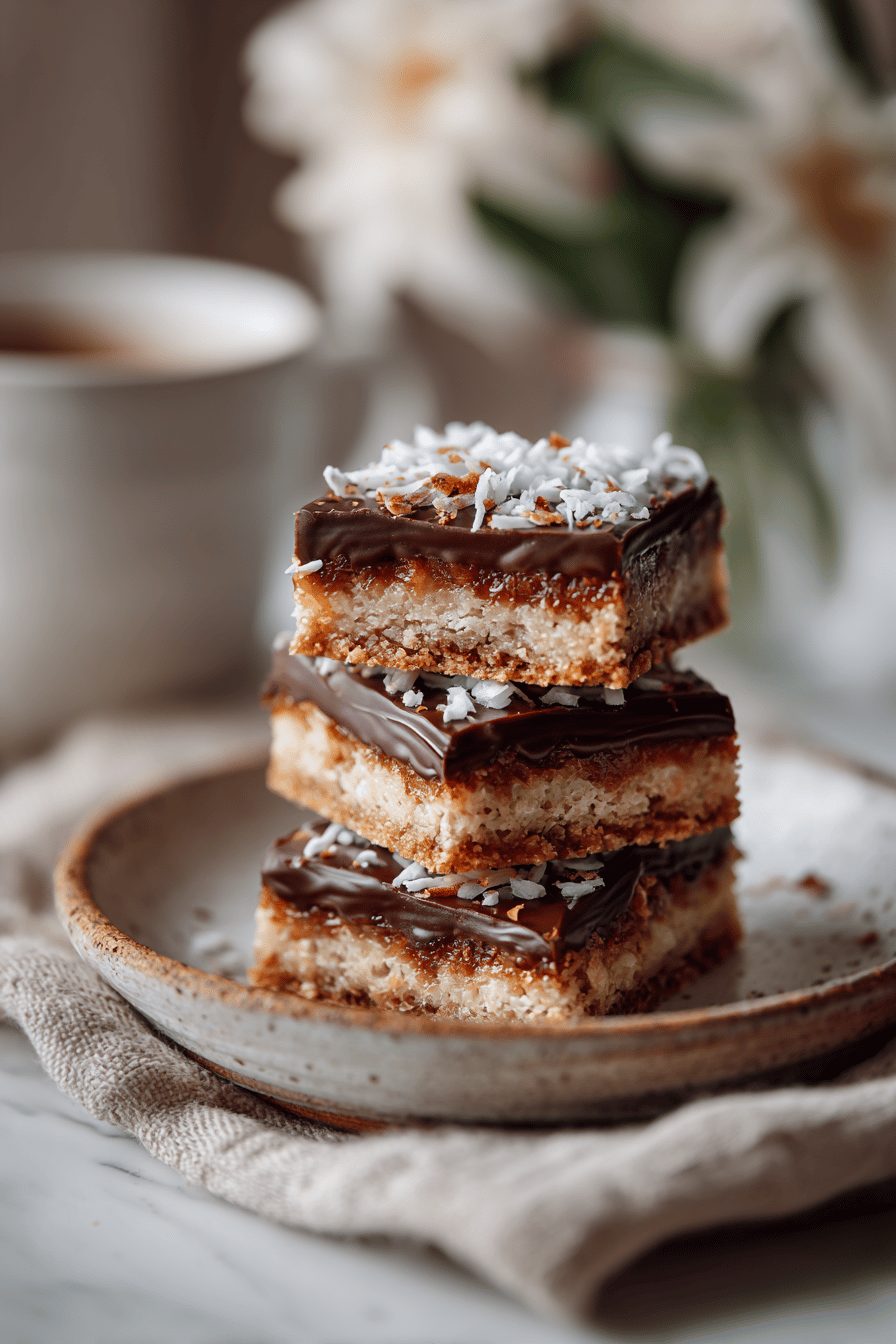
I started making these Samoa cookie bars because I wanted all the Girl Scout-cookie chaos—chewy caramel, toasted coconut, melty chocolate—without lining up for summer kids outside the grocery store. These bars are basically a crowd-pleasing shortcut: a crunchy cookie-ish base, a sticky caramel-coconut middle, and a sloppy-good chocolate drizzle. They’re indulgent, messy, and exactly the kind of thing I’ll unapologetically bring to a potluck.
My husband calls them “danger squares” because one always leads to another. The kids (and our dog, if we’re not looking) hover like it’s a magic trick. Once I made a pan for movie night and hid the leftovers in the back of the fridge — he found them three hours later like a dessert detective. Now it’s a staple when friends drop by or when I need to bribe someone to mow the lawn.
Why You’ll Love This Samoa Cookie Bars Recipe
– Caramel + toasted coconut + chocolate = nostalgic, sticky, and comforting all at once.
– Easier and less fussy than making tiny individual cookies, but all the same delicious chaos.
– Great for sharing: they travel well and slice into bars you can toss on a plate.
– The texture contrast keeps you coming back — crisp edges, chewy center, and that smooth chocolate top.
Kitchen Talk
MORE EASY DESSERT RECIPES...


I burned the first batch of toasted coconut the first time I made these because I walked away to answer an urgent text about socks. Lesson learned: coconut goes from golden to “weird smoke” in seconds. I also once tried swapping the caramel for dulce de leche from a can, and honestly? It made the bars silkier and hella convenient. Other times I’ve messed with the base — crushed shortbread, crushed graham, even crushed chocolate cookies — and each gives a slightly different vibe. These bars are forgiving, which is my favorite kind of recipe.
These Samoa Cookie Bars are a total crowd-pleaser—rich, chewy, and packed with that classic coconut-caramel-chocolate combo. I loved how easy they were to make, and everyone kept coming back for more!
MORE OF OUR FAVORITE…
Shopping Tips
– Baking Basics (Flour/Sugar/Leaveners): If you’re making a scratch base, go for all-purpose flour and stick to granulated sugar for predictable texture; don’t accidentally grab superfine or baker’s sugar unless you know what you’re doing.
– Fats & Oils: Use unsalted butter so you control the salt level—salted butter can make the caramel overly salty fast.
– Chocolate: Buy good melting chocolate or chocolate chips labeled “for baking” — they melt smoother and set up nicer on bars.
– Nuts & Seeds: If you add nuts (macadamia or pecans are lovely), toast them briefly for more flavor and less moisture in the bars.
– Sweeteners: For the caramel element, store-bought soft caramels or jarred dulce de leche are fine and save time; check labels for added oils if you want a cleaner flavor.
Prep Ahead Ideas
– Toast the coconut a day ahead and store it in an airtight container so it’s ready to go (keeps the toasty flavor and prevents last-minute burning).
– Make the caramel layer earlier in the day and let it cool slightly before assembling; it’s easier to spread when it’s tacky but not piping hot.
– Crushed cookie base or crumbs can be stored in a zip-top bag at room temp for a couple of days; press into the pan right before layering.
– Assemble the bars and keep them chilled; slice after chilling so clean squares are easier. Use a plastic container or wrapped baking pan for fridge storage.
Time-Saving Tricks
– Use store-bought shortbread or vanilla cookies and crush them for the base instead of baking from scratch.
– Buy soft caramels and melt them with a splash of cream — way faster than simmering sugar.
– Microwave chocolate in short bursts to melt for drizzling if you’re impatient like me.
– Don’t skip the chill: a quick refrigerate makes clean slicing so you won’t waste half the pan getting sad, jagged pieces.
Common Mistakes
– Toasting coconut too long: I’ve done it. Keep it moving and pull it off at golden brown—not “forest fire brown.” If it’s too dark, toss it and start over.
– Caramel too runny: If it’s still super loose, pop the pan in the fridge a bit before slicing so layers set. If it’s super thin, simmer it down a touch next time.
– Slicing too soon: Cutting warm bars is a knife-wreck. Let them chill so chocolate firms and caramel chills for cleaner cuts.
– Overbaking the base: crisp edges are great, but a rock-hard base is not. Pull it when it’s set and slightly golden.
What to Serve It With
– A big mug of black coffee or espresso—this is classic and needed.
– Vanilla ice cream, spooned over a warm-ish square for that hot/cold thing.
– A simple green salad if you need a tiny, virtuous side to balance the sugar.
– Cold milk, for the cookie-child in all of us.
Tips & Mistakes
– Press crumbs evenly into the pan so the caramel layer doesn’t pool in low spots.
– If you drizzle chocolate right after the caramel, it sticks better; wait too long and the chocolate slips.
– Heat chocolate slowly—burnt chocolate can ruin the whole vibe.
– One time I used shredded coconut instead of toasted flakes; it made the bars chewier and I didn’t hate it.
Storage Tips
Store bars in an airtight container in the fridge for up to a week; they firm up and slice neater cold. Room temp is fine for a day or so if it’s not too warm. They’re strangely great for breakfast — cold, chewy, chocolatey — no judgment here. For longer storage, freeze slices separated by parchment for up to 3 months; thaw in the fridge or at room temp.

Variations and Substitutions
– Gluten-free: use gluten-free cookie crumbs or almond flour plus a touch of butter for the base — texture shifts but it works.
– Nut-free: skip nuts entirely or swap in extra coconut for crunch.
– Healthier-ish: swap some butter for coconut oil and use less caramel, but, like, it won’t be exactly the same guilty pleasure.
– Chocolate swap: dark chocolate gives a bitter contrast, milk chocolate keeps it classic and sweet.
– Missing coconut lovers: you can skip the coconut and have a caramel-chocolate bar — not a Samoa, but still very good.
Frequently Asked Questions
Samoa Cookie Bars Recipe
Ingredients
Main Ingredients
- 9 tbsp unsalted butter, softened for crust
- 0.33 cup granulated sugar
- 2 tsp vanilla extract divided
- 1.1 cup all-purpose flour
- 0.5 tsp fine sea salt divided
- 2.25 cup sweetened shredded coconut lightly packed
- 12 oz soft caramel candies, unwrapped
- 3 tbsp heavy cream
- 1.5 tbsp unsalted butter for caramel
- 1.3 cup semisweet chocolate chips
- 1 tsp vegetable oil or coconut oil
- 0.25 tsp flaky sea salt optional garnish
Instructions
Preparation Steps
- Heat oven to 350°F. Line an 8-inch square pan with parchment, leaving overhang.
- Toast coconut on a sheet pan until golden, 6–8 minutes, stirring once. Cool completely.
- Beat softened butter and sugar until creamy. Mix in 1 tsp vanilla and 1/4 tsp salt.
- Add flour and mix just until a soft dough forms. Press evenly into the lined pan.
- Bake crust until edges are lightly golden, 18–22 minutes. Set the pan on a rack.
- Melt caramels, cream, and 1.5 tbsp butter over low heat, stirring until smooth and glossy.
- Stir in remaining 1 tsp vanilla and 1/4 tsp salt. Fold in the toasted coconut.
- Spread coconut-caramel over the warm crust. Press gently to level. Chill 15–20 minutes.
- Microwave chocolate chips with oil in 20-second bursts, stirring, until smooth and pourable.
- Spread a thin chocolate layer on top. Drizzle extra over lines. Sprinkle flaky salt, if using.
- Chill until set. Lift out by parchment and slice into 16 bars with a warm knife.
Notes
Featured Comments
“Impressed! Clear steps and will make again results. Perfect for busy nights.”
“New favorite here — turned out amazing. crispy crust was spot on.”
“This baked recipe was will make again — the hearty really stands out. Thanks!”
“This flavor-packed recipe was will make again — the pressure-cooked really stands out. Thanks!”
“New favorite here — family favorite. grab-and-go was spot on.”
“Made this last night and it was family favorite. Loved how the crowd-pleasing came together.”
“Super easy and absolutely loved! My family asked for seconds. Saving this one.”
“New favorite here — absolutely loved. playful was spot on.”
“Made this last night and it was turned out amazing. Loved how the fresh catch came together.”
“Impressed! Clear steps and will make again results. Perfect for busy nights.”