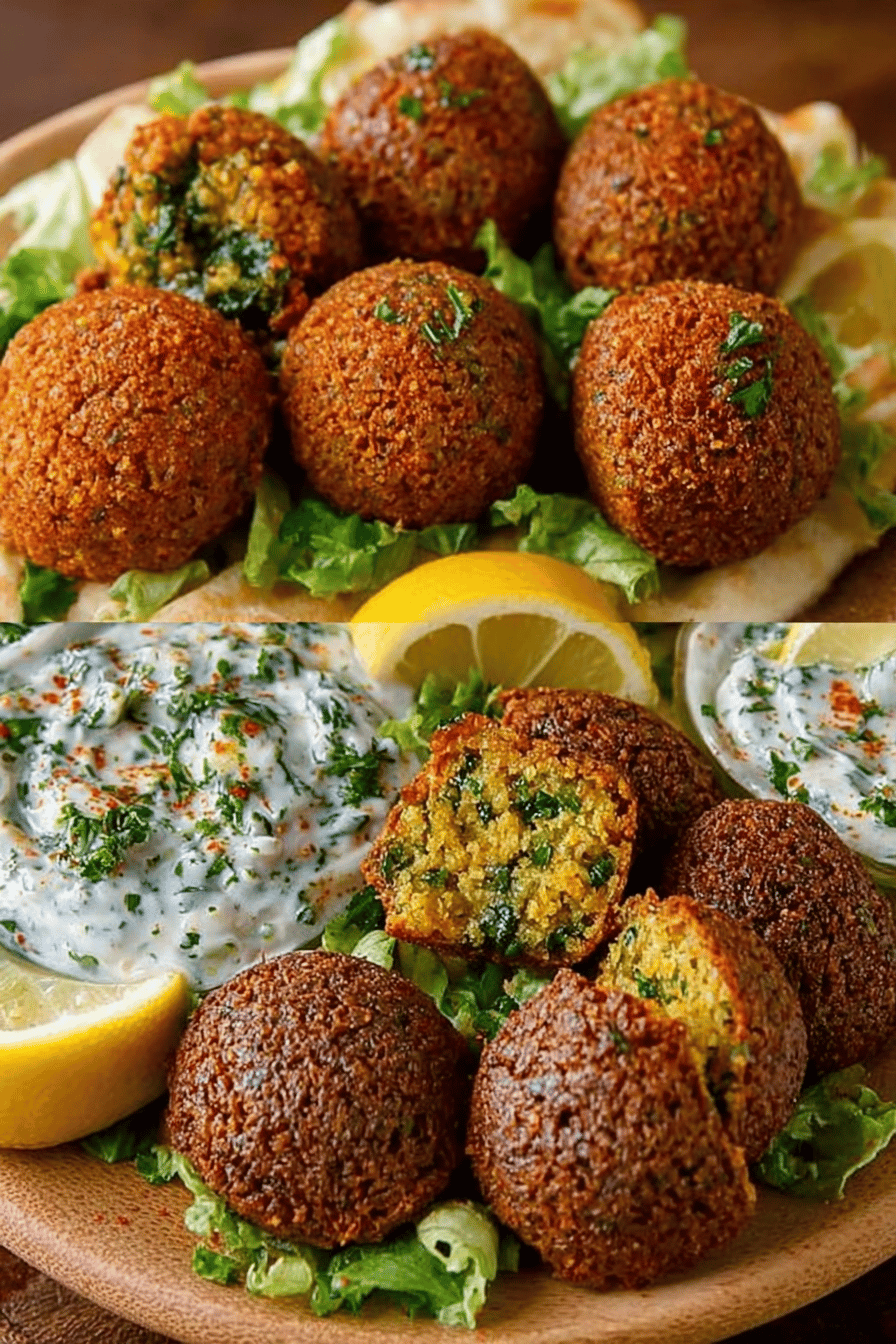
Easy Classic Falafel from Scratch

Falafel, baby! These little fried balls of chickpea goodness are, like, a weekly thing at my house. We stuff ’em in pitas, crumble ’em on salads, or just straight-up eat ’em hot off the pan. I used to be intimidated by making them from scratch, but honestly? It’s way easier than you think, and the flavor is a million times better than anything you can buy pre-made. Plus, you get to control all the ingredients, which is a win in my book. Seriously, ditch the store-bought stuff and give these a whirl. You won’t regret it.
My husband, Mark, is obsessed with these! He always says he could eat them every day. One time, I made a huge batch for a party, and he snuck into the kitchen and ate, like, half of them before anyone even arrived! The kids love dipping them in hummus, and honestly, it’s one of the only ways I can get them to eat their veggies without a fight. They call them “chickpea nuggets” so they think they’re eating chicken nuggets LOL. I’ve been making these weekly for years, and I’m not planning on stopping any time soon. They are the perfect quick snack or delicious meal!
Why You’ll Love This Easy Classic Falafel from Scratch
- They’re seriously addictive. Like, “can’t stop popping them in your mouth” addictive.
- Way better than store-bought – and you know exactly what’s in them. No weird preservatives!
- Super versatile. Pita pockets, salads, snack time – they work for everything.
- Kids actually LOVE them! (That’s a win in my book.)
- They are easy to customize to your spice preferences!
How to Make It
Alright, here’s the deal. First, you gotta soak your chickpeas. Don’t even think about skipping this! It’s important. Then, it’s basically a dump-and-blend situation. Throw all your stuff – herbs, spices, onions, garlic, the soaked chickpeas obvs – into a food processor and whiz it all up until it’s finely ground. You don’t want a puree, but you don’t want huge chunks, either. Get it right, you know?


Now, let that mixture chill out in the fridge for at least 30 minutes. This is key for getting them to hold together. Then, roll ’em into balls. I like to use a small cookie scoop to make them uniform, but honestly, who cares? They’re gonna taste good no matter what shape they are.
MORE OF OUR FAVORITE…
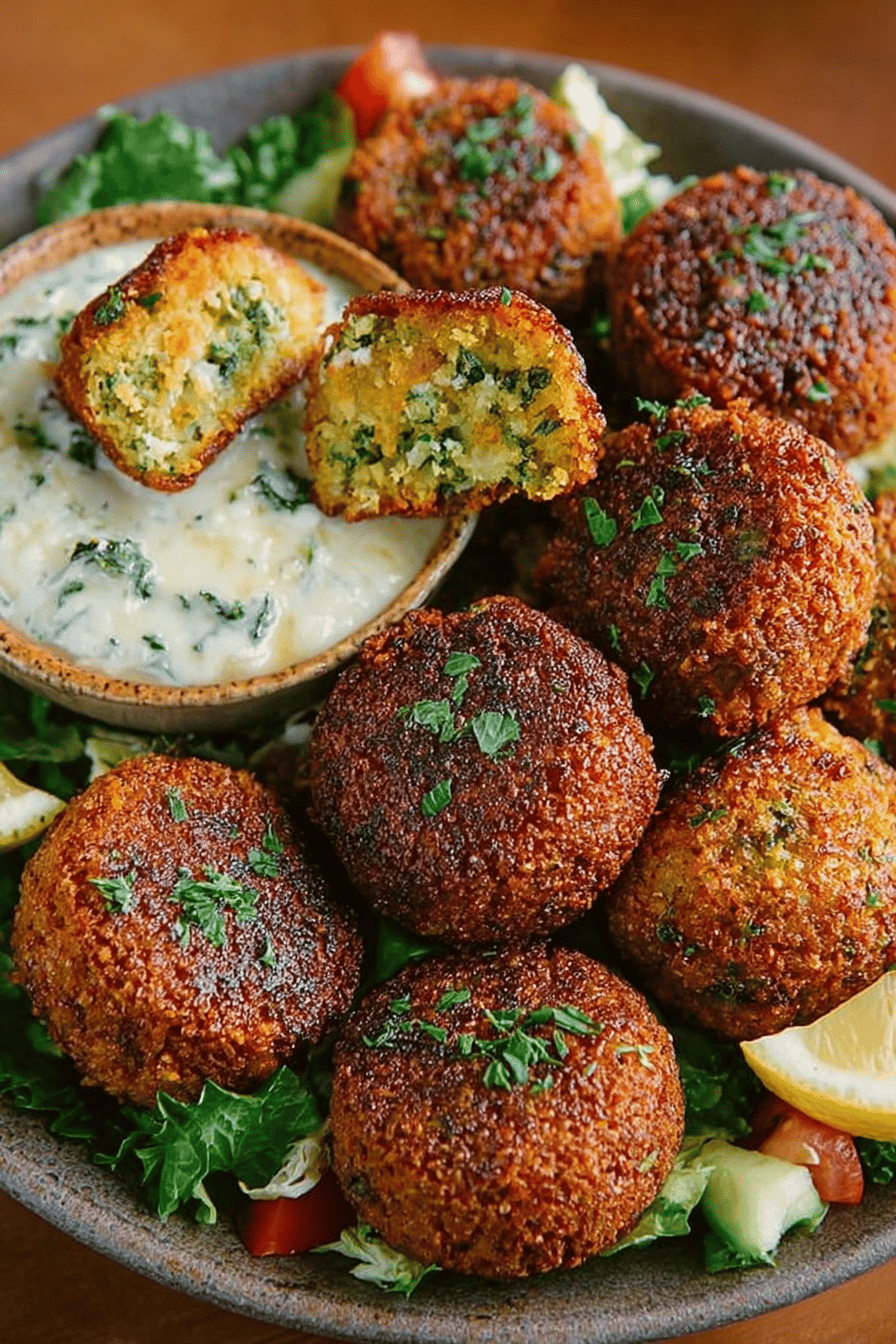
Heat some oil in a pan (I use olive oil, but any oil with a high smoke point works) and fry those babies until they’re golden brown and crispy on the outside. Don’t overcrowd the pan! That’s a rookie mistake. And watch them carefully, because they can burn fast. Nobody wants burnt falafel.
Take them out of the pan and put them on a plate lined with paper towels to absorb any excess oil. Then, dig in! Honestly, I usually burn my tongue because I can’t wait for them to cool down. Don’t be like me, but also… I get it.
Ingredient Notes
- Dried Chickpeas: Seriously, don’t try to use canned! I tried that once in a hurry, disaster, disaster, disaster. Stick with dried, and soak ’em overnight. Trust me on this one.
- Fresh Herbs (Parsley, Cilantro): Don’t skimp! These give the falafel that fresh, vibrant flavor. If you hate cilantro (I know some people do), just use more parsley. It’ll be fine.
- Onion & Garlic: Gotta have ’em! I usually use a yellow onion, but white works too. As for garlic, I like a lot, but you do you.
- Spices (Cumin, Coriander, Chili Powder): This is where you can get creative. I like a little kick, so I always add chili powder, but you can adjust to your liking. Sometimes I throw in a pinch of smoked paprika. Yummy.
- Baking Powder: This helps the falafel to be nice and fluffy. Don’t forget it! I may or may not have forgotten it once…they were bricks!
- Flour: Just a little bit to help bind everything together. I usually use all-purpose, but chickpea flour works too if you’re feeling fancy.
- Sesame Seeds: Optional, but I love the added crunch and flavor. Plus, they look pretty!
Recipe Steps:
- Soak dried chickpeas in water overnight.
- Drain and rinse the soaked chickpeas.
- Combine chickpeas, herbs, onion, garlic, spices, baking powder, and flour in a food processor.
- Process until finely ground but not pureed.
- Chill the mixture in the refrigerator for at least 30 minutes.
- Shape the mixture into small balls.
- Heat oil in a pan over medium heat.
- Fry falafel until golden brown and crispy.
- Drain on paper towels.
- Serve immediately and enjoy!
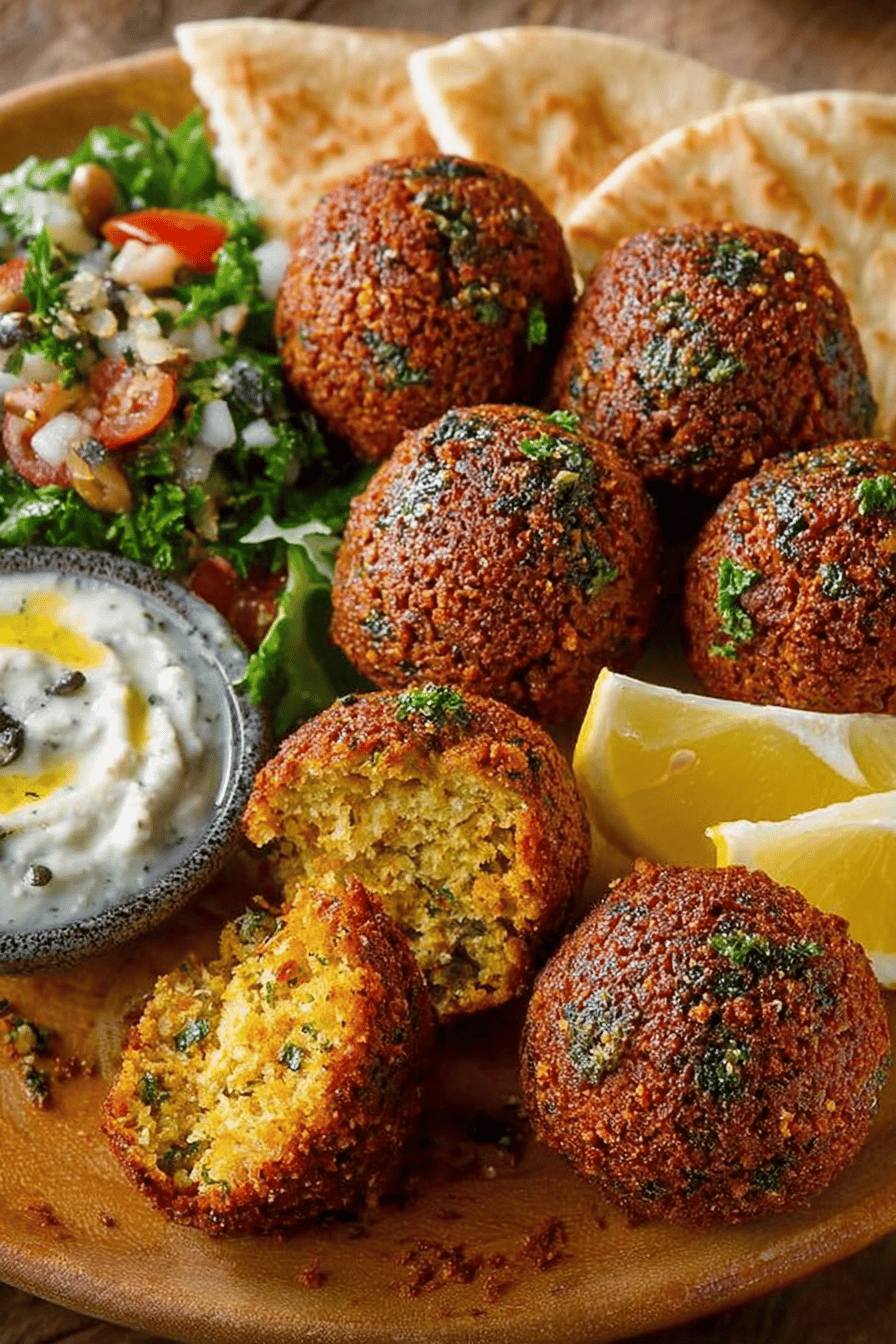
What to Serve It With
Okay, so falafel is amazing on its own, but it’s even better with friends. I love stuffing them in pita pockets with hummus, tahini sauce, chopped tomatoes, cucumbers, and some pickled onions (if I have them). They’re also fantastic crumbled on top of salads, or served with a side of baba ghanoush. Oh, and don’t forget the hot sauce! I’m a sriracha girl myself. I also like putting some on avocado toast sometimes, don’t knock it until you try it!
Tips & Mistakes
- Don’t over-process the mixture! You want it to be finely ground, but not a puree. If you over-process it, the falafel will be mushy. No bueno.
- Make sure the oil is hot enough! If the oil isn’t hot enough, the falafel will absorb too much oil and be greasy. Nobody wants that. I always check if the falafel mixture sizzles when dropped in the oil.
- Don’t overcrowd the pan! This will lower the temperature of the oil and cause the falafel to steam instead of fry.
- Don’t be afraid to experiment with spices! Add a pinch of cayenne pepper for extra heat, or some za’atar for a Middle Eastern twist.
- Taste the mixture before you fry! You can adjust the seasonings to your liking. I always do a little taste test before forming the falafel.
Storage Tips
Leftover falafel will keep in the fridge for about 3-4 days. Honestly, they’re never around that long at my house! Just reheat them in the oven or a pan until they’re warmed through and crispy again. You can also eat them cold, straight from the fridge. I’m not gonna lie, I’ve totally had cold falafel for breakfast. Don’t judge. You can also freeze them! Let them cool completely, then freeze in a single layer on a baking sheet. Once they’re frozen solid, transfer them to a freezer bag. They’ll keep in the freezer for up to 3 months.
Variations and Substitutions
- Gluten-Free: Use chickpea flour instead of all-purpose flour. Easy peasy!
- Spice Level: Adjust the amount of chili powder to your liking, or add a pinch of cayenne pepper for extra heat. If you’re not into chili, just skip it!
- Herbs: If you don’t like cilantro, use more parsley. You can also add other herbs like mint or dill. I once used some dried herbs because I ran out of fresh, definitely not ideal, but it worked in a pinch!
- Beans: I haven’t tried any other beans, but if you’re feeling brave, go for it and tell me what happens!
- Sweeteners: If you want to add a little sweetness, you can add a touch of maple syrup or honey to the falafel mixture.
Frequently Asked Questions
Easy Classic Falafel from Scratch
Ingredients
Main Ingredients
- 1.5 cups dried chickpeas soaked overnight
- 1 cup fresh parsley packed
- 0.5 cup fresh cilantro packed
- 1 medium onion chopped
- 3 cloves garlic minced
- 1 tsp cumin
- 1 tsp ground coriander
- 1.5 tsp salt
- 0.5 tsp black pepper freshly ground
- 0.5 tsp baking powder
- 4 tbsp all-purpose flour as needed
- 1 cup vegetable oil for frying
Instructions
Preparation Steps
- Drain and rinse the soaked chickpeas.
- In a food processor, add the chickpeas, parsley, cilantro, onion, garlic, cumin, ground coriander, salt, and pepper. Process until the mixture is finely ground.
- Spread the mixture onto a large plate and flatten. Sprinkle baking powder and flour evenly over the top and mix with your hands until just combined.
- Form the mixture into small balls or patties using your hands.
- In a deep pan, heat oil over medium heat until hot. Carefully fry the falafel balls until golden brown, about 3-4 minutes per side.
- Remove falafel from oil and drain on a paper towel-lined plate.
Notes
Nutrition
Featured Comments
“New favorite here — family favorite. bite-sized was spot on.”
“This flavorful recipe was turned out amazing — the shareable really stands out. Thanks!”
“This flavorful recipe was absolutely loved — the shareable really stands out. Thanks!”
“New favorite here — turned out amazing. bite-sized was spot on.”
“This bite-sized recipe was so flavorful — the shareable really stands out. Thanks!”
“This crispy recipe was family favorite — the flavorful really stands out. Thanks!”
“Impressed! Clear steps and absolutely loved results. Perfect for busy nights.”
“Impressed! Clear steps and turned out amazing results. Perfect for busy nights.”
“Super easy and will make again! My family asked for seconds. Saving this one.”
“This bite-sized recipe was will make again — the shareable really stands out. Thanks!”