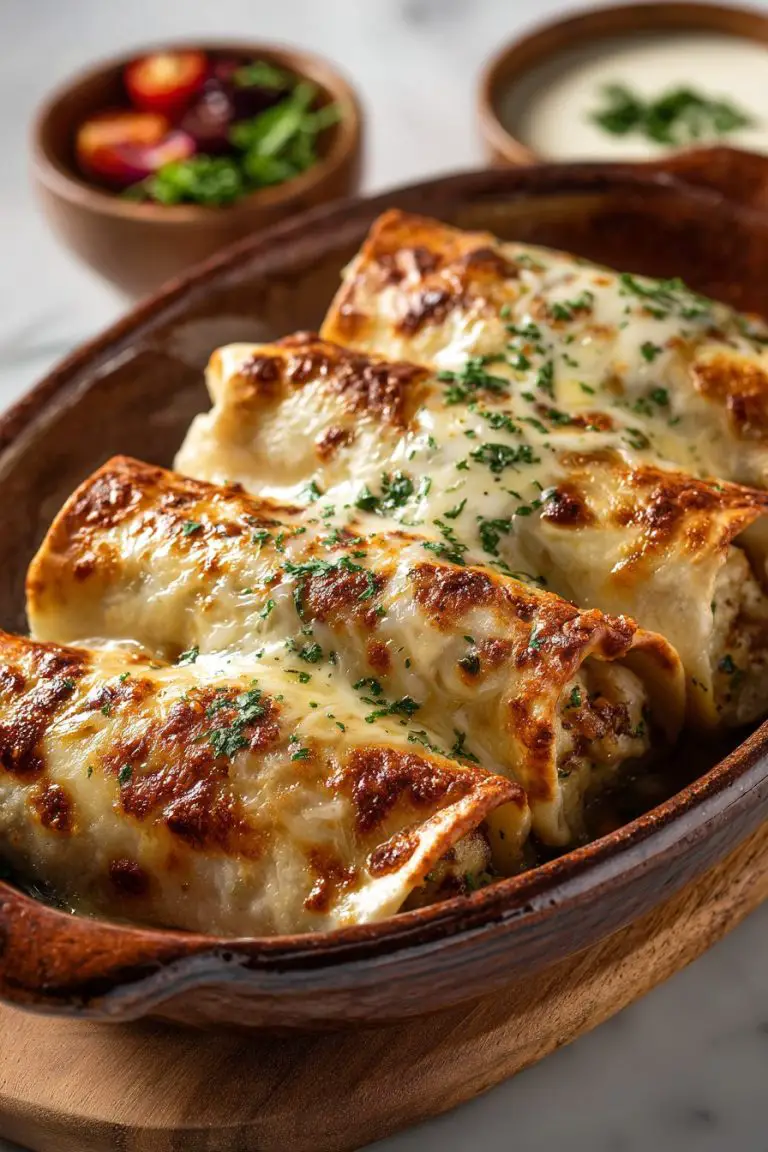
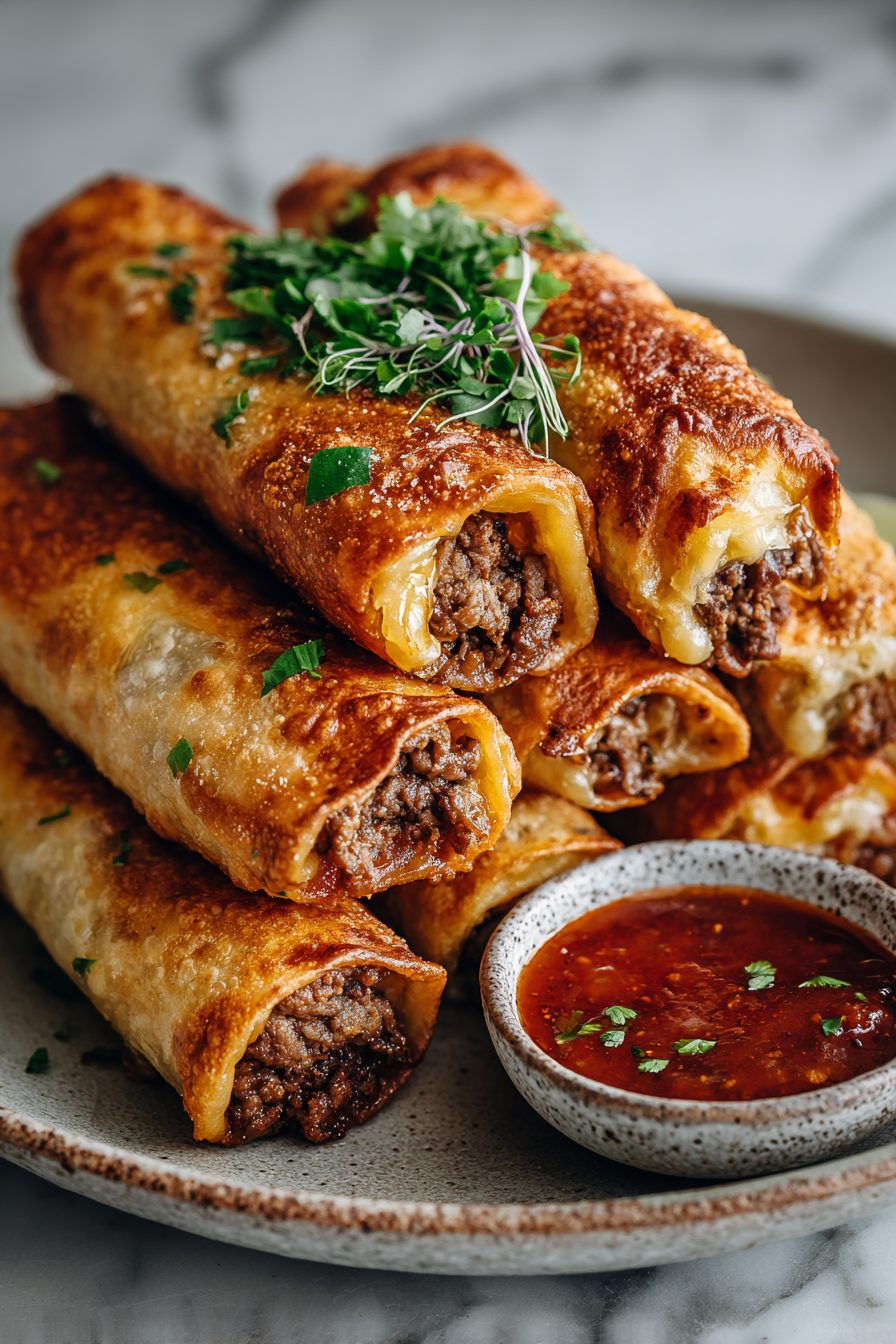
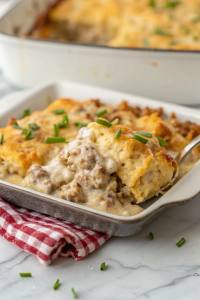
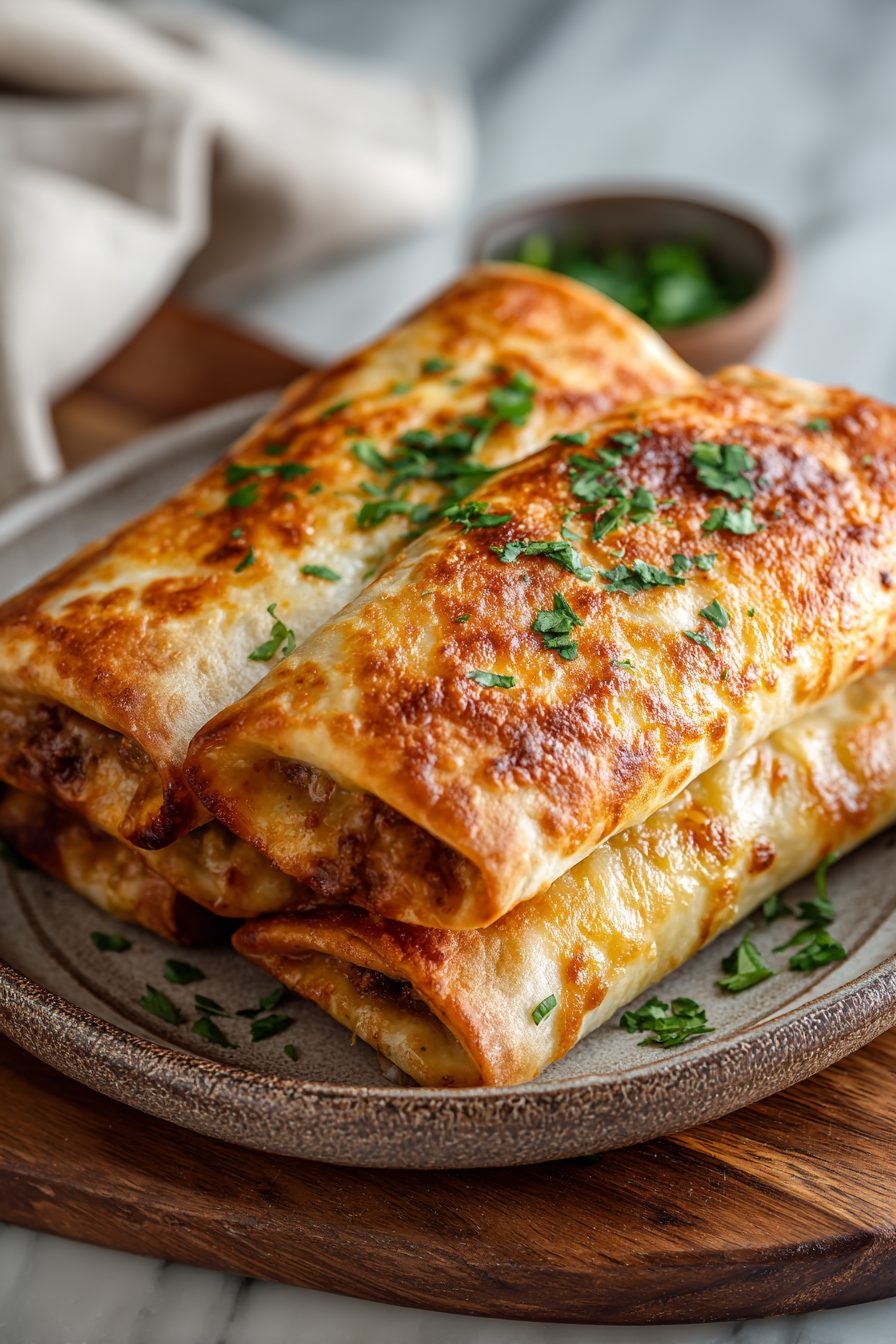
Chimichangas with Beef and Cheese
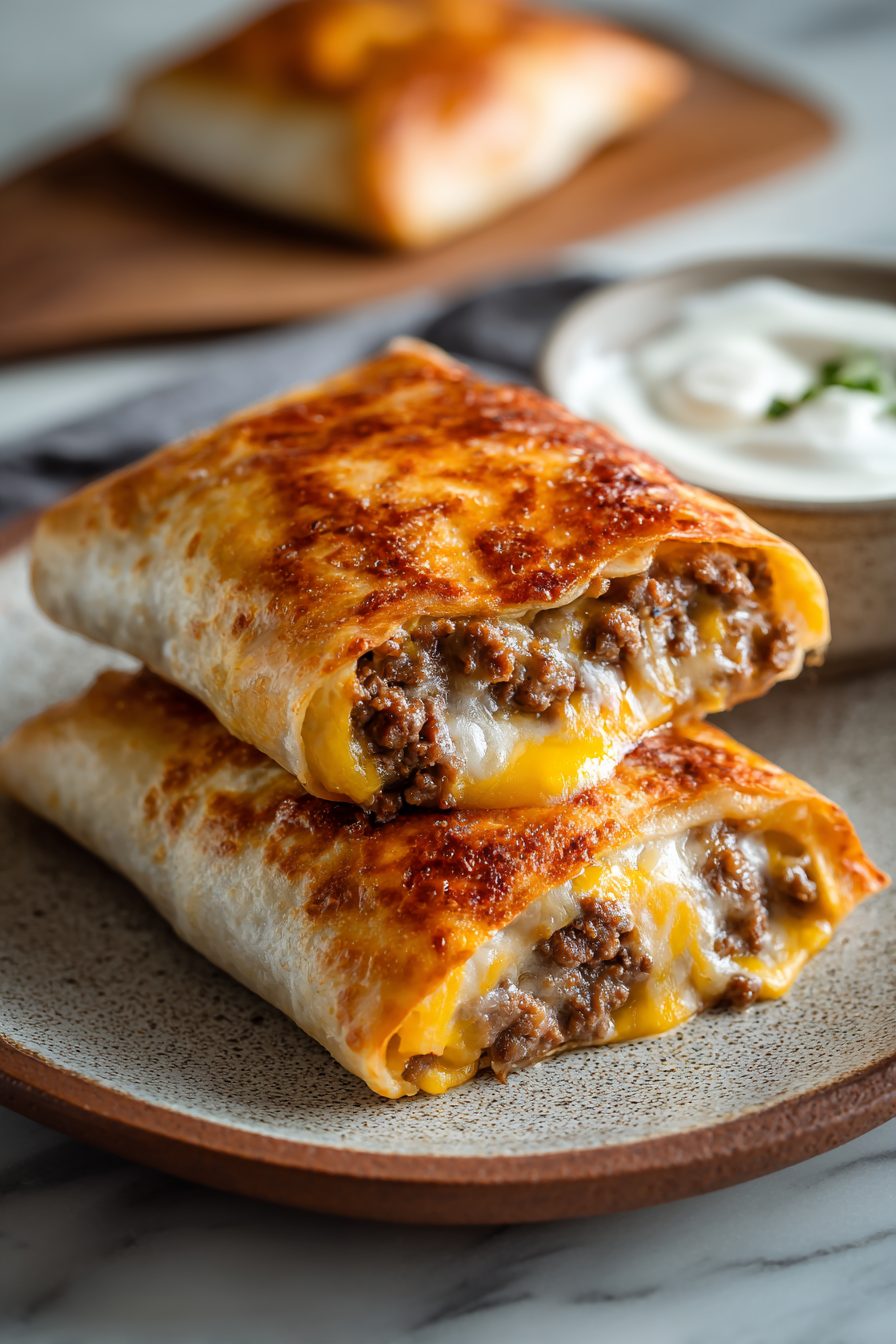
These chimichangas are my comfort-food cheat code — crunchy on the outside, ridiculously cheesy and spiced on the inside, and somehow both fancy enough for guests and lazy enough for a Tuesday. If you love bold flavors, melty cheese, and a little crunchy mess, this one’s for you.
My husband calls these “the crunchy hugs” and will literally start circling the kitchen when I pull the skillet out. Our kid likes to dunk theirs in sour cream like it’s a new food group. This started as a “let’s use up leftover taco meat” experiment and became our go-to when we want something that feels celebratory but takes almost no brainpower. I’ve made them in a hurry, I’ve made them slowly, and every version has ended with the same thing: everyone scraping their plates and asking, “Can you make more tomorrow?”
Why You’ll Love This Chimichangas with Beef and Cheese
– Deeply satisfying crunch with gooey cheese inside — it’s the texture contrast that hooks you.
– Uses simple pantry proteins and spices but tastes like you spent hours in the kitchen.
– Completely adaptable: swap the beef, load it with veggies, or make it mild for kids.
– Hands-on comfort food that doubles as party food — they travel well and reheat like pros.
Kitchen Talk
MORE EASY DINNER RECIPES...


I’ll admit: my first attempt exploded in the skillet because I overstuffed the tortillas and my flipping game was weak. Lesson learned — less is more, and a gentle press seals the deal. I also once swapped ground beef for shredded rotisserie chicken when the fridge was desperate and ended up preferring that lighter version. Sometimes I shallow-fry, sometimes I bake them for a cleaner kitchen; both work, depending on my mood and how many witnesses are around to judge the oil splatters.
MORE OF OUR FAVORITE…
Shopping Tips
– Protein: Use 80/20 ground beef for flavor and moisture, or pick leaner if you want less splatter; pre-seasoned taco meat from the deli works in a pinch.
– Cheese: Pick a melty cheese like Monterey Jack or a mild cheddar; buy a block and shred it yourself for better melt and less mystery preservatives.
– Grains/Pasta: Flour tortillas should be pliable — not rock hard; look for burrito-size (10–12 inches) for easier rolling.
– Fats & Oils: If frying, use a high-smoke oil like canola or vegetable; for a lighter bake route, toss them with a little oil spray so they still get golden.
– Spices: Fresh chili or smoked paprika and cumin make a big difference; if buying pre-mixed taco seasoning, check sodium levels.
Prep Ahead Ideas
– Brown the beef, cook the onions/peppers, and cool before storing in an airtight container for up to 3 days so assembly is fast.
– Shred cheese and portion into small bags or containers so you can grab and go.
– Assemble chimichangas cold and refrigerate on a tray covered lightly with plastic wrap for up to a day, then fry or bake straight from the fridge.
– Use shallow storage pans or sheet trays for stacking — it keeps tortillas from folding and saves you time when it’s go-time.
Time-Saving Tricks
– Use pre-shredded rotisserie chicken or leftover taco meat if you’re short on time.
– Toast tortillas briefly in a dry pan before filling — they become more pliable and less likely to split when rolling.
– Make a double batch of filling and freeze half in meal-sized portions so you can bake fresh ones later.
– If pan-frying seems intimidating, bake on a parchment-lined sheet until crisp; it’s less hands-on and still tasty.
Common Mistakes
– Overstuffing the tortillas — I did this once and had a skillet full of delicious filling; fix it by salvaging the filling and reincorporating into properly rolled chimichangas.
– Frying at too-high heat — they’ll burn outside and stay cold inside; keep oil steady and medium-high for even golden color.
– Using dry, crumbly cheese — it won’t bind; choose a melty variety or mix with a touch of cream cheese if you want ultra-gooey results.
– Not draining the filling enough — watery fillings make soggy shells; let cooked fillings cool slightly and drain excess grease.
What to Serve It With
– Simple shredded cabbage slaw with lime and cilantro for a crunchy, bright counterpoint.
– Mexican rice or cilantro-lime rice for a fuller plate.
– Refried beans or black beans, warm and slightly seasoned.
– Quick sides like a green salad or chips with salsa and guac.
Tips & Mistakes
– Warm tortillas before filling — cold ones crack when rolled.
– Press seam side down in the pan to seal after frying; it helps keep fillings inside.
– Don’t crowd the pan when frying — give each chimichanga space to get crispy.
– If the seam pops open, use a toothpick to hold it while cooling slightly.
Storage Tips
Leftovers keep well: refrigerate in an airtight container up to 3–4 days. Reheat in a toaster oven or oven to bring back the crunch; the microwave makes them soggy but is fine for a fast, 30-second zap if you don’t care about texture. Cold? Totally edible — I’ve eaten them like that for breakfast with hot sauce and no shame.
Variations and Substitutions
– Swap ground beef for shredded chicken, pulled pork, or plant-based crumbles — all work well with the same spice profile.
– For a lighter option, brush with oil and bake instead of frying; you’ll lose a bit of crunch but gain peace of mind and fewer dishes.
– Add beans, corn, or roasted peppers if your fridge is full of extras — they stretch the filling and add texture.
– Skip the cheese for dairy-free diets and use a flavorful bean mash or vegan cheese substitute.
Frequently Asked Questions

Chimichangas with Beef and Cheese
Ingredients
Main Ingredients
- 1.5 cup vegetable oil for frying
- 1 lb ground beef
- 1 cup diced yellow onion
- 2 tsp minced garlic
- 4 oz diced green chiles, drained
- 0.75 cup tomato sauce
- 1.25 cup refried beans
- 1.5 tsp chili powder
- 1 tsp ground cumin
- 0.5 tsp dried oregano
- 0.5 tsp smoked paprika
- 0.75 tsp kosher salt
- 0.5 tsp black pepper
- 20 oz flour tortillas about eight 8–10 inch tortillas
- 2 cup shredded cheese blend cheddar or Monterey Jack
- 1 tbsp lime juice
- 0.5 cup sour cream for serving
- 0.5 cup salsa or pico de gallo for serving
- 0.25 cup chopped fresh cilantro for garnish
Instructions
Preparation Steps
- Heat a large skillet over medium and add a spoonful of oil. Soften the onion for 3–4 minutes.
- Add the garlic and cook until fragrant, about 30 seconds.
- Crumble in the ground beef. Brown fully, breaking it up, then spoon off excess fat.
- Stir in chili powder, cumin, oregano, paprika, salt, and pepper. Cook 1 minute to bloom the spices.
- Mix in tomato sauce, green chiles, and refried beans. Simmer until thick and cohesive, 4–5 minutes.
- Off the heat, stir in lime juice. Let the filling cool 5 minutes.
- Warm tortillas until pliable. Microwave under a damp towel or on a skillet for 20–30 seconds.
- Spoon filling across the lower third of each tortilla. Sprinkle with some shredded cheese.
- Fold in the sides, then roll up tightly to seal the seam. Set seam-side down.
- Heat 1.5 cups oil in a deep skillet to about 350°F. Fry chimichangas seam-side down until golden, 2–3 minutes per side.
- Drain on a rack or paper towels. Serve hot with sour cream, salsa, and cilantro.
Notes
Featured Comments
“Made this last night and it was absolutely loved. Loved how the shareable came together.”
“Made this last night and it was so flavorful. Loved how the hands-off came together.”
“New favorite here — turned out amazing. lighter was spot on.”
“Made this last night and it was so flavorful. Loved how the satisfying came together.”
“Made this last night and it was family favorite. Loved how the flavorful came together.”
“Super easy and so flavorful! My family asked for seconds. Saving this one.”
“New favorite here — so flavorful. summer-ready was spot on.”
“Super easy and absolutely loved! My family asked for seconds. Saving this one.”
“Made this last night and it was turned out amazing. Loved how the handheld came together.”
“Super easy and family favorite! My family asked for seconds. Saving this one.”