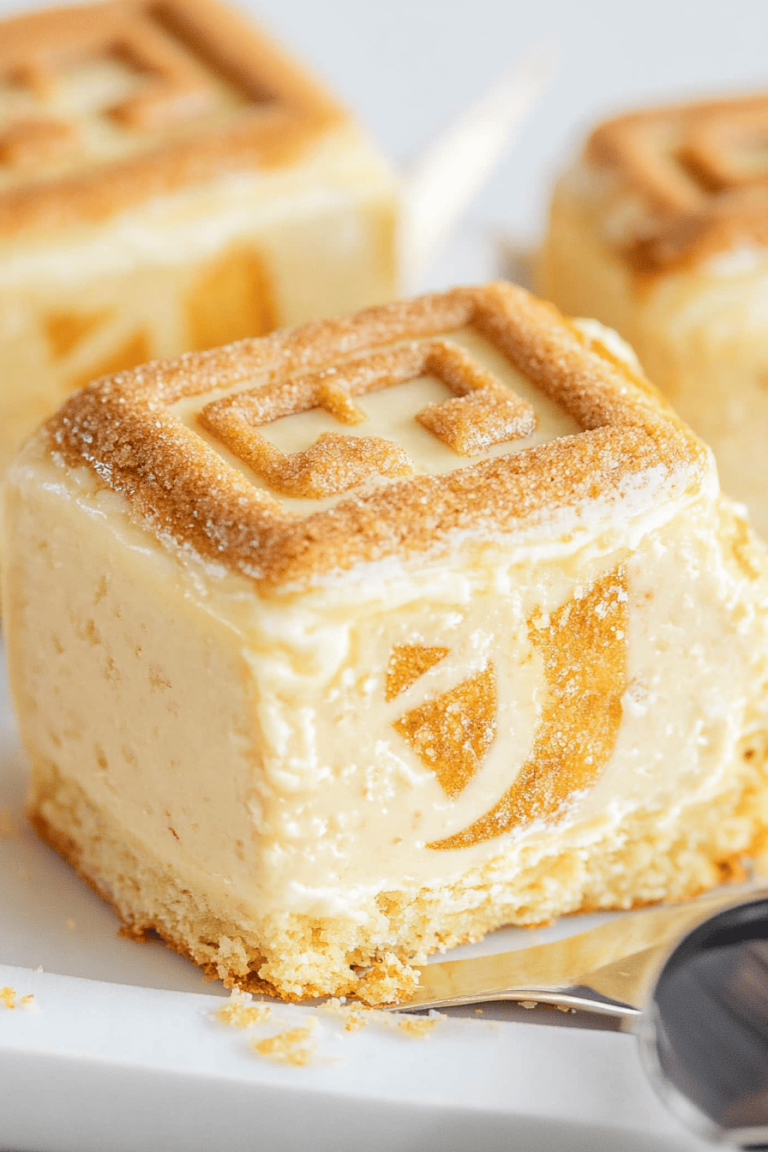
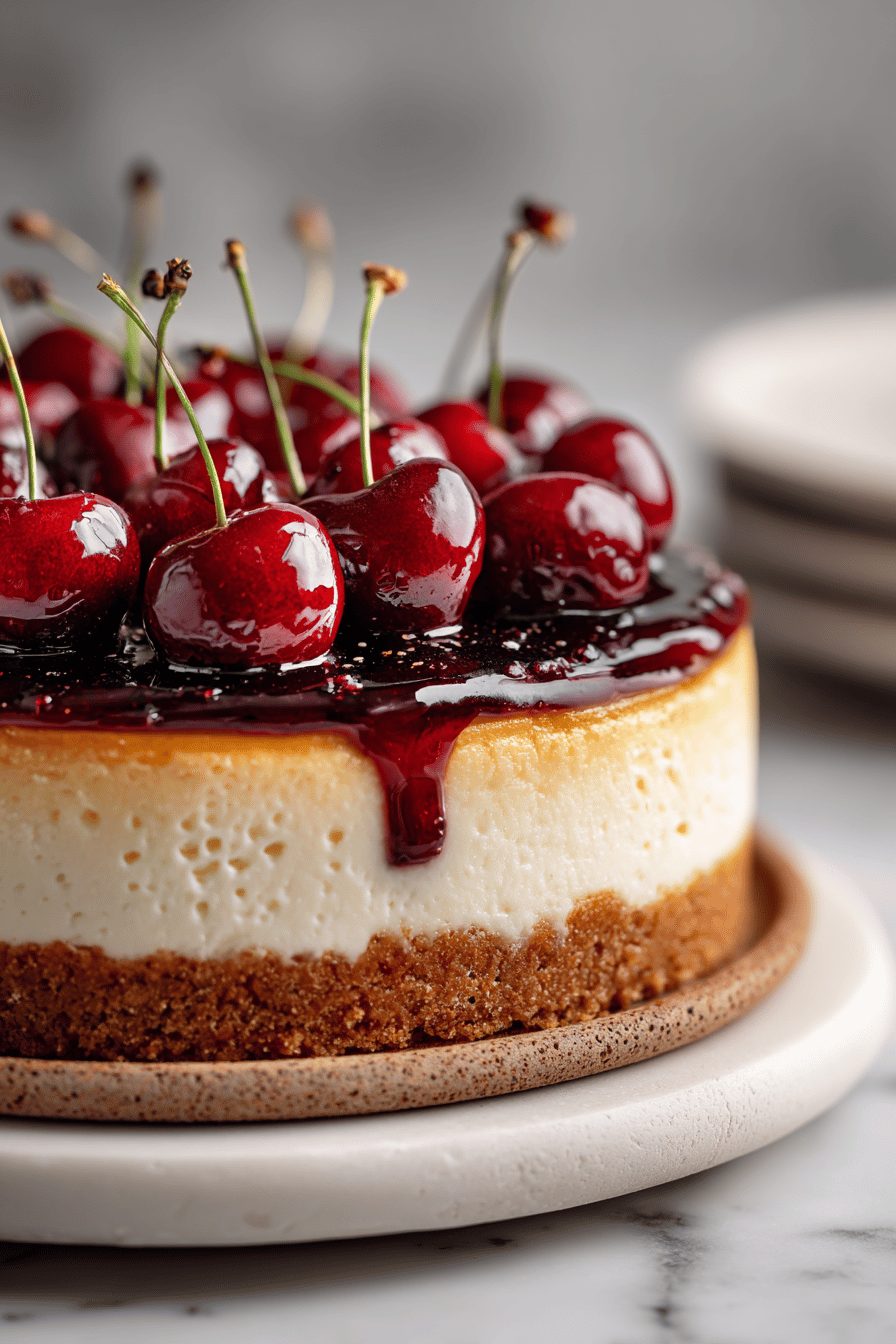
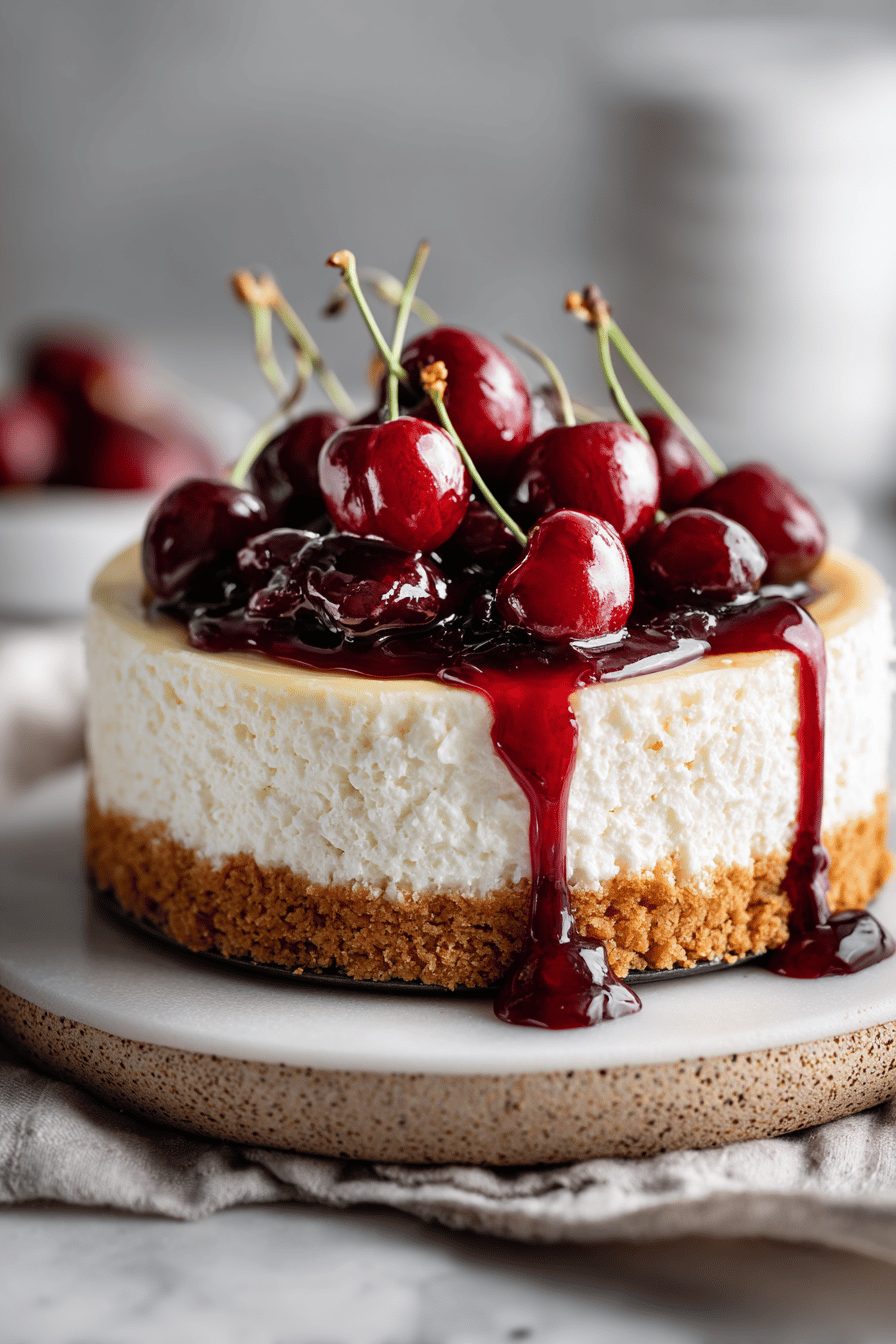
Cherry Cheesecake Cookie Crust

I make this mostly out of stubbornness and leftover cookies — it’s a Cherry Cheesecake Cookie Crust that feels fancy but is two steps away from “I found it in the pantry.” Crunchy cookie crumbs, a tangy cheesecake layer, and bright cherries on top: dessert that looks like effort but eats like comfort.
My husband goes full toddler level excitement when I bring this out. He steals corner pieces, takes exaggerated tiny bites, and acts like he’s discovered fireworks. Our kid calls it “the red cake” and insisted we bring it to a bake sale even though I promised to bake one for the PTA — somehow we had three volunteers before breakfast. It’s become our go-to, low-stress dessert for dinner guests, weeknight celebrations, and those weekends when we loudly declare we “must clean the pantry” and then bake instead.
Why You’ll Love This Cherry Cheesecake Cookie Crust
– Crunchy cookie crust makes it feel special without a million steps.
– The cheesecake layer is tangy, not tooth-achingly sweet — perfect with bright cherries.
– Looks like you fussed; honestly, you probably just crushed some cookies and called it a day.
– Great for feeding a crowd because it slices nicely and keeps well in the fridge.

Kitchen Talk
MORE EASY DESSERT RECIPES...


I once tried making this with store-bought shortbread cookies and then, because I’m a glutton for punishment, used olive oil instead of butter. The crust was weirdly savory (lesson learned) but the cherries saved it. Also, if you want a prettier edge, press the crumbs with a measuring cup instead of your fingers — your fingers will get messy but it makes the dish feel lived-in. If the cherries are extra juicy, drain them a bit before spooning on top unless you like the “soggy bottom” vibe.
This Cherry Cheesecake Cookie Crust recipe was such a delight! The sugar cookie crust adds a wonderful sweet and slightly chewy base that pairs perfectly with the creamy cheesecake filling and tart cherry topping. It’s simple to make and turns out beautifully every time—definitely a new favorite dessert in my house.
MORE OF OUR FAVORITE…
Shopping Tips
– Baking Basics (Flour/Sugar/Leaveners): You probably won’t need flour for the crust, but have sugar on hand for the filling if your cherries are tart; granulated and a little powdered sugar for dusting are handy.
– Fats & Oils: Use unsalted butter for the crust — it packs more flavor control. If only salted is available, reduce added salt in the filling.
– Dairy: Full-fat cream cheese makes the creamiest filling; low-fat can be fine in a pinch but expect a thinner, tangier texture.
– Fruit: Fresh cherries are gorgeous, but jarred pie cherries or frozen (thawed and drained) work just as well when not in season.
– Nuts & Seeds: Almonds or pecans mixed into the crust add a lovely crunch and flavor if you want to jazz it up; toast them first for extra oomph.
Prep Ahead Ideas
– Make the crust a day ahead: press the crumbs into the pan, cover tightly, and refrigerate; saves evening time.
– You can beat the cheesecake filling a day ahead and keep it chilled — it actually firms up nicely and is easier to slice.
– Store cherries in an airtight container separate from the assembled tart if you plan to serve later, then spoon them on right before guests arrive so the crust stays crisp.
– Use shallow airtight containers for chilled sections to avoid absorbing fridge smells.
Time-Saving Tricks
– Buy pre-crushed cookie crumbs or toss cookies into a bag and bash with a rolling pin while singing loudly — instant crust.
– Use a handheld mixer for the filling instead of getting the stand mixer out; faster cleanup.
– If cherries are on sale, pit and freeze them in a single layer on a tray — easy topping later.
– Don’t rush the chill time if you can help it; the filling sets faster in a colder fridge, so pop it in sooner rather than later.
Common Mistakes
– Not draining cherries can make the crust soggy — I did this once and we pretended it was a trifle.
– Overmixing the filling makes it airy and less like classic cheesecake; mix until smooth, not whipped.
– Pressing the crust too thin leads to crumble-city when you slice; go for a firm, even inch-ish base.
– Taking it out of the fridge too soon can lead to messy slices — let it chill long enough to set.
What to Serve It With
– Simple whipped cream or crème fraîche on the side for extra tang.
– A strong espresso or cold brew to cut the sweetness.
– Light, peppery arugula salad if you need a green contrast (trust me).
– Sliced almonds or flaky sea salt sprinkled on top for texture.
Tips & Mistakes
– Use room-temperature cream cheese so it blends silky with less elbow grease.
– Salt the crust a little — even desserts need a hint of salt to sing.
– If the top cracks (it can happen), press some cherries over the crack and call it rustic.
– Run a knife under hot water and wipe dry before each slice for cleaner pieces.
Storage Tips
Keep leftovers in the fridge covered tightly; it stays great for 3–4 days. Eating it cold? Totally fine — it’s basically cheesecake, and cold is classic. For breakfast? No judgment here: a corner piece with coffee is practically a rite of passage. You can freeze slices wrapped well for up to a month; thaw in the fridge overnight.
Variations and Substitutions
– Swap cherries for blueberries or roasted stone fruit if cherries are meh — same technique, different vibe.
– Use graham crackers, gingersnaps, or even Oreos for the crust depending on how buttery or chocolatey you want it.
– For a lighter version, try Greek yogurt folded into the filling, but expect a tangier, less dense result.
– No fresh cherries? Canned pie cherries are a lifesaver — drain them slightly to avoid watery crusts.
Frequently Asked Questions
Cherry Cheesecake Cookie Crust
Ingredients
Main Ingredients
- 2.25 cup shortbread cookie crumbs finely crushed
- 7 tbsp unsalted butter, melted cooled slightly
- 2 tbsp granulated sugar
- 0.125 tsp fine salt
- 16 oz cream cheese, softened brick style
- 0.75 cup powdered sugar sift if lumpy
- 0.5 cup sour cream full-fat
- 1.5 tbsp fresh lemon juice
- 1.5 tsp vanilla extract
- 0.5 cup heavy cream, cold whipped to stiff peaks
- 21 oz cherry pie filling about one can
Instructions
Preparation Steps
- Line an 8-inch square pan with parchment, leaving overhang for lifting.
- Stir cookie crumbs, granulated sugar, and salt in a bowl.
- Pour in melted butter and mix until evenly moistened and sandy.
- Press mixture firmly into the pan base using a flat cup. Chill 10 minutes.
- Beat cream cheese and powdered sugar until smooth and fluffy, about 2 minutes.
- Blend in sour cream, lemon juice, and vanilla until silky.
- Whip cold heavy cream to stiff peaks. Gently fold into cheesecake mixture.
- Spread filling over crust and smooth the top. Cover and chill 4–6 hours.
- Spoon cherry pie filling over the set cheesecake. Slice and serve cold.
Notes
Featured Comments
“Super easy and so flavorful! My family asked for seconds. Saving this one.”
“New favorite here — turned out amazing. warming was spot on.”
“This crowd-pleasing recipe was turned out amazing — the weeknight winner really stands out. Thanks!”
“This juicy patty recipe was absolutely loved — the crispy really stands out. Thanks!”
“This indulgent recipe was turned out amazing — the loaded really stands out. Thanks!”
“This shareable recipe was will make again — the energizing really stands out. Thanks!”
“This satisfying recipe was family favorite — the speedy really stands out. Thanks!”
“This simple recipe was family favorite — the gooey really stands out. Thanks!”
“This shareable recipe was absolutely loved — the balanced really stands out. Thanks!”
“Made this last night and it was so flavorful. Loved how the party favorite came together.”