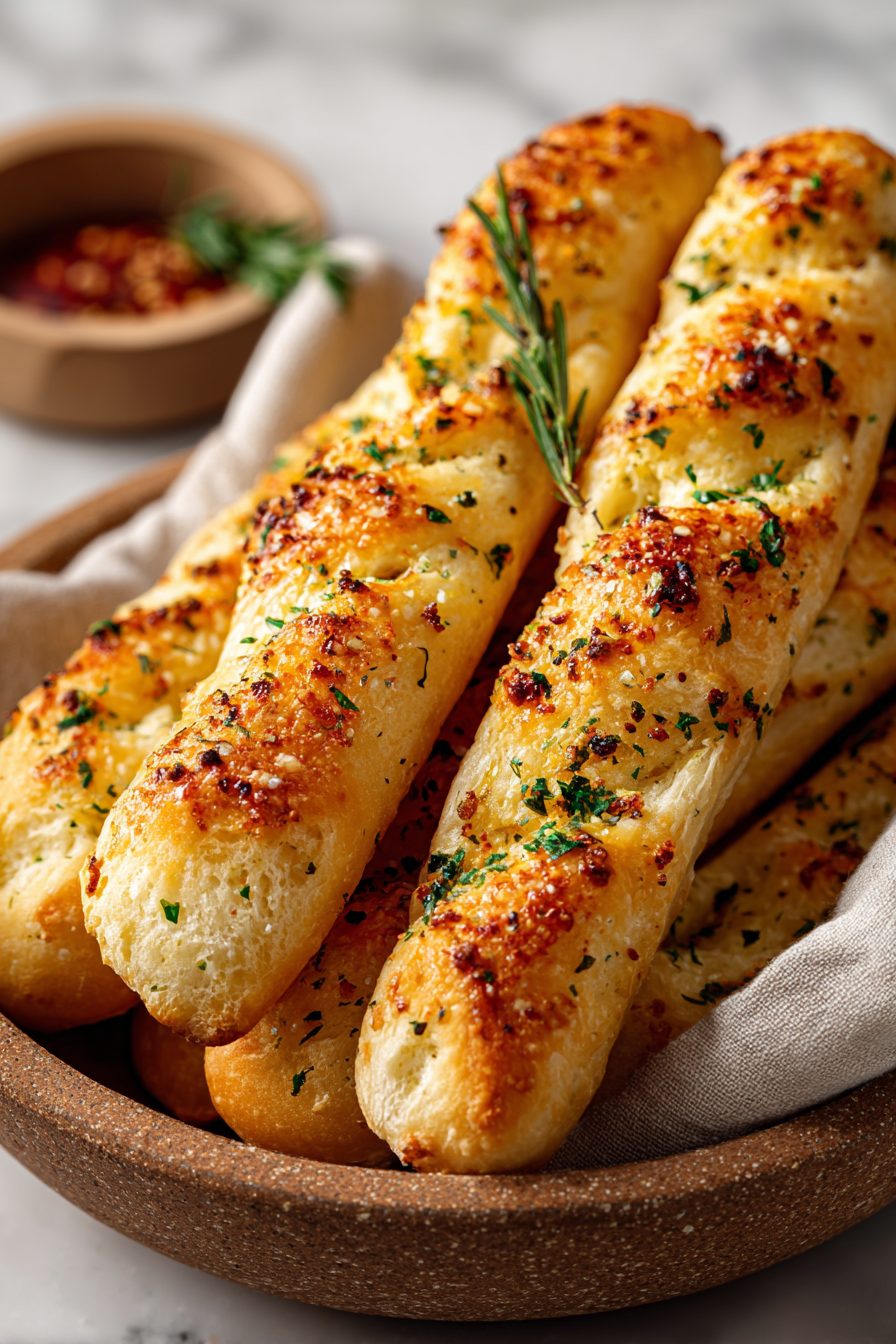
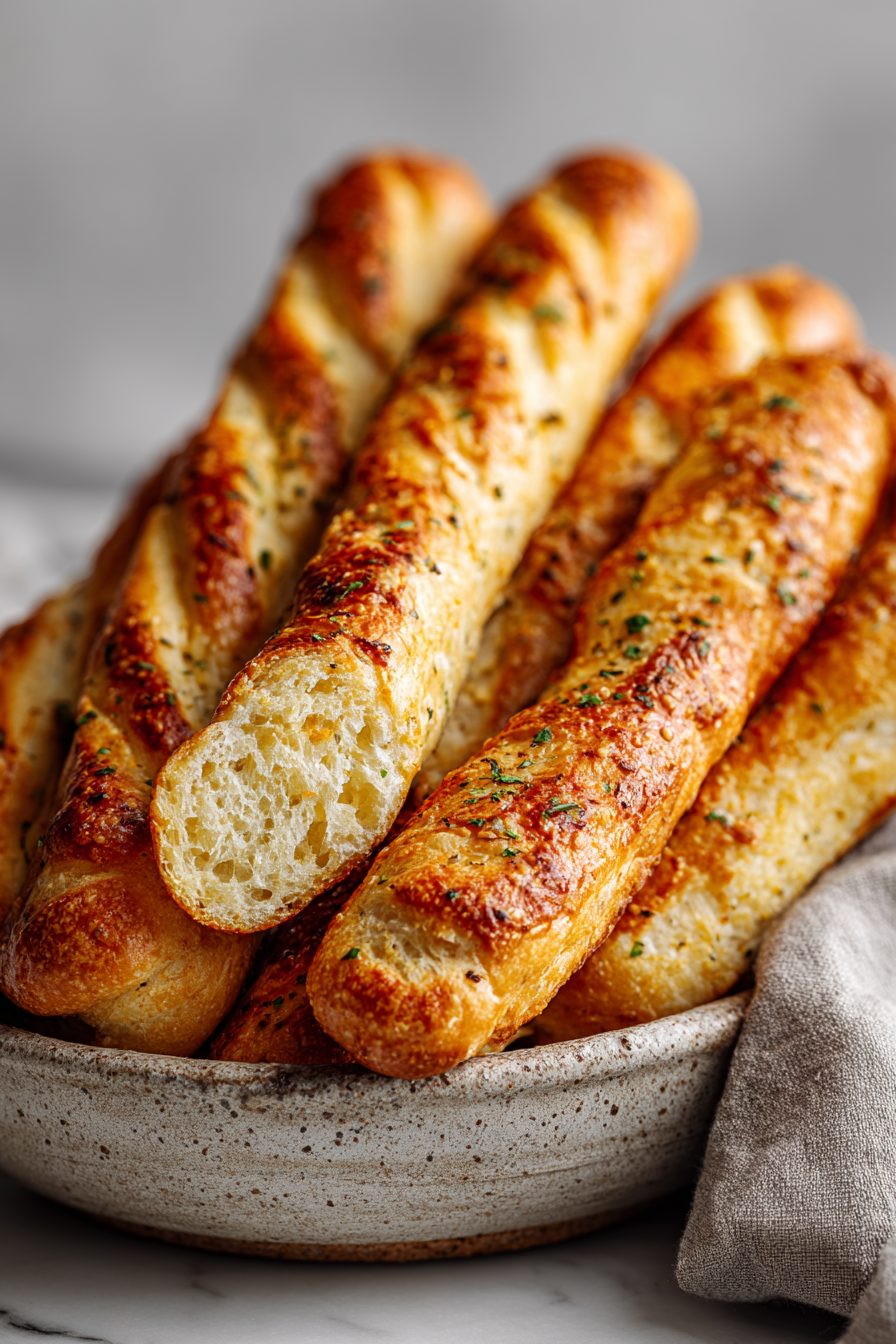
Easy Olive Garden Breadsticks Recipe
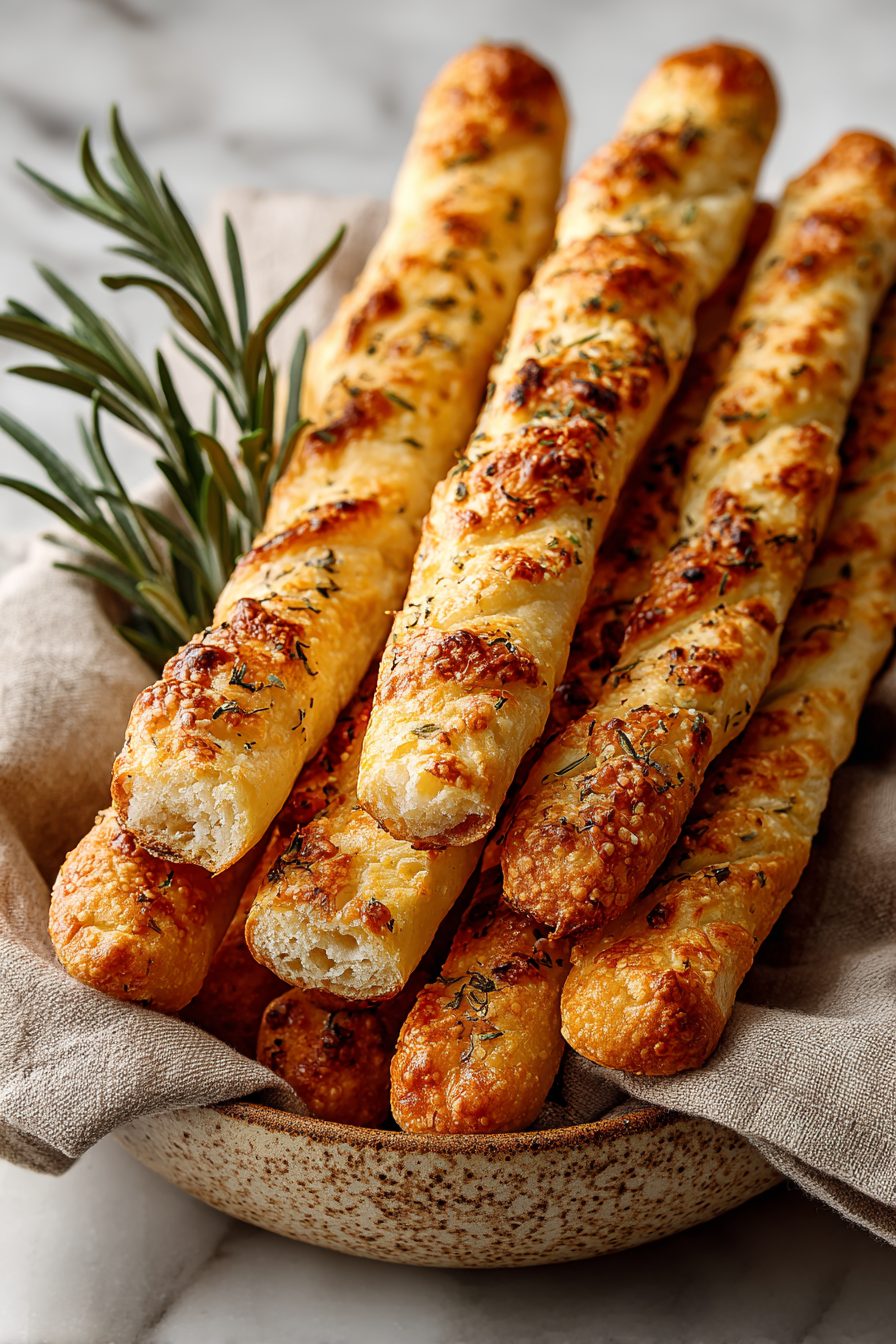
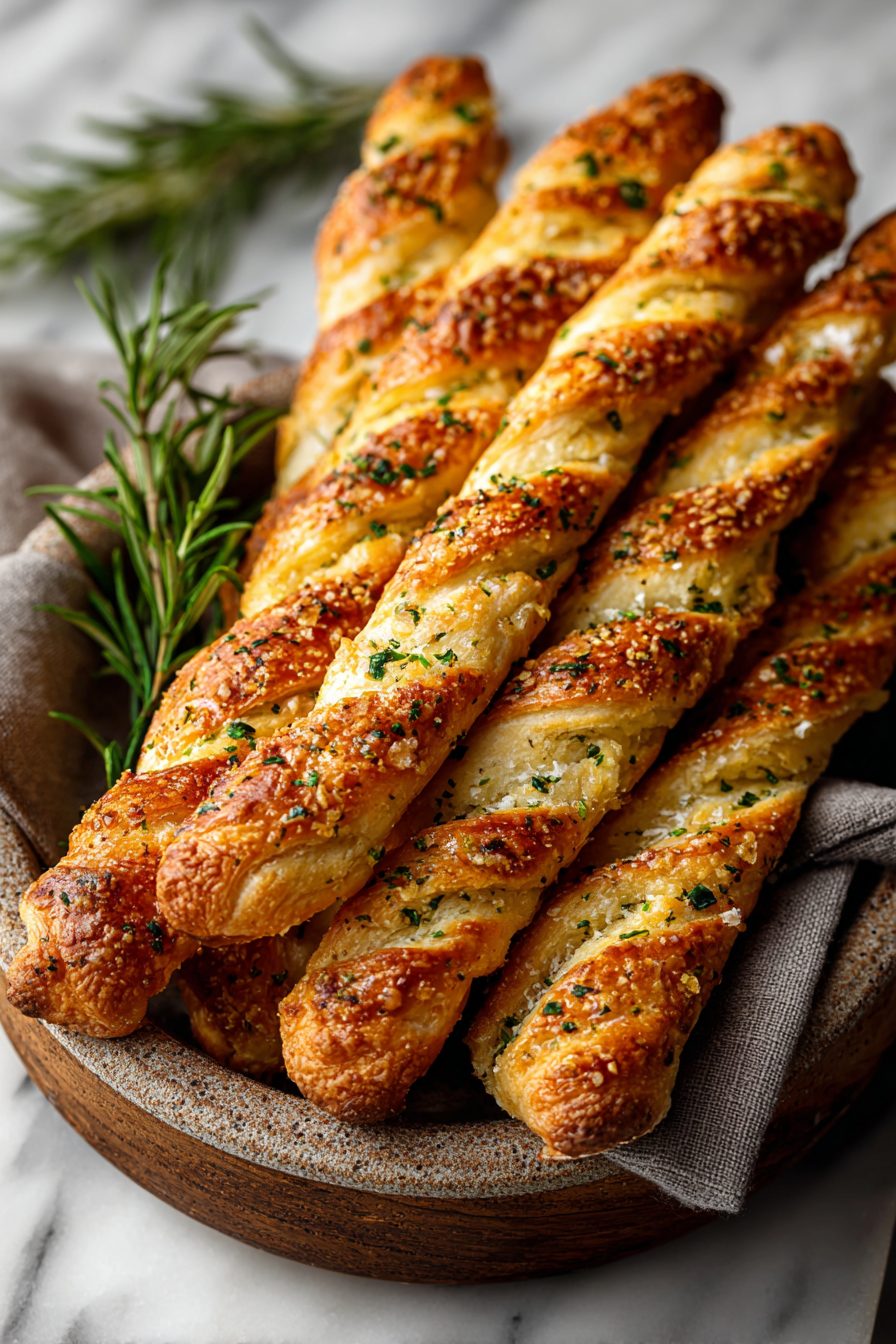
This recipe is my love letter to warm, buttery Olive Garden breadsticks — soft inside, a little chewy, speckled with garlic and parm, and brushed with melted butter like a tiny golden halo. It’s comfort food that feels slightly fancy but is shockingly doable on a weeknight. If you want restaurant vibes without leaving your couch (or your pajamas), this is it.
My little family absolutely loses it over these. My husband will literally cancel plans if he thinks there might be breadsticks involved — not proud, but true. We’ve had them with pasta, with soup, as an afterschool snack, and once at 10 p.m. with cold marinara and stares of pure contentment. Making a batch is now my “I love you” shorthand and a guaranteed way to end a chaotic day on a high note.
Why You’ll Love This Easy Olive Garden Breadsticks Recipe
– Soft, slightly chewy inside with a crisp bottom — like a hotel pillow for your teeth.
– Buttery garlic flavor without needing a pharmacy’s worth of ingredients.
– Fast enough for weeknights but impressive enough for guests (or to win over very picky husbands).
– Makes a forgiving dough: a little over- or underwork won’t ruin the whole thing.
Kitchen Talk

I have ruined more batches of dough than I care to admit — too much flour, too hot water, a silent fussy oven. Once I tried adding fresh rosemary because I wanted to be “gourmet” and ended up with breadsticks that tasted like a pine forest. Lesson learned: keep it humble. Also discovered that brushing the butter on while warm makes the garlic stick better and gives you that glossy, irresistible finish. If you forget to let the dough rest enough, it will snap back when you shape it — not the end of the world, just give it a little more time and a stern talk.
MORE OF OUR FAVORITE…
Shopping Tips
– Baking Basics: Use all-purpose flour for reliable results; bread flour gives more chew if you want that extra stretch.
– Dairy: Salted butter is fine for the garlic brush, but use unsalted if you’re counting salt so you can control seasoning.
– Cheese: Freshly grated Parmesan melts and browns better than the pre-shredded stuff; the flavor is worth the tiny extra step.
– Fats & Oils: Olive oil for the dough adds flavor, but don’t skip the butter on top — that’s the signature.
– Spices: Garlic powder or garlic salt both work; adjust extra salt if you use garlic salt to avoid over-salting.
Prep Ahead Ideas
– Make the dough the night before and let it rise slowly in the fridge — you’ll wake up to cozy dough that’s easier to shape.
– Keep the shaped, unbaked sticks on a tray covered in plastic in the fridge for up to 24 hours; pull them out to come to room temp before baking.
– Store melted garlic butter in a small jar in the fridge for a few days so you can brush fresh, warm butter right when they come out.
Time-Saving Tricks
– Use store-bought pizza dough in a pinch — it won’t be identical but it’s a great shortcut.
– Microwave butter in short bursts to melt fast; stir in garlic and parsley so it’s ready when the bread comes out.
– Turn on the oven early so it’s truly hot; a preheated surface gives the bottom the quick crisp it needs.
– Pre-grate your cheese and keep it in the fridge — no last-minute scavenger hunts while the bread bakes.
Common Mistakes
– Over-flouring the dough: I did this once and ended up with cricket-jerky sticks. Use just enough to keep things workable.
– Not letting dough rest: trying to stretch it too soon makes it snap back — let it relax.
– Brushing butter too early: if the sticks are hot and you brush too roughly, you’ll smear off the herbs; a gentle hand works wonders.
– Burning the garlic: cook minced garlic just until fragrant, or use garlic powder in the butter to avoid bitter burnt bits.
What to Serve It With
– Classic marinara for dunking (or that jar of roasted pepper sauce you pretend you made).
– A crisp green salad with lemon vinaigrette to cut the buttery richness.
– Pair with instant favorites like tomato basil soup or hearty minestrone.
– Try alongside pasta or your favorite baked ziti for full Italian comfort.
Tips & Mistakes
– Let the dough double — patience here = soft, airy sticks.
– Salt late: salt in the dough is needed, but taste and adjust the butter topping last.
– If they’re doughy in the middle, bake a few minutes longer at a slightly lower temp so the outside doesn’t burn.
– Quick fix for soggy bottoms: blast them on a hot baking sheet for 2–3 minutes.
Storage Tips
Keep leftovers in an airtight container or zip-top bag at room temperature for up to 2 days. To reheat, wrap in foil and warm in a 350°F oven for 8–10 minutes, or revive one in the toaster oven for a couple minutes to get that crisp back. Cold breadsticks are fine for a snack — butter still tastes like dessert at 9 a.m., don’t judge me.
Variations and Substitutions
– Parmesan ↔ Asiago or Pecorino: sharper cheeses add more punch.
– Garlic powder ↔ fresh garlic: fresh is brighter but easier to burn; powder is foolproof.
– All-purpose ↔ bread flour: bread flour = chewier; AP = light and forgiving.
– Butter ↔ olive oil: oil gives a different vibe (less buttery, more Mediterranean) and is a solid swap if you’re out of butter.
– Add-ins that work: everything bagel seasoning, shredded mozzarella for pull-apart cheesy sticks, or a light brush of pesto.
Frequently Asked Questions
Easy Olive Garden Breadsticks Recipe
Ingredients
Main Ingredients
- 1 cup warm water about 110°F
- 1.5 tbsp granulated sugar
- 2 tsp active dry yeast
- 3.25 cup all-purpose flour
- 1.25 tsp fine salt for the dough
- 2.5 tbsp unsalted butter, softened for the dough
- 1 tbsp olive oil to grease bowl and add richness
- 3.5 tbsp unsalted butter, melted for brushing
- 1.25 tsp garlic powder for topping
- 0.75 tsp kosher salt for sprinkling
- 0.75 tsp dried parsley flakes optional garnish
Instructions
Preparation Steps
- Bloom the yeast: Stir warm water and sugar in a large bowl, sprinkle in yeast, and let it foam for 5–10 minutes.
- Start the dough: Mix in 2 cups flour, the softened butter, and fine salt until shaggy.
- Add remaining flour gradually, kneading until a soft, slightly tacky dough forms, 6–8 minutes by hand or mixer.
- Grease a bowl with olive oil, place dough inside, turn to coat, cover, and let rise until doubled, about 1 hour.
- Punch down the dough and divide into 12 equal pieces. Roll each into a 7–8 inch rope.
- Arrange on a parchment-lined sheet, cover, and let rise 15–20 minutes while the oven heats to 400°F.
- Bake until lightly golden, 12–15 minutes.
- Combine melted butter with garlic powder and a pinch of kosher salt.
- Brush hot breadsticks generously with the garlic butter. Sprinkle with remaining kosher salt and parsley.
Notes
Featured Comments
“Impressed! Clear steps and so flavorful results. Perfect for busy nights.”
“This bite-sized recipe was so flavorful — the crispy really stands out. Thanks!”
“Impressed! Clear steps and family favorite results. Perfect for busy nights.”
“This shareable recipe was will make again — the flavorful really stands out. Thanks!”
“This shareable recipe was so flavorful — the flavorful really stands out. Thanks!”
“Made this last night and it was will make again. Loved how the flavorful came together.”
“Impressed! Clear steps and absolutely loved results. Perfect for busy nights.”
“New favorite here — so flavorful. shareable was spot on.”
“Made this last night and it was turned out amazing. Loved how the flavorful came together.”
“This bite-sized recipe was turned out amazing — the flavorful really stands out. Thanks!”