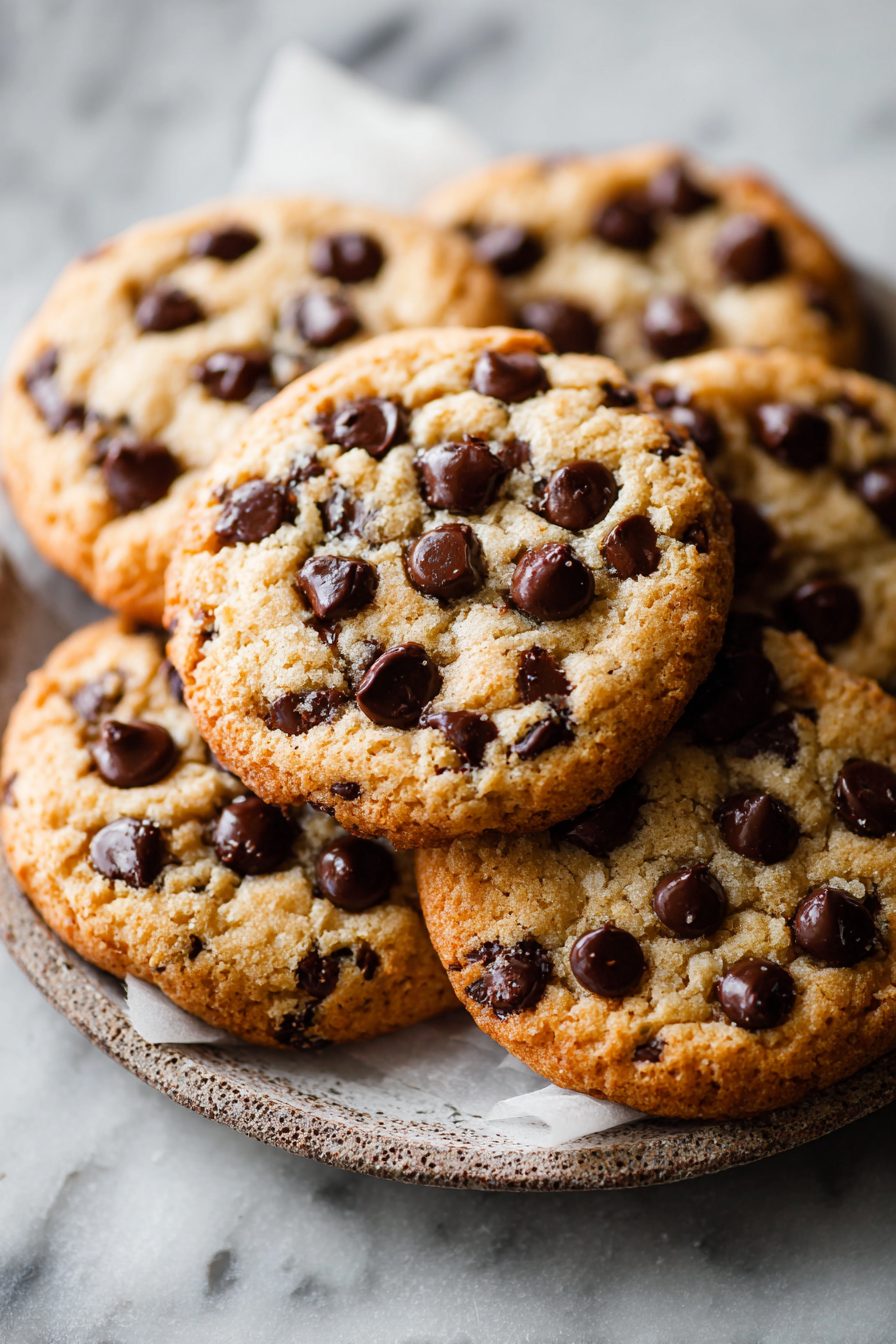
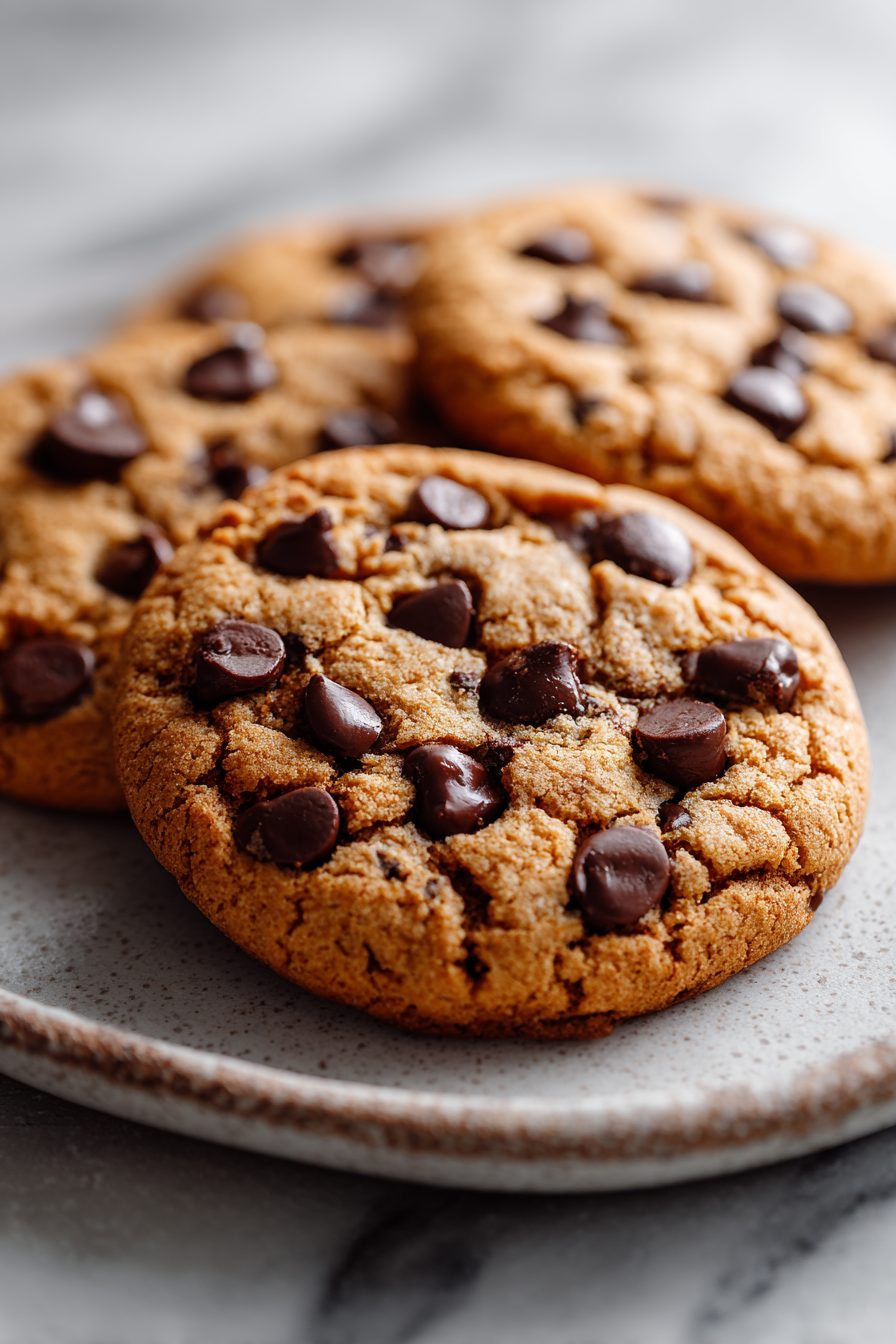
Sheet Pan Chocolate Chip Cookies
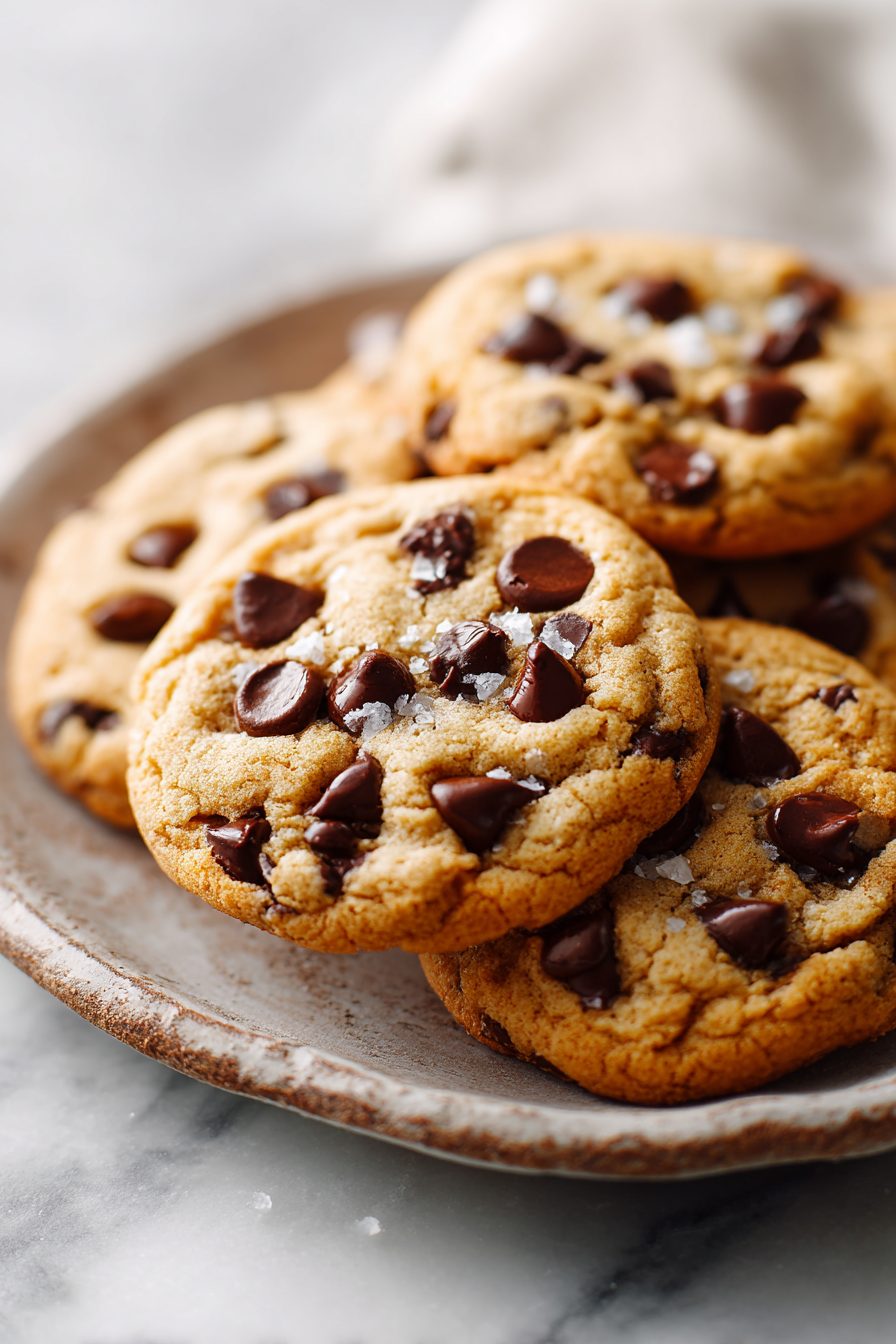
This cookie is basically everything I want from dessert: giant slab-like chocolate chip cookies baked on a sheet pan, slightly crisp at the edges, gooey in the middle, and impossibly easy to feed a crowd. You scoop the dough into loose mounds, flatten a bit, bake once, and suddenly you’ve got a whole tray of cookie slabs to break apart however you like. It’s the lazy, glorious way to make chocolate chip cookies look impressive without babysitting dozens of rounds.
My little household is obsessed. My husband wanders into the kitchen like a cartoon character the minute they come out of the oven — hovering, burning his fingers on the corner of a warm cookie, claiming the best piece like it’s his birthright. We’ll eat them warm with milk, pack pieces in lunch boxes, and sometimes I hide one in the fridge for a midweek treat (don’t judge). It started as a “let’s feed a bake sale with minimal effort” experiment and now it’s our weekend ritual.
Why You’ll Love This Sheet Pan Chocolate Chip Cookies
– One tray = tons of cookies without individually scooping a hundred mounds. Endgame energy saver.
– Crispy edges and a soft, chewy center — no debate, just comfort.
– Great for sharing, bake sales, last-minute guests, or those nights when you need a sweet win with zero flour dust on the floor.
– Tolerant recipe: can be tweaked into chunkier, nuttier, or ultra-chocolate versions without throwing it off.
Kitchen Talk
I learned to trust my instincts with this one. The first attempt was a disaster: I kept the mounds too far apart and ended up with single-cookie islands instead of a glorious slab. Then I flattened them more and let them touch slightly — brilliant. Also, tossing the dough in the fridge for a short rest makes the flavor pop; a long rest makes it better still (patience pays in cookies, shockingly). I once swapped half the chocolate for chopped caramel candy because we had guests — it was a mess and also somehow perfect. Expect happy accidents.
MORE OF OUR FAVORITE…
Shopping Tips
– Baking Basics (Flour/Sugar/Leaveners): All-purpose flour works perfectly here; check the label for unbleached if you prefer a more neutral flavor, and make sure your baking soda/powder isn’t ancient (they lose oomph).
– Fats & Oils: Real butter gives the best flavor and crisp edges — use salted if you forget to add salt, but taste your dough and adjust.
– Eggs: Room-temperature eggs mix into dough more smoothly and help with the chewy center; pull them out 30 minutes before baking.
– Chocolate: Use a mix of chips and chopped bars for texture — chocolate chunks create melty pockets while chips keep structure.
– Sweeteners: A combo of brown and white sugar is classic: brown adds chewiness and depth, white keeps spread predictable.
– Nuts & Seeds: If you’re adding walnuts or pecans, toss them lightly in flour so they don’t all sink to the bottom of the slab.
Prep Ahead Ideas
– Make the dough a day or two ahead and keep it tightly wrapped in the fridge — flavor improves and it’s one less thing the day of.
– Freeze portions of flattened dough on a tray, then pop into a bag; bake straight from frozen with a couple extra minutes.
– Store dough in a shallow, airtight container if you want to slide it right onto the sheet without re-scooping.
Time-Saving Tricks
– Use a large cookie scoop to portion, then press them together on the sheet instead of individual rolling — faster and rustic-looking.
– Bake on two sheets at once by rotating halfway through for even baking.
– If you’re in a rush, a short chill (15–20 minutes) still helps control spread without waiting overnight.
Common Mistakes
– Under-flattening the dough so nothing joins: you’ll get islands. Fix by pressing the mounds lightly before baking.
– Overbaking for a uniformly brown top — pull them when edges are set and centers still look soft; carryover heat finishes them.
– Using too-warm butter: dough will spread too much. Chill a touch if the kitchen is hot (I learned this the sticky way).
– Shoving the whole pan into the fridge to chill and forgetting it — give it a few minutes to bounce back before baking or you’ll get uneven rise.
What to Serve It With
– Cold milk, obviously. Or a splash of coffee for grown-up vibes.
– Vanilla ice cream for an instant dessert mash-up.
– Fruit salad or sliced pears if you need something to make it feel slightly virtuous.
– Toasted nuts or a chunk of sharp cheddar if you’re weirdly into sweet-and-savory (no judgment).
Tips & Mistakes
– Use a rimmed baking sheet so the edges brown without sliding off.
– Don’t overmix once the flour goes in — overworked dough = tough cookies.
– If centers aren’t set but edges are browning, tent with foil to prevent more color while finishing the middle.
– Salt matters: a sprinkle of flaky sea salt after baking lifts the whole thing.
Storage Tips
Store cooled cookie slabs airtight at room temp for a couple days, or in the fridge up to a week. Freeze portions in a freezer bag for longer. Cold cookies are fine (I’ll eat them straight from the fridge), but warming a piece for 8–10 seconds in the microwave brings back that gooey center magic — breakfast-approved, no shame.

Variations and Substitutions
– Make them chunkier: add larger chocolate pieces and whole nuts, press less, bake a minute longer.
– Gluten-free: swap in a 1:1 gluten-free flour blend and chill dough longer to help it hold together.
– Lower-sugar tweak: reduce white sugar slightly and add a touch more brown sugar for chewiness without being flat.
– Dairy-free: use a stick-style plant butter and dairy-free chocolate; results aren’t identical but still very satisfying.
Frequently Asked Questions
Sheet Pan Chocolate Chip Cookies
Ingredients
Main Ingredients
- 2.5 cup all-purpose flour
- 1 tbsp cornstarch
- 1 tsp baking soda
- 0.75 tsp fine sea salt
- 1 cup unsalted butter, melted and cooled
- 1.25 cup packed light brown sugar
- 0.75 cup granulated sugar
- 2 large eggs
- 2 tsp vanilla extract
- 2 cup semi-sweet chocolate chips
- 0.5 tsp flaky sea salt, for topping optional
Instructions
Preparation Steps
- Heat oven to 350°F. Line a 13x18-inch rimmed sheet pan with parchment.
- Whisk flour, cornstarch, baking soda, and fine salt in a large bowl.
- Stir melted butter with brown sugar and granulated sugar until smooth and glossy.
- Whisk in eggs and vanilla until fully combined.
- Fold dry mixture into the wet ingredients just until no dry spots remain.
- Stir in most of the chocolate chips, reserving a small handful for topping.
- Spread dough onto the pan and press evenly into the corners.
- Scatter reserved chips over top and sprinkle with flaky salt if using.
- Bake 16–20 minutes until edges are deep golden and center looks set.
- Cool 15 minutes in the pan, then slice into bars and serve.
Notes
Featured Comments
“New favorite here — family favorite. fruity was spot on.”
“New favorite here — turned out amazing. satisfying was spot on.”
“This gooey recipe was absolutely loved — the tender really stands out. Thanks!”
“This satisfying recipe was family favorite — the crunchy really stands out. Thanks!”
“New favorite here — will make again. shareable was spot on.”
“Super easy and so flavorful! My family asked for seconds. Saving this one.”
“This tender recipe was family favorite — the satisfying really stands out. Thanks!”
“This clean recipe was family favorite — the plant-powered really stands out. Thanks!”
“This shareable recipe was turned out amazing — the weeknight saver really stands out. Thanks!”
“This fresh recipe was family favorite — the loaded really stands out. Thanks!”