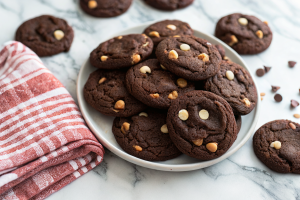
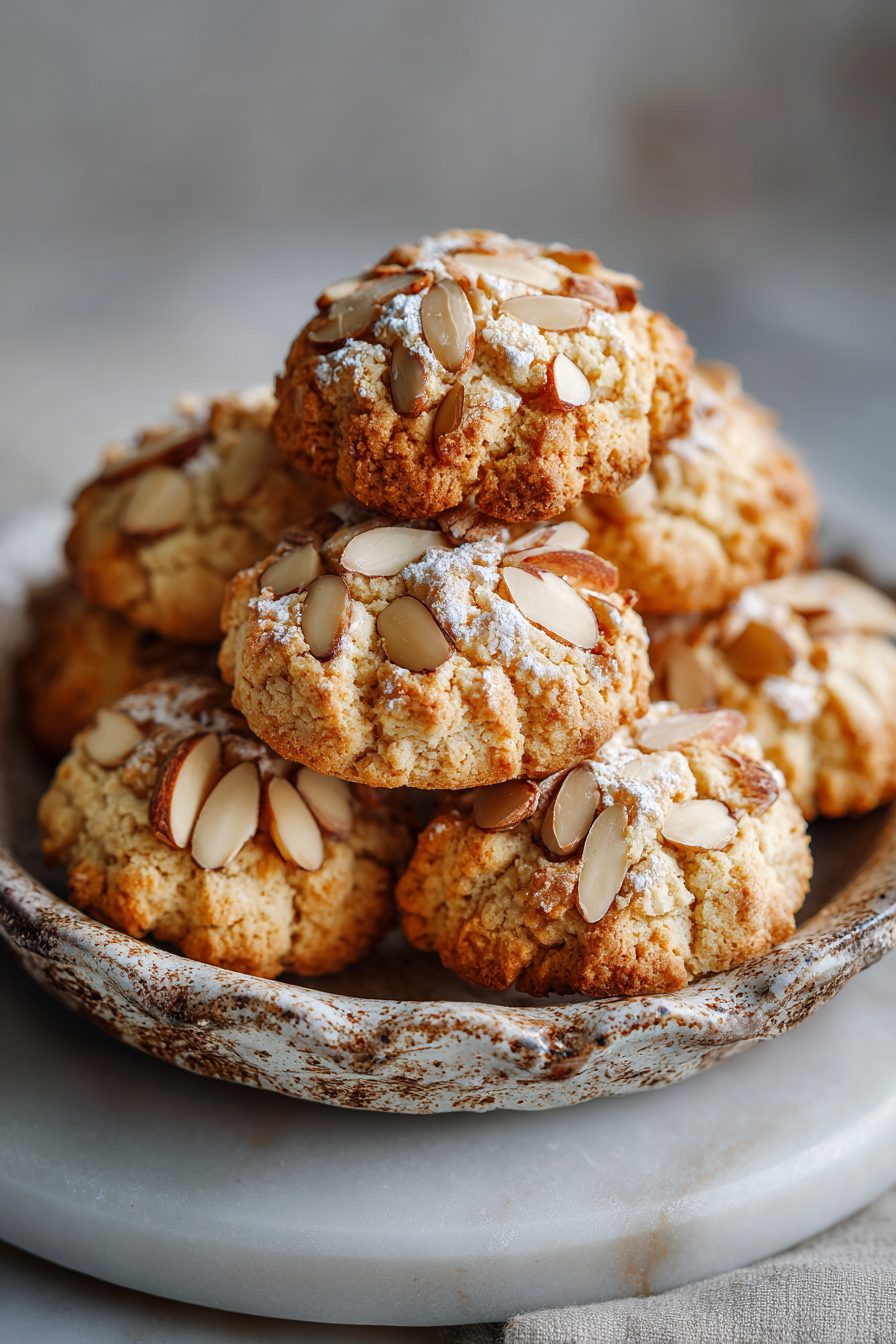
Pine Nut Cookie Delights
I started making these Pine Nut Cookie Delights on a whim one rainy afternoon and now they’re my go-to when I need something that feels fancy but is actually zero-pressure. Think buttery, slightly chewy cookies with toasted pine nuts scattered through—nutty, warm, and oddly luxurious for such a simple treat. They’re that cookie you bring to a dinner party and everyone pretends they always bake like this (liar, they don’t).
My husband declared them “dangerously snackable” after the first batch. He’d sneak one with his coffee, then another after dinner, then defend his whole right to a midnight cookie while I shook my head and ate three. Our kid thinks the pine nuts are tiny treasure and insists on helping sprinkle them on top, which usually ends with more on the floor than in the bowl. It’s become a Sunday ritual: I mix, he sneaks, we argue about whether they’re better fresh or slightly cold. Spoiler: both.
Why You’ll Love This Pine Nut Cookie Delights
– Warm, nutty flavor that makes plain butter feel like it went to culinary school.
– Crunchy pine nuts + tender cookie: textural drama in every bite.
– Fancy enough for guests, easy enough for a weeknight when you’ve lost three other pots in the chaos.
– Little hands love them — great for baking with kids who think measuring is an extreme sport.
Kitchen Talk
I learned early on that toasting the pine nuts is non-negotiable. Raw pine nuts are like the sad opening act; toasting is the main event. I once forgot to check the oven and came back to a smoke alarm celebration—don’t be me. Also, I experimented with brown butter once and nearly proposed to the pan. It’s indulgent, but sometimes the skillet deserves a love letter.
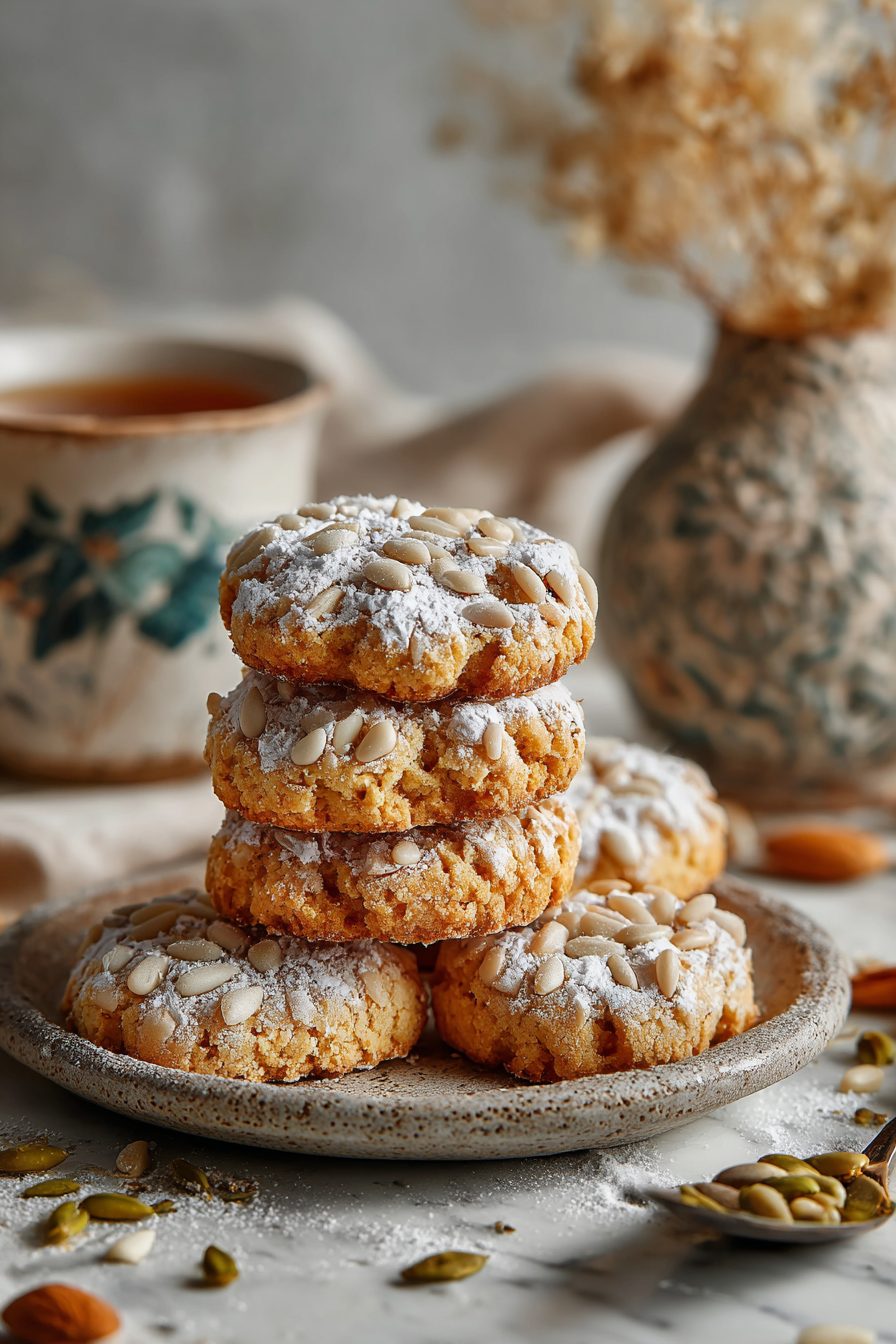
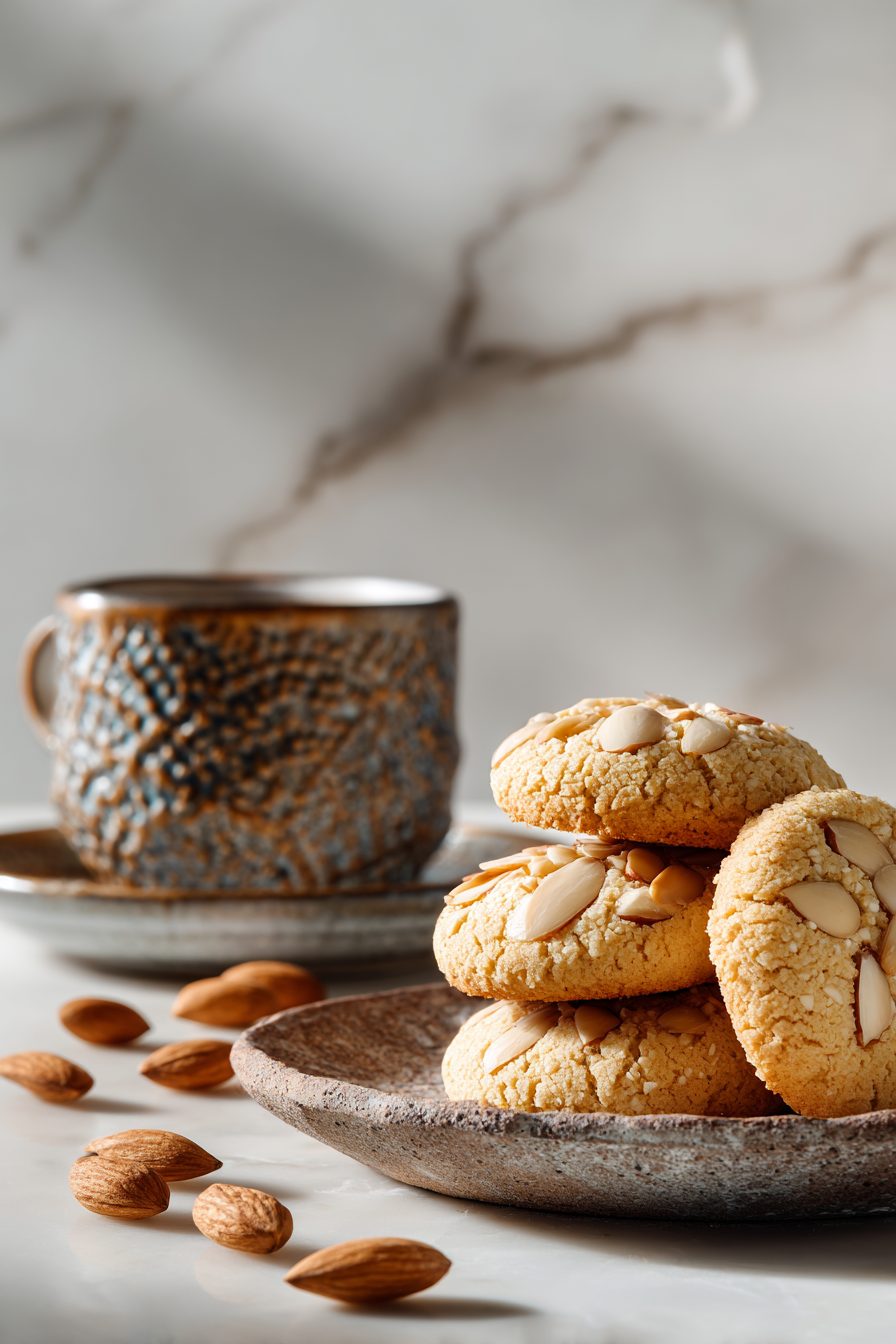
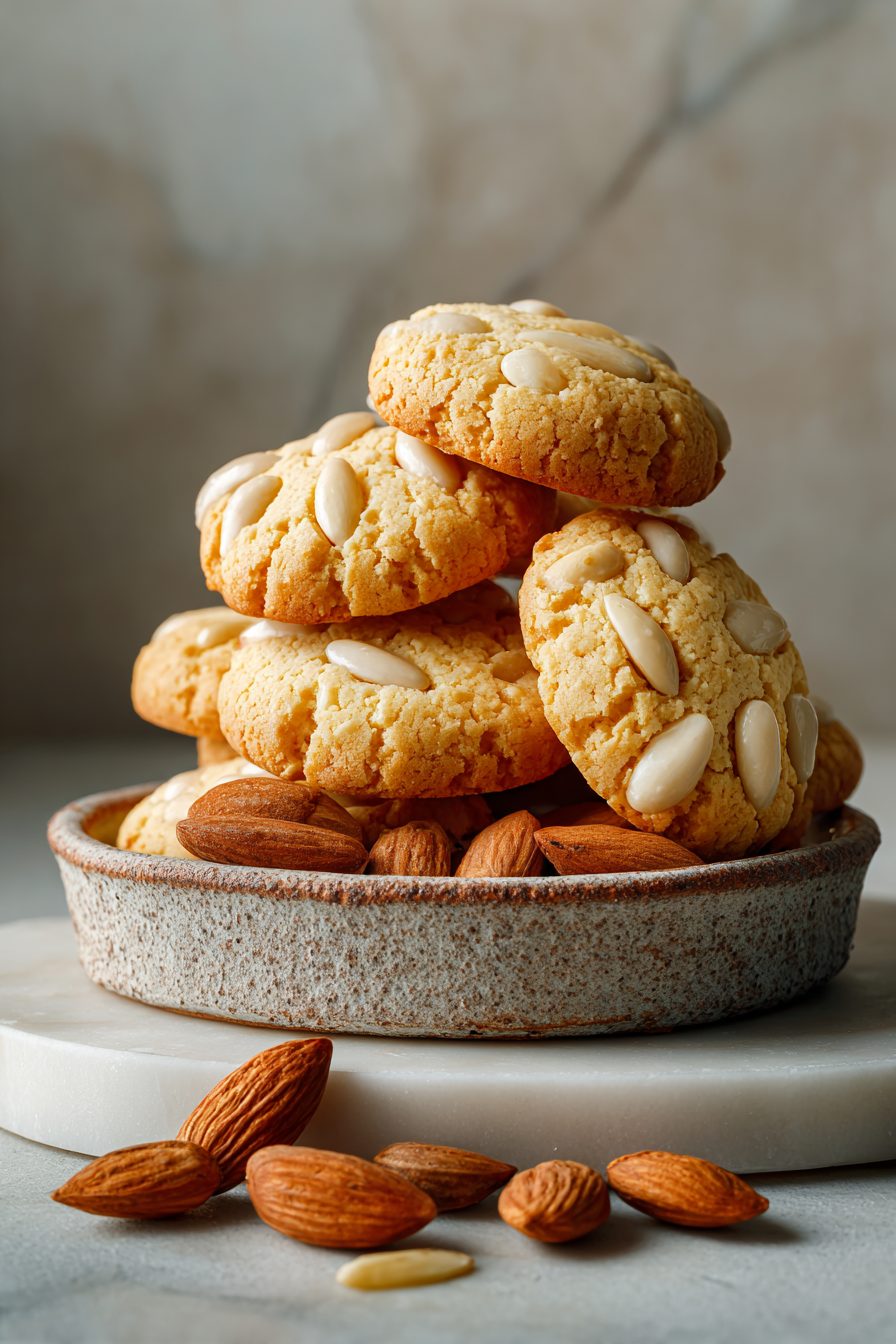
These Pine Nut Cookie Delights turned out chewy, nutty, and perfectly sweet—just like the classic Italian pignoli cookies I grew up loving, with that simple almond paste magic shining through[1][2]. Chilling the dough made rolling them in pine nuts a breeze, and they baked up golden in about 12 minutes for holiday perfection[1][3]. Honest truth: they're addictive, but watch those pricey pine nuts—they're worth every bite!
MORE OF OUR FAVORITE…
This recipe has forgiving timing — that’s the best kind. Dough that sits a little while chills and gains flavor, but if you’re impatient (hi), you can bake straightaway and no one will stage an intervention. If you swap almond for pine nuts in a pinch, it’s okay, but not the same guilty-grin magic.
Shopping Tips
– Baking Basics (Flour/Sugar/Leaveners): Use good all-purpose flour and check your baking powder/soda dates — old leaveners make cookies sad and flat.
– Fats & Oils: Real butter gives the best flavor; if you’re using margarine or a vegan block, expect a slightly different texture.
– Nuts & Seeds: Buy pine nuts that look pale and plump; avoid ones that smell bitter or have dark spots. Toast them quickly for the best flavor.
– Eggs: Fresh eggs give better structure and gloss to cookies; if you’re unsure, do the float test (they should sink).
– Flavor Boosts: Pure vanilla extract and a little citrus zest (optional) will lift the whole batch — use real vanilla if you can.
Prep Ahead Ideas
– Toast pine nuts a day ahead and store them in an airtight container to keep them crunchy.
– You can mix the dough the night before, shape into a log or scoop rounds, wrap tightly, and refrigerate; bake straight from chilled for a slightly denser, chewier cookie.
– Use shallow, airtight containers for prepped dough so it chills evenly; label with date so you don’t forget which log belongs to which recipe.
– Doing the prep the night before saves a frantic hour on baking day — great when you want fresh cookies after dinner without the whole kitchen takeover.
Time-Saving Tricks
– Toast pine nuts in a skillet while the oven preheats — two tasks, one pan, less mess.
– Use a medium cookie scoop so cookies bake evenly without fiddling with spoonfuls.
– Freeze scooped dough on a tray, then transfer to a bag; bake frozen scoops — no need to defrost.
– Don’t rush the browning step if your recipe calls for browned butter; it’s worth the 2–3 extra minutes for depth of flavor.
Common Mistakes
– Overbaking: I once left a tray in while I finished a phone call and returned to toast-shaped hockey pucks. Pull them out when edges are lightly golden — they’ll set as they cool.
– Not toasting nuts: raw pine nuts taste grassy. Toast until fragrant and just starting to color.
– Crowding the pan: cookies that touch bake into one sad sheet; give them room to spread so they get those pretty edges.
– Using old baking powder/soda: cookies won’t rise properly — check dates if your cookies come out flat.
What to Serve It With
– A mug of strong coffee or a creamy latte — the bitterness balances the buttery cookie.
– A scoop of vanilla ice cream for an indulgent dessert mashup.
– Fresh fruit salad to brighten the richness on the side.
– Serve with tea for a cozy afternoon snack.
Tips & Mistakes
– Use room-temperature butter unless the recipe says otherwise; it creams better with sugar.
– If dough seems greasy, pop it in the fridge for 20 minutes — it’ll firm up and bake prettier.
– Salt matters: a tiny pinch of flaky salt on top after baking is a game-changer.
– If cookies spread too much, try chilling the dough longer or using slightly less butter.
Storage Tips
Leftovers live happily in an airtight container at room temp for 3–4 days; the pine nuts keep a little crunch but mellow. Pop them in the fridge if it’s humid and you want to delay oiliness — they’ll be firmer and kind of lovely cold (yes, I eat them cold for breakfast, don’t judge). For longer storage, freeze baked cookies in a single layer, then bag them; thaw at room temp or nuke for 8–10 seconds if you want that just-baked feel.
Variations and Substitutions
– Swap some of the white sugar for brown sugar for a deeper, caramel-like flavor.
– Use browned butter for a toffee-ish richness — yes, it’s fussy but worth it.
– If pine nuts are outrageously priced, try blanched almonds or chopped hazelnuts; still delicious, just different.
– For a gluten-free option, use a 1:1 gluten-free flour blend and chill the dough a bit longer to help it hold together.
Frequently Asked Questions
Pine Nut Cookie Delights
Ingredients
Main Ingredients
- 10 oz almond paste, crumbled
- 0.5 cup granulated sugar
- 0.33 cup confectioners' sugar
- 2.5 oz egg whites about 2 large egg whites
- 1 tsp pure vanilla extract
- 0.25 tsp fine sea salt
- 1.25 cup pine nuts
- 0.5 tsp finely grated lemon zest optional, for brightness
- 2 tbsp confectioners' sugar, for dusting
Instructions
Preparation Steps
- Heat oven to 325°F. Line two baking sheets with parchment.
- Pulse almond paste, granulated sugar, and confectioners' sugar in a food processor until sandy.
- Whisk egg whites with vanilla, salt, and lemon zest until lightly foamy.
- With the processor running, stream in egg whites. Process until a sticky, smooth dough forms.
- Chill the dough 10 minutes to firm slightly for easier shaping.
- Add pine nuts to a shallow bowl. Scoop tablespoon-size portions of dough and roll to coat in pine nuts.
- Arrange on sheets, spacing 2 inches apart. Gently flatten tops. Dust lightly with confectioners' sugar.
- Bake 14–18 minutes, until edges are lightly golden and centers are just set.
- Cool on the pan 5 minutes, then transfer to a rack to cool completely for chewy centers.
- Store in an airtight container at room temperature up to 5 days.
Notes
Featured Comments
“Made this last night and it was absolutely loved. Loved how the foolproof came together.”
“Made this last night and it was will make again. Loved how the warm came together.”
“Made this last night and it was family favorite. Loved how the smoky came together.”
“Super easy and so flavorful! My family asked for seconds. Saving this one.”
“New favorite here — so flavorful. handheld was spot on.”
“This colorful recipe was absolutely loved — the flavor-packed really stands out. Thanks!”
“Impressed! Clear steps and family favorite results. Perfect for busy nights.”
“New favorite here — turned out amazing. fresh catch was spot on.”
“Made this last night and it was will make again. Loved how the cozy came together.”
“Super easy and family favorite! My family asked for seconds. Saving this one.”