Twix Bar Recipe: Easy and Delicious
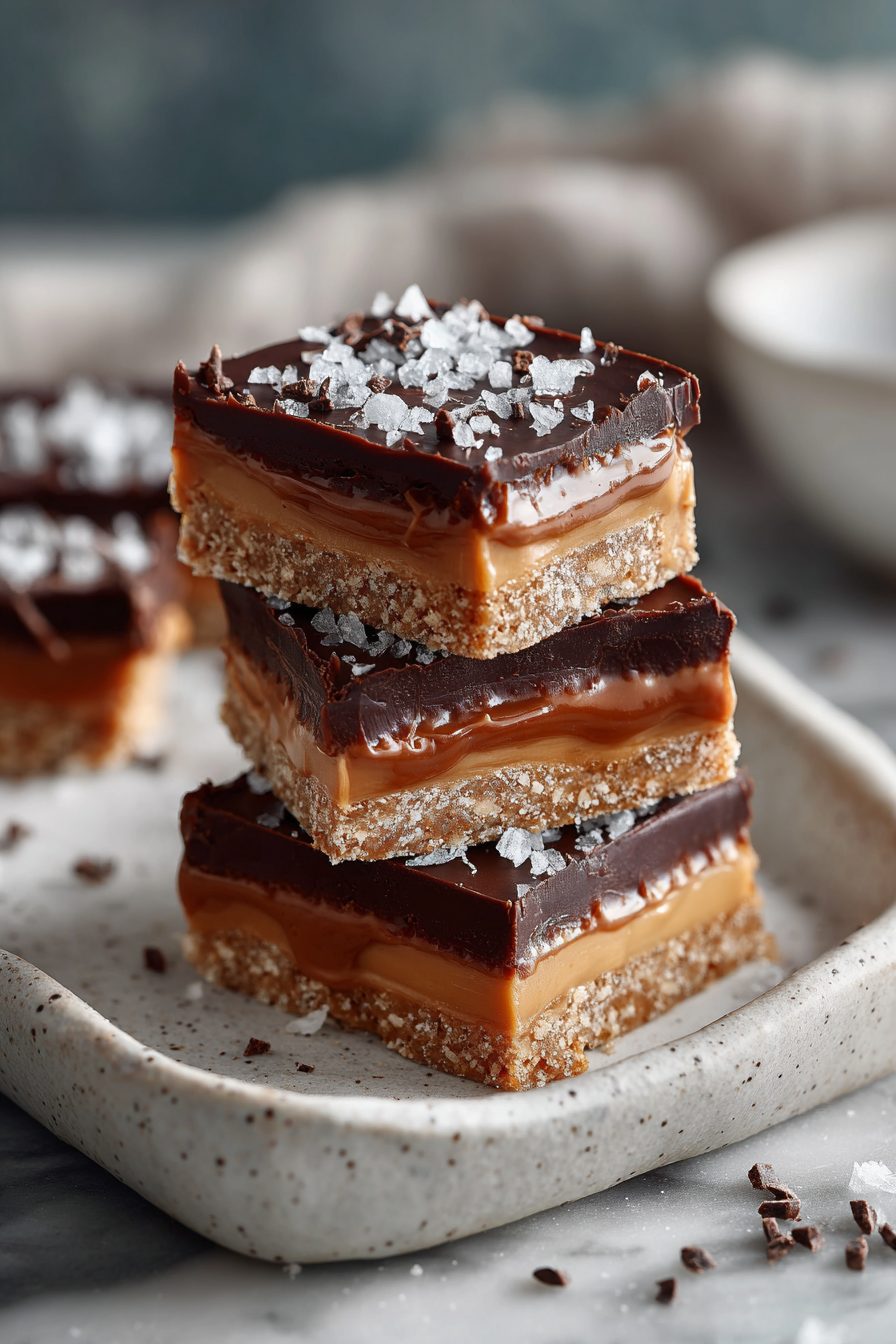
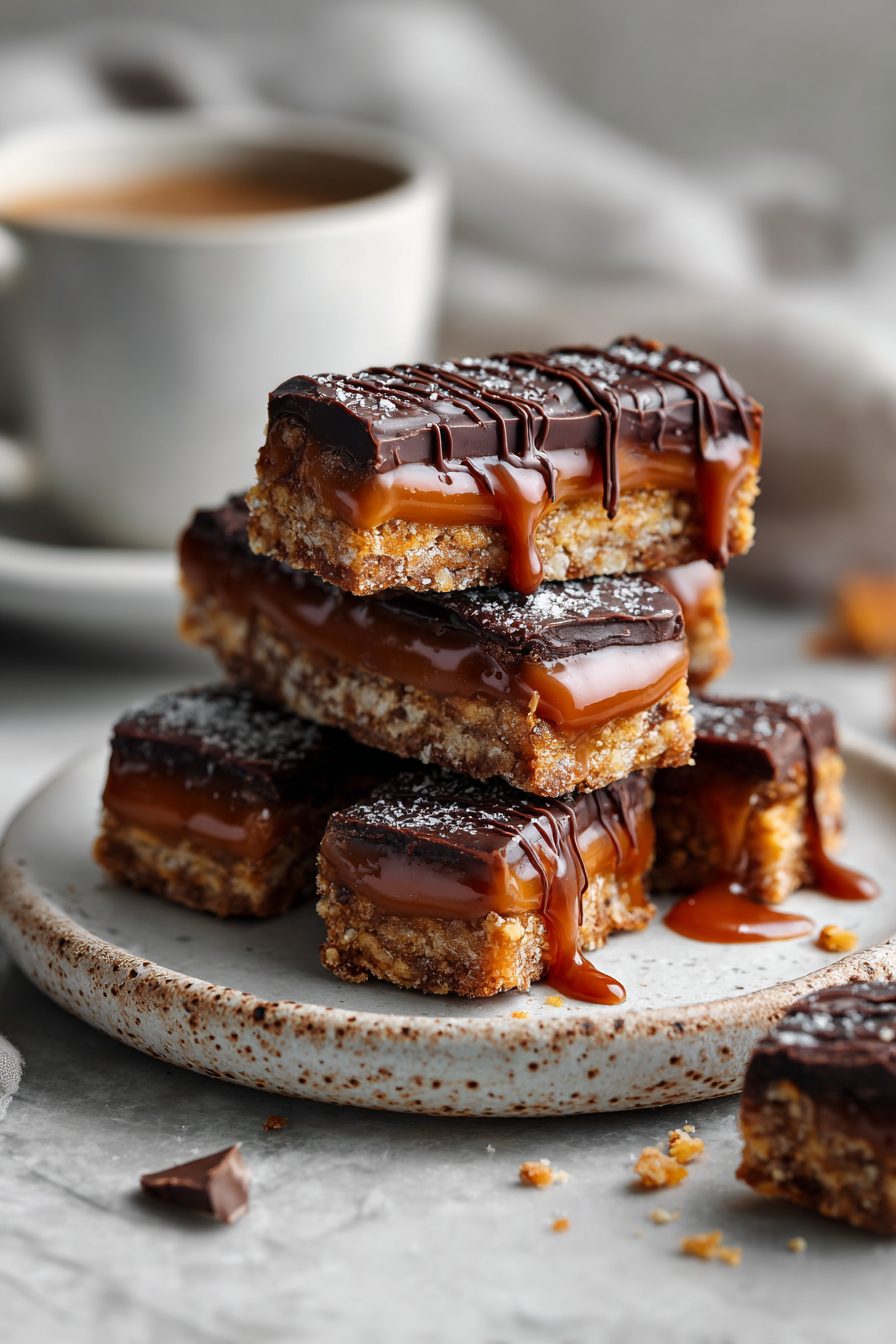
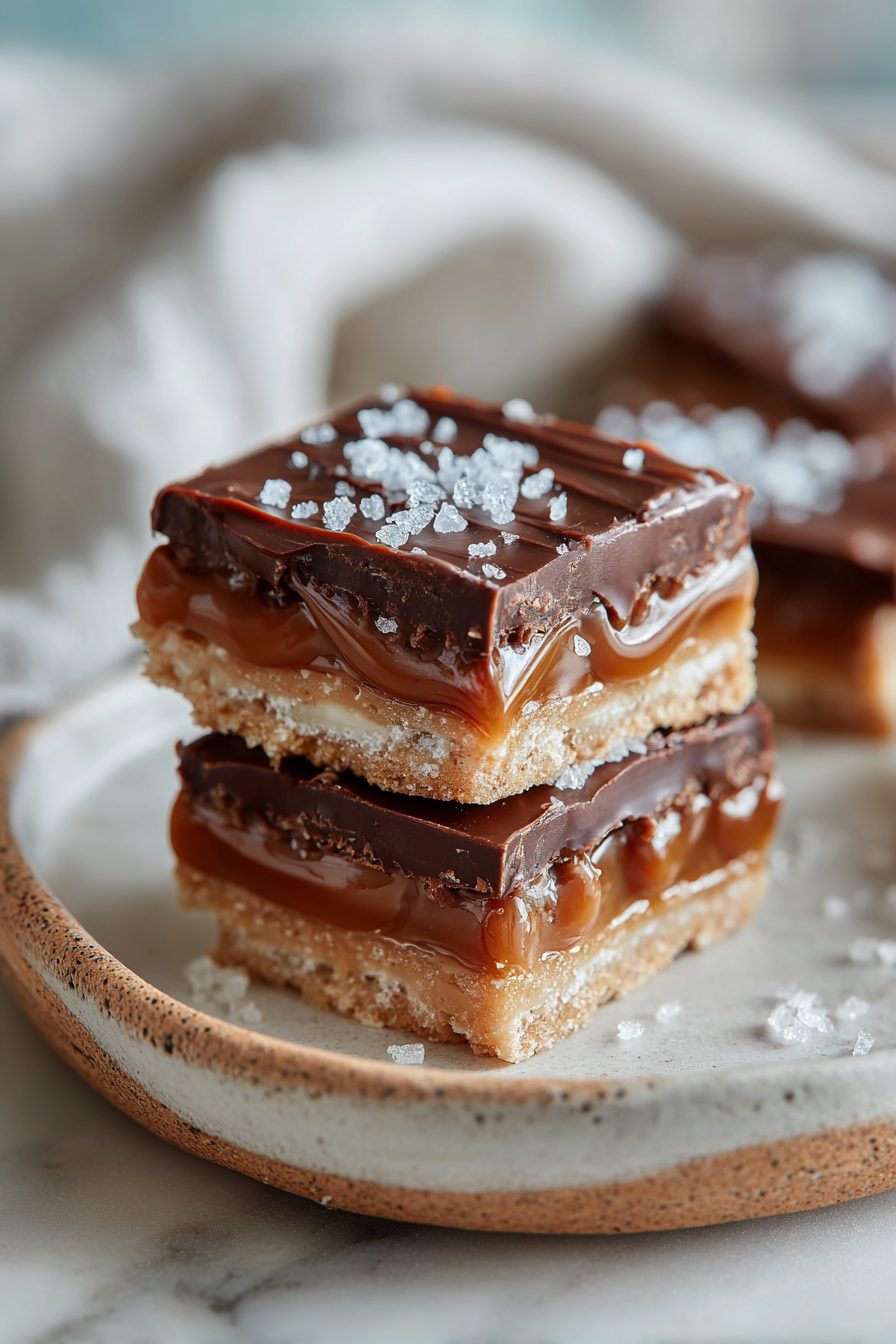
I made these homemade Twix bars because one rainy afternoon I wanted candy-bar nostalgia without the weird mystery oils, and also because someone in this house (looking at you, husband) will eat any chocolate–caramel-cookie thing offered. They’re a simple shortbread-ish base, a gooey caramel middle, and a chocolate top that snaps satisfyingly when you bite — the whole thing is ridiculous and exactly what you want after dinner.
My husband calls them “danger bars” and hides them in the back of the pantry like contraband. The kids have a system where the youngest politely asks for one and the oldest pretends not to see them. I’ve brought these to potlucks, birthday parties, and a frozen pie rescue once (don’t ask), and people always ask for the recipe. It’s easy to double and easy to hide. Also: you’ll probably eat the cut ends first. No shame.
Why You’ll Love This Twix Bar Recipe: Easy and Delicious
– All the crunchy cookie + gooey caramel + chocolate satisfaction of a candy bar, but homemade and way more generous with the caramel.
– No fancy tools or pastry degree required — mostly press, spread, chill, melt, repeat.
– Foolproof party food: makes a tray that disappears fast and gets compliments from strangers.
– Flexible — make them fancy with flaky salt or keep them simple and comforting.
Kitchen Talk
MORE EASY DESSERT RECIPES...


I once tried to rush the caramel and ended up with a gritty, panic-layer that wouldn’t set. Learned to breathe, give it time, and let the pan do its thing. Another time I swapped part of the butter for a touch of oil because I was out of butter, and honestly? It still tasted like happiness, just a little less brittle. If your life is chaotic like mine, use store-bought caramel squares melted down — no judgments here. The messy part is normal: your spatula will have evidence, and so will your shirt.
Warm, homey, and delightfully indulgent—this Twix bar recipe delivers a buttery shortbread base, gooey caramel, and a chocolate top that tastes like a weekend treat made with love. It’s easy enough for a cozy baking session and the layers come together beautifully, though I kept mine chilled briefly so the chocolate didn’t get too melty.
MORE OF OUR FAVORITE…
Shopping Tips
– Baking Basics (Flour/Sugar/Leaveners): Grab all-purpose flour and granulated sugar for the base; if you see “unenriched” flour at a discount, skip it — it bakes differently.
– Fats & Oils: Use real butter for flavor and structure; salted vs. unsalted is personal, but unsalted gives you control over the final salt level.
– Chocolate: Choose a decent baking chocolate or a bar you’d eat — higher cocoa gives a nicer snap and less sweetness.
– Flavor Boosts (vanilla/zest): A splash of vanilla and a tiny pinch of flaky sea salt on top lift the whole bar from “nice” to “ridiculously good.”
– Nuts & Seeds: If you want a crunch upgrade, buy roasted, unsalted chopped nuts or crushed pretzels to sprinkle on before the chocolate sets.
Prep Ahead Ideas
– Make the shortbread base a day ahead and keep it chilled; it’s easier to top and cuts cleaner when cold.
– Caramel can be cooked and cooled in advance; warm gently before spreading if it gets too stiff.
– Store layers separately in airtight containers if prepping for a party, then assemble the day of to keep textures perfect.
– Use shallow, parchment-lined containers so you can lift the whole slab out to cut evenly later.

Time-Saving Tricks
– Use pre-made caramel candies (unwrap, melt) if you’re short on time — still tastes like love.
– Press the crust into a rimmed sheet pan with parchment for easy removal and even edges.
– Melt chocolate in short bursts in the microwave, stirring between bursts, so you don’t babysit a double boiler.
– Chill between layers — quick 20–30 minute chills speed up assembly without wrecking texture.
Common Mistakes
– Letting caramel runny? I did this once and it seeped into the crust. Fix: put the slab in the fridge for longer, or blot excess and re-spread thicker caramel.
– Chocolate that blooms or looks streaky — that means it got too warm or cooled unevenly. Quick fix: reheat gently and re-smooth, or toss a sprinkle of flaky salt and call it artisanal.
– Using too thin a base — bars break when you cut them. If that happens, serve them as “crumbly cookies” and nobody will complain.
– Forgetting to line the pan — learned the hard way. Always parchment.
What to Serve It With
– A big mug of black coffee or espresso for contrast.
– Vanilla ice cream for ultimate warm-cold pairing.
– Fresh fruit like berries to cut the sweetness.
– A simple green salad if you’re serving these after dinner and want something light first.
Tips & Mistakes
– Press the crust firmly and evenly — uneven thickness = uneven baking.
– Salt late: flaky sea salt on top after the chocolate sets is magic.
– If chocolate hardens with fingerprints, refrigerate briefly to firm it up for cleaner slices.
– Overbaked base = dry crumbs; watch the edges, not the center.
Storage Tips
Keep these in an airtight container at room temp for a couple of days, or refrigerate for longer life — cold ones are firmer and snackable for breakfast if you’re morally dubious like me. They freeze well in layers separated by parchment; thaw in the fridge for best texture. If you eat them cold, the caramel will be chewier and the chocolate more brittle — perfectly acceptable behavior.
Variations and Substitutions
– Swap peanut butter into the caramel layer for a nutty twist (peanut butter lovers, you’re welcome).
– Use dark chocolate for less sweetness or milk chocolate for classic candy-bar vibes.
– Gluten-free crowd? Use a 1:1 gluten-free flour blend for the base — it’ll be a touch different but totally cozy.
– Short on time: press a store-bought cookie crust into the pan, top with caramel and chocolate, and call it a day.
Frequently Asked Questions
Twix Bar Recipe: Easy and Delicious
Ingredients
Main Ingredients
- 0.95 cup unsalted butter, softened for the shortbread base
- 0.45 cup granulated sugar for the shortbread base
- 2.1 cup all-purpose flour spooned and leveled
- 0.5 tsp fine salt for the shortbread base
- 1 tsp vanilla extract for the shortbread base
- 0.5 cup unsalted butter for the caramel
- 0.5 cup light brown sugar, packed for the caramel
- 14 oz sweetened condensed milk one can
- 2 tbsp light corn syrup for smoother caramel
- 0.25 tsp fine salt for the caramel
- 1 tsp vanilla extract for the caramel
- 12 oz milk chocolate chips or chopped milk chocolate
- 2 tsp vegetable oil for glossy chocolate
- 0.25 tsp flaky sea salt optional, for topping
Instructions
Preparation Steps
- Heat oven to 350°F. Line a 9×13-inch pan with parchment, leaving overhang.
- Cream softened butter and sugar for the shortbread until light and smooth.
- Blend in vanilla and salt, then mix in flour just until a soft, crumbly dough forms.
- Press dough evenly into the pan. Dock lightly with a fork.
- Bake 18–22 minutes, until edges are lightly golden. Cool in pan 10 minutes.
- Cook caramel: melt butter, brown sugar, condensed milk, corn syrup, and salt in a saucepan over medium heat, stirring constantly.
- Simmer 4–6 minutes, stirring, until thick and 238–240°F or deeply golden. Remove from heat and stir in vanilla.
- Pour caramel over the warm crust. Spread evenly and chill 15–20 minutes to set.
- Melt chocolate with oil in a microwave or double boiler, stirring until silky.
- Spread chocolate over caramel. Sprinkle flaky salt if using. Chill until firm, about 20 minutes.
- Slice into bars with a warm knife. Wipe the blade between cuts for clean edges.
Notes
Featured Comments
“Impressed! Clear steps and will make again results. Perfect for busy nights.”
“New favorite here — so flavorful. crowd-pleasing was spot on.”
“This perfect pair recipe was will make again — the foolproof really stands out. Thanks!”
“Super easy and absolutely loved! My family asked for seconds. Saving this one.”
“Super easy and so flavorful! My family asked for seconds. Saving this one.”
“New favorite here — family favorite. satisfying was spot on.”
“Impressed! Clear steps and so flavorful results. Perfect for busy nights.”
“New favorite here — will make again. vibrant was spot on.”
“Impressed! Clear steps and will make again results. Perfect for busy nights.”
“Super easy and will make again! My family asked for seconds. Saving this one.”