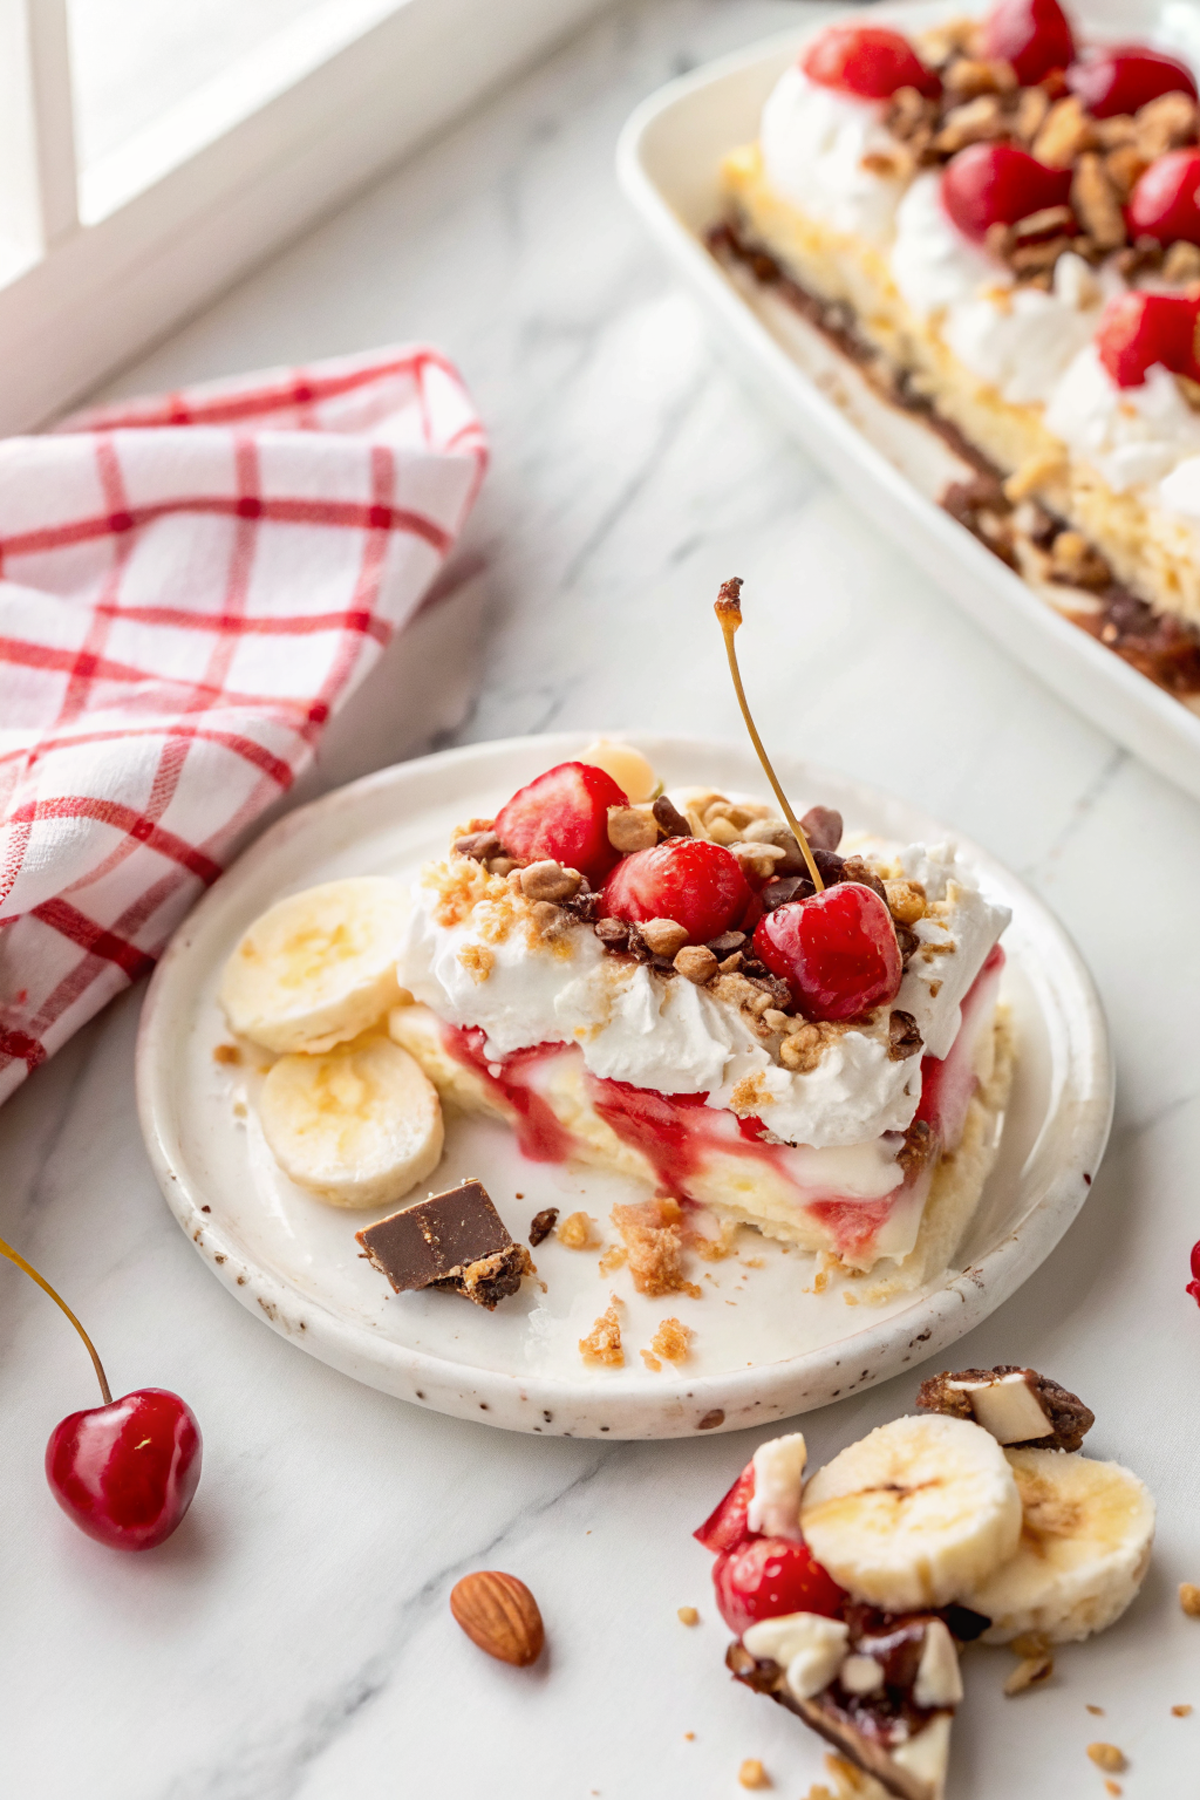
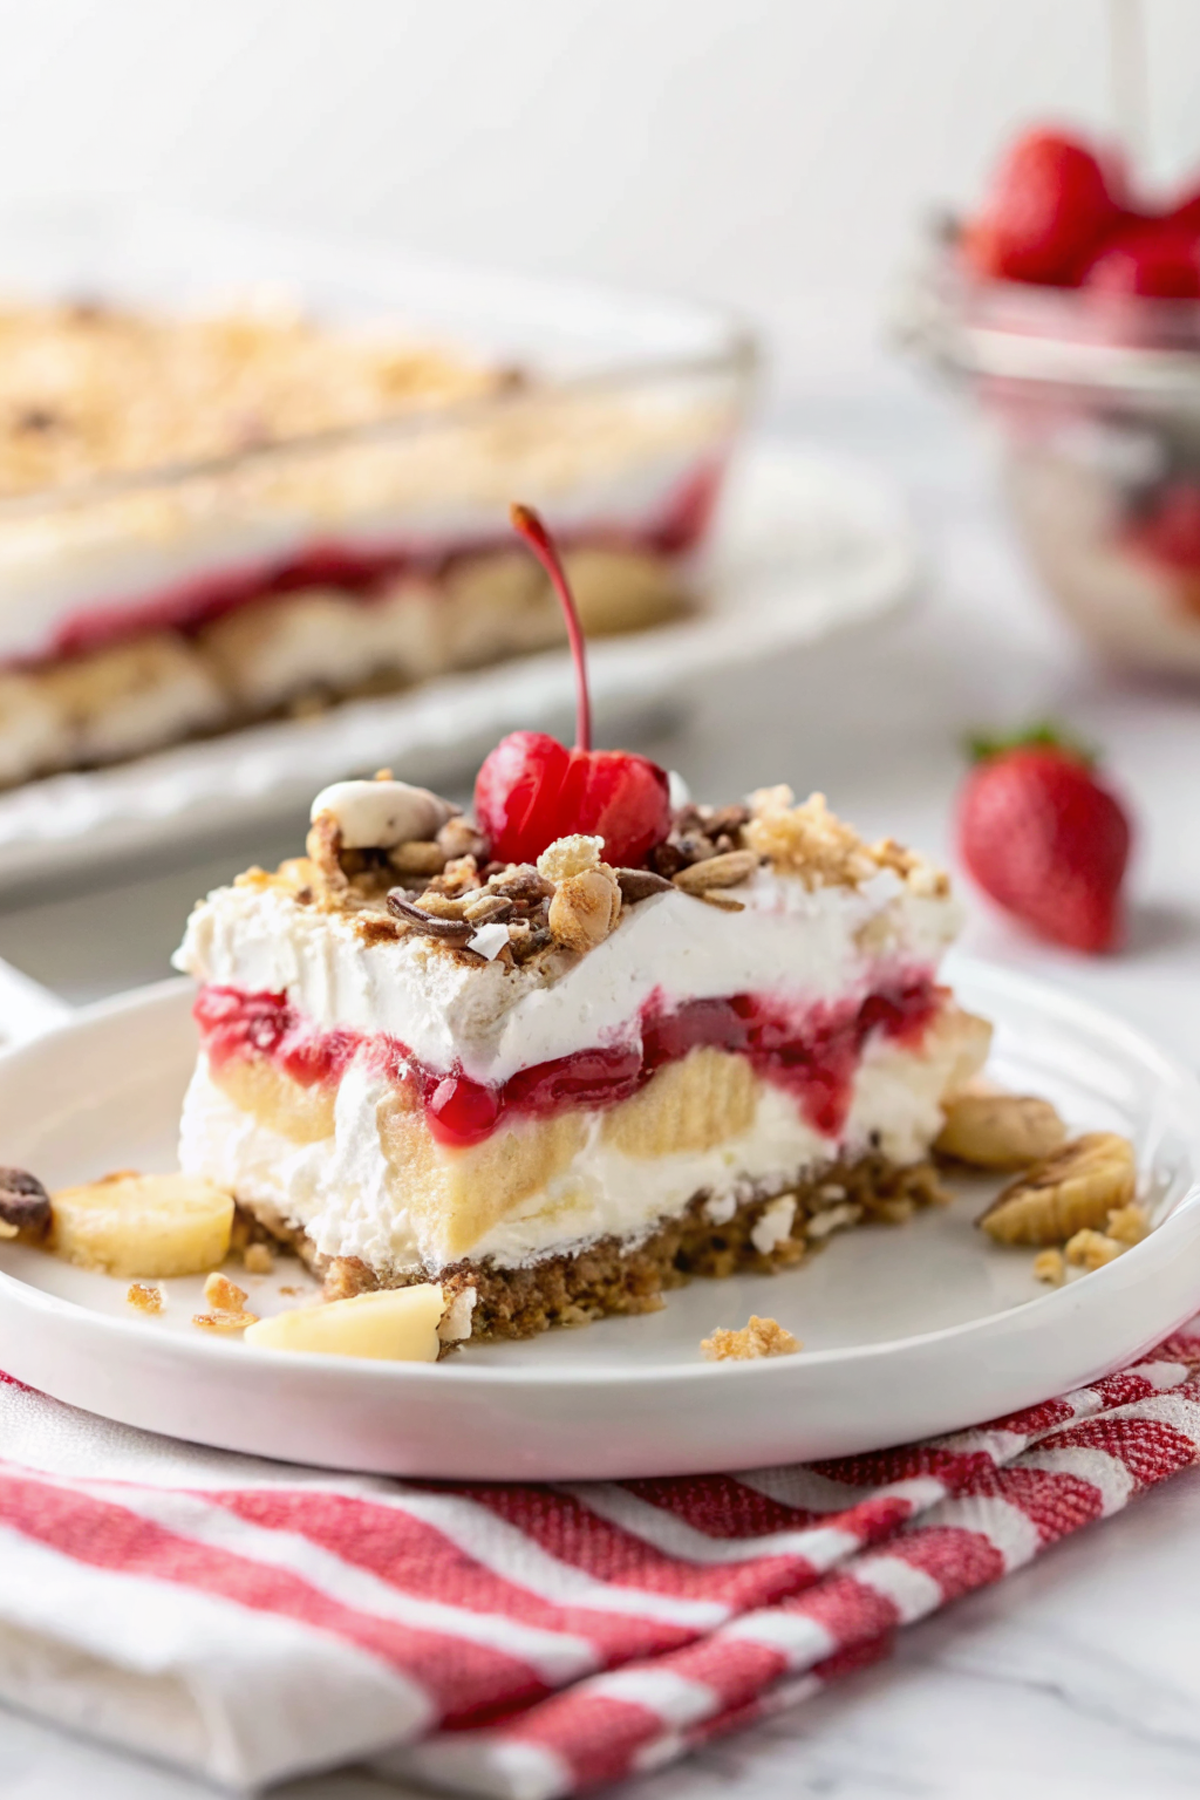
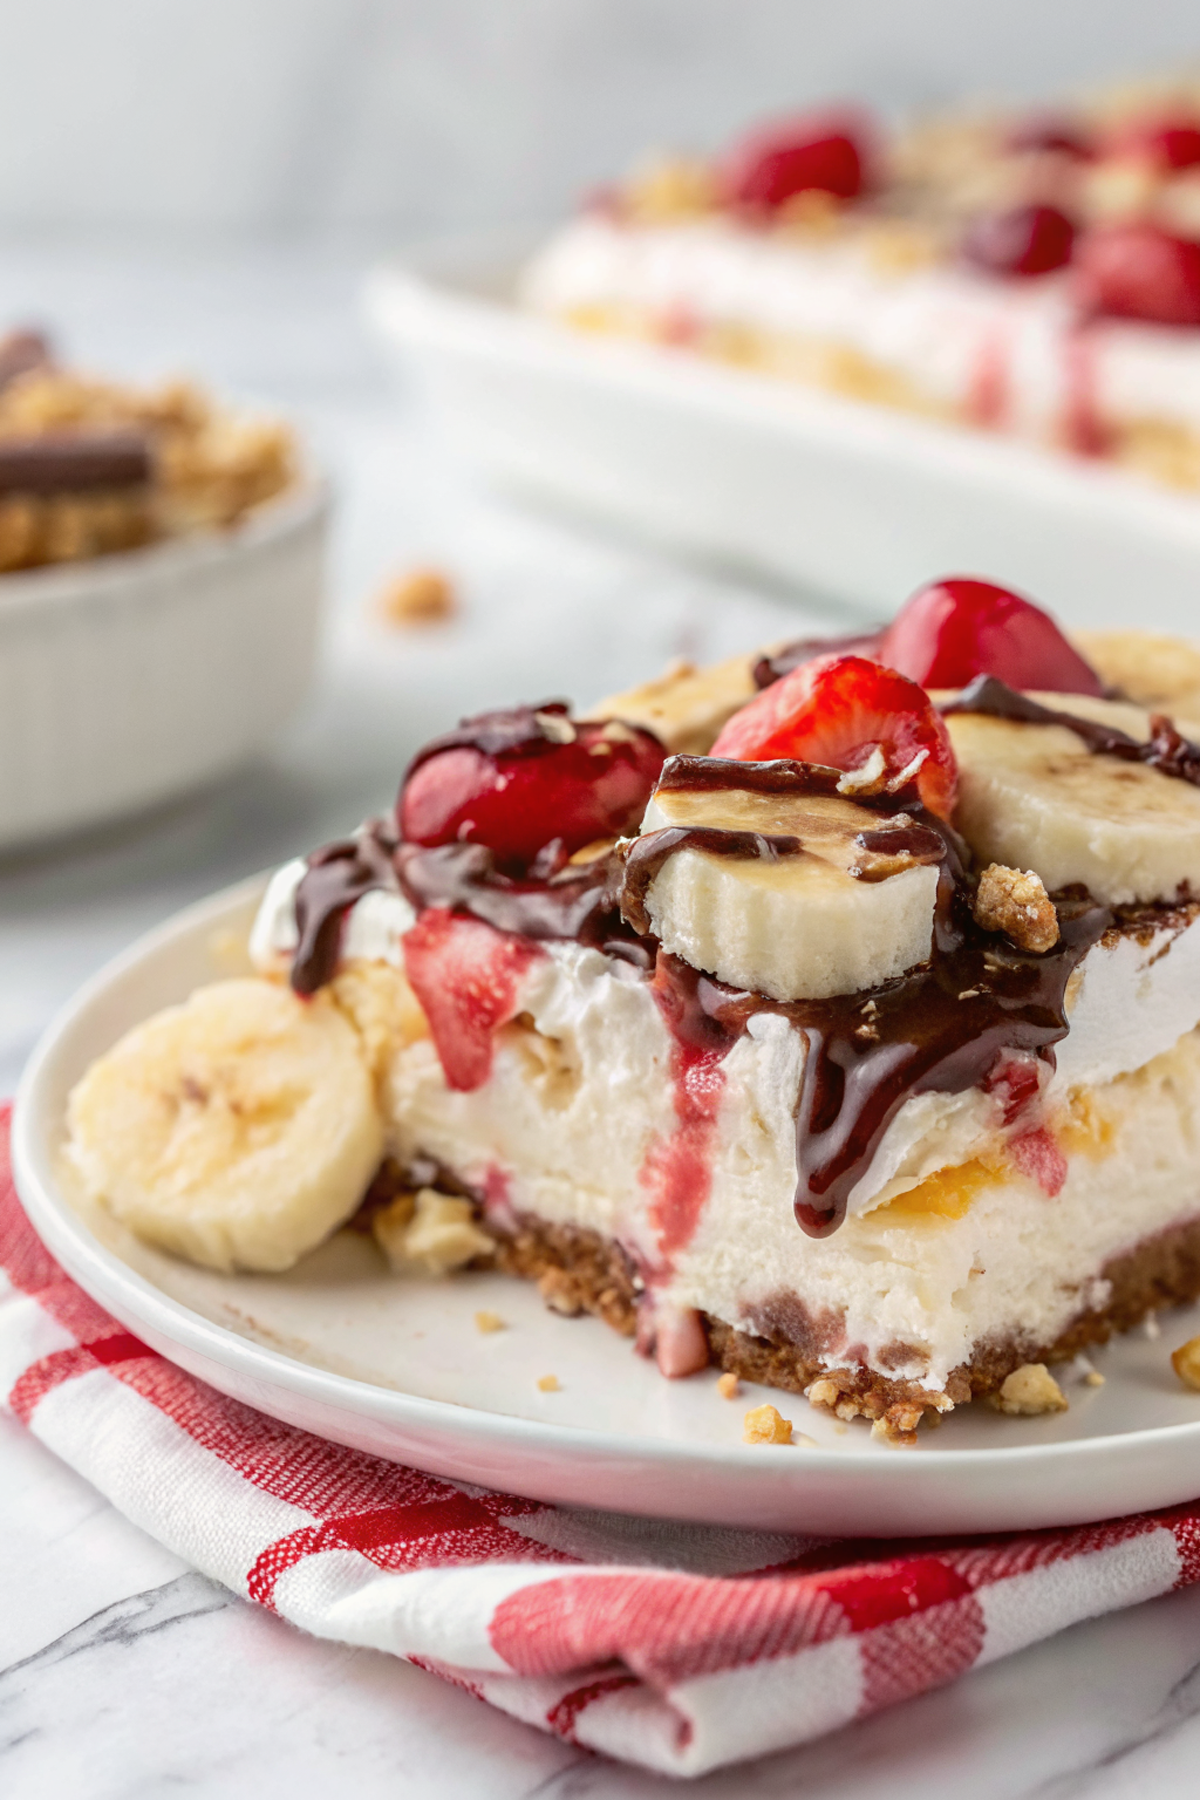
No Bake Banana Split Dessert
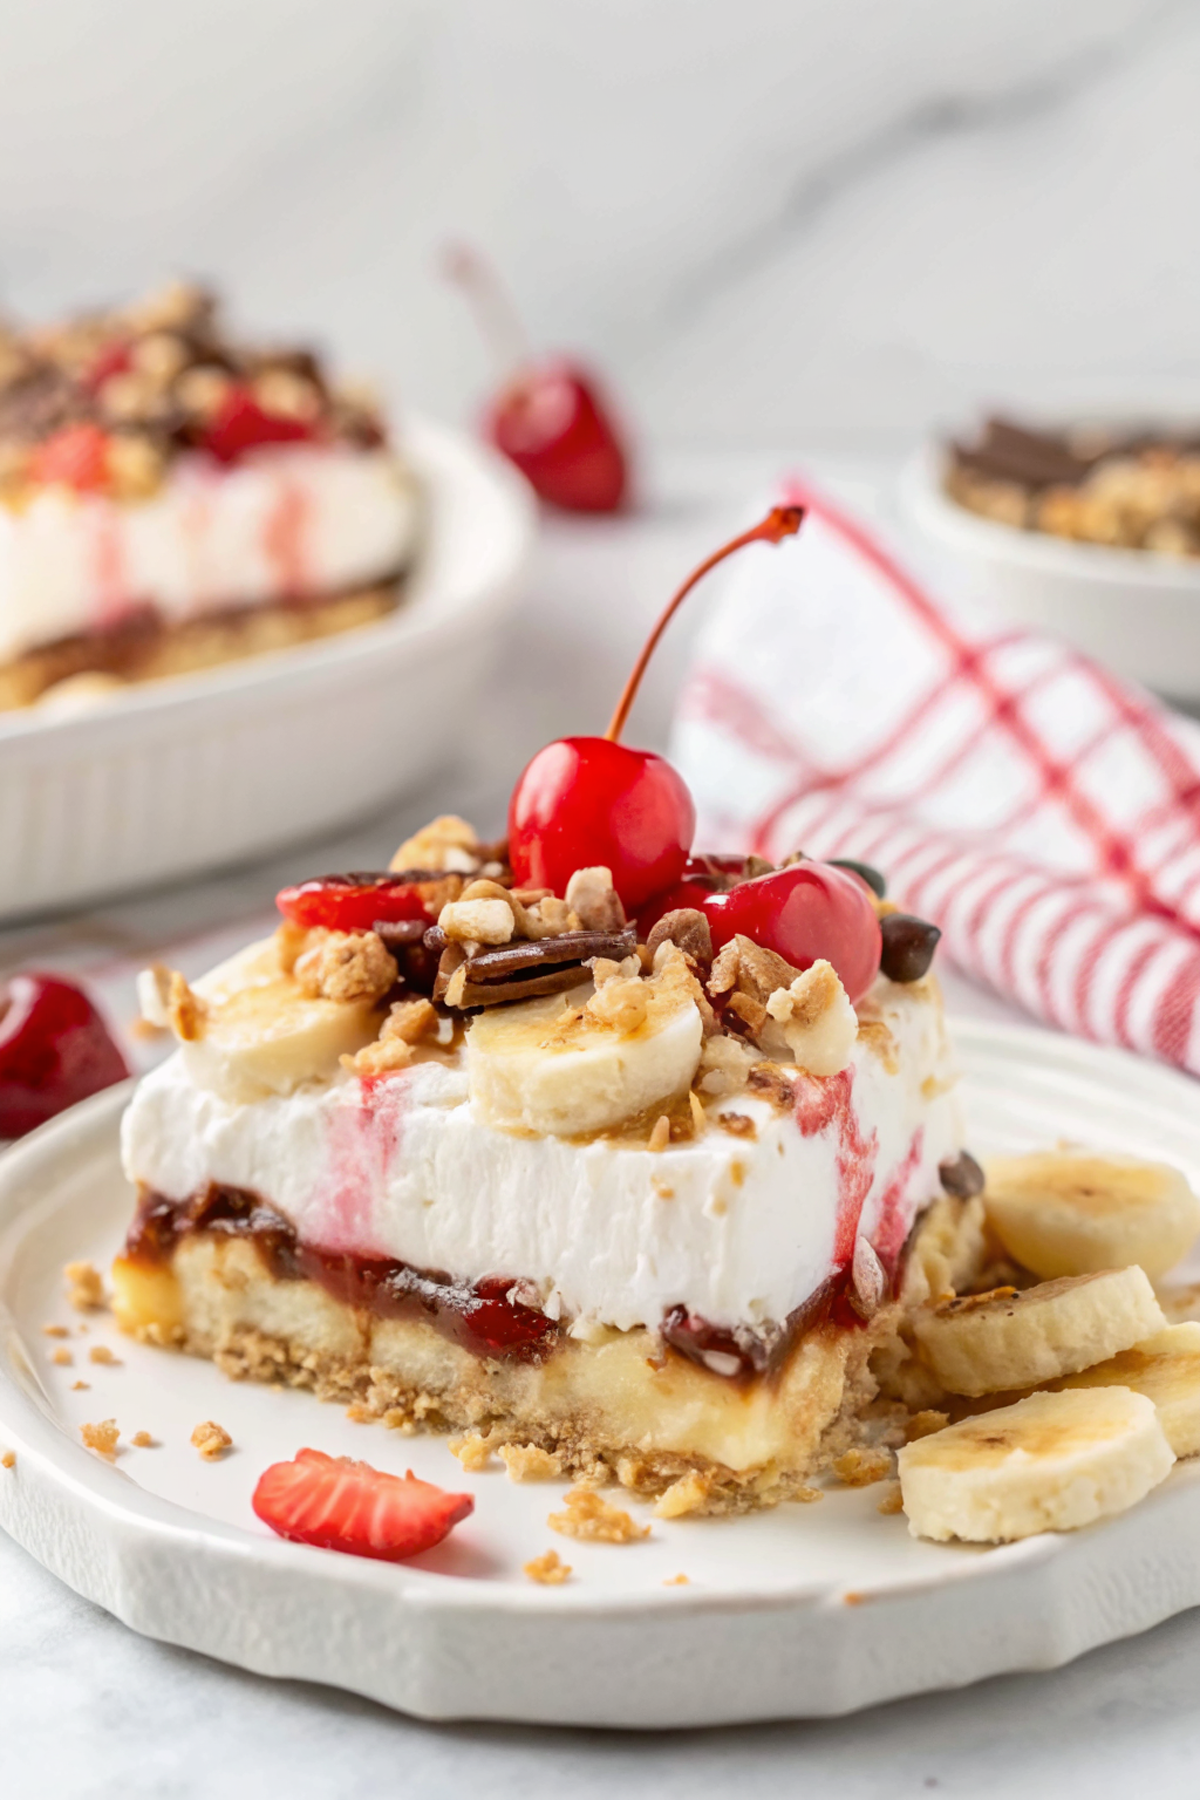
This no-bake banana split dessert is basically a grown-up, lazy version of the childhood sundae you begged for after swimming lessons — layered, slightly messy, and all the best flavors in one spoon. Think crunchy cookie base, creamy pudding or mascarpone, ripe bananas, bright strawberries and pineapple, a drizzle of chocolate, a dollop of whipped cream and a cherry on top — but without turning on the oven. It sets in the fridge, stays chill, and somehow tastes way fancier than the time you microwaved ice cream (don’t do that).
My husband officially declares this his “adult birthday cake” and my kid calls it “the spoon party.” We make it whenever someone shows up hungry at 7 p.m., when friends stop by, or when I need dessert that feels celebratory but won’t eat up my evening. Once I layered it in a trifle bowl and forgot it in the back of the fridge — found it two days later and everyone still wanted seconds. That’s how it became a staple: forgiving, fast, and dangerously easy to hide from guests (sorry, not sorry).
Why You’ll Love This No Bake Banana Split Dessert
– It’s no-bake: cool for hot days and lazy bakers.
– All the banana-split nostalgia without the sticky countertop aftermath.
– Layers give you texture — crunchy, creamy, fruity, and chocolatey in one bite.
– Makes a big bowl for sharing or a bunch of little jars for pretending you planned ahead.
Kitchen Talk
MORE EASY DESSERT RECIPES...


I made this the first time after a long, chaotic day and zero patience for recipes that require measuring cups and dignity. The first attempt looked like a science project, but the kids loved it so I kept going. I’ve swapped pudding for whipped mascarpone when I wanted a less-sweet version, and once I used crushed graham crackers instead of cookies because that’s what the pantry offered — surprisingly great. Expect a little drippy chaos when you spoon it into bowls; that’s part of the charm.
MORE OF OUR FAVORITE…
Shopping Tips
– Produce/Fruit: Choose bananas that are yellow with a few brown spots for peak sweetness — too green and they won’t taste like much.
– Dairy: If using whipped cream or mascarpone, buy full-fat for the best texture; low-fat can turn runny faster.
– Sweeteners: If your pudding is too sweet, balance with a squeeze of lemon on the fruit or use plain yogurt mixed with a touch of honey.
– Chocolate: Pick a semi-sweet bar for melting (better flavor than chips); dark chocolate makes it less cloying.
– Crunch Extras: Vanilla wafers, graham crackers, or chopped nuts all work — go with what you like or what’s on sale.
Prep Ahead Ideas
– Slice bananas and berries a few hours ahead and keep them in an airtight container with a little lemon juice to stop browning.
– Crush cookies or crackers and store in a sealed bag at room temp so they stay crispy.
– Mix pudding or mascarpone filling earlier in the day and fridge-chill; assemble layers right before serving for maximum texture.
– Use small mason jars or a big trifle bowl depending on whether you want grab-and-go or drama.
Time-Saving Tricks
– Use instant pudding or stabilized whipped cream to skip long chilling times.
– Buy pre-sliced fruit if you’re in a hurry — saves 10 minutes and a knife fight with kids.
– Make lots at once in one big bowl; it’s the same effort and feeds more people.
– Don’t overthink the chocolate drizzle — a quick zap in the microwave melts it fast (10–15 seconds at a time).
Common Mistakes
– Overly mushy bananas: I once sliced them too early and the whole layer turned brown and sad — slice close to assembly next time.
– Soggy base: if you layer cookies directly under wet fruit, they’ll get soggy; put a thin barrier of filling in between.
– Too-sweet: if your fruit isn’t tart enough, the dessert can feel cloying — a little lemon or plain yogurt helps.
– Skimping on texture: no one wants a uniform blob; keep at least one crunchy layer (cookies, nuts, or granola).
What to Serve It With
– A simple espresso or iced coffee to cut the sweetness.
– Fresh mint or a quick fruit salad for extra brightness.
– Shortbread cookies or extra vanilla wafers on the side for dunking.
– Scoop of good vanilla ice cream if you want to go full-sundae.
Tips & Mistakes
– Use room-temperature pudding or cream for smoother layers; cold stuff can clump.
– Slice bananas right before assembly to avoid browning.
– If your whipped cream weeps, give it a quick whisk before serving.
– If a layer is wet, press a paper towel against the edge to soak up excess moisture quickly.
Storage Tips
Leftovers keep covered in the fridge for 2–3 days, but the texture changes — cookies soften and bananas get browner. It’s still really good cold for breakfast (no judgment here). For the best look, store components separately (crumbs, fruit, cream) and assemble within a day.
Variations and Substitutions
– Swap pudding for Greek yogurt sweetened with honey for a tangier, protein-packed version.
– Use toasted nuts (pecans or almonds) instead of wafers for a nutty crunch.
– Pineapple can be swapped for mango or peach when in season.
– If dairy-free, coconut whipped cream and dairy-free cookies are a solid plan — texture shifts but flavor is still fun.
Frequently Asked Questions
No Bake Banana Split Dessert
Ingredients
Graham Crust
- 2 1/2 cups graham cracker crumbs
- 6 tablespoons unsalted butter, melted
Creamy Layer
- 8 ounces cream cheese, softened
- 1 3/4 cups powdered sugar
- 2 tablespoons unsalted butter, softened
- 1 teaspoon pure vanilla extract
Fruit Layer
- 5 ripe bananas, sliced
- 2 teaspoons fresh lemon juice
- 1 can (16 oz) crushed pineapple, well drained
Topping & Garnish
- 12 ounces whipped topping, thawed (or 2 cups cold heavy cream whipped to soft peaks)
- 1/2 cup hot fudge sauce, gently warmed
- 3/4 cup chopped pecans or walnuts
- 10-12 maraschino cherries, drained and halved
- 2 tablespoons dark chocolate shavings
Instructions
Preparation Steps
- Line a 9x13-inch pan with a parchment sling (for easy lifting). Set a fine-mesh strainer over a bowl and drain the crushed pineapple well; press with a spoon to remove excess liquid. Pat the cherries dry with paper towels. If whipping cream, chill the mixing bowl and beaters.
- Stir the graham cracker crumbs with the melted butter until evenly moistened. Pour into the prepared pan and compact firmly with the bottom of a measuring cup, pressing into the corners. Refrigerate 20 minutes to set.
- In a medium bowl, beat the cream cheese and softened butter until completely smooth, about 1 minute. Add the powdered sugar in two additions, beating after each until fluffy, then mix in the vanilla. Spread this layer evenly over the chilled crust.
- Toss the banana slices with the lemon juice. Arrange bananas over the cream cheese layer, then scatter the well-drained pineapple on top. Press lightly with clean hands so the fruit adheres.
- Spread the whipped topping (or freshly whipped cream) over the fruit, sealing all the way to the edges to keep the bananas from browning.
- Drizzle the warm hot fudge in zigzags, sprinkle with chopped nuts, nestle the cherry halves across the top, and finish with dark chocolate shavings.
- Chill for at least 3 hours (or up to overnight). For extra-clean slices, place in the freezer for 15–20 minutes before cutting and use a warm knife wiped clean between cuts.
Notes
Featured Comments
“Super easy and family favorite! My family asked for seconds. Saving this one.”
“New favorite here — turned out amazing. family favorite was spot on.”
“Super easy and will make again! My family asked for seconds. Saving this one.”
“New favorite here — will make again. fluffy was spot on.”
“New favorite here — absolutely loved. speedy was spot on.”
“Super easy and absolutely loved! My family asked for seconds. Saving this one.”
“New favorite here — will make again. tender was spot on.”
“Impressed! Clear steps and will make again results. Perfect for busy nights.”
“Made this last night and it was family favorite. Loved how the tender came together.”
“Super easy and will make again! My family asked for seconds. Saving this one.”