Easy Crispy Potato Waffles

There’s this funny little lane between hash browns and waffles, and these live right there—golden potato waffles that are crispy-crunchy on the outside and fluffy-salty inside. Think latke meets diner waffle, with those perfect little syrup pockets if you’re into sweet-meets-savory. They’re easy, cheap, and wildly versatile, which is very much my love language on a Tuesday night when I have exactly zero brain cells left.
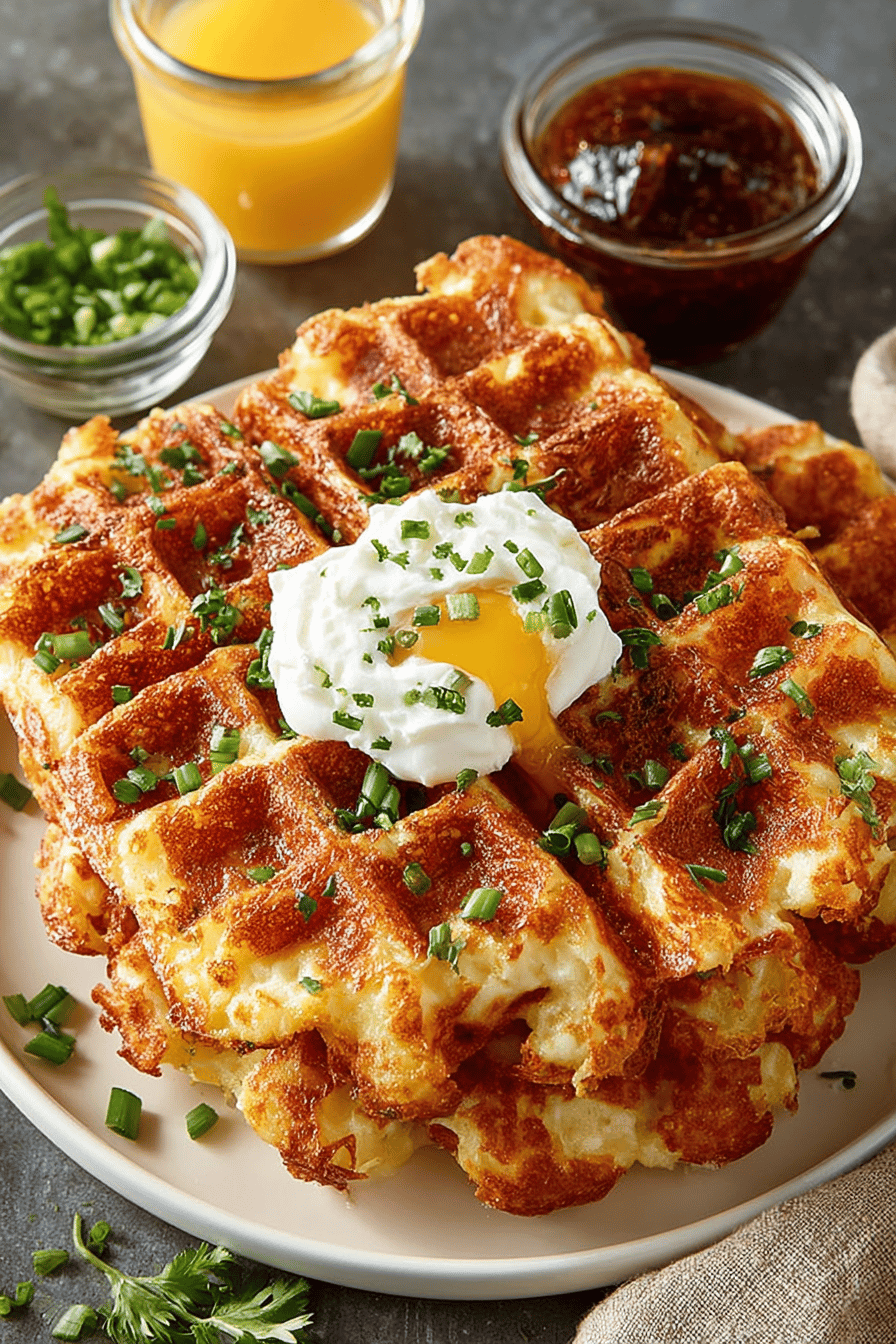
My husband calls these “waffle fries you can put eggs on,” and my kid calls them “crunchy grids,” which is… not wrong. We make a batch, throw them on a rack in the oven to stay crisp, and everyone gets to top their own—mine with a fried egg and hot honey, his with sour cream and lox if we’re feeling fancy, and the little one dips them in ketchup with terrifying enthusiasm. This recipe started as a clean-out-the-fridge experiment and now it’s become that reliable thing I can make while talking on the phone and unloading the dishwasher. Bless.
Why You’ll Love This Easy Crispy Potato Waffles
– The edges. Unreal. Like hash browns got a promotion.
– Pantry hero: potatoes, eggs, a little flour. That’s it. Add cheese if you’re living right.
– Dinner, breakfast, or the “I forgot about lunch” snack—totally flexible.
– Waffle maker magic: no flipping, no splattering oil, just close, wait, crisp.
– They freeze shockingly well, so future-you gets a treat.


These Easy Crispy Potato Waffles were such a fun twist on traditional breakfast! They came out golden and crunchy on the outside, soft and fluffy inside—just how I like them. Super simple to whip up, and my kids asked for seconds!
MORE OF OUR FAVORITE…
How to Make It
Okay, here’s the vibe: you’re basically making a potato latke batter, but sticking it in a hot waffle iron so it gets crispy in those little waffle pockets.
Grate 1½ pounds of russet potatoes on the large holes of a box grater, plus half a small onion if you want that classic diner taste. Toss it all in a bowl, then squeeze the ever-loving water out of it—fistfuls over the sink, or use a clean kitchen towel. The drier the better. Put the squeezed shreds back in the bowl with 2 beaten eggs, 1/3 cup flour (or 1/4 cup rice flour/cornstarch if gluten-free), 1 teaspoon baking powder (for a tiny lift), 1 teaspoon kosher salt, a good pinch of pepper, 1/2 teaspoon garlic powder, and a handful of sliced scallions or 1/2 cup shredded cheddar if you’re feeling cheesy. Stir. It’ll look shaggy and a little sticky—perfect.
Preheat the waffle iron to medium-high. Brush or spray both plates with oil. Don’t skip the oil. Scoop a generous 1/2 cup per square (for a 4-square Belgian iron), close the lid, and don’t peek for 5–6 minutes. You want deep golden brown. If it’s pale, give it 1–2 more minutes. Lift gently with tongs, prop on a wire rack, and if you’re batching, keep them warm in a 250°F oven so they stay crisp while you finish the rest.
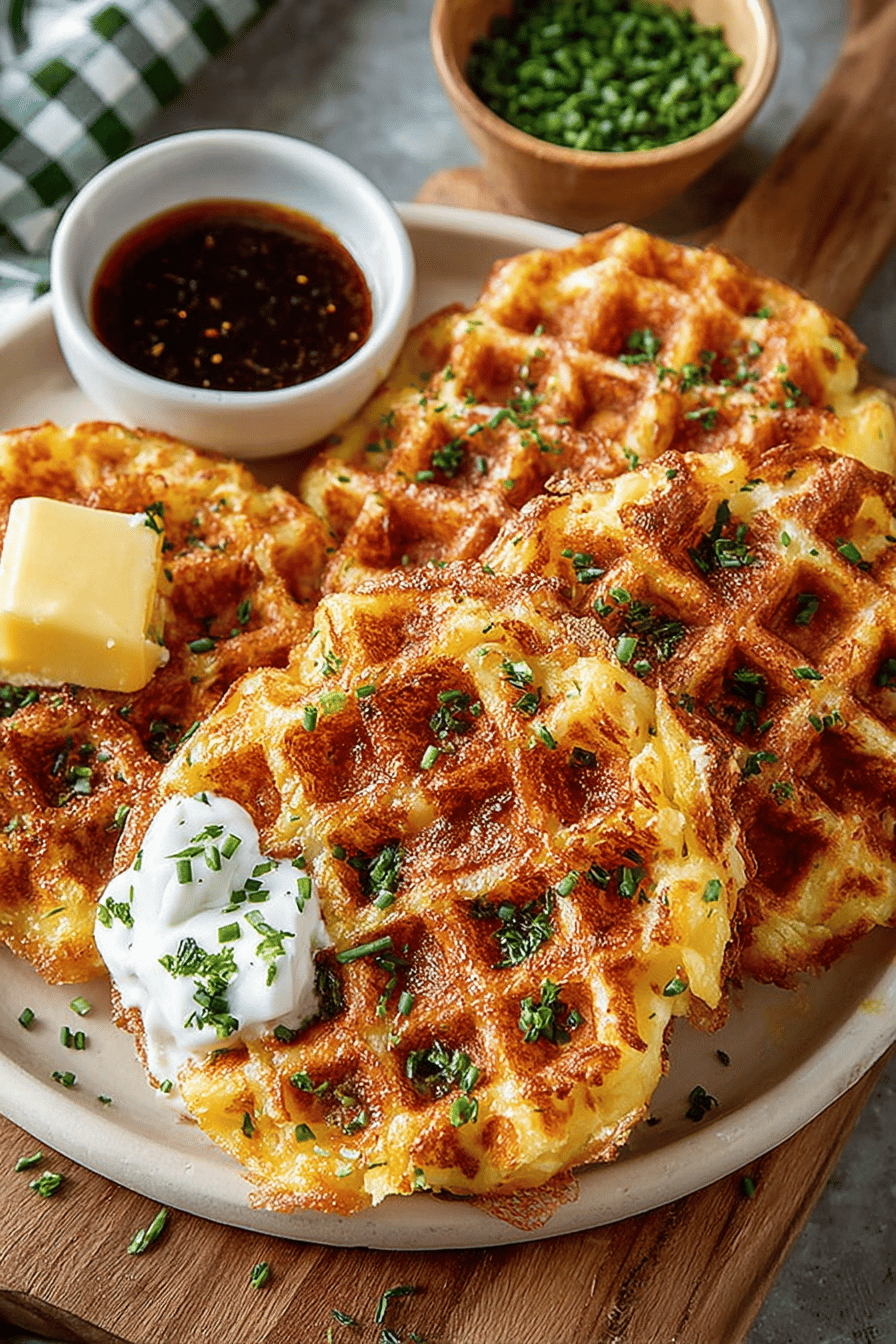
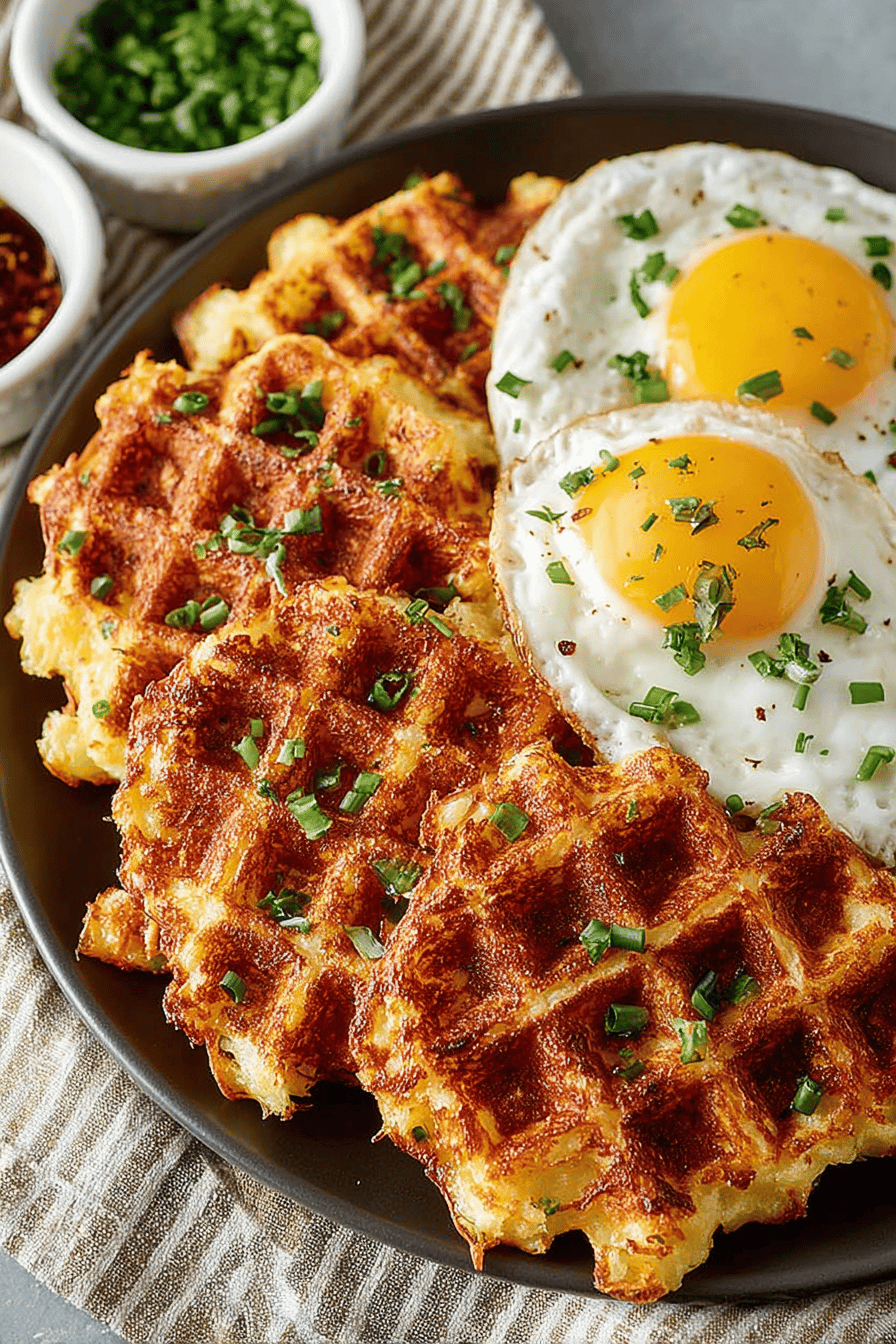
Top however you want: fried egg, sour cream and chives, hot sauce, smoked salmon, applesauce, maple syrup—go sweet, go savory, it all works. This makes about 4 big waffles or 6–8 smaller ones, depending on your waffle maker and your heart.
Ingredient Notes
– Russet potatoes: High starch = crisp edges. If you use Yukon Golds, still great, just a little softer. Squeeze them dry like you mean it.
– Eggs: Binder city. Two is the sweet spot—one is too fragile, three starts tasting omelet-y.
– Flour or starch: Flour gives a tender bite; rice flour or cornstarch makes it shatter-crisp. Both work. Don’t overdo or it gets cakey.
– Baking powder: Optional but fun. Tiny lift, better texture. Skip if you don’t have it.
– Onion + scallions: Onion adds diner flavor; scallions make it fresh. Raw onion can be strong, but it mellows in the waffle iron.
– Cheese: Cheddar melts and crisps at the edges. Don’t use fresh mozzarella—it’ll just weep.
– Oil or melted butter: A tablespoon or two in the batter helps browning. Brushing the iron is non-negotiable.
– Seasoning: Salt, pepper, garlic powder. Smoked paprika if you want that campfire vibe.
Recipe Steps
1. Grate 1½ lb russet potatoes (and ½ small onion if using) on large holes.
2. Squeeze out excess liquid thoroughly using hands or a clean towel.
3. Mix in 2 beaten eggs, 1/3 cup flour (or 1/4 cup rice flour/cornstarch), 1 tsp baking powder, 1 tsp kosher salt, pepper, 1/2 tsp garlic powder, and optional scallions/cheddar.
4. Preheat waffle iron to medium-high and brush both plates with oil.
5. Scoop batter (about 1/2 cup per waffle square), close lid, and cook 5–7 minutes until deep golden and crisp.
6. Transfer to a wire rack; keep warm in a 250°F oven while cooking remaining waffles. Serve hot with your favorite toppings.
What to Serve It With
– Fried or jammy eggs, chives, and hot sauce
– Smoked salmon, capers, red onion, sour cream
– Crispy bacon + maple syrup (don’t knock it)
– Apple sauce and a dusting of cinnamon for that latke energy
– Leftover chili or pulled pork piled on top like a crispy base
– Avocado, tomato, and everything bagel seasoning
Tips & Mistakes
– Squeeze the potatoes. If you skip this, you’ll get sog-city. No thanks.
– Oil the iron every batch. Helps release and browns better.
– Don’t peek early. Steam needs to do its thing. Open at 5 minutes, then decide.
– Salt enough. Potatoes are black holes for seasoning.
– Keep finished waffles on a wire rack, not a plate. Steam = sogginess.
– If your iron runs hot, drop to medium. Burnt outside, raw inside is a thing.
Storage Tips
Fridge: Cool completely, then store in an airtight container for 3–4 days. They’ll soften but come back to life in a toaster or 400°F oven for 8–10 minutes. Cold from the fridge? I’ve eaten them like a cold leftover pizza situation—still good, weirdly satisfying.
Freezer: Freeze in a single layer, then stash in a bag up to 2 months. Reheat straight from frozen in the toaster or 425°F oven until sizzling and crisp.
Variations and Substitutions
– Gluten-free: Use rice flour or cornstarch. Crispiest option, honestly.
– Dairy-free: Skip the cheese and use oil instead of butter. Still great.
– Sweet potato: Swap 1:1. Add a pinch of cinnamon and a little extra salt.
– Herby: Dill, parsley, or thyme. Fresh herbs make it wildly brunch-y.
– Cheesy-jalapeño: Cheddar + minced jalapeño. Killer with sour cream.
– Bacon + chive: Fold in crisp bacon bits. Reduce salt a smidge.
– Seasoning swaps: Smoked paprika, Old Bay, ranch seasoning—play around.
– Topping swaps: Hot honey ↔ maple syrup, Greek yogurt ↔ sour cream, tamari ↔ soy sauce for any savory drizzle.
Frequently Asked Questions
Easy Crispy Potato Waffles
Ingredients
Main Ingredients
- 4 cup shredded russet potatoes packed; squeeze very dry
- 2 large eggs
- 0.5 cup all-purpose flour
- 2 tbsp cornstarch for extra crispness
- 0.5 tsp baking powder
- 1 tsp kosher salt
- 0.5 tsp black pepper
- 0.5 tsp garlic powder
- 0.5 tsp onion powder
- 0.5 cup shredded sharp cheddar cheese optional
- 2 tbsp chopped chives
- 2 tbsp neutral oil for greasing the waffle iron
Instructions
Preparation Steps
- Preheat the waffle iron to medium-high. Lightly brush or spray both plates with neutral oil.
- Rinse and shred the potatoes. Pile them into a clean kitchen towel and squeeze very firmly to remove as much liquid as possible.
- In a large bowl, whisk eggs. Add flour, cornstarch, baking powder, salt, pepper, garlic powder, and onion powder; whisk until smooth.
- Fold in the shredded potatoes, chives, and cheddar (if using) until evenly coated.
- Spoon batter onto the hot waffle iron (about 0.75 cup per waffle). Spread into an even layer without overfilling.
- Close and cook until deep golden and very crisp, 6 to 8 minutes, resisting the urge to open early.
- Transfer waffles to a wire rack and keep warm in a 200°F oven. Re-oil the iron and repeat with remaining batter.
- Serve hot with sour cream, hot sauce, or a fried egg on top, if desired.
Notes
Nutrition
Featured Comments
“Made this last night and it was turned out amazing. Loved how the satisfying came together.”
“This quick recipe was absolutely loved — the light really stands out. Thanks!”
“Impressed! Clear steps and so flavorful results. Perfect for busy nights.”
“Super easy and absolutely loved! My family asked for seconds. Saving this one.”
“Impressed! Clear steps and will make again results. Perfect for busy nights.”
“Impressed! Clear steps and so flavorful results. Perfect for busy nights.”
“Impressed! Clear steps and absolutely loved results. Perfect for busy nights.”
“Super easy and so flavorful! My family asked for seconds. Saving this one.”
“Super easy and turned out amazing! My family asked for seconds. Saving this one.”
“This anytime recipe was so flavorful — the fluffy really stands out. Thanks!”