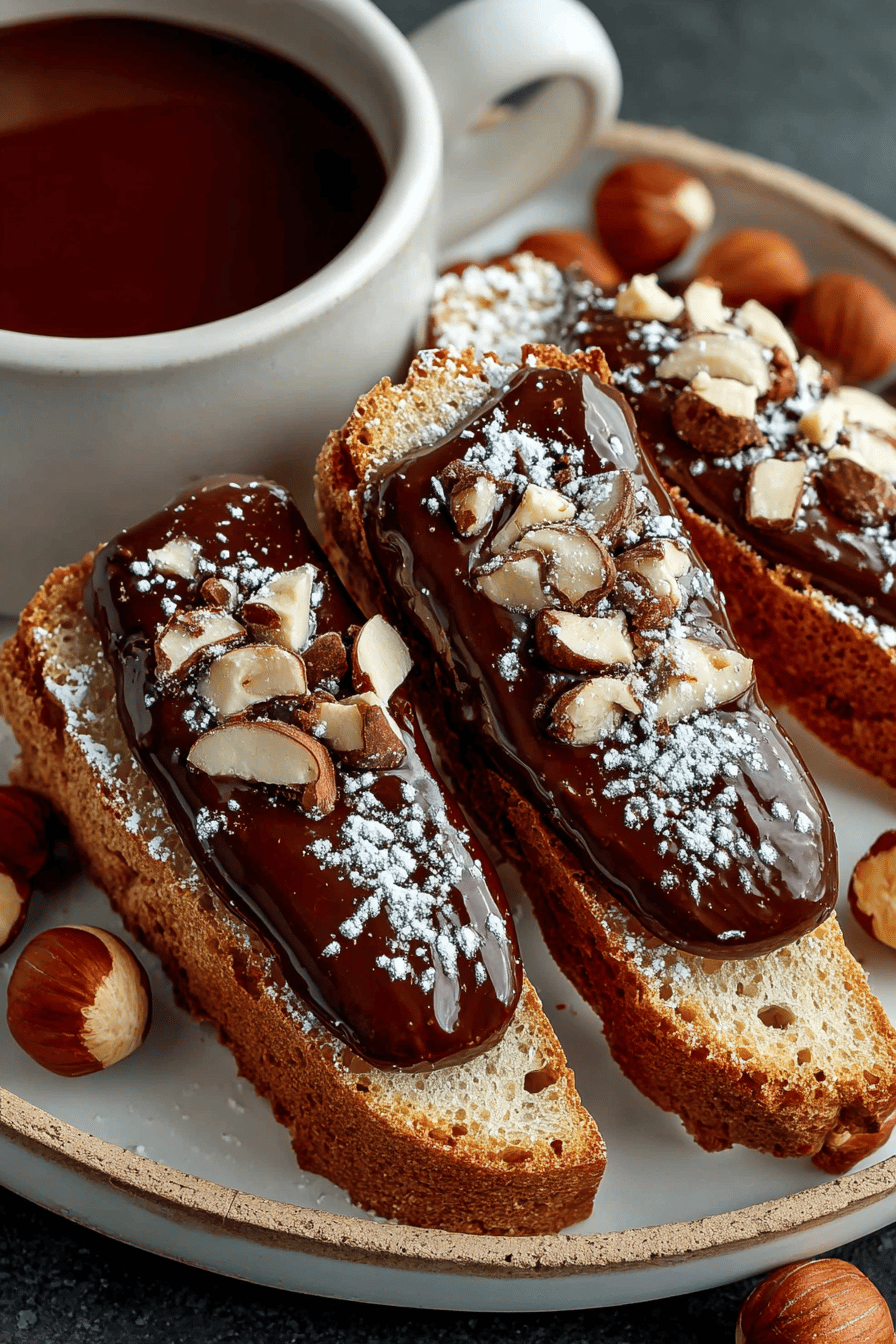
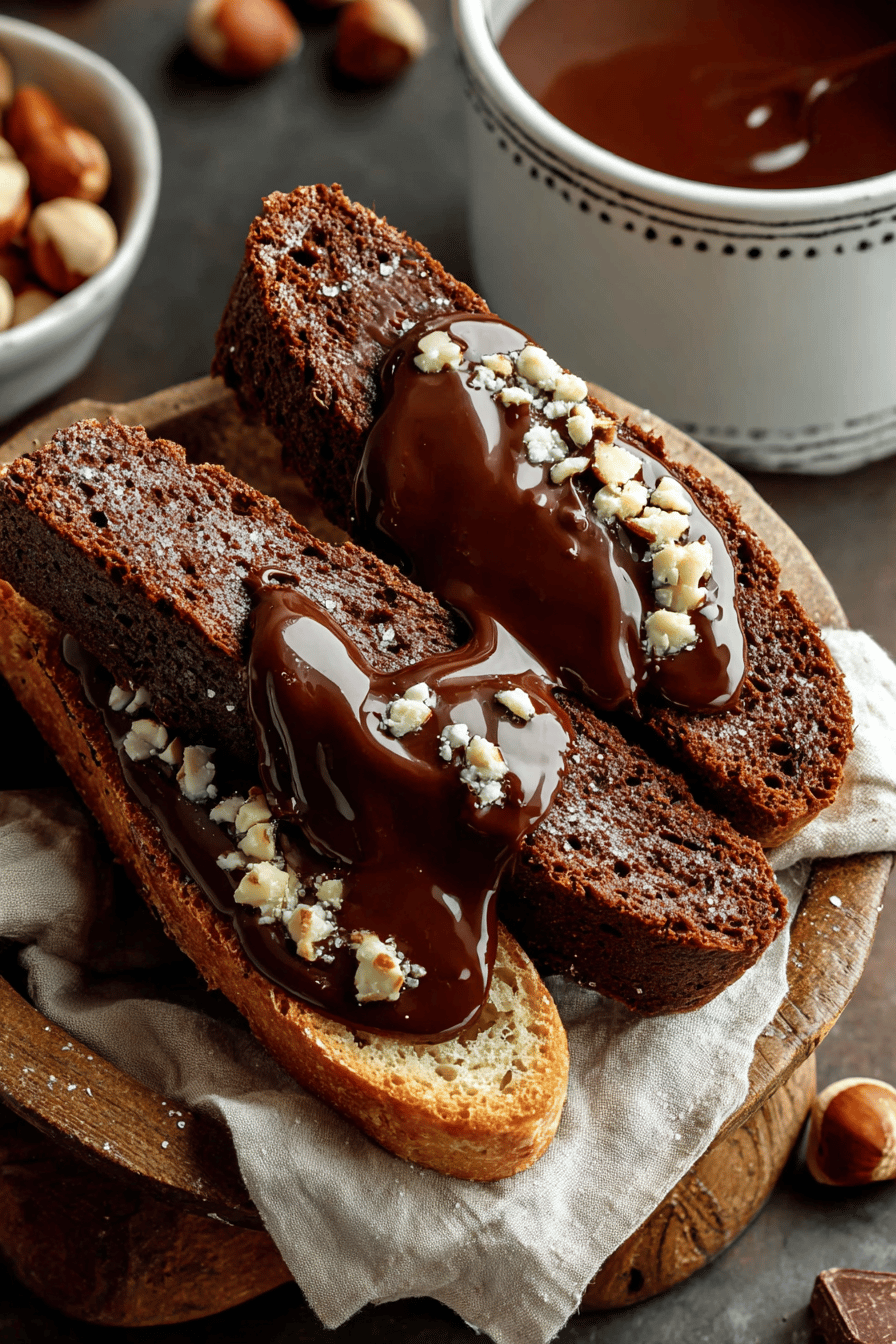
Easy Chocolate Hazelnut Biscotti Recipe
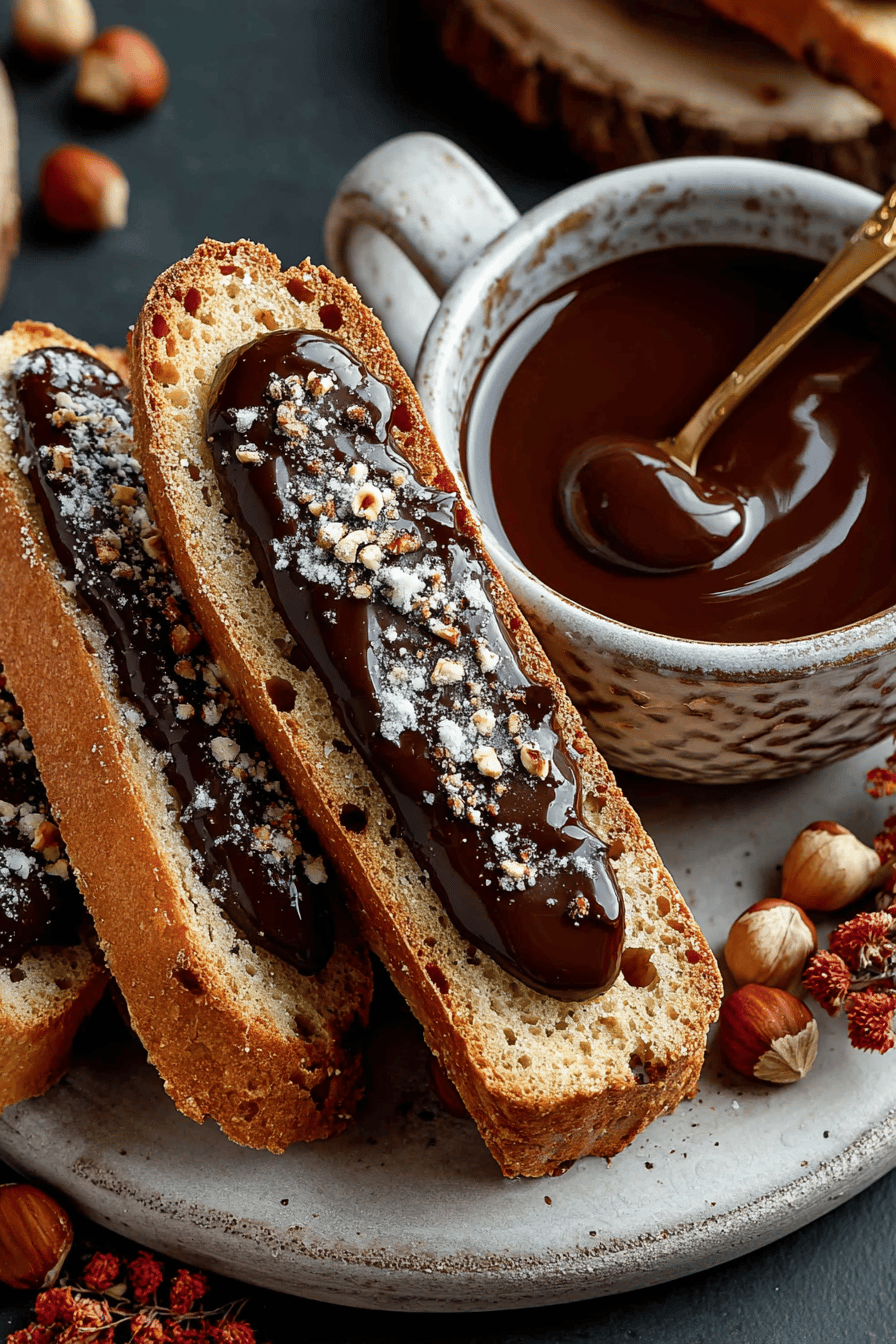
That’s where this Easy Chocolate Hazelnut Biscotti Recipe comes in. It’s crunchy, it’s chocolatey, it’s got that nutty goodness… and honestly, it’s way easier to make than it looks. If I can do it (and trust me, I’ve had my kitchen fails!), you definitely can. So grab your apron, let’s make some biscotti!
My husband? Obsessed. Legit, hides them from the kids. I caught him the other day sneaking one in the garage, pretending he was “checking the car”. And my youngest? He calls them “choco-hazel sticks” and dips them in his milk. It’s a whole thing. These biscotti have become a weekend staple. I bake a batch on Saturday morning, and they’re usually gone by Sunday night. Not even kidding.
Why You’ll Love This Easy Chocolate Hazelnut Biscotti Recipe
- Because you get to dip them in coffee. Need I say more?
- They last FOREVER. Okay, maybe not forever, but way longer than regular cookies. Perfect for stashing away for emergency chocolate cravings.
- You get to smack the dough into a log before baking it. Seriously therapeutic.
- Chocolate AND hazelnuts? It’s like, a sophisticated Nutella, but in cookie form.
- Because they are just SO good.

How to Make It
Alright, listen up, because this is where the magic happens… sort of. First, you’re gonna cream together your butter and sugar. Don’t skimp on the creaming! Get it nice and fluffy, like you’re whipping up a cloud. Then, crack in your eggs, one at a time, and vanilla extract. Mix it all together until it’s combined. Don’t overmix! We’re not making cake here.
MORE EASY DESSERT RECIPES...


In a separate bowl (because we’re being all fancy), whisk together your flour, baking powder, and salt. Now, slowly add the dry ingredients to the wet ingredients, mixing until just combined. And then comes the good part: fold in your chocolate chips and hazelnuts. Make sure they’re evenly distributed, because nobody wants a biscotti with just nuts on one end.
MORE OF OUR FAVORITE…
Now, dump the dough out onto a lightly floured surface. Don’t be shy, get your hands in there! Form it into a log, about 12 inches long. Place it on a baking sheet lined with parchment paper. This is important, or you’ll be scraping biscotti off your pan for days.
Bake it in a preheated oven until it’s golden brown and firm to the touch. Let it cool slightly, then slice it into 1-inch thick slices. Now, lay those slices back on the baking sheet and bake them again, until they’re nice and crunchy. This is the “biscotti” part, the twice-baked action that gives them that signature crunch. Let them cool completely before you try to eat them, or you’ll burn your mouth. I speak from experience here, people!
Ingredient Notes
- All-Purpose Flour: This is your base, baby! Don’t try using cake flour unless you want sad, crumbly biscotti. Trust me, I’ve been there.
- Butter: Real butter, not margarine. Please. It makes a difference. And soften it! Nobody wants to spend an hour trying to cream cold butter.
- Hazelnuts: Toast them beforehand! It brings out the flavor. You can do it in the oven or in a dry pan on the stovetop. Just don’t burn them, or they’ll taste bitter. Speaking from experience.
- Chocolate Chips: I like semi-sweet, but you can use milk chocolate if you’re feeling extra sweet. Or dark chocolate if you’re feeling fancy. It’s your biscotti, do what you want!
- Vanilla Extract: Don’t skip it! It adds that little something-something.
Recipe Steps:
- Cream together butter and sugar until fluffy.
- Mix in eggs and vanilla extract until combined.
- Whisk together flour, baking powder, and salt in a separate bowl.
- Add dry ingredients to wet ingredients until just combined.
- Fold in chocolate chips and hazelnuts.
- Shape dough into a 12-inch log on a floured surface.
- Bake until golden brown and firm.
- Cool slightly, then slice into 1-inch thick slices.
- Bake slices again until crunchy.
- Cool completely before serving.
What to Serve It With
Coffee, obviously! But also, tea, hot chocolate, a glass of red wine, or even just a big glass of milk. Or, if you’re feeling fancy, crumble them over ice cream. Trust me on this one.
Tips & Mistakes
- Don’t overmix the dough! It’ll make the biscotti tough.
- Make sure your oven is properly preheated. Nobody wants underbaked biscotti.
- Watch them closely during the second bake, because they can burn easily.
- If your dough is too sticky to handle, chill it in the fridge for a bit.
- Don’t be afraid to experiment with different flavors!
Storage Tips
Store these babies in an airtight container. They’ll last for weeks. Seriously. But let’s be real, they’ll probably be gone way before then. And yeah, eating them cold is totally fine. I’ve been known to grab one straight from the container for breakfast. No judgment here!
Variations and Substitutions
- No hazelnuts? Use almonds or walnuts! Or even pistachios if you’re feeling fancy.
- Don’t like chocolate? (Who are you?!) Leave it out! Or use white chocolate chips.
- Add some orange zest to the dough for a little extra flavor.
- I once tried using honey instead of sugar and it was a sticky mess. Don’t recommend it.
- If you’re out of vanilla extract, a little bit of almond extract will do in a pinch.
Frequently Asked Questions
Easy Chocolate Hazelnut Biscotti Recipe
Ingredients
Main Ingredients
- 2 cups all-purpose flour
- 1 cup granulated sugar
- 0.5 cup unsweetened cocoa powder
- 1 tsp baking powder
- 0.5 tsp salt
- 3 large eggs
- 1 tsp vanilla extract
- 1 cup hazelnuts toasted and chopped
- 0.5 cup semi-sweet chocolate chips
Instructions
Preparation Steps
- Preheat your oven to 350°F (175°C). Line a baking sheet with parchment paper.
- In a large bowl, whisk together the flour, sugar, cocoa powder, baking powder, and salt.
- Add the eggs and vanilla extract to the dry ingredients and mix until combined. Fold in the hazelnuts and chocolate chips.
- Divide the dough in half and shape each portion into a 12-inch log on the prepared baking sheet. Flatten each log slightly.
- Bake for 25 minutes, then remove from the oven and let cool for 10 minutes.
- Using a sharp knife, cut each log into 1/2-inch slices. Arrange slices cut side down on the baking sheet.
- Return to the oven and bake for an additional 15 minutes or until dry. Allow to cool completely.
Notes
Nutrition
Featured Comments
“This cheesy recipe was absolutely loved — the tender really stands out. Thanks!”
“Super easy and turned out amazing! My family asked for seconds. Saving this one.”
“Made this last night and it was turned out amazing. Loved how the crispy came together.”
“Super easy and absolutely loved! My family asked for seconds. Saving this one.”
“Super easy and will make again! My family asked for seconds. Saving this one.”
“Made this last night and it was turned out amazing. Loved how the grilled came together.”
“Impressed! Clear steps and family favorite results. Perfect for busy nights.”
“This balanced recipe was will make again — the nostalgic really stands out. Thanks!”
“Super easy and so flavorful! My family asked for seconds. Saving this one.”
“Made this last night and it was absolutely loved. Loved how the bite-sized came together.”