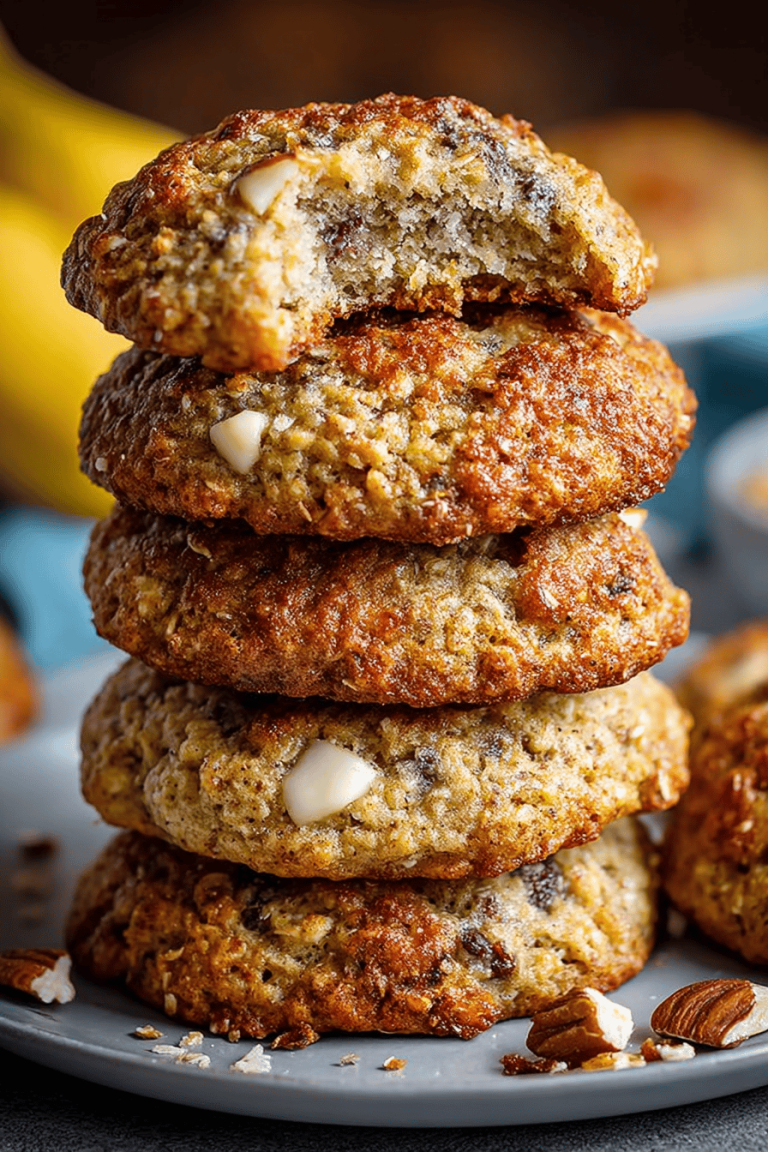
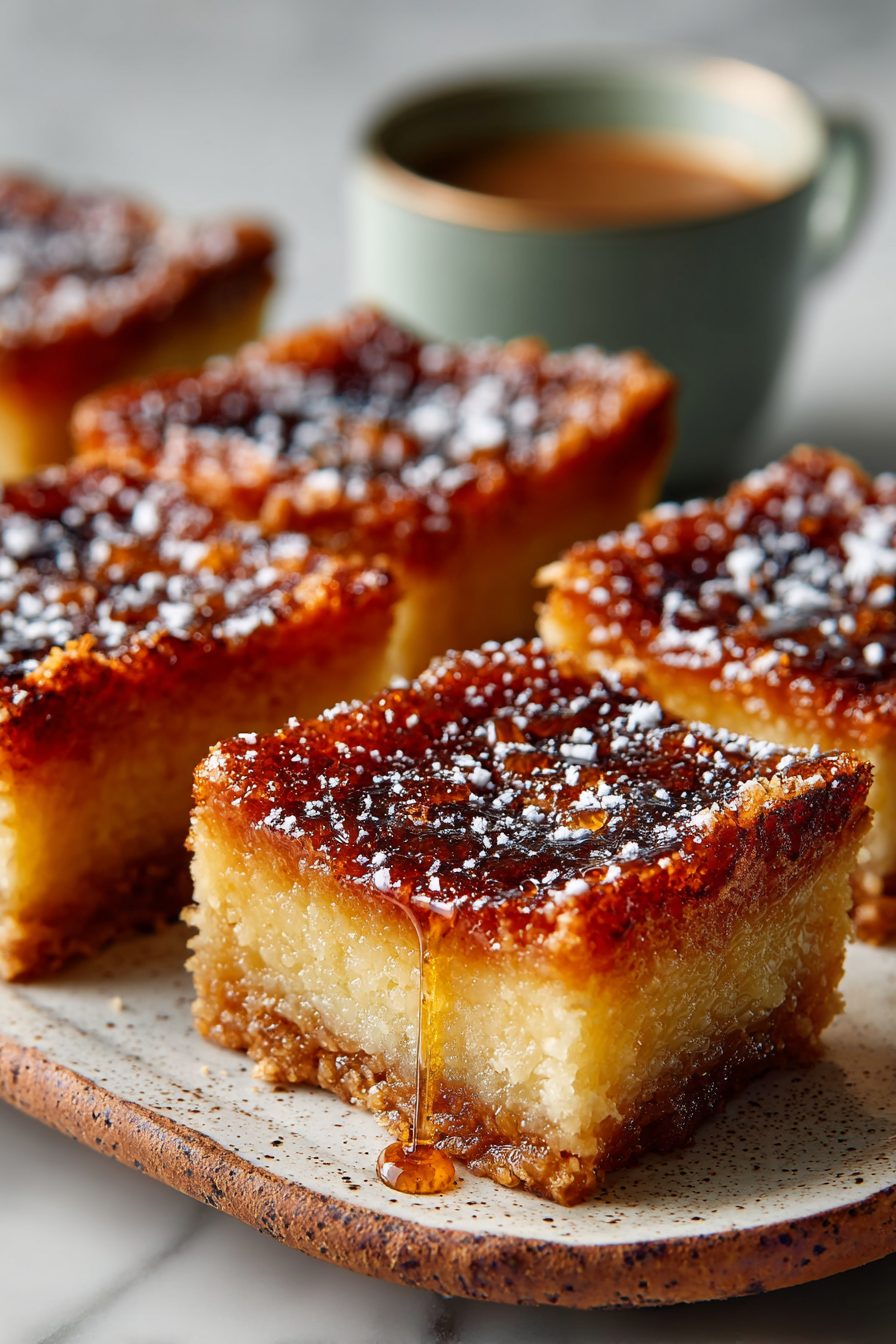
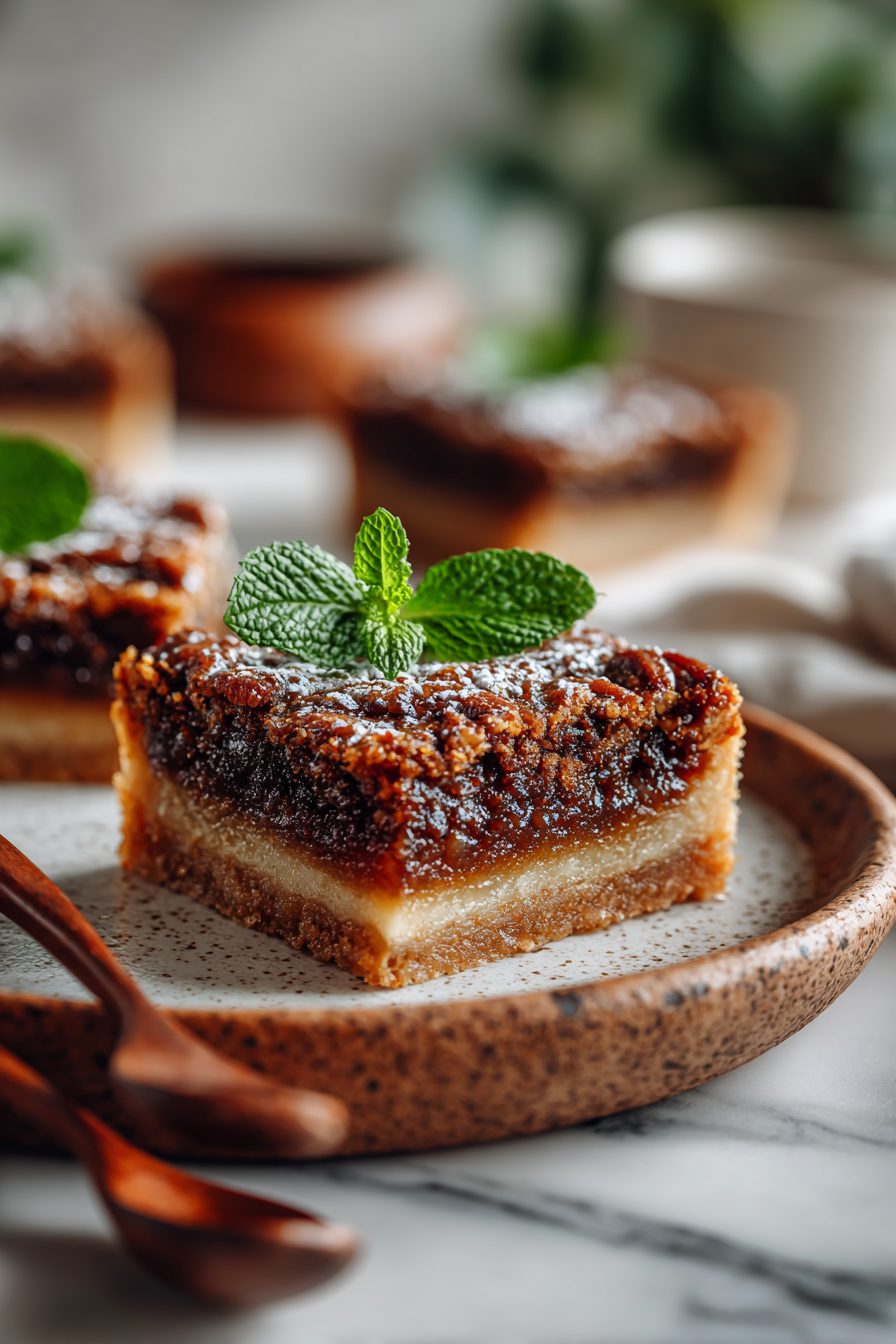
Butter Tart Squares Made Easy
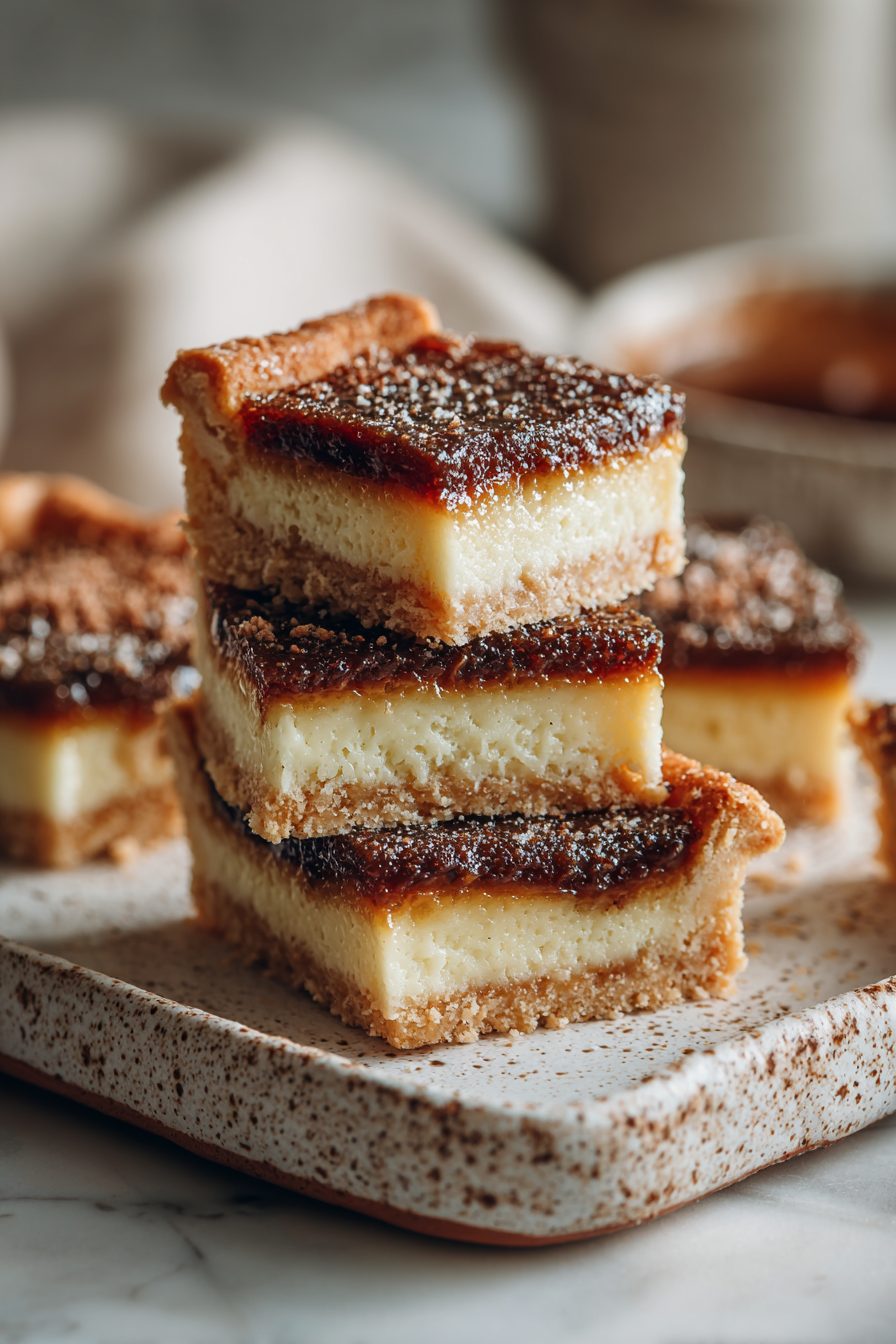
These squares are butter tart filling — gooey, buttery, just-sweet-enough caramel — folded into a flaky shortbread-like crust so you can eat the whole thing with your hands and feel zero shame. It’s basically a butter tart (you know, the Canadian classic) made square so it’s less fussy, more grab-and-go, and a million times more likely to actually get made on a weeknight.
My husband will eat the corner pieces like it’s his job. He calls them “little regrets” because he always promises himself one and then eats three. My kid thinks raisins are a personality trait, so sometimes they go in, sometimes they don’t — and honestly both ways are winners. This started as a holiday thing and turned into our weekend ritual: bake a pan, hide half, and pretend we’re being responsible adults.
Why You’ll Love This Butter Tart Squares Made Easy
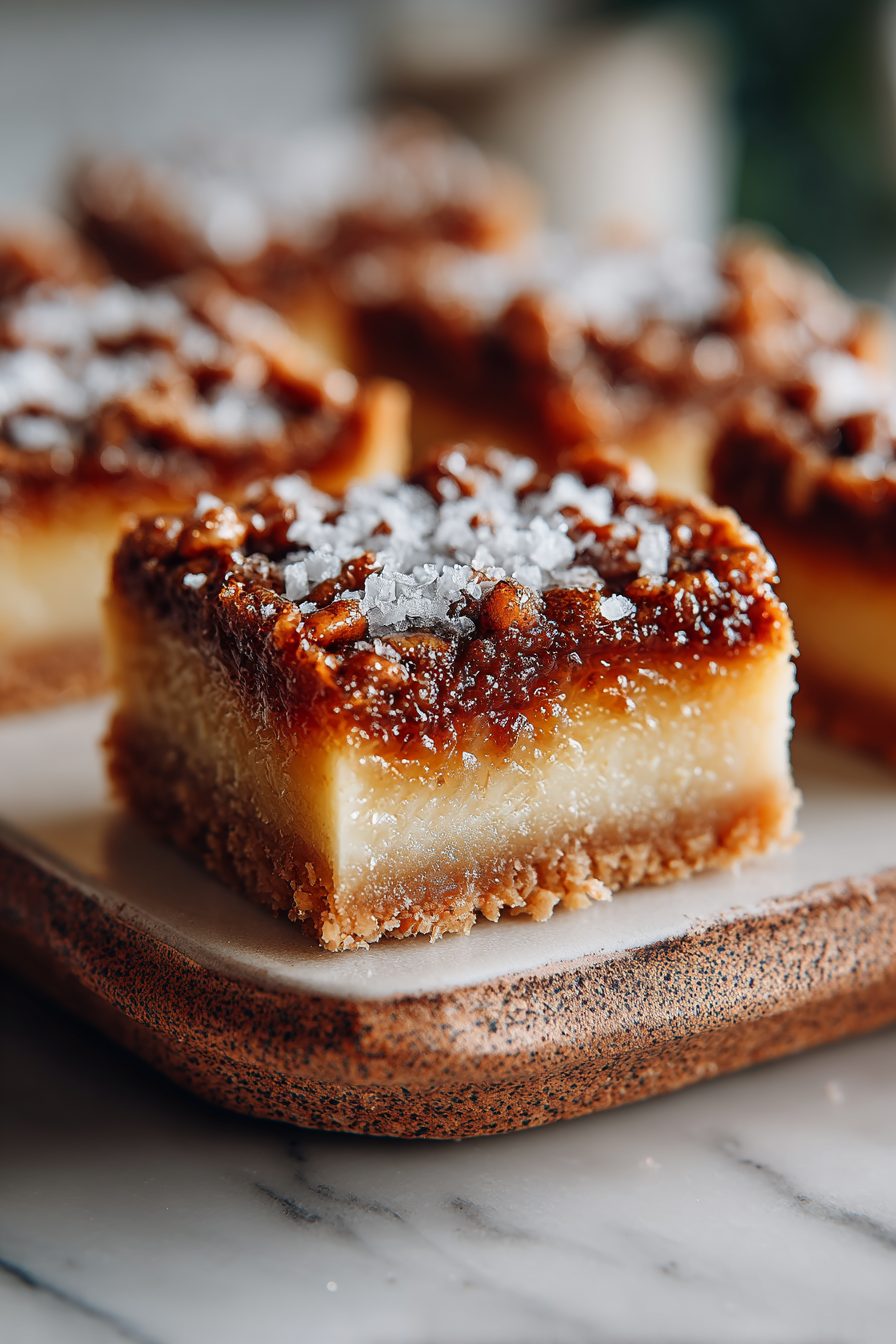
– Tiny, buttery shortbread crust that holds a gooey, almost-custardy filling — all the butter tart vibes without the tedium of individual shells.
– Flexible: toss in raisins, pecans, chocolate chips, or leave it naked; it still behaves.
– Easy to slice and serve for parties, potlucks, or when you need a dessert that’s impressive but not dramatic.
– Keeps well in the fridge — perfect for sneaking bites for breakfast (no judgment).
Kitchen Talk
I always underbake the center by a hair because I love that oozy middle — it firms up as it cools, promise. Once, I overenthusiastically stirred in a full cup of raisins because I thought it would be balanced. It turned out like a raisin casserole and we ate it anyway. I also once swapped half the corn syrup for maple syrup and the flavor got this smoky, grown-up depth that made me re-think everything. Little swaps can be delightful, but keep the ratios: you want pourable filling, not lava.
MORE OF OUR FAVORITE…
Shopping Tips
– Baking Basics (Flour/Sugar/Leaveners): Use all-purpose flour for the crust — no need for special flours; plain granulated sugar is perfect here.
– Fats & Oils: Get real butter (not margarine) for the crust and filling; it’ll change the flavor and texture in a big way.
– Dairy: Use whole milk or light cream if the recipe asks; higher-fat dairy makes the filling silkier.
– Eggs: Fresh large eggs are best — they add structure and a richer color to the filling.
– Nuts & Seeds: If adding pecans or walnuts, buy them shelled and give them a quick toast for extra crunch and depth.
Prep Ahead Ideas
– Make the crust the day before: press it into the pan, cover with plastic, and pop it in the fridge. Saves 20 minutes on baking day.
– Mix the filling ahead and keep it in the fridge for up to 24 hours; let it sit at room temp a bit before pouring so it isn’t rock-solid.
– Store prepped pans in the fridge on a baking sheet if you need to move them; it helps prevent spills when transferring to the oven.
Time-Saving Tricks
– Use a food processor for the crust if you’re being lazy — it makes quick work of cold butter and flour.
– Toast nuts in a skillet while the oven preheats instead of using a separate oven step.
– Don’t overthink glazing or decoration — a simple dusting of powdered sugar or a few scattered pecans is elegant and fast.
– Let them cool at least 30 minutes; slicing too early turns edges into crumbs.
Common Mistakes
– Underbaking the crust: I did this once and ended up scooping filling out of a soggy center — bake until edges are golden.
– Overfilling the pan: you want a thin layer of filling; too much and it bubbles over (yes, we had parchment-paper lava on the oven floor once).
– Using margarine instead of butter: flavor suffers, and so does texture — that one’s non-negotiable for me.
– Cooling too briefly: cut too soon and you get a sticky mess. Patiently waiting 45–60 minutes is the difference between pretty squares and “we’ll eat it with a spoon.”
What to Serve It With
– A big mug of coffee or a cappuccino — the bitterness balances the sweet.
– Vanilla ice cream for the top-heat contrast.
– Simple whipped cream and a scattering of toasted pecans.
– A sharp cheddar cheese board for the weird-but-delicious sweet-salty combo.
Tips & Mistakes
– Use room-temp eggs for an even filling texture.
– Press the crust firmly into corners — it keeps the filling from oozing out.
– If your filling smells “too sweet” before baking, it’ll calm down once the edges caramelize.
– One-liner rescue: burned edges? Trim and disguise with powdered sugar and extra nuts.
Storage Tips
Keep leftovers in an airtight container in the fridge for up to 5 days. They’re totally fine cold for breakfast (I’m not proud), and if you want that fresh-baked vibe pop a piece into a 300°F oven for 5–7 minutes or microwave for 12–15 seconds — don’t overdo it or the filling will go nuclear. Freezing works too: wrap squares individually, freeze up to 2 months, thaw in the fridge then warm slightly before serving.
Variations and Substitutions
– Raisin-free? Swap in chopped toasted pecans or walnuts for crunch.
– Corn syrup swap: equal parts maple syrup or golden syrup work in a pinch, but flavor will shift (maple = deeper, golden = lighter).
– Dairy-free options: use a non-dairy butter and full-fat canned coconut milk for a workable but slightly different texture.
– Want chocolate? Stir in 1/2 cup chocolate chips for a chocolate-butter tart hybrid — 10/10 in my house.
Frequently Asked Questions
Butter Tart Squares Made Easy
Ingredients
Main Ingredients
- 1.5 cup all-purpose flour for crust
- 0.33 cup granulated sugar for crust
- 0.25 tsp fine salt for crust
- 0.75 cup cold unsalted butter, diced for crust
- 0.95 cup packed brown sugar for filling
- 0.5 cup light corn syrup for filling
- 0.33 cup unsalted butter, melted for filling
- 0.67 cup beaten eggs for filling; about 3 large eggs
- 1.5 tsp vanilla extract for filling
- 1 tsp white vinegar for filling
- 0.25 tsp fine salt for filling
- 0.75 cup raisins for filling
- 1 tbsp all-purpose flour for filling; light thickener
Instructions
Preparation Steps
- Heat oven to 350°F. Line a 9-inch square pan with parchment, leaving overhang.
- Combine flour, sugar, and salt for the crust in a bowl. Cut in cold butter until sandy crumbs form.
- Press the mixture firmly into the pan. Bake 12–15 minutes, until set and lightly golden at the edges.
- Whisk brown sugar, corn syrup, melted butter, and the 1 tbsp flour until smooth.
- Stream in the beaten eggs. Add vanilla, vinegar, and salt. Whisk until glossy and well combined.
- Fold in raisins so they’re evenly distributed.
- Pour the filling over the hot crust. Smooth the top with a spatula.
- Bake 20–22 minutes, until edges are set and the center still jiggles slightly.
- Cool completely in the pan. Chill 30 minutes for cleaner cuts, then lift and slice into squares.
Notes
Featured Comments
“Impressed! Clear steps and will make again results. Perfect for busy nights.”
“New favorite here — absolutely loved. handheld was spot on.”
“This festive recipe was family favorite — the comforting really stands out. Thanks!”
“New favorite here — will make again. crusty was spot on.”
“This melt-in-your-mouth recipe was absolutely loved — the family favorite really stands out. Thanks!”
“Impressed! Clear steps and absolutely loved results. Perfect for busy nights.”
“New favorite here — so flavorful. vibrant was spot on.”
“Made this last night and it was so flavorful. Loved how the crispy came together.”
“New favorite here — absolutely loved. perfectly seasoned was spot on.”
“Made this last night and it was so flavorful. Loved how the perfectly seasoned came together.”