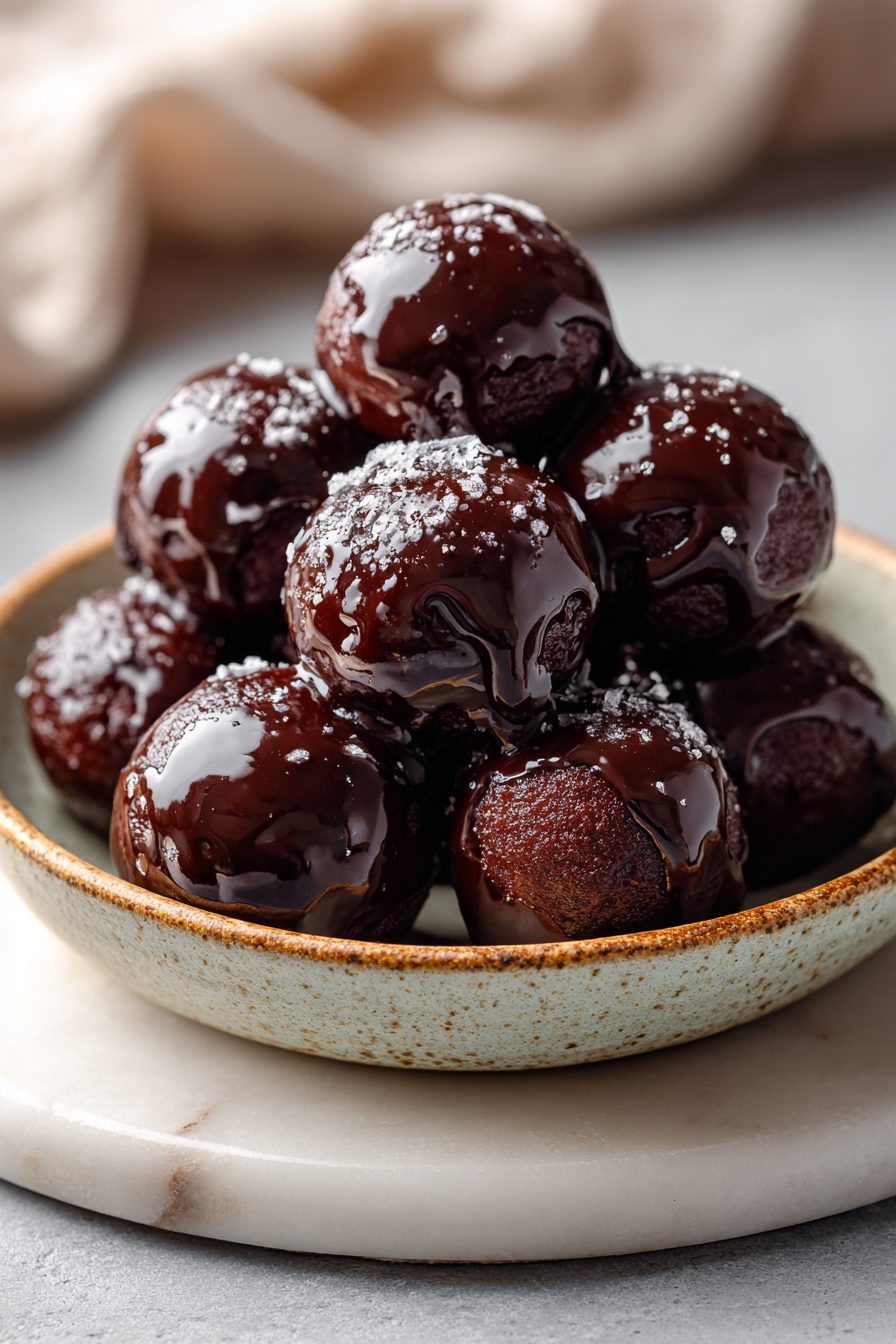
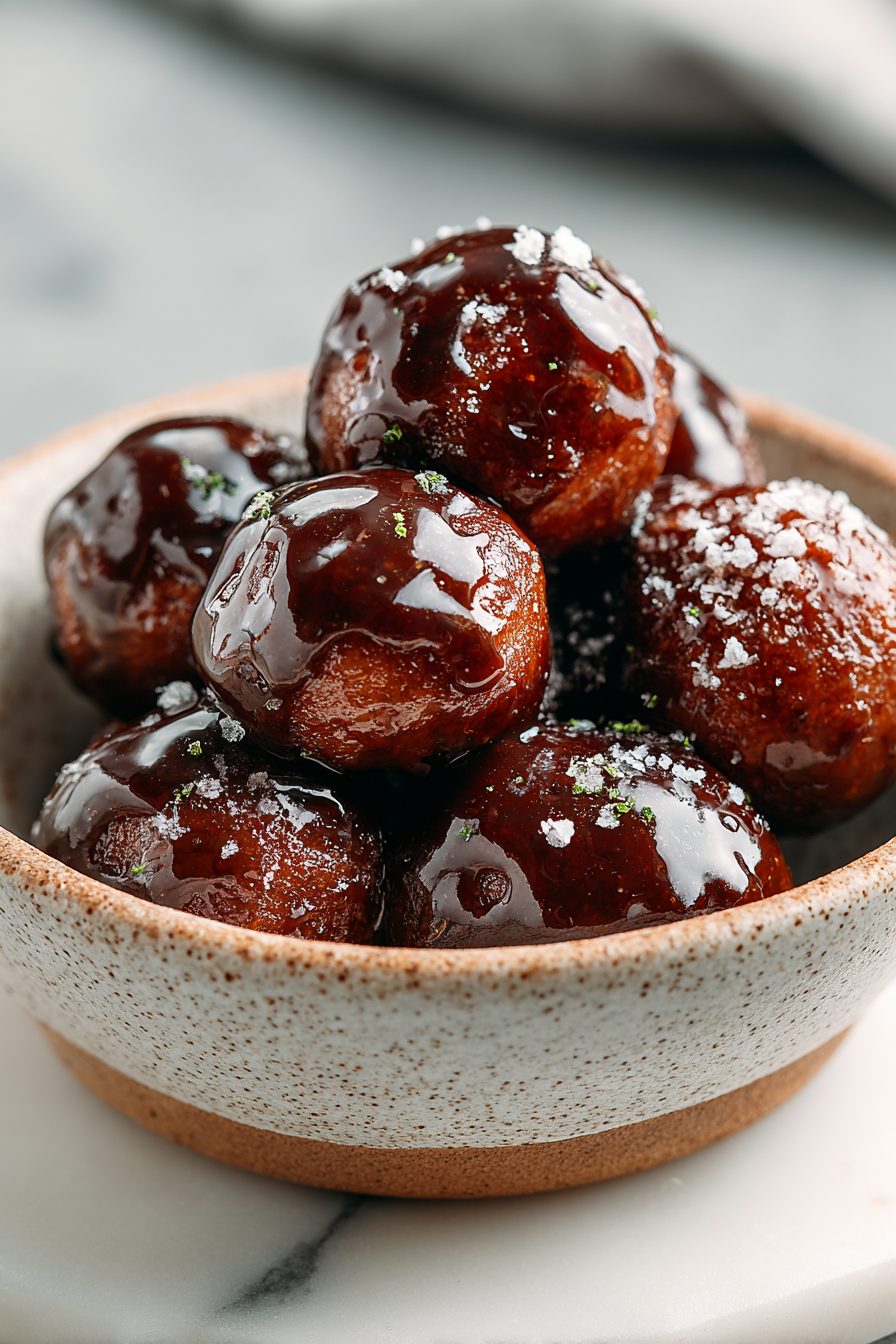
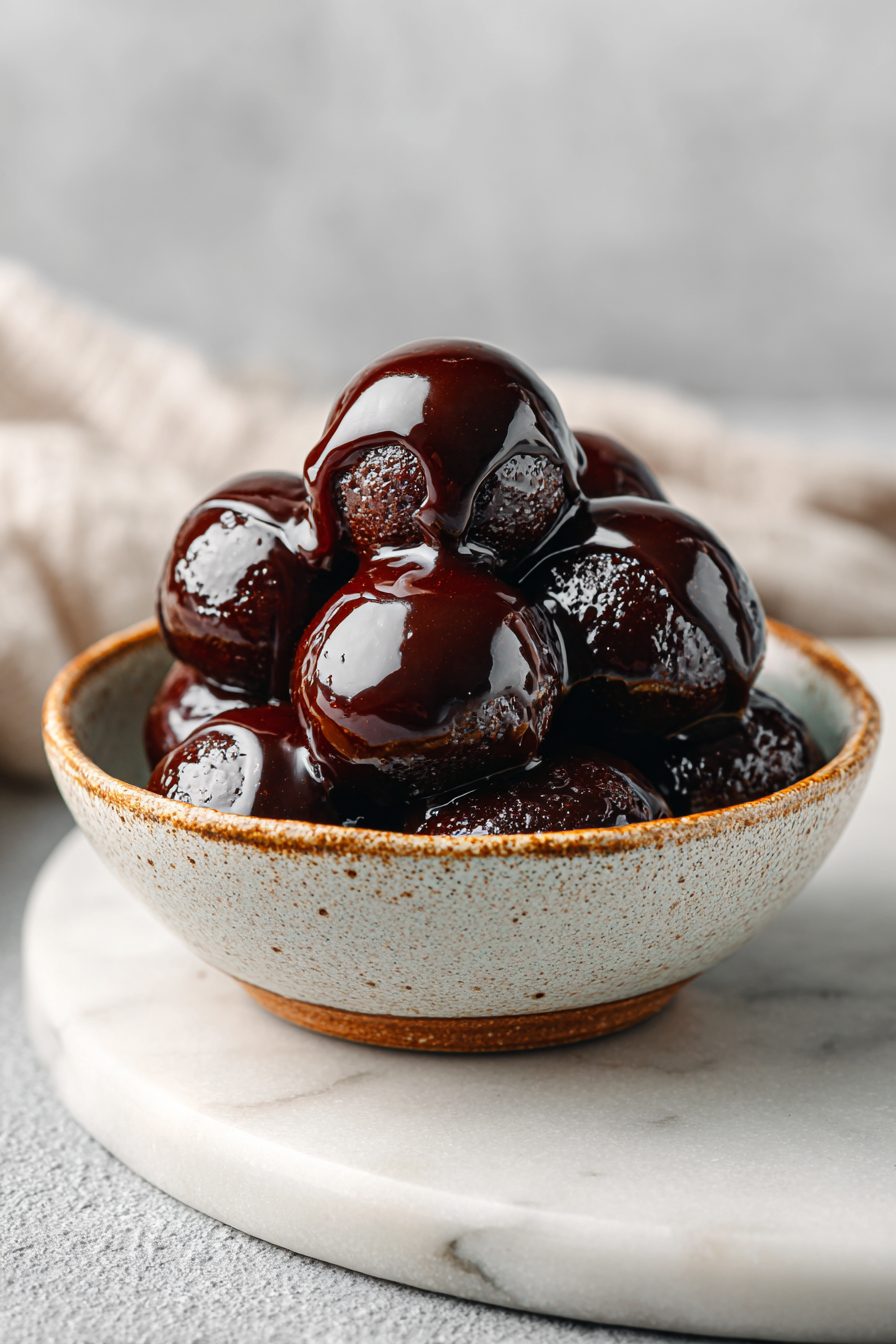
Glazed Chocolate Donut Holes
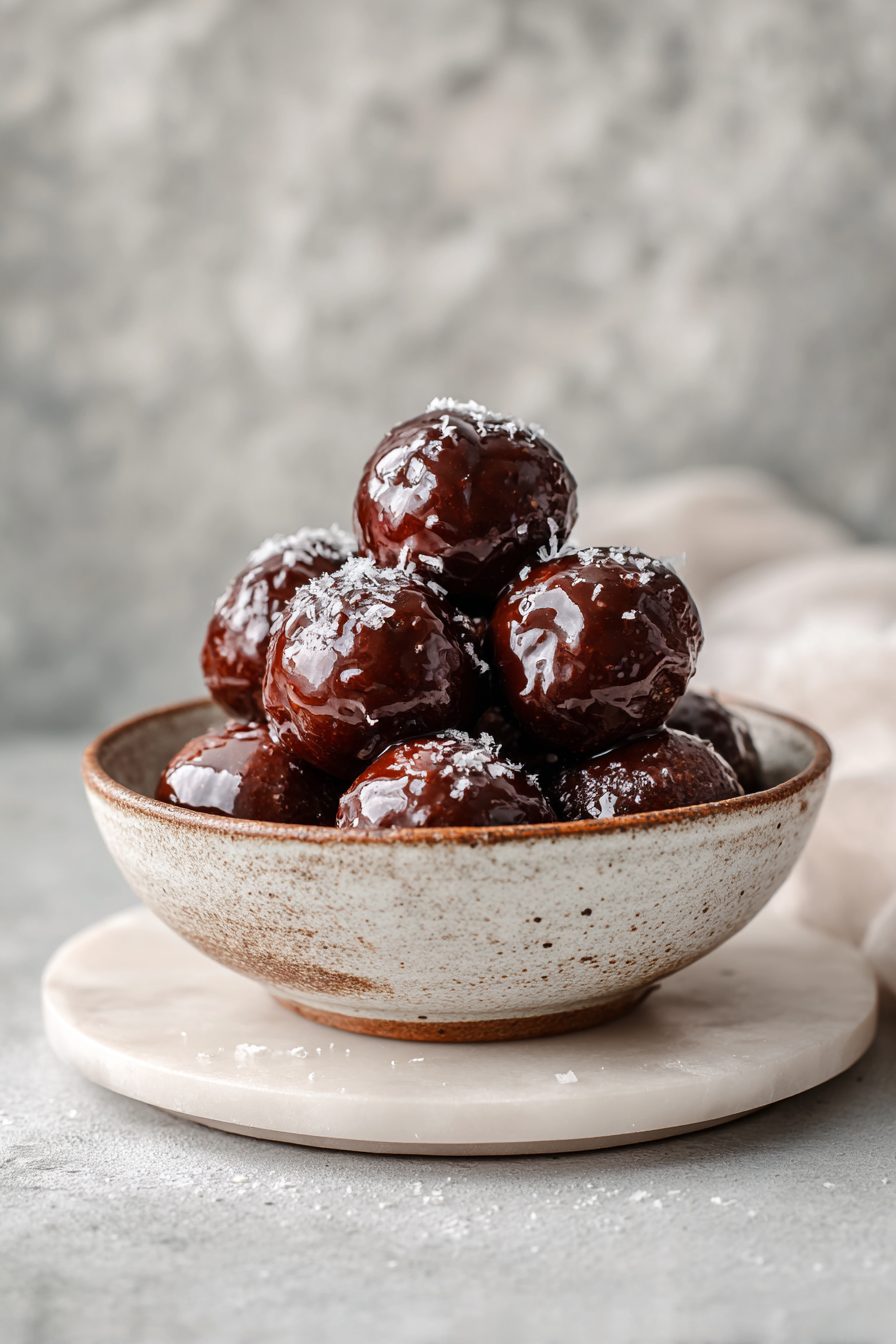
I make these Glazed Chocolate Donut Holes because apparently I have no self-control around warm, chocolatey fried balls of joy — and also because they’re shockingly easy to pull together on a weekend when you’d rather eat breakfast in bed than behave like an adult. Think tender little cake-y centers dunked in a shiny chocolate glaze that sets with a perfect sheen: slightly crisp on the outside, pillowy inside, and dangerously dunkable in coffee.
My husband declared them “the official weekend peace treaty” after a particularly tense Saturday over who left the toothpaste open. The kids call them chocolate boba (no idea why), and once I made them for a school bake sale and somehow came home with zero left — that’s how addictive they are. These donut holes have become our go-to comfort baking: quick enough for a lazy Sunday, fancy enough for when in-laws drop by. Also, full disclosure — I’ve used store-bought biscuit dough in an emergency and nobody noticed. Don’t tell.
Why You’ll Love This Glazed Chocolate Donut Holes
– They’re bite-sized happiness: all the gooey chocolate glaze, none of the knife-and-plate drama.
– Fast to make but feels like a treat you didn’t earn (in the best way).
– Flexible: you can fry, bake, or use a mini donut pan and still get a crowd-pleaser.
– The glaze sets glossy and keeps fingers happily sticky for minutes (or forever, if you’re me).
Kitchen Talk
These donut holes have taught me patience and the limits of my stovetop skills. I once tried to fry them at a too-high temperature and they browned like little moons while refusing to cook through — the kids still ate them but politely called it “extra toasty.” Another time I baked them, forgot the glaze, and declared it an “artisan dusted donut” — which is a fancy way of saying sad. The glaze is forgiving: whisk it warm and thin if it’s too thick, or add powdered sugar if it’s runny. If you’re frying, use a thermometer or a steady eye; if you’re baking, don’t obsessively open the oven — trust the timer and your nose.
MORE OF OUR FAVORITE…
Shopping Tips
– Baking Basics (Flour/Sugar/Leaveners): Use all-purpose flour and fresh baking powder for fluffier dough; old leavener = flat-ish donut holes.
– Eggs: Room temperature eggs blend into the batter easier and give a better texture; if you forget to take them out, a five-minute warm-water bath helps.
– Fats & Oils: For frying, pick a neutral oil with a high smoke point (canola or vegetable); for baking, unsalted butter gives the best flavor control.
– Chocolate: Use good-quality cocoa powder for the batter and semi-sweet chocolate for the glaze — it melts smoother and keeps the glaze glossy.
– Sweeteners: Regular granulated sugar is fine for the batter; powdered sugar is your friend for adjusting glaze thickness without grit.
Prep Ahead Ideas
– Mix the batter or dough the night before and store it covered in the fridge; bring to room temp for 20–30 minutes before frying or baking.
– Make the glaze ahead and refrigerate; rewarm gently over a double boiler or in short bursts in the microwave, stirring between intervals.
– Keep donut holes in a single layer on a tray lined with parchment until you’re ready to glaze so they don’t stick together.
– Use airtight containers or a cake carrier for transporting to brunch — they survive short drives fine if stacked gently.
Time-Saving Tricks
– Use a small cookie scoop to portion dough quickly and evenly — faster than rolling little balls by hand.
– Shortcut: canned biscuit dough works in a pinch; lightly press the seams and fry or bake as directed.
– Multitask: heat oil or preheat the oven while you make the batter, then scoop straight in — no waiting around.
– If you hate frying, use a mini donut pan and glaze while warm; you’ll cut cleanup time way down.
Common Mistakes
– Frying at too-high heat: outsides brown while insides stay raw — lower the temp and cook a bit longer. Rescue by finishing in a 350°F oven for a few minutes.
– Overmixing batter: makes them dense. Mix until just combined; a few lumps are fine.
– Glaze too thick or too thin: add a splash of milk to thin, or more powdered sugar to thicken. If glaze seizes (rare), heat gently and whisk.
– Storing while warm: traps steam and makes them soggy. Let them cool slightly before glazing or storing.
What to Serve It With
– Hot coffee or a strong latte for classic pairings.
– A big bowl of mixed berries to cut the sweetness.
– Crisp bacon or breakfast sausage if you want sweet + savory chaos on one plate.
– Simple yogurt parfaits for a brunch spread that looks fancier than it is.
Tips & Mistakes
– Use a thermometer if frying — 350–365°F is the sweet spot most times.
– Don’t overcrowd the fryer or pan; crowding drops oil temp fast.
– If you overbake, zap them for 10–15 seconds in the microwave to soften — not pretty, but it works.
– Glaze while donut holes are warm for the best sheen and adhesion.
Storage Tips
Store leftover donut holes in an airtight container at room temperature for 1–2 days. If you refrigerate, they’ll last 4–5 days but may firm up and lose that freshly-glazed shine; a quick 8–10 second zap in the microwave revives them. Cold donut holes are fine — they’re basically chocolatey stress relief — but reheating brings back the pillowy texture.
Variations and Substitutions
– Swap the chocolate glaze for a simple vanilla or maple glaze when you want something lighter.
– Use dairy-free butter and a flax egg (1 tbsp ground flax + 3 tbsp water) for egg-free/dairy-free versions; texture will be a touch different but still excellent.
– Add a pinch of espresso powder to the batter for deeper chocolate flavor.
– Roll fresh donut holes in cinnamon sugar instead of glazing for a classic twist.
Frequently Asked Questions
Glazed Chocolate Donut Holes
Ingredients
Main Ingredients
- 2 cup all-purpose flour
- 0.5 cup unsweetened cocoa powder
- 0.67 cup granulated sugar
- 2.25 tsp baking powder
- 0.5 tsp baking soda
- 0.5 tsp fine salt
- 0.25 tsp ground nutmeg optional
- 0.75 cup whole milk room temperature
- 0.33 cup sour cream or plain yogurt
- 1 large egg room temperature
- 2 tsp vanilla extract
- 4 tbsp unsalted butter, melted cooled slightly
- 32 fl oz vegetable oil for frying
- 1.5 cup powdered sugar for glaze
- 3 tbsp milk for glaze
- 0.5 tsp vanilla extract for glaze
- 0.13 tsp fine salt pinch, for glaze
- 1 tsp light corn syrup optional, for glossy glaze
Instructions
Preparation Steps
- Whisk flour, cocoa, sugar, baking powder, baking soda, salt, and nutmeg in a large bowl.
- In another bowl, whisk milk, sour cream, egg, vanilla, and melted butter until smooth.
- Stir wet ingredients into dry just until combined; the batter will be thick. Rest 5 minutes.
- Heat 2–3 inches of oil to 350°F in a deep pot, keeping a thermometer clipped to the side.
- Scoop heaping tablespoons of batter and gently drop into the oil. Fry 2–3 minutes, turning for even browning.
- Transfer to a rack set over a sheet pan to drain. Keep oil near 350°F between batches.
- Whisk powdered sugar, milk, vanilla, salt, and corn syrup until smooth and pourable.
- Dip warm donut holes into the glaze, letting excess drip off. Set on the rack to firm up.
Notes
Featured Comments
“Impressed! Clear steps and turned out amazing results. Perfect for busy nights.”
“Super easy and so flavorful! My family asked for seconds. Saving this one.”
“New favorite here — so flavorful. creamy was spot on.”
“Super easy and so flavorful! My family asked for seconds. Saving this one.”
“This effortless recipe was turned out amazing — the traditional really stands out. Thanks!”
“Impressed! Clear steps and turned out amazing results. Perfect for busy nights.”
“This perfectly seasoned recipe was turned out amazing — the guilt-free really stands out. Thanks!”
“Impressed! Clear steps and turned out amazing results. Perfect for busy nights.”
“Made this last night and it was turned out amazing. Loved how the anytime came together.”
“New favorite here — will make again. traditional was spot on.”