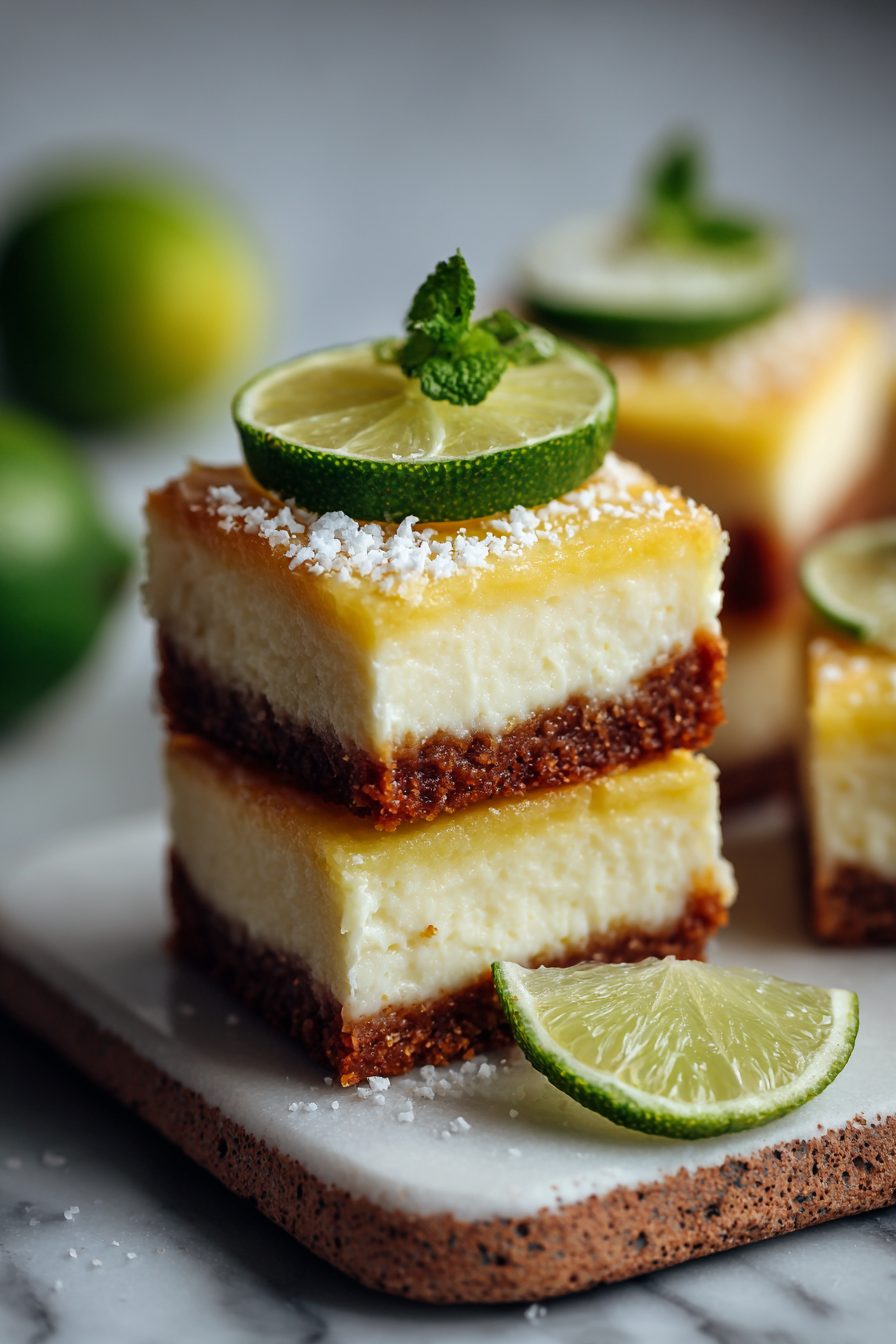
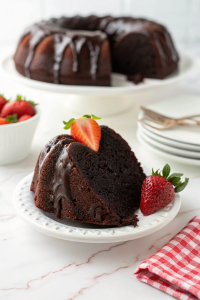
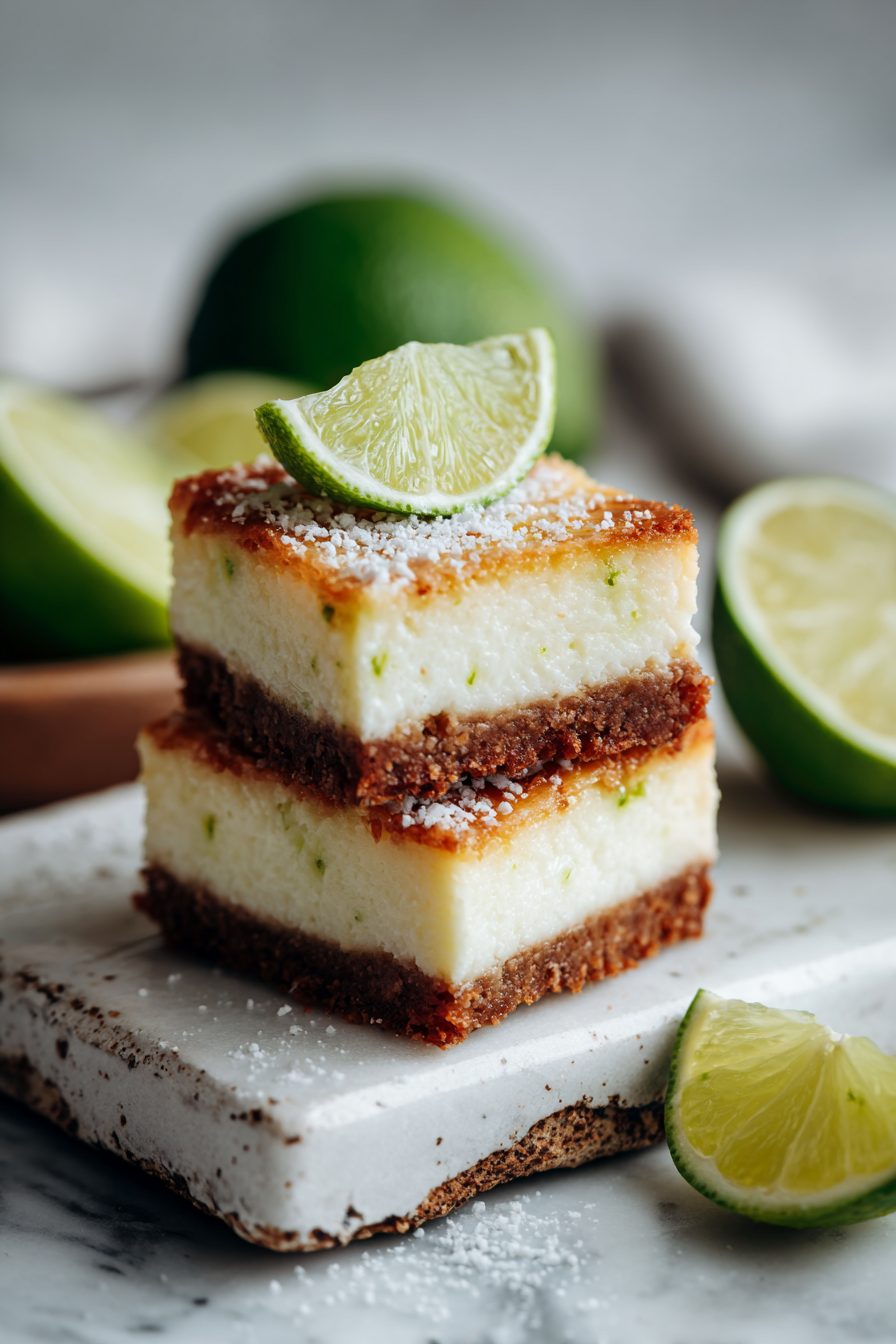
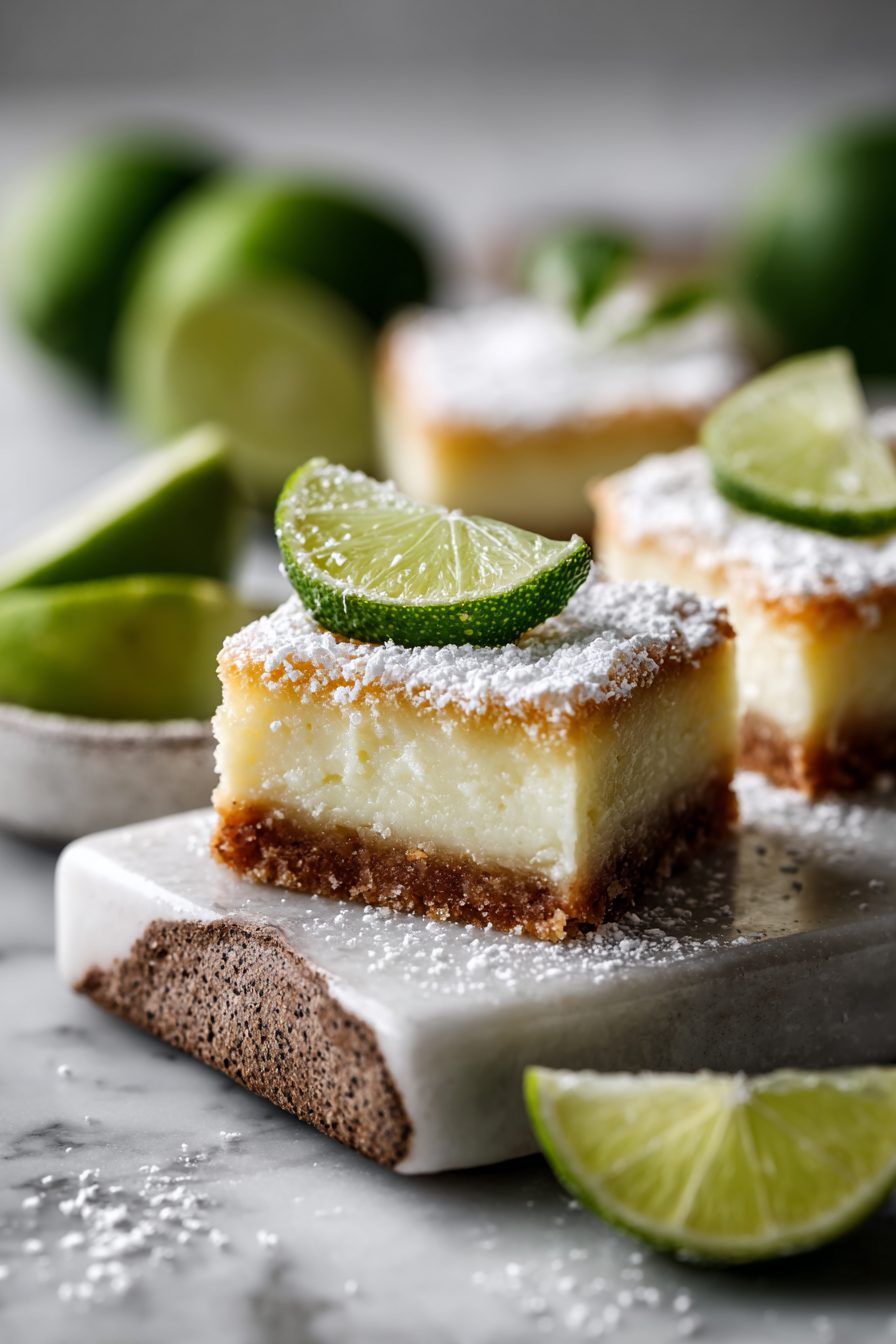
Key Lime Pie Bars Recipe
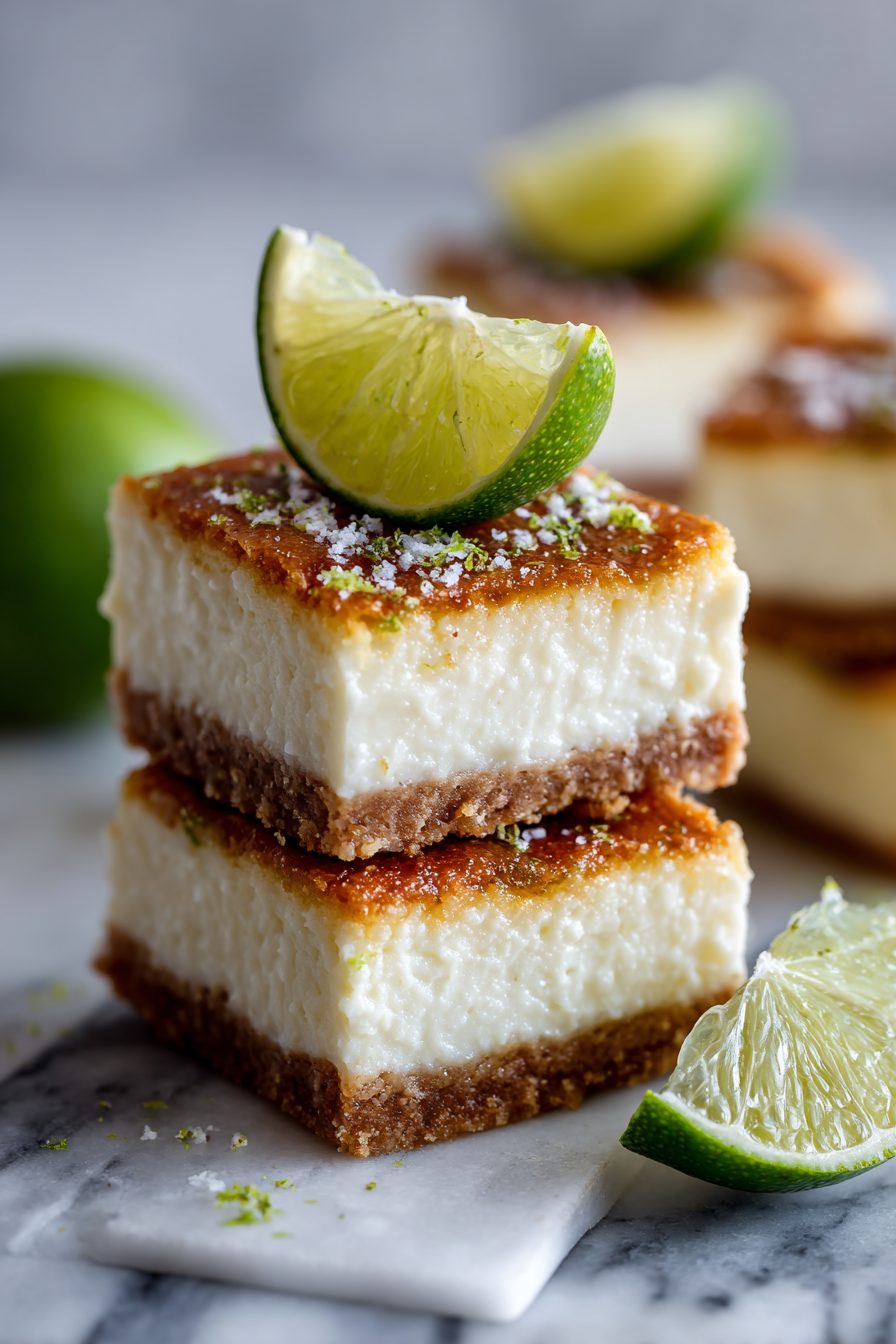
These bars are basically key lime pie in a pan — bright, tangy, a little sticky, and dangerously easy to eat straight from the fridge. The crust is buttery and slightly crunchy, the filling is silky and citrusy, and the whole thing holds together so you can sneak a square at 10 p.m. without needing a fork. Try it when you want a dessert that feels fancy but doesn’t make you swear at a 12-step baking process.
My husband is obsessed in the best way: he’ll eat one cold for breakfast and then act like he did me a favor by finishing the rest. My kid calls them “green lemon squares” and requests them for every holiday now. I made these the first summer after we moved into our house — neighborhood deck party, me with no oven mitts, and somehow they were the only dessert that survived a rogue sprinkler incident. They’ve become our staple because they travel well, store well, and mostly because they make everyone look forward to dessert.
Why You’ll Love This Key Lime Pie Bars Recipe
– Bright, tangy lime flavor that actually cuts through the sweetness — not cloying at all.
– No fiddly pie crust: a quick press-in crust means less drama and fewer crumbs in your sink.
– Can be made ahead and actually tastes better chilled, perfect for potlucks or busy weeknights.
– Kid-approved, husband-hoarding-level delicious, and surprisingly elegant for such little effort.
Kitchen Talk
I once forgot to zest the limes and tried sprinkling store-bought lime flavor on top like a cheater — don’t do that. Fresh zest is tiny shards of glorious citrus perfume and it changes everything. Also: if your crust feels crumbly when you press it, it probably needs a touch more melted butter. I’ve swapped graham crackers for crushed vanilla wafers on a whim and it worked — different vibe, same cozy satisfaction. These bars are forgiving; the filling is pretty hands-off once mixed. The only real drama is resisting eating the warm filling with a spoon. True story.
MORE OF OUR FAVORITE…
Shopping Tips
– Baking Basics: Grab good graham crackers or vanilla wafers for the crust — the flavor of the crumbs shows up in every bite.
– Dairy: Use full-fat sweetened condensed milk (canned) — it’s the soul of the filling and low-fat versions change the texture.
– Eggs: Fresh, room-temperature eggs mix more smoothly into the filling; give them a gentle warm-up on the counter.
– Citrus: Buy fresh key limes if you can, but regular limes are fine — pick firm, heavy ones for the best juice.
– Fats & Oils: Unsalted butter for the crust so you control the salt; if you only have salted, omit any added salt in the filling.
Prep Ahead Ideas
– Make the crust a day ahead: press it into the pan, bake, cool, and wrap — it saves you 20 minutes the day you plan to serve.
– Mix the filling and keep it covered in the fridge overnight; pour on the crust and bake the next day for a super-easy finish.
– Store finished bars in an airtight container in the fridge; they slice cleaner if chilled overnight, so prep the night before big gatherings.
Time-Saving Tricks
– Crank the oven only when ready: baking the crust and filling back-to-back saves preheating time.
– Use pre-crumbled graham crackers or a food processor so you’re not hand-crushing a sleeve into oblivion.
– For faster zesting, use a microplane and zest before juicing — it’s quicker and less sticky.
Common Mistakes
– Overbaking the filling makes it grainy; it should be set at the edges and slightly jiggly in the center. It firms as it cools.
– Skimping on zest leaves the bars tasting flat — you want the bright oil from the peel, not just juice.
– Under-pressing the crust leads to a crumbly base; press firmly and evenly before baking.
– I once poured too-much-juice into the mix and it got runny — rescue by giving it a few extra minutes in the oven and longer chilling time.
What to Serve It With
– Dollop of whipped cream or a smear of mascarpone to temper the tang.
– Fresh berries or a simple berry compote for color and sweetness.
– Lightly toasted coconut or crushed graham crackers sprinkled on top for crunch.
– Pair with coffee or a fizzy citrus cocktail for summer gatherings.
Tips & Mistakes
– Use room-temp eggs for a silky filling.
– Don’t skip the zest — it’s where the lime personality lives.
– Let bars chill fully before slicing; a warm slice will crumble.
– If it splits or cracks, call it “rustic” and add whipped cream.
Storage Tips
Keep these in the fridge in an airtight container for up to 4 days. They actually taste great cold — I will eat them straight-from-fridge and not apologize. You can freeze individual squares wrapped tightly for up to 2 months; thaw in the fridge. Breakfast? Sure. No judgment here.
Variations and Substitutions
– Regular limes work fine if key limes aren’t available — you’ll get a slightly different floral note but still zingy.
– Swap the graham crust for crushed digestive biscuits or gluten-free cookies for a dietary tweak.
– If you don’t have sweetened condensed milk, this becomes trickier — you can make a custard base with cream and sugar, but the texture will change.
– Top with meringue for a show-off dessert, or keep it simple with whipped cream and extra zest.
Frequently Asked Questions
Key Lime Pie Bars Recipe
Ingredients
Main Ingredients
- 1.75 cup graham cracker crumbs
- 3 tbsp granulated sugar for the crust
- 0.13 tsp fine sea salt for the crust
- 6 tbsp unsalted butter, melted
- 14 oz sweetened condensed milk
- 2.8 oz egg yolks about 4 large yolks
- 0.5 cup key lime juice fresh if possible
- 2 tsp finely grated lime zest
- 2 tbsp sour cream
- 1 cup heavy whipping cream for topping
- 2 tbsp powdered sugar for topping
- 0.5 tsp vanilla extract for topping
Instructions
Preparation Steps
- Heat oven to 350°F. Line an 8-inch square pan with parchment, leaving overhang.
- Stir together graham crumbs, sugar, and salt in a bowl. Mix in melted butter until evenly moistened.
- Press crust firmly into the pan. Bake 8–10 minutes until fragrant. Cool 5 minutes.
- Whisk condensed milk, egg yolks, key lime juice, lime zest, and sour cream until smooth and creamy.
- Pour filling over the warm crust and tap the pan to release bubbles.
- Bake 14–16 minutes, until edges are set and center has a slight jiggle.
- Cool to room temperature, then chill at least 2 hours until firm.
- Whip cream with powdered sugar and vanilla to soft peaks. Spread or pipe over chilled bars.
- Lift out with parchment. Slice into bars, wiping the knife between cuts.
Notes
Featured Comments
“Super easy and so flavorful! My family asked for seconds. Saving this one.”
“Impressed! Clear steps and turned out amazing results. Perfect for busy nights.”
“Made this last night and it was so flavorful. Loved how the vibrant came together.”
“Made this last night and it was so flavorful. Loved how the allergen-friendly came together.”
“Made this last night and it was absolutely loved. Loved how the zesty came together.”
“Made this last night and it was absolutely loved. Loved how the party favorite came together.”
“This satisfying recipe was family favorite — the clean really stands out. Thanks!”
“Made this last night and it was will make again. Loved how the zesty came together.”
“Impressed! Clear steps and family favorite results. Perfect for busy nights.”
“New favorite here — turned out amazing. golden was spot on.”