No Bake Peanut Butter Marshmallow Pie
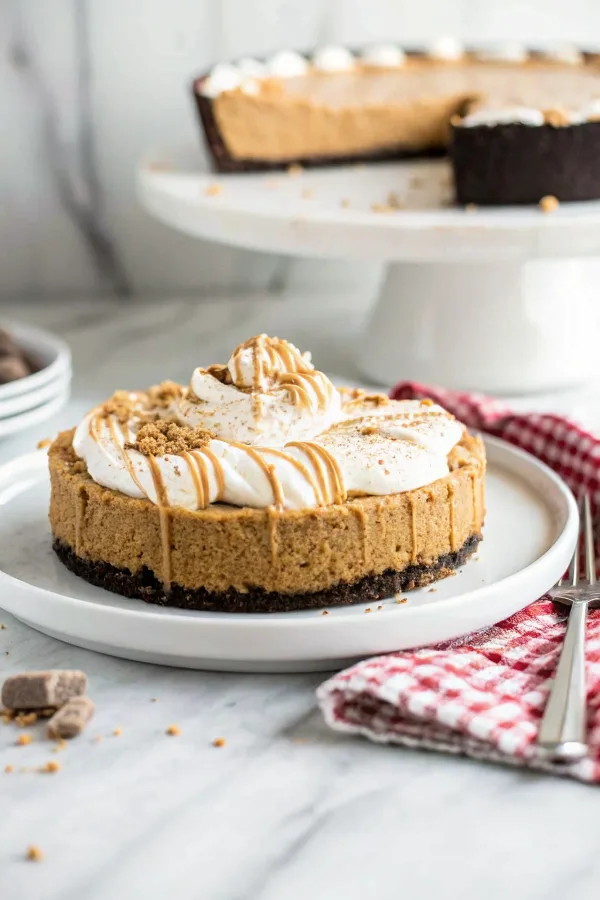
This no-bake peanut butter marshmallow pie is a creamy, slightly airy dessert with rich peanut butter flavor and pillowy marshmallow sweetness set in a crunchy cookie crust — a quick, oven-free treat that comes together with simple pantry ingredients.
It’s one of those desserts you can make in an afternoon and have ready for guests the next day. It holds up well in the fridge, is easy to slice, and is forgiving if you want to tweak sweetness or add a chocolate drizzle.
Why This No Bake Peanut Butter Marshmallow Pie Works
1. The peanut butter filling gives deep, nutty richness that pairs perfectly with the sweet, fluffy marshmallow layer.
2. Whipped cream (or whipped topping) lightens the filling so the pie isn’t overly dense.
3. A pressed cookie crust adds crunchy texture without any baking.
4. It’s quick to assemble and can be made ahead, which makes serving stress-free.
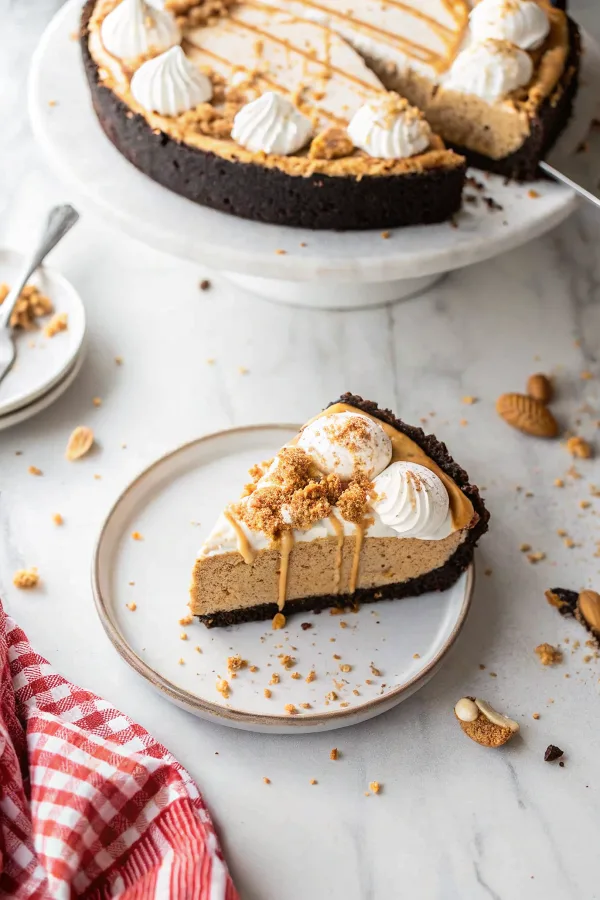
Ingredients




A short list of what you’ll need and why each item matters.
MORE OF OUR FAVORITE…
– Graham cracker crumbs or chocolate cookie crumbs: Forms the crust; chocolate gives a richer, more dessert-like base.
– Unsalted butter: Binds the crumbs and firms the crust when chilled.
– Creamy peanut butter: Provides the main flavor — use regular creamy for smooth texture.
– Powdered sugar: Sweetens and helps stabilize the peanut butter filling.
– Marshmallow fluff (marshmallow creme): Gives the pie its marshmallow flavor and glossy, smooth texture.
– Heavy cream (or whipped topping): Whipped to add lightness; Cool Whip is a more stable swap.
– Vanilla extract and a pinch of salt: Balances sweetness and enhances peanut butter flavor.
– Optional toppings (chopped peanuts, chocolate shavings): Add crunch or chocolate contrast at serving.
Substitutions and Variations
– Swap chocolate cookie crumbs for graham crackers for a chocolate-peanut combo — crust will be richer and slightly more decadent.
– Use natural peanut butter: expect a looser filling; add a touch more powdered sugar or chill longer to firm.
– Replace heavy cream with whipped topping for an easier, more stable filling; the texture will be slightly less fresh-tasting.
– Fold in chopped peanuts or mini chocolate chips for added texture; chips make the slices a bit firmer.
– Add a layer of melted chocolate on the crust before filling for a firm chocolate seal — gives a nice snap when sliced.
How to Make No Bake Peanut Butter Marshmallow Pie
This is a summary — the full recipe card has exact amounts and timing.
1. Mix cookie or graham crumbs with melted butter, press into a 9-inch springform or pie pan, and chill until firm.
2. Whip heavy cream to medium-stiff peaks and set aside (or thaw and whip whipped topping slightly if using Cool Whip).
3. Beat creamy peanut butter with powdered sugar, vanilla, and a pinch of salt until smooth.
4. Fold half of the whipped cream into the peanut butter mixture to loosen, then fold in the remaining cream gently.
5. Fold marshmallow fluff into the peanut butter-whipped mixture until streaks are gone (or swirl if you like ribbons).
6. Spread the filling into the chilled crust, smooth the top, and chill at least 4 hours or overnight to set.
7. Garnish with chopped peanuts or chocolate shavings just before serving.
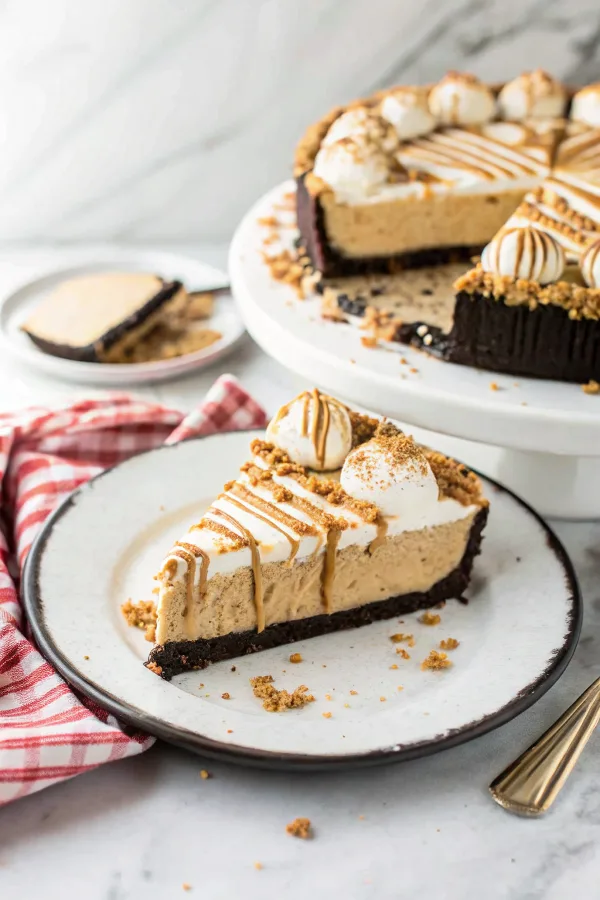
Tips for the Best Results
1. Chill the crust well before filling so it stays firm and doesn’t weep.
2. Whip cream to medium-stiff peaks — too soft and the filling will be slack; too stiff and it can break when folding.
3. Room-temperature peanut butter mixes smoother; scrape the bowl to remove pockets.
4. Use a rubber spatula and fold gently to keep the filling light and airy.
5. Chill at least 4 hours; overnight is best for clean slices.
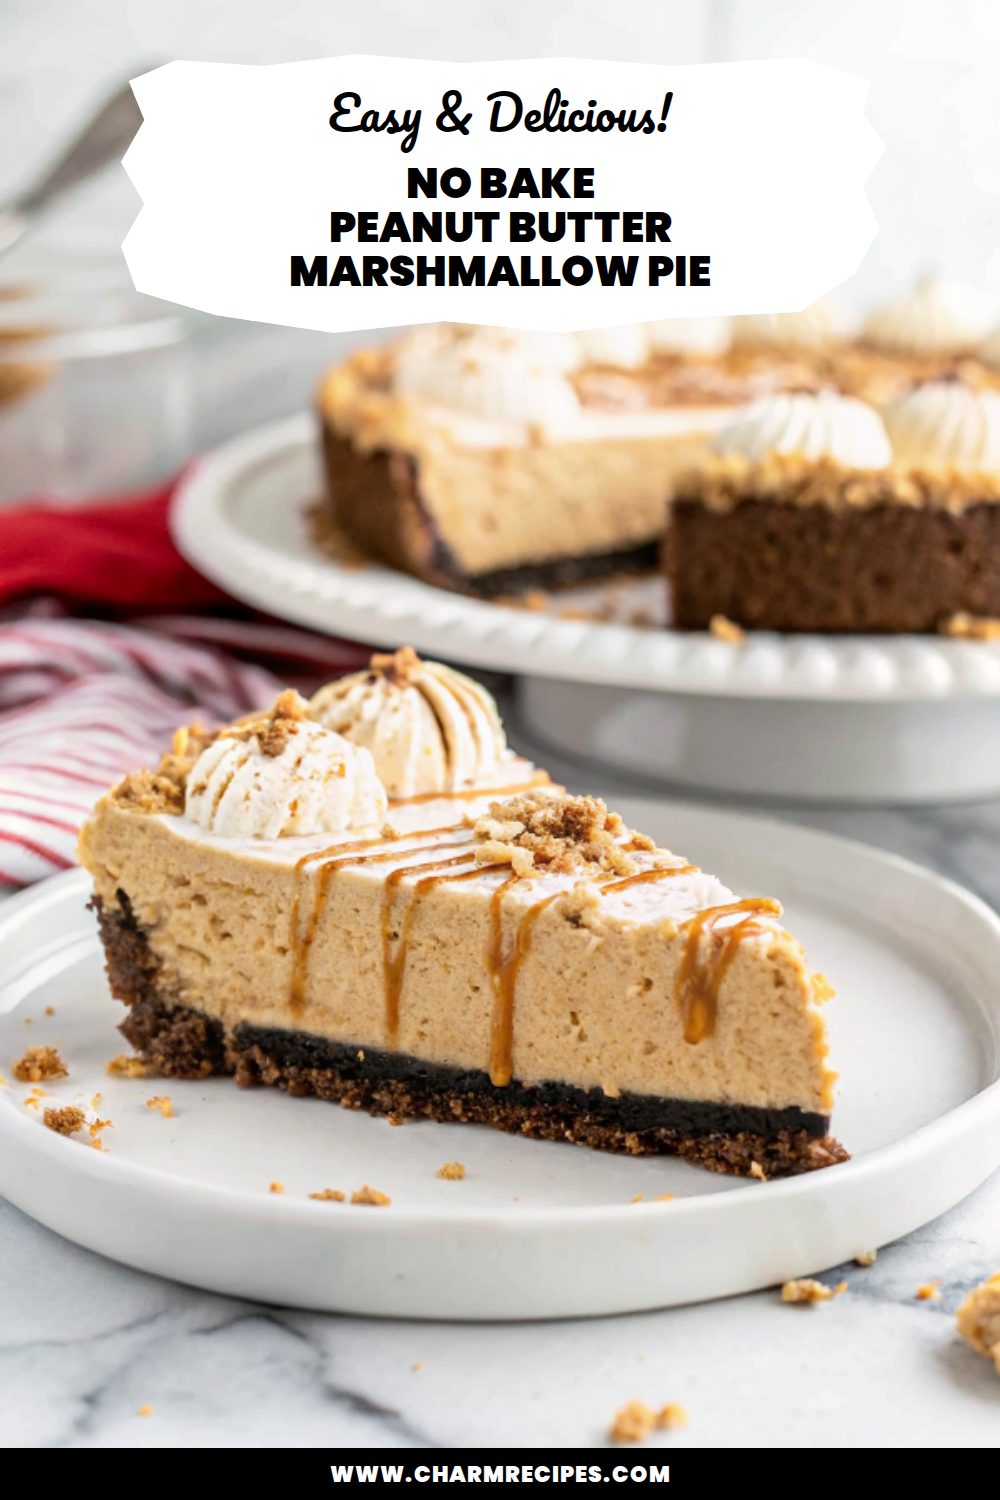
Common Mistakes
– Filling too runny: often from under-whipped cream or cold peanut butter — whip cream firmer and warm the peanut butter slightly before mixing.
– Crust falls apart when sliced: the crust needs enough butter and time to chill; press firmly and chill longer.
– Overmixed filling becomes dense: fold gently and stop as soon as ingredients are combined.
– Marshmallow fluff lumps: warm fluff briefly in a microwave-safe bowl (5–10 seconds) and stir to smooth before folding.
– Pie tastes flat: add a pinch more salt or a splash more vanilla to brighten flavors.
Storage
Storing
Keep the pie covered in the refrigerator for up to 3–4 days. Use a cake carrier or tight plastic wrap to prevent absorption of fridge odors.
Freezing
You can freeze the pie for up to 1 month. Wrap the whole pie or individual slices tightly in plastic wrap and foil. Thaw overnight in the fridge before serving.
Reheating or serving later
No reheating needed. Let chilled pie sit at room temperature 10–15 minutes for easier slicing and slightly softer texture.
How to Serve No Bake Peanut Butter Marshmallow Pie
– Drizzle with melted chocolate and sprinkle chopped salted peanuts for a sweet-salty finish.
– Serve with a scoop of vanilla ice cream for extra creaminess.
– Add fresh berries or a tangy berry compote to cut the sweetness.
– Cut into bars for potlucks or make mini versions in a muffin tin for individual servings.
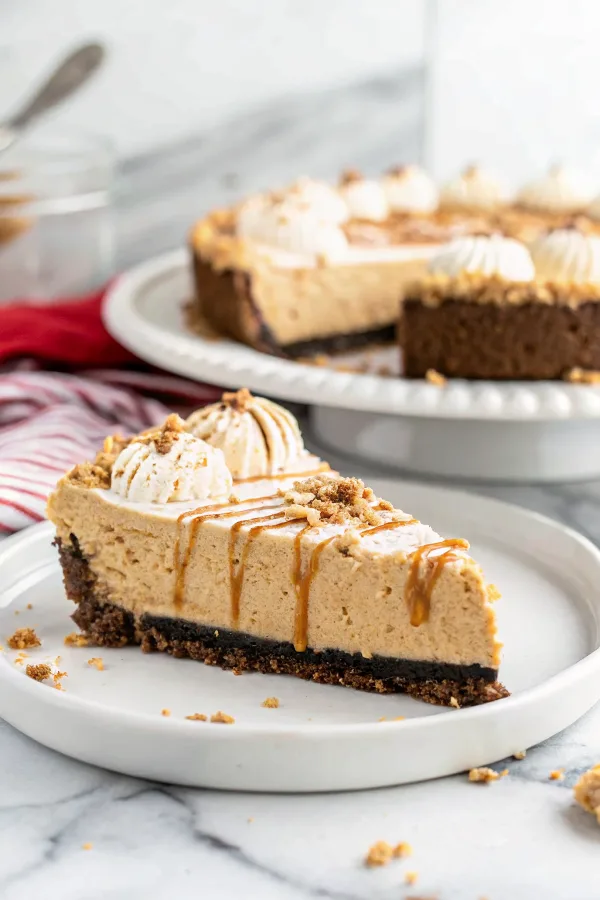
More Helpful Notes
– Use creamy peanut butter for the smoothest, most consistent filling — chunky will change the mouthfeel.
– If you prefer less sweetness, reduce powdered sugar slightly and taste before folding in all the cream.
– For a firmer, slightly tangy filling, stir in 2–4 ounces softened cream cheese with the peanut butter.
– Marshmallow fluff keeps the texture glossy and stable — mini marshmallows work but may need melting.
Frequently Asked Questions
No Bake Peanut Butter Marshmallow Pie
Ingredients
Chocolate Cookie Crust
- 36 chocolate sandwich cookies (about 13 oz), finely crushed
- 7 tablespoons unsalted butter, melted
Peanut Butter Marshmallow Filling
- 8 ounces cream cheese, softened
- 1/2 cup powdered sugar
- 1 cup creamy peanut butter
- 8 ounces marshmallow creme
- 1 teaspoon pure vanilla extract
- 1/8 teaspoon fine sea salt
Whipped Cream + Finish
- 1 1/2 cups cold heavy whipping cream
- 2 tablespoons powdered sugar
- 3 tablespoons creamy peanut butter, warmed (optional, for drizzling)
- 2 chocolate sandwich cookies, crushed (optional, for garnish)
Instructions
Preparation Steps
- Chill a large mixing bowl and beaters in the refrigerator for 10 minutes. Measure all ingredients so they’re ready to go.
- Make the whipped cream first: In the chilled bowl, whip the cold heavy cream with 2 tablespoons powdered sugar on medium-high until medium-stiff peaks form, 2–3 minutes. Reserve about one-third of the whipped cream in the fridge for topping; keep the rest chilled for folding into the filling.
- Build the crust: Place the cookies in a large zip-top bag and crush with a rolling pin until very fine. Transfer crumbs to a bowl, stir in the melted butter until evenly moistened, then press firmly into a 9-inch deep-dish pie plate, packing the bottom and sides with a flat-bottomed glass. Freeze the crust for 15 minutes to set while you make the filling.
- Mix the filling: Beat the softened cream cheese until smooth and fluffy, about 1 minute. Add 1/2 cup powdered sugar, vanilla, and salt; beat until creamy and no lumps remain. Mix in the peanut butter until fully incorporated and slightly aerated, then blend in the marshmallow creme just until combined and silky.
- Lighten the filling: Fold the larger portion of whipped cream into the peanut butter mixture in two additions, using broad strokes to keep it airy.
- Assemble: Spoon the filling into the chilled crust and smooth the top. Dollop the reserved whipped cream over the surface and swirl. If using, warm the peanut butter 15–20 seconds in the microwave and drizzle over the top; use a skewer to create gentle ripples. Sprinkle with crushed cookies, if desired.
- Chill until set, at least 4 hours (or overnight for the cleanest slices). Keep refrigerated until serving.
- Slice and serve: For neat wedges, run a long knife under hot water and wipe dry between cuts.
Notes
Featured Comments
“New favorite here — absolutely loved. light was spot on.”
“Super easy and turned out amazing! My family asked for seconds. Saving this one.”
“Impressed! Clear steps and will make again results. Perfect for busy nights.”
“Super easy and absolutely loved! My family asked for seconds. Saving this one.”
“Impressed! Clear steps and absolutely loved results. Perfect for busy nights.”
“This fluffy recipe was family favorite — the celebratory really stands out. Thanks!”
“New favorite here — family favorite. savory was spot on.”
“Super easy and absolutely loved! My family asked for seconds. Saving this one.”
“New favorite here — family favorite. nutty was spot on.”
“Impressed! Clear steps and so flavorful results. Perfect for busy nights.”