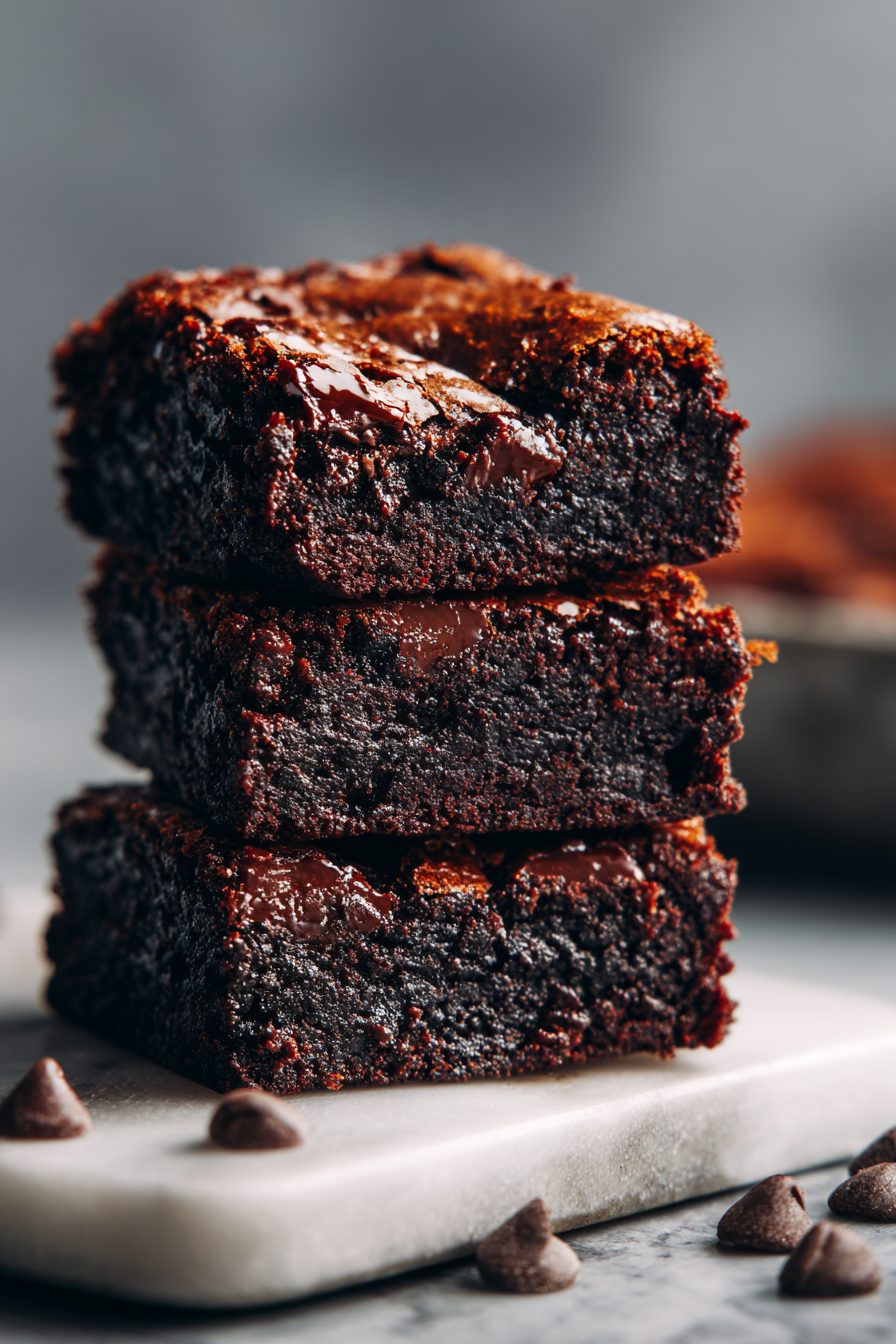
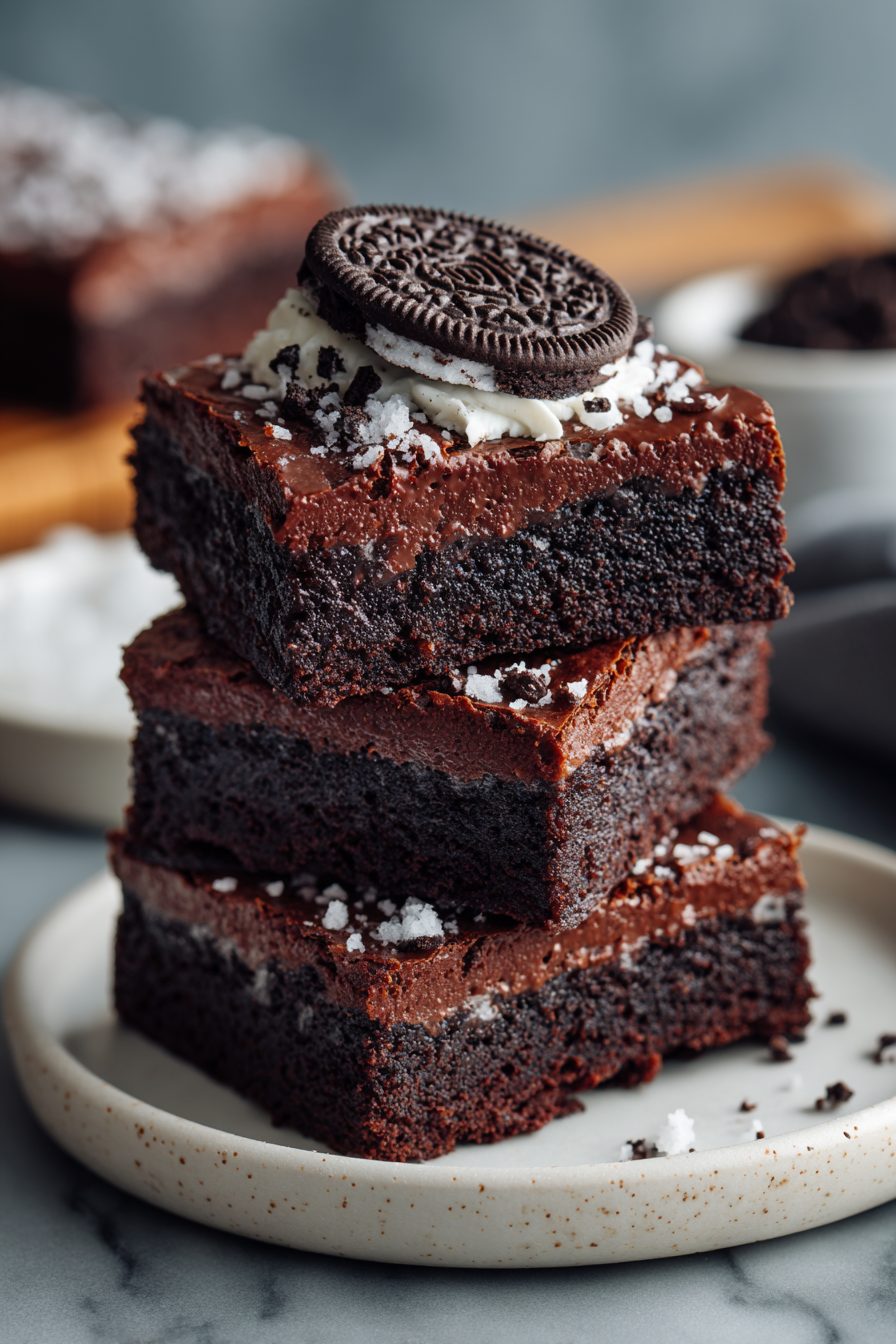
Oreo Brownies Recipe

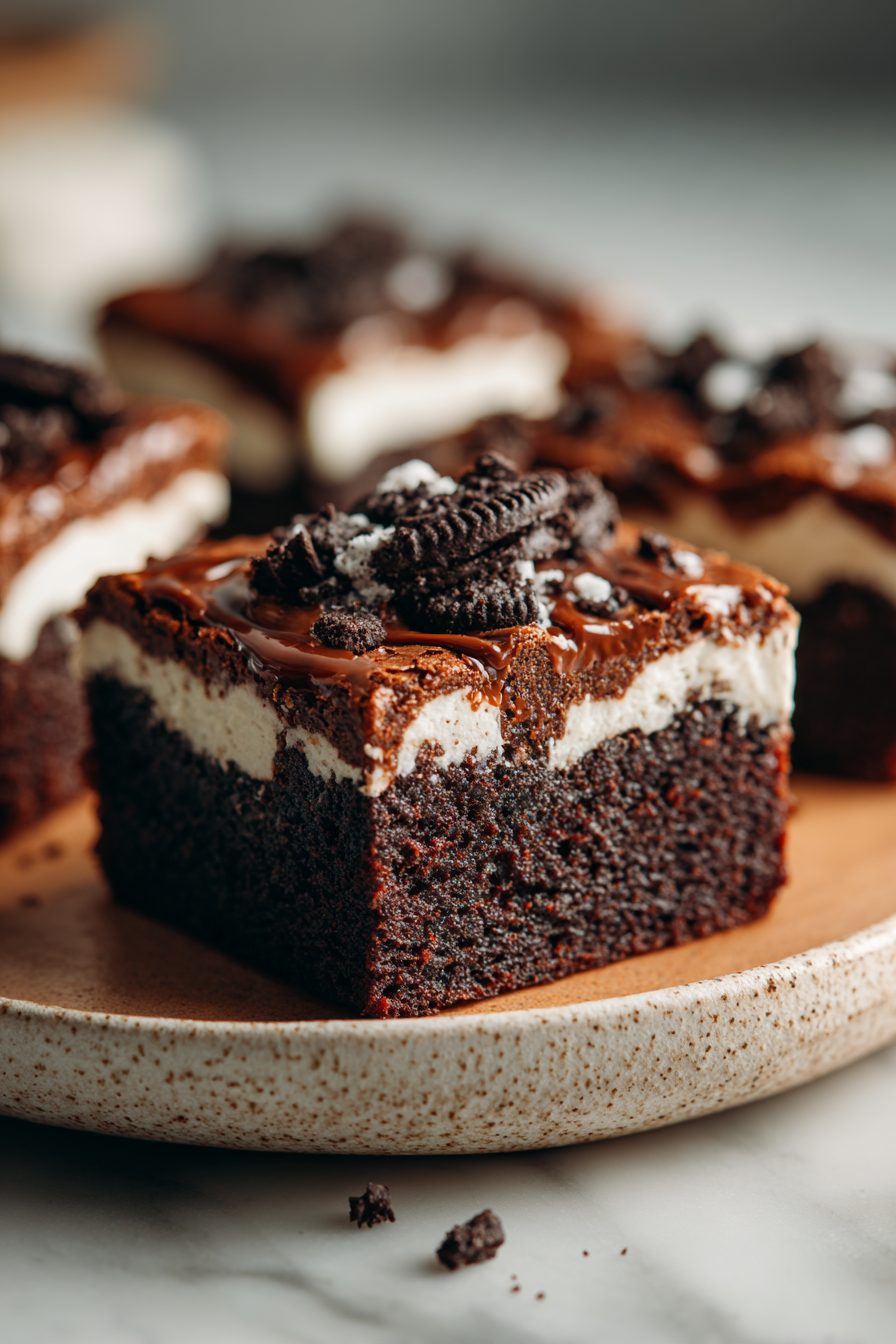
These brownies are the kind of dessert that arrives at your house with a little chaos and leaves as everyone’s new favorite: fudgy, slightly crackly on top, loaded with chunks of Oreo cookies so you get chocolate cookie crunch in every bite. They’re not fancy. They are exactly what you crave after dinner, at a potluck, or when you need to impress without actually trying that hard.
My kiddo and my husband both hover around the counter like vultures when I make these. My husband pretends he’s only having one square but then comes back for “test bites” until there’s basically a sad little sliver left. Once I baked a double batch for a game night and hid the pan in the garage fridge—bad idea. It took ten minutes for someone to remember they could go outside and steal brownies. They’re now a family staple because they’re fast, forgiving, and so dang shareable.
Why You’ll Love This Oreo Brownies Recipe
– Fudgy center + crunchy Oreo bits = textural perfection every time.
– No weird ingredients: most stuff you probably already have in the pantry.
– Fast to pull together on a weeknight, but impressive enough for guests.
– Totally kid-friendly: let them press Oreos in and call it “helping.”
Kitchen Talk
These brownies live somewhere between “homemade” and “semi-homemade chaos.” I started by smashing Oreos with a rolling pin on the counter and ended up with cookie dust everywhere; now I use a zip-top bag and a heavy pan. Don’t be afraid to fold in big chunks of Oreos for dramatic effect—tiny crumbs are fine, but those big pieces are the point. One time I subbed melted dark chocolate for cocoa powder and it made the brownies more fudgy but slightly less “brownie” tasting; still delicious, but different. Also, scraping the bowl clean is part of the job—no shame.
MORE OF OUR FAVORITE…
Shopping Tips
– Baking Basics: Use all-purpose flour and a good unsweetened cocoa powder—Dutch-process will give a deeper chocolate flavor if you have it.
– Fats & Oils: Butter is my go-to for flavor; neutral oil (like canola) keeps them ultra-fudgy if you prefer.
– Chocolate: If the recipe calls for chips or chopped chocolate, pick a bar you actually like eating—it shows.
– Eggs: Room-temperature eggs mix more smoothly and give better rise; take them out 20–30 minutes before baking.
– Nuts & Seeds: If you’re adding walnuts or pecans, toast them first for more crunch and flavor.
Prep Ahead Ideas
– You can mix the dry ingredients the night before and store them in an airtight container or zip-top bag; next day just add the wet stuff and Oreos.
– Crush Oreos in advance (in a bag) and stash them in the fridge so you’re not dealing with crumbs five minutes before guests arrive.
– Bake ahead and freeze individual squares in a single layer on a sheet pan, then transfer to a freezer-safe bag—heat gently when you want one.
Time-Saving Tricks
– Use melted butter and whisk wet ingredients right in the pot to cut down on dishes.
– Skip perfectly uniform Oreos—broken pieces are faster to mix in and look nicer when baked.
– If you’re impatient, warm a brownie for 10–12 seconds in the microwave for gooey nirvana—don’t overdo it.
Common Mistakes
– Overbaking: I once left them in five minutes too long and they turned cakey; if the center still jiggles slightly, you’re good.
– Crushing Oreos into dust: you want chunks, not powder—large bits create pockets of crispness.
– Using low-quality cocoa: a bitter cocoa will dominate the Oreo’s sweetness; balance matters.
– Rescue move: if too dry, warm a slice and slather with butter or ice cream; instant redemption.
What to Serve It With
– A scoop of vanilla ice cream or cookies & cream ice cream for maximum nostalgia.
– Cold milk or a hot mocha if you want a grown-up pairing.
– Fresh berries or a quick fruit salad to cut the richness.
Tips & Mistakes
– Use a glass or metal pan as the recipe suggests—timing shifts by a few minutes between them.
– Let the brownies cool enough before cutting; impatiently cutting ruins the edges.
– Salt is your friend—a tiny sprinkle of flaky sea salt on top before baking is game-changing.
– If the top cracks a bit, that’s normal and kind of desirable—more texture.
Storage Tips
Store brownies in an airtight container at room temperature for 2–3 days. Refrigerate if your kitchen is hot—cold brownies are perfectly fine (and oddly good for breakfast with coffee). For longer storage, freeze individual squares wrapped tightly; thaw at room temp or microwave for a few seconds. No judgment if you eat them straight from the fridge.
Variations and Substitutions
– Add a swirl: peanut butter or Nutella swirled into the batter before baking is heavenly.
– Make them vegan: swap butter for coconut oil, use flax eggs, and be sure your Oreos are vegan (many are, but check).
– Nut-free: skip nuts entirely or replace with sunflower seeds for crunch.
– Gluten-free: try a 1:1 gluten-free flour blend; texture changes but still satisfies.
– Swap Oreos for other sandwich cookies if you want a different flavor—chocolate-covered mint cookies make a bold twist.
Frequently Asked Questions
Oreo Brownies Recipe
Ingredients
Main Ingredients
- 0.75 cup unsalted butter, melted and slightly cooled
- 1.25 cup granulated sugar
- 0.25 cup light brown sugar, packed
- 3.5 oz eggs, lightly beaten about 2 large
- 2 tsp vanilla extract
- 0.95 cup all-purpose flour
- 0.6 cup unsweetened cocoa powder
- 0.5 tsp fine sea salt
- 0.25 tsp baking powder
- 0.5 tsp instant espresso powder optional, boosts chocolate flavor
- 0.75 cup semisweet chocolate chips
- 2 cup chopped chocolate sandwich cookies
- 0.5 cup crumbled cookies, for topping
Instructions
Preparation Steps
- Heat oven to 350°F. Line an 8-inch square pan with parchment, leaving overhang.
- Whisk melted butter, granulated sugar, and brown sugar until glossy and combined.
- Whisk in the beaten eggs and vanilla until the mixture looks thick and smooth.
- In a bowl, combine flour, cocoa, salt, baking powder, and espresso powder.
- Fold dry ingredients into the wet mixture just until streaks disappear. Do not overmix.
- Stir in chocolate chips and most chopped cookies, reserving a handful for topping.
- Spread batter into the pan. Scatter remaining cookie pieces on top and press lightly.
- Bake 26–30 minutes, until edges are set and a toothpick shows moist crumbs.
- Cool in the pan on a rack for 30 minutes. Lift out and cut into squares.
Notes
Featured Comments
“This family favorite recipe was family favorite — the savory really stands out. Thanks!”
“New favorite here — family favorite. perfectly seasoned was spot on.”
“Impressed! Clear steps and will make again results. Perfect for busy nights.”
“This celebratory recipe was absolutely loved — the comforting really stands out. Thanks!”
“Impressed! Clear steps and turned out amazing results. Perfect for busy nights.”
“Super easy and so flavorful! My family asked for seconds. Saving this one.”
“Made this last night and it was turned out amazing. Loved how the playful came together.”
“This toasty recipe was turned out amazing — the warm really stands out. Thanks!”
“This zesty recipe was so flavorful — the satisfying really stands out. Thanks!”
“Made this last night and it was so flavorful. Loved how the crunchy came together.”