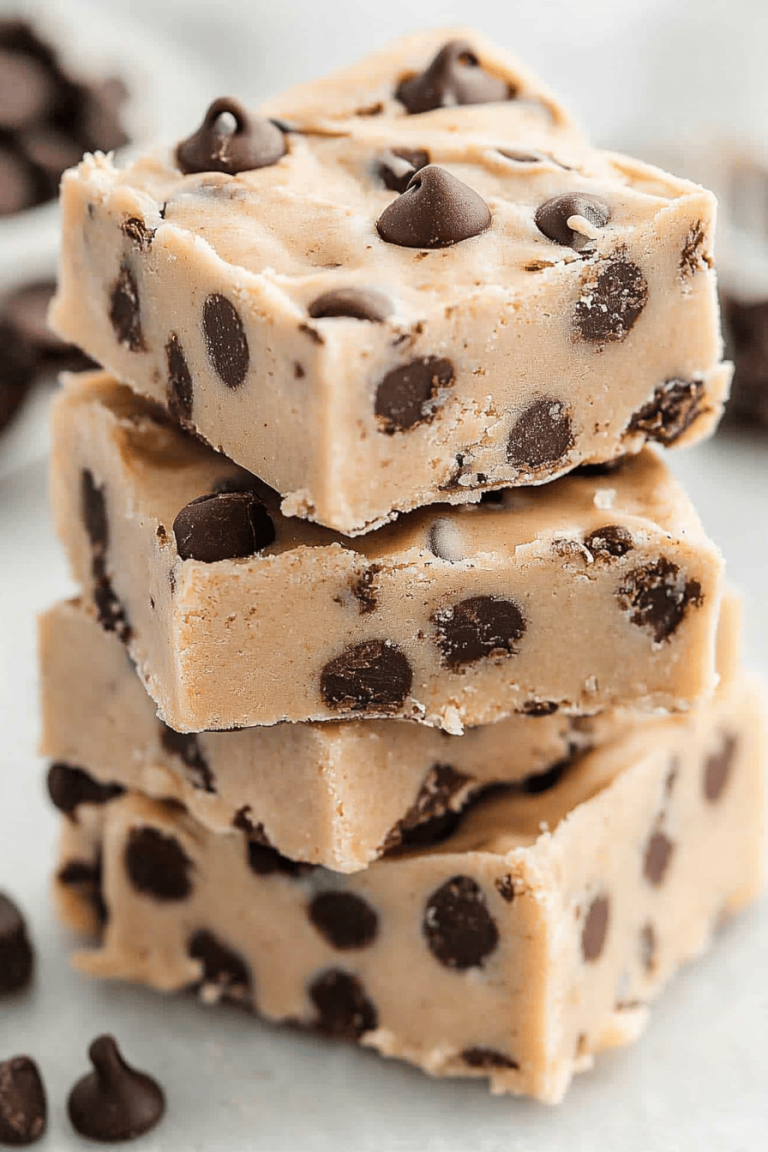
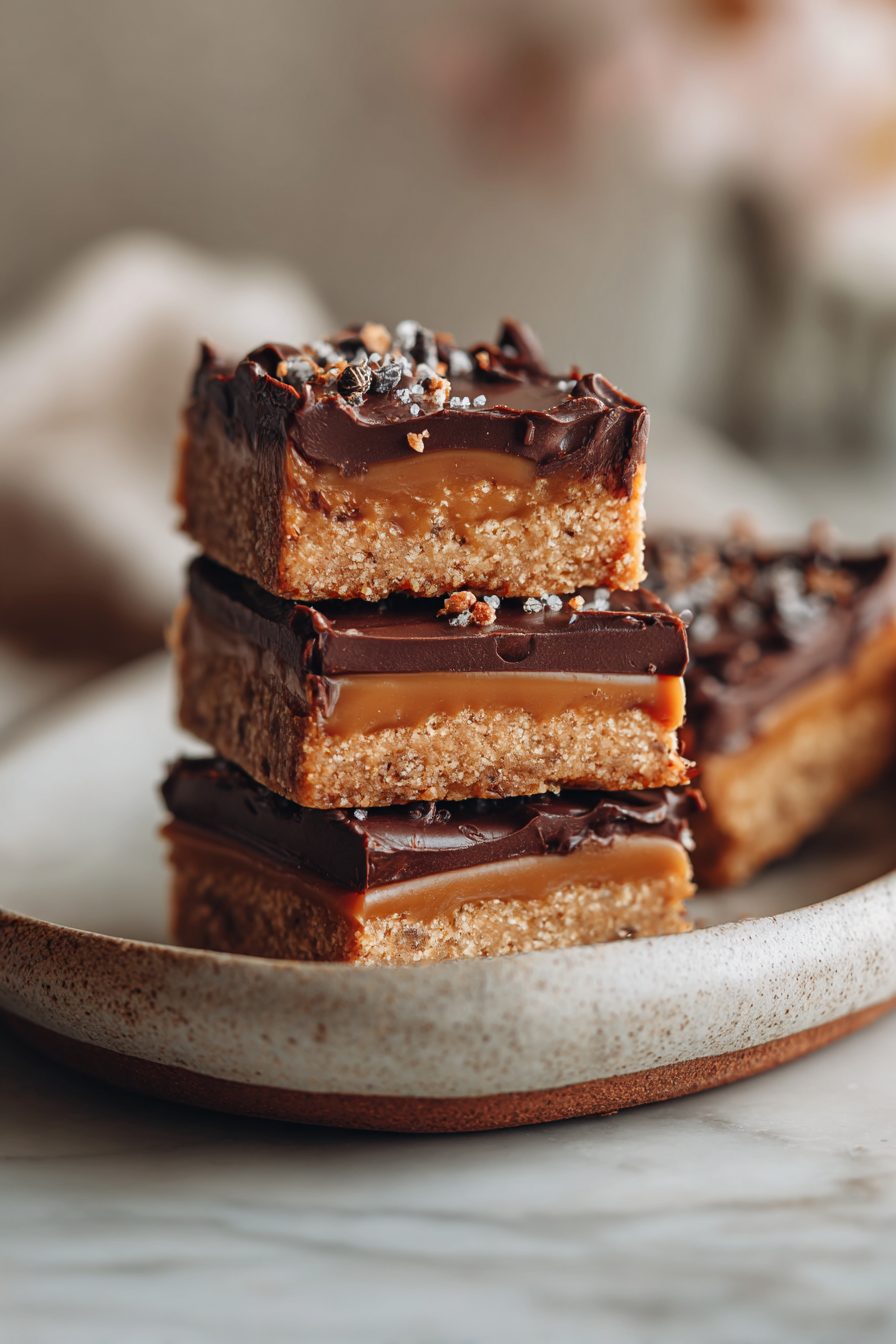
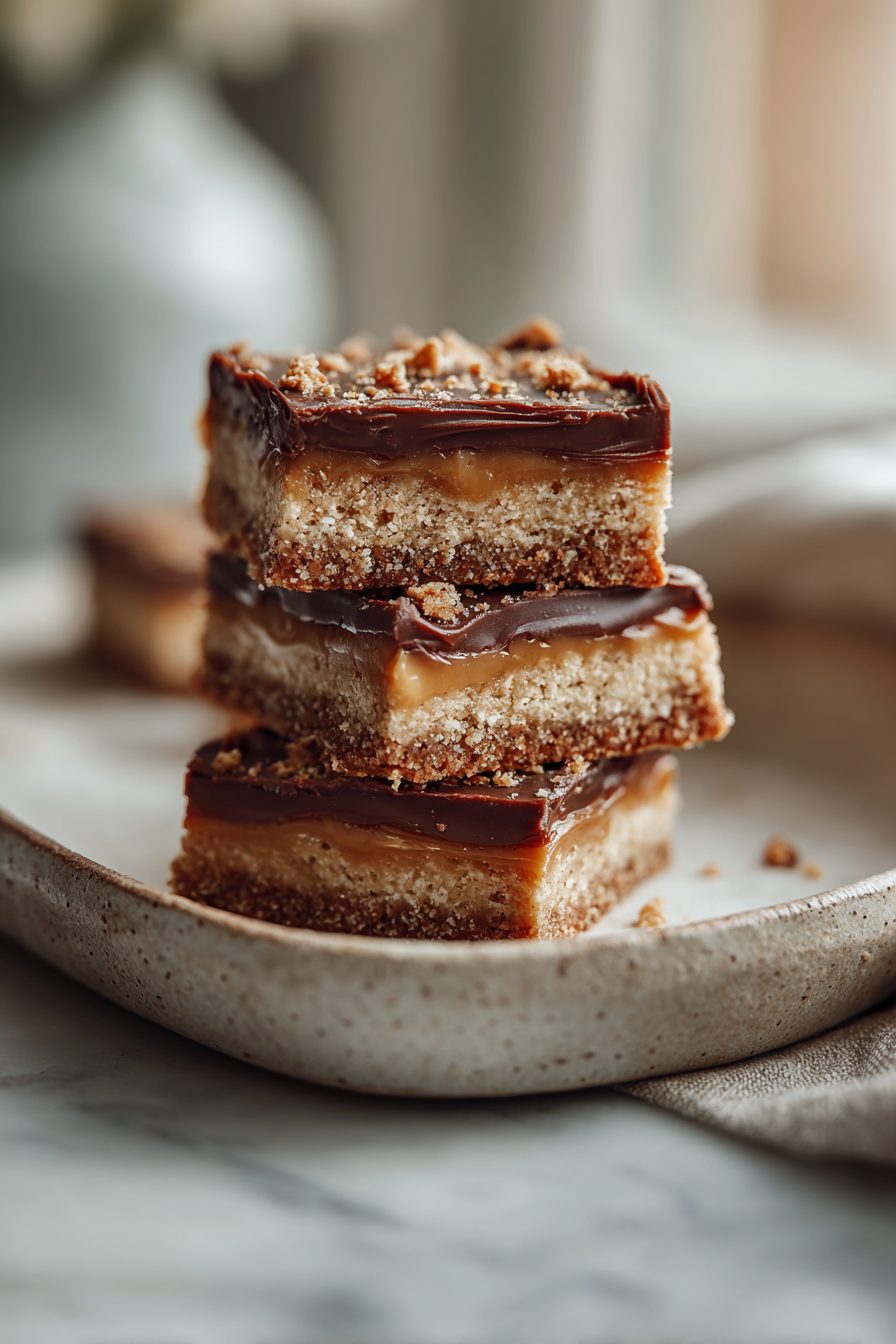
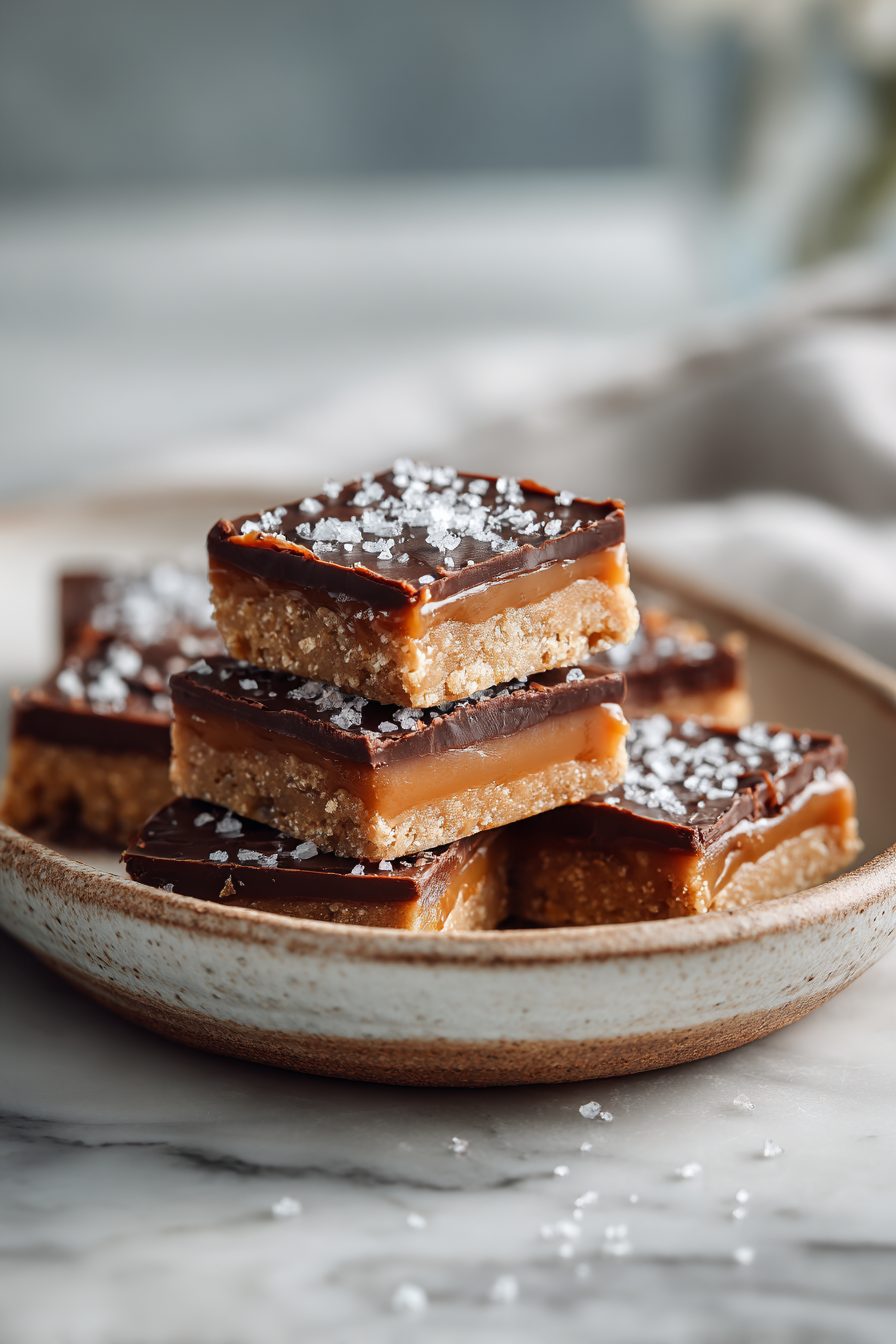
No-Bake Cookie Dough Bars
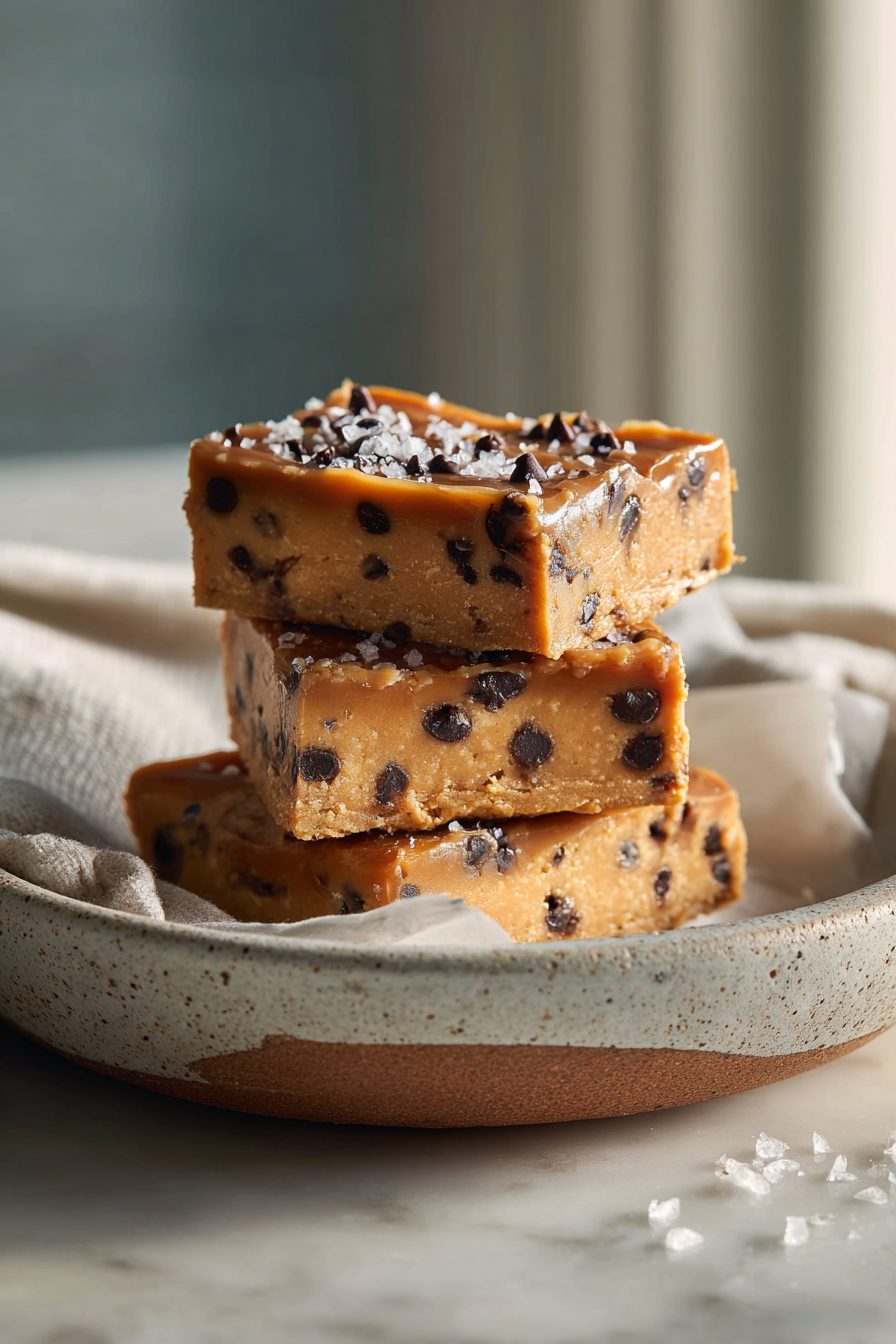
I am not above eating raw cookie dough — like, unapologetically scooping it out of a mixing bowl at 10 p.m. — so turning that habit into a legit dessert felt like destiny. These no-bake cookie dough bars are chewy, slightly crunchy at the edges, and dangerously easy: a soft, eggless cookie dough layer tucked into a buttery base and (of course) a chocolate layer on top. They’re the kind of thing you can throw together in minutes, stash in the fridge, and then pretend you’re being virtuous by slicing them into “portion-controlled” squares.
My husband calls them “that pan of joy.” He’ll wander into the kitchen, open the fridge, and mutter, “You made the cookie bars?” like I’d performed a small miracle. Our kiddo once brought one to school in a lunchbox and proudly announced they were dessert and breakfast. We’ve made them for bake sales, late-night movie marathons, and the time our electricity went out and we ate the whole pan by candlelight. They’re boringly popular here — and for good reason.
Why You’ll Love This No-Bake Cookie Dough Bars
– Eggless cookie dough you can eat without fear — hello, instant gratification.
– No oven required: perfect for hot days, small kitchens, or when you’re pretending you’ll “just make one small dessert.”
– Crowd-pleasing texture combo: tender cookie dough, crunchy base, melty chocolate top.
– Adaptable — swap mix-ins like chocolate chips, nuts, or a sprinkle of sea salt for grown-up vibes.
Kitchen Talk
MORE EASY DESSERT RECIPES...


I once tried to make a “healthier” version with seven pantry substitutions and the dough tasted like sad cardboard. Lesson learned: a couple of good ingredients beat a dozen bandaids. Also, I tried chilling the pan overnight once and the chocolate cracked like a moat — still edible, but I prefer slicing after a few hours so the top stays smooth and the middle is soft. Pro tip: use a tray with removable foil for easy lifting — life-changing for clean edges.
These No-Bake Cookie Dough Bars are a total game-changer—super quick to whip up with simple pantry staples like oat flour, peanut butter, and maple syrup, and they taste just like forbidden raw cookie dough but totally safe![1] The chocolate topping sets perfectly after chilling, making chewy, addictive squares that disappeared in minutes with my family.[1][2] Honest highlight: a tad sweet for me, but dialing back the syrup fixed it—five stars for ease and yumminess!
MORE OF OUR FAVORITE…
Shopping Tips
– Baking Basics: Grab a good brown sugar and plain flour; they actually change the chew and flavor more than you’d expect. Don’t buy the cheapest powdered sugar if it’s for frosting — it can be gritty.
– Fats & Oils: Use unsalted butter unless you want a salting surprise; room-temp butter mixes easiest for the base. If using margarine, expect a different texture.
– Chocolate: Buy good-quality chocolate or chips for the top — you don’t need single-origin, but cheap chocolate can be waxy when set. Dark or semi-sweet behaves best.
– Nuts & Seeds: If you’re adding nuts, toast them lightly for more flavor; store-bought pre-toasted are fine but check for freshness (smell = easiest test).
– Dairy: If a recipe calls for milk or cream, whole milk gives the creamiest texture; for non-dairy, use a neutral oat or cashew milk.
Prep Ahead Ideas
– You can make the base and cookie dough the day before and keep both covered in the fridge; assemble and chill when you’re ready to set the chocolate.
– Store the base and dough separate in airtight containers (or layered between parchment) to prevent sogginess.
– Doing the mixing the night before means pick-up or post-work dessert comes together in 5–10 minutes: heat the chocolate, pour, chill, and slice.
Time-Saving Tricks
– Use a food processor for the crust or cookie dough if you’re doing big batches — saves mixing and clean-up time.
– Buy mini chocolate chips or pre-chopped nuts to skip extra chopping.
– Don’t rush the chill time too much: the bars set faster in a shallow pan, so use a 9×9 or similar to cut waiting time.
Common Mistakes
– Not chilling long enough: I once tried to slice too soon and got a gooey mess — let it set or you’ll be giving out “rustic” squares.
– Overmixing the dough: it can turn dense and a little tough; pulse until combined.
– Using low-quality chocolate: melts oddly and doesn’t snap — makes for a sticky top. Quick fix: microwave in short bursts and stir, or add a tiny smear of coconut oil to smooth it out.
What to Serve It With
– A simple glass of cold milk or a big mug of coffee for grown-up dessert vibes.
– Vanilla ice cream for an indulgent mash-up.
– Fresh berries to cut the sweetness and add a bright note.
– Crumbled over plain yogurt for a cheeky breakfast parfait.
Tips & Mistakes
– Don’t skip the chill — texture depends on it.
– Run a knife under hot water and dry it before slicing for cleaner cuts.
– If top chocolate blooms (white streaks), it still tastes fine — just prettier when fresh.
– If your dough is too sticky, pop it in the fridge 10–15 minutes and try again.
Storage Tips
Keep these bars in an airtight container in the fridge for 4–5 days. They’re perfectly fine at room temp for a few hours (great at picnics), and yes — eating them cold for breakfast is a known thing in our house, no shame. Freeze individual squares between layers of parchment for up to 3 months; thaw in the fridge or at room temp for about 20 minutes before serving.
Variations and Substitutions
– Swap the chocolate top for a peanut butter drizzle or melted white chocolate for a sweeter bite.
– Make them nut-free by swapping sunflower seed butter for nut butter and using pumpkin seeds instead of nuts.
– For a vegan version, use dairy-free butter and chocolate, and a flax “egg” isn’t needed here because the dough is eggless — just use a little more binder if it feels crumbly.
– Tried using honey instead of brown sugar once — it made the dough sticky and softer; it works but needs extra chilling time.
Frequently Asked Questions
No-Bake Cookie Dough Bars
Ingredients
Main Ingredients
- 0.5 cup unsalted butter, softened
- 0.5 cup light brown sugar, packed
- 0.25 cup granulated sugar
- 2 tsp pure vanilla extract
- 3 tbsp milk use more as needed for softness
- 1.5 cup all-purpose flour, heat-treated and cooled see instructions for heat-treating
- 0.5 tsp fine sea salt
- 0.75 cup mini chocolate chips
- 1 cup semisweet chocolate chips for topping
- 1 tbsp coconut oil or neutral oil for melting with topping chocolate
- 0.25 tsp flaky sea salt optional, for finishing
Instructions
Preparation Steps
- Line an 8-inch square pan with parchment, leaving overhang for easy lifting.
- Heat-treat the flour: microwave in a shallow bowl in 30-second bursts, stirring, until it reaches 165°F. Cool completely.
- Beat butter, brown sugar, and granulated sugar until creamy and slightly fluffy.
- Mix in vanilla and milk until smooth.
- Stir in the cooled heat-treated flour and salt until a soft dough forms. Add a splash more milk if needed.
- Fold in the mini chocolate chips.
- Press the dough evenly into the lined pan, smoothing the surface.
- Melt topping chocolate chips with oil in short microwave bursts, stirring until silky.
- Pour the melted chocolate over the dough and spread into an even layer. Sprinkle with flaky salt if using.
- Chill until set, about 1–2 hours. Lift out, slice into bars, and serve.
Notes
Featured Comments
“Impressed! Clear steps and so flavorful results. Perfect for busy nights.”
“Super easy and family favorite! My family asked for seconds. Saving this one.”
“Super easy and will make again! My family asked for seconds. Saving this one.”
“Super easy and will make again! My family asked for seconds. Saving this one.”
“New favorite here — family favorite. melt-in-your-mouth was spot on.”
“Super easy and so flavorful! My family asked for seconds. Saving this one.”
“Super easy and will make again! My family asked for seconds. Saving this one.”
“New favorite here — turned out amazing. wholesome was spot on.”
“New favorite here — so flavorful. shareable was spot on.”
“This gooey recipe was absolutely loved — the nutty really stands out. Thanks!”