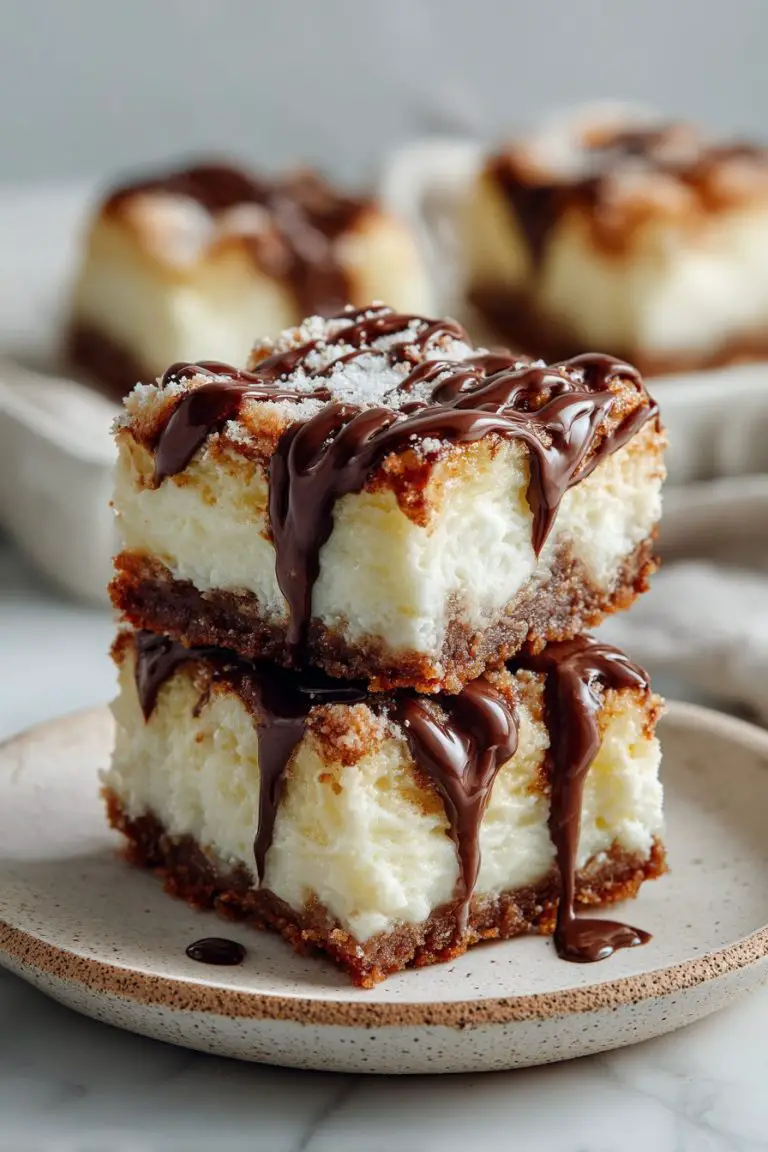
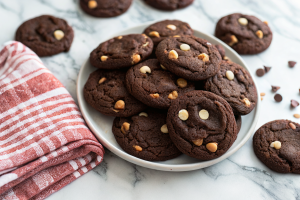
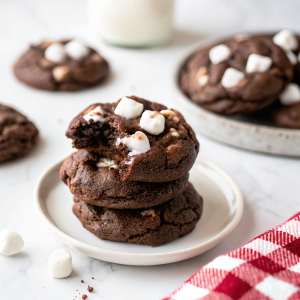
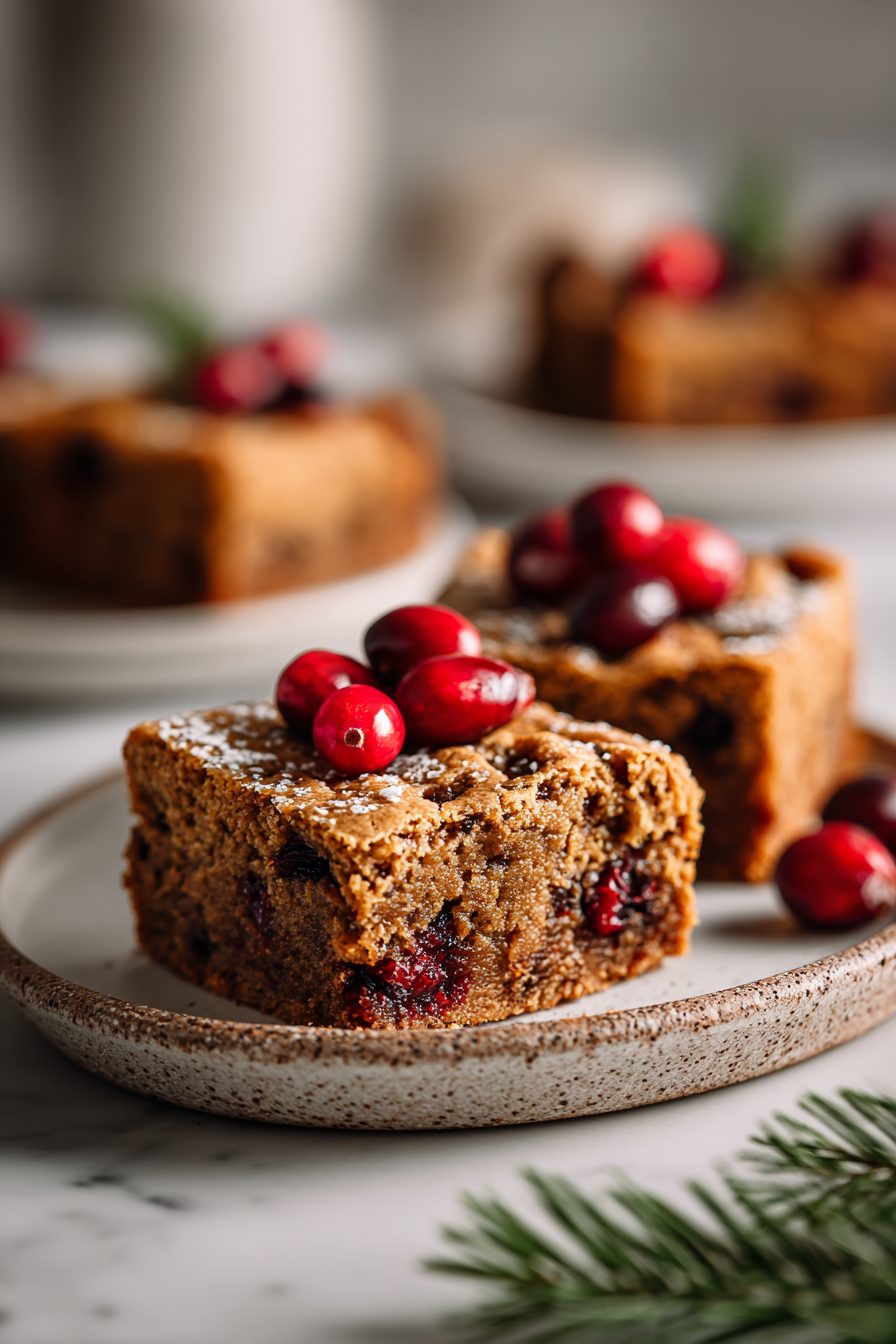
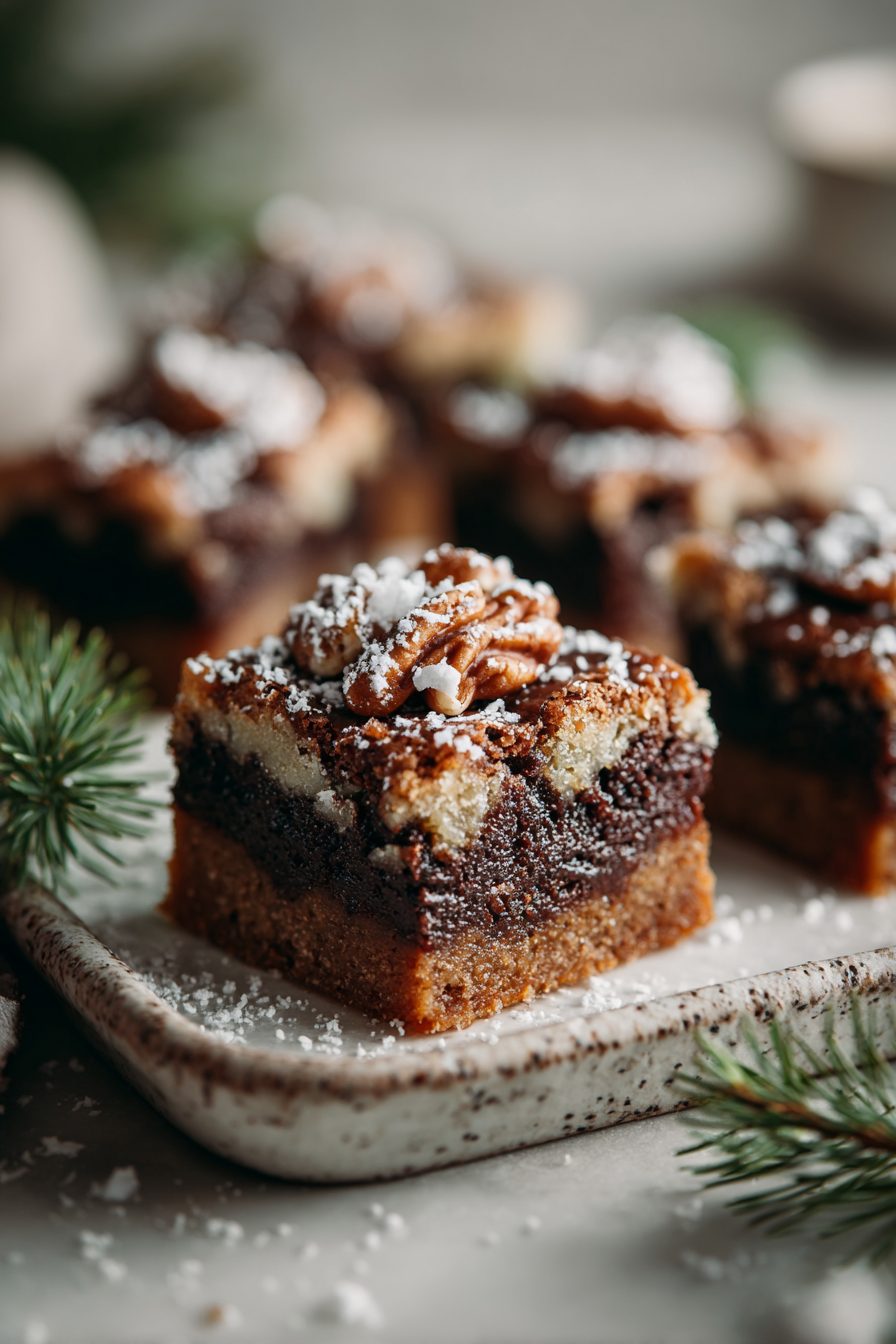
Easy Christmas Cookie Bars
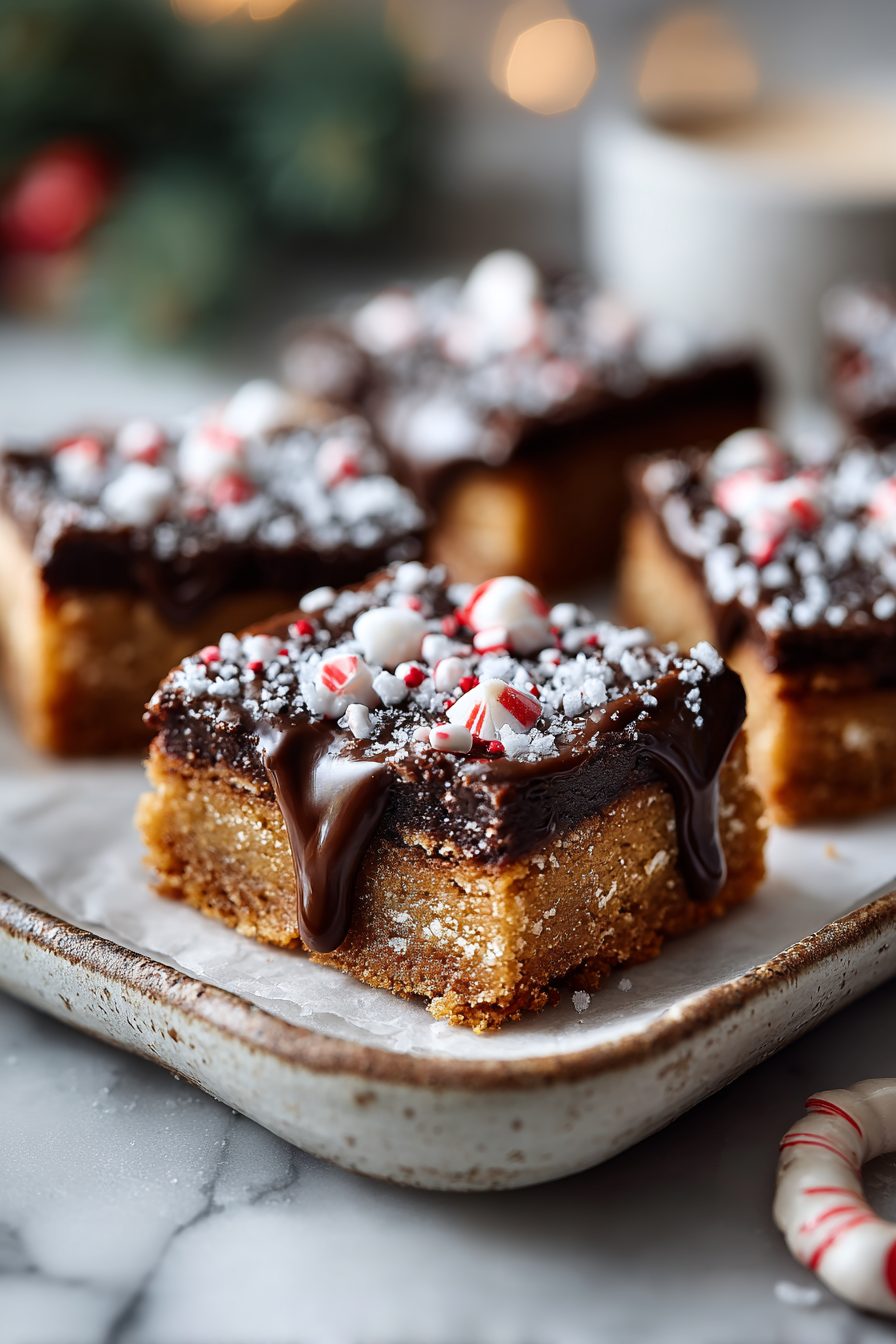
Every year I swear I’m going to be the chill person who makes one elegant, complicated cookie. And every year the calendar steamrolls me and I remember why cookie bars exist: one pan, big payoff, all the Christmas sparkle. These are soft and chewy in the middle, a little crisp on the edges, stuffed with melty chocolate and festive bits, and they look like you tried a lot harder than you did. Slice them thick and hand them out like holiday soap—except, you know, delicious.
My husband calls these “wrapping fuel.” He’ll cue up Home Alone, press the dough into the pan with way too much confidence, and I’ll pretend I’m not nervous he’s going to sneak half the M&Ms before they bake. The kids love “sprinkle snow”—that magical moment where someone always dumps the whole jar and we just go with it. These bars were the hero of last year’s power-outage night; we baked them in the afternoon, ate them by twinkle light after dinner, and honestly, I think that’s when they became a December non-negotiable.
Why You’ll Love This Easy Christmas Cookie Bars
– No scooping fifty tiny cookies. Press, bake, slice, done.
– They’re soft and chewy but hold up to travel—perfect for cookie boxes and teacher gifts.
– Customize like crazy: white chocolate + peppermint? Dark chocolate + walnuts? Yes and yes.
– They taste great warm, at room temp, and at 10 a.m. when you “accidentally” cut a sliver.
– Festive without fuss. Messy sprinkles look charming. Perfection not required.
Kitchen Talk
I learned the hard way that those tiny round nonpareil sprinkles bleed like wild when you stir them too much, so I gently press them on top right before baking instead of mixing them in. If all you’ve got is glass bakeware, it works—just keep an eye on the edges so they don’t go too bronzy while the middle catches up. I’ve made these with browned butter and, whew, the nutty flavor is unreal, but also: regular melted butter totally does the job. One time I swapped half the chocolate chips for chopped candy canes. It was crunchy in a good way, but they’ll melt into little peppermint puddles if you go overboard. I use a parchment sling because I’m lazy and like to lift the whole slab out and pretend I run a bakery for five minutes.
MORE OF OUR FAVORITE…
Shopping Tips
– Baking Basics (Flour/Sugar/Leaveners): Grab fresh baking powder and make sure your flour isn’t compacted in the bag—light flour means softer bars.
– Dairy: Real unsalted butter gives better flavor than margarine here. If using salted, just ease up on any extra salt.
– Eggs: Large eggs at room temp mix in smoother and keep the batter from getting stiff.
– Chocolate: Mix a couple of types—chips for gooey pockets, chopped bar chocolate for meltier swirls. Holiday M&M’s add color without melting everywhere.
– Sweeteners: A mix of white and brown sugar gives that chewy middle; if you can, choose dark brown for a more caramelly vibe.
– Budget Swaps: Store-brand sprinkles and chocolate chips work great; splurge on a nicer bar chocolate if you want those dramatic puddles.
Prep Ahead Ideas
– Make the dough the night before and chill it tightly covered; press into the pan right before baking.
– Stir together the dry ingredients and keep them in a labeled jar so the “assembly” is a two-minute thing later.
– Line your pan with parchment and stack it in the cabinet like you’re a future-you fairy godmother.
– Baked bars freeze beautifully: cool, slice, freeze flat, then tuck into a freezer bag. Pull out what you need for lunch boxes or last-minute neighbors.
Time-Saving Tricks
– Melt the butter so you can skip creaming—fewer dishes, faster mixing.
– One bowl, wooden spoon. A stand mixer is fine, but totally optional.
– Press the dough into the pan with a lightly greased spatula or a piece of parchment—no sticky fingers.
– Use a parchment sling so you can lift, cool, and cut neatly without wrestling the pan.
– Don’t rush cooling completely if you want clean edges; warm bars taste amazing, but they’ll smudge chocolate all over your knife (not a tragedy, just messy).
Common Mistakes
– Overbaking. The center should still look a touch pale when you pull them; they finish setting as they cool. If the edges are brown and the middle is shiny-wet, tent with foil and keep going just a bit.
– Heavy hand with flour. If the dough feels stiff and crumbly, stir in a splash of milk to bring it back.
– Sprinkle bleed. Add sprinkles on top right before baking instead of beating them in.
– Uneven thickness. Nudge the dough into the corners and level the top so you don’t get raw-center, crisp-edge drama.
– Using only chips. Chips hold shape; add some chopped bar chocolate for those good melt puddles.
What to Serve It With
– Hot cocoa with a tiny pinch of cinnamon.
– Peppermint lattes or plain strong coffee for balance.
– A scoop of vanilla or peppermint ice cream and a little chocolate drizzle.
– Salty snacks (pretzels, kettle chips) for that sweet-salty situation.
Tips & Mistakes
– Line the pan—future you will bless past you when it’s time to cut.
– Metal pans brown faster than glass; peek early if yours runs hot.
– Salt matters; a fling of flaky salt on top makes the chocolate pop.
– Let them cool before slicing if you care about sharp edges; otherwise, embrace the goo.
– If your dough seems greasy, it’s probably too warm—chill the pan 10 minutes and carry on.
– Knife sticking? Wipe with a warm, damp towel between cuts.
Storage Tips
Room temp in an airtight container for a few days is perfect; stack with parchment if you’re layering. They stay soft, and honestly, they’re dangerously good cold straight from the fridge. For longer storage, freeze in a zip-top bag, then thaw on the counter or eat half-frozen like I do when I’m “taste-testing breakfast.”
Variations and Substitutions
– Peppermint crunch: Swap a handful of chocolate for crushed candy canes; add a drop of peppermint extract if you love it bold.
– Santa’s trail mix: Stir in chopped walnuts or pecans for crunch (toast them first if you can).
– Double chocolate: Use cocoa powder for part of the flour and add white chocolate chips for contrast.
– Gluten-free: A good 1:1 baking blend works well; don’t skip the parchment to avoid sticking.
– Dairy-free: Use a plant butter stick and dairy-free chocolate; texture stays chewy and happy.
– No eggs: A flax “egg” holds it together nicely; the bars will be a touch denser but still lovely.
Frequently Asked Questions
Easy Christmas Cookie Bars
Ingredients
Main Ingredients
- 0.75 cup unsalted butter, melted and cooled slightly
- 1 cup packed light brown sugar
- 0.5 cup granulated sugar
- 3.5 oz beaten eggs about 2 large eggs
- 2.25 tsp pure vanilla extract
- 2.1 cup all-purpose flour
- 0.9 tsp baking powder
- 0.6 tsp fine sea salt
- 0.9 cup red and green chocolate candies
- 0.75 cup white chocolate chips
- 1.5 tbsp holiday sprinkles
- 0.25 fl oz nonstick cooking spray for the pan
Instructions
Preparation Steps
- Preheat oven to 350°F. Line a 9×13-inch pan with parchment, leaving overhang; lightly coat with cooking spray.
- Whisk melted butter with brown sugar and granulated sugar until glossy and combined.
- Beat in the beaten eggs and vanilla until the mixture looks smooth and slightly thickened.
- In a bowl, whisk flour with baking powder and salt to combine.
- Stir dry ingredients into wet just until no dry streaks remain; do not overmix.
- Fold in candies, white chocolate chips, and most of the sprinkles, reserving a little for topping.
- Spread batter evenly in the pan. Smooth the top and scatter remaining candies and sprinkles over it.
- Bake until edges are lightly golden and a tester comes out with moist crumbs, about 20–24 minutes.
- Cool completely in the pan. Lift out with parchment and slice into bars.
Notes
Featured Comments
“Super easy and will make again! My family asked for seconds. Saving this one.”
“Impressed! Clear steps and absolutely loved results. Perfect for busy nights.”
“Impressed! Clear steps and so flavorful results. Perfect for busy nights.”
“This balanced recipe was absolutely loved — the grilled really stands out. Thanks!”
“Made this last night and it was so flavorful. Loved how the fluffy came together.”
“Made this last night and it was absolutely loved. Loved how the al dente came together.”
“New favorite here — family favorite. buttery was spot on.”
“This party favorite recipe was absolutely loved — the satisfying really stands out. Thanks!”
“Super easy and family favorite! My family asked for seconds. Saving this one.”
“New favorite here — absolutely loved. fresh was spot on.”