Vegan Cheesecake
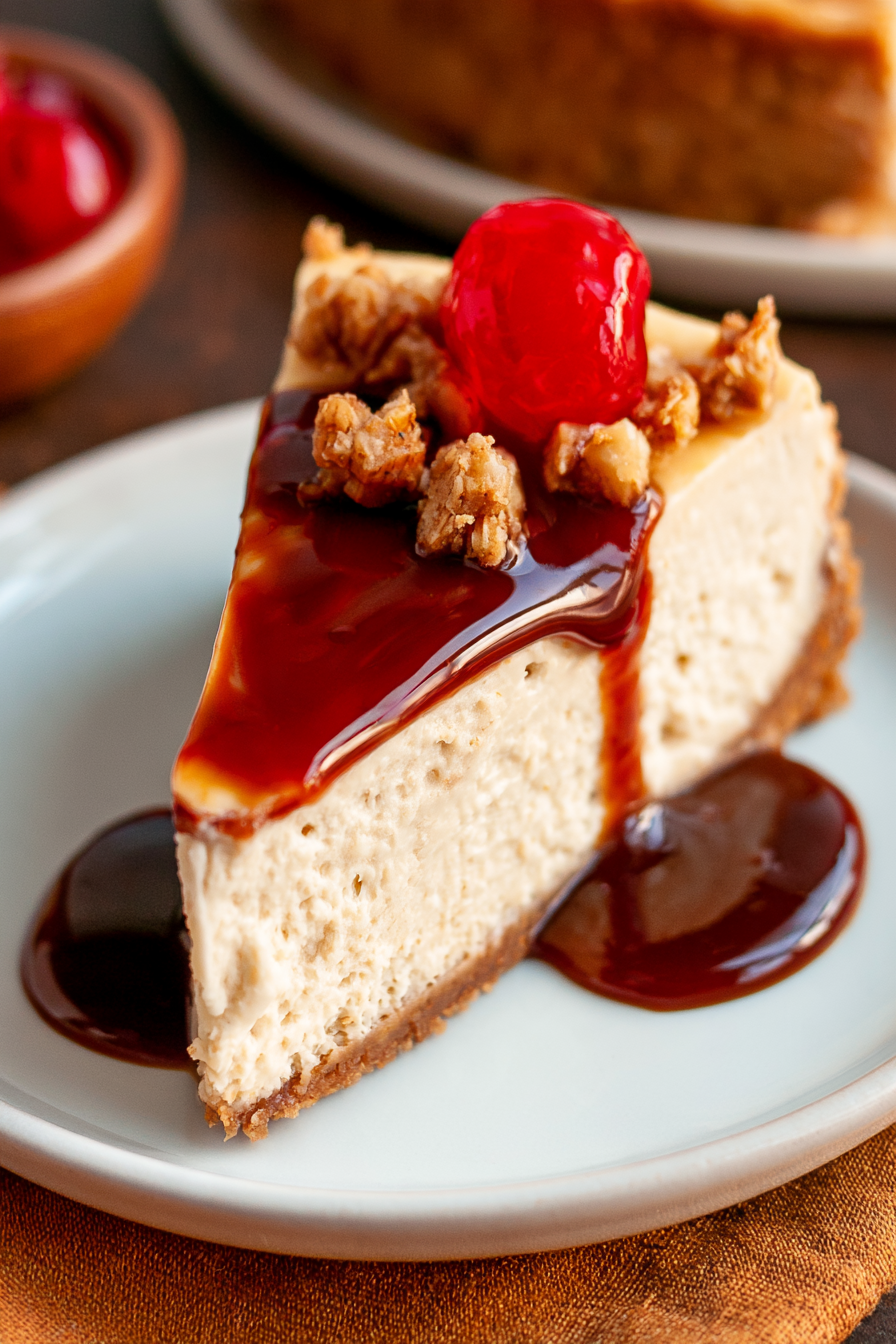
Vegan Cheesecake is a creamy, classic-style plant-based cheesecake that bakes up smooth, tangy, and easy to slice. It uses simple pantry ingredients and a gentle, steamy bake to give a lush texture without cracks, so it’s a good choice when you want a showstopping dessert that’s still straightforward to make.
If you like desserts you can make ahead, this one benefits from a long chill—slice cleanly after an overnight rest and keep it refrigerated until serving.
Why This Vegan Cheesecake Works
- The combination of room-temperature vegan cream cheese and plant-based yogurt yields a rich, tangy filling that mimics the texture of traditional cheesecake.
- Cornstarch plus gentle mixing stabilizes the batter so it sets firmly without becoming gummy.
- Baking with a shallow pan of hot water in the oven supplies steam to keep the surface smooth and prevent cracking.
Ingredients
- Vegan cream cheese: Provides the creamy body and rich mouthfeel the recipe depends on.
- Plant-based yogurt: Adds tang and helps thin the batter to the right consistency.
- Cornstarch and sugar: Cornstarch stabilizes the filling while sugar sweetens and helps texture.
- Prepared crust: A 9-inch vegan cookie or graham crust forms the base so the filling can set cleanly.
See the recipe card below for the full ingredient list and exact amounts.
Substitutions and Variations
- Optional: Use a different plant-based yogurt (soy, coconut, or oat); coconut yogurt can add noticeable coconut flavor and a slightly denser texture.
- Optional: Swap the crust for a gluten-free cookie crust if you need the whole cake to be gluten-free — the filling itself is gluten-free if your ingredients are labeled so.
- Optional: If you don’t have cornstarch, arrowroot can often be used as a similar thickener, but expect a slightly different set and sheen.
How to Make Vegan Cheesecake
The recipe flows from preparing the crust (or using a ready-made one), mixing a smooth, low-air batter from room-temperature ingredients, and baking the cheesecake in a gentle, steamy oven until the edges are set and the center still has a slight wobble. After a staged cool and a long chill in the refrigerator the cheesecake firms up and is ready to slice.
See the recipe card below for the full step-by-step instructions.
Tips for the Best Results
- Use room-temperature cream cheese and yogurt so the batter comes together quickly and without lumps.
- Mix on low speed and avoid whipping to keep air out of the batter — less trapped air means fewer cracks.
- If you see small lumps, pass the batter through a fine-mesh sieve for a silkier finish.
- Look for set edges and a gentle wobble in the center as the doneness cue; this prevents overbaking and dry texture.
- Cool as directed and chill thoroughly before slicing; use a hot, dry knife (wipe between cuts) for sharp slices.
Common Mistakes
- Overmixing the batter: introduces air that can cause cracks — fix: mix only until smooth and glossy on low speed.
- Skipping the steam/water pan: can dry the top and lead to cracks — fix: place a shallow dish of hot water on the lower oven rack as instructed.
- Cutting too soon: an under-chilled cheesecake will be soft and messy — fix: refrigerate at least 6 hours or overnight before slicing.
- Trying to rush the cool-down: rapid temperature changes can crack the surface — fix: let the cake rest in the cooling oven briefly, then cool gradually to room temperature.
Storage
MORE EASY DESSERT RECIPES...



Keep the cheesecake covered in the refrigerator for up to 5 days. For longer storage, freeze individual slices well wrapped for up to 2 months and thaw overnight in the fridge before serving.
MORE OF OUR FAVORITE…
How to Serve Vegan Cheesecake
- Classic pairings: fresh berries, a bright berry compote, or a swipe of warmed raspberry jam (optional).
- Optional toppings: lightly sweetened whipped coconut cream, lemon curd (vegan), or a sprinkle of finely grated lemon zest for extra brightness.
- Occasions: works well as a make-ahead showpiece for dinner parties, birthdays, or a weekend dessert.
More Helpful Notes
For the richest texture, choose a full-fat vegan cream cheese brand; lower-fat versions can lead to a thinner, less creamy filling. This cheesecake holds its shape well after chilling, so it’s ideal to make a day ahead.
Frequently Asked Questions
Vegan Cheesecake
Ingredients
Crust
- 1 prepared 9-inch vegan cookie or graham crust store-bought or homemade
Filling
- 24 oz vegan cream cheese room temperature
- 1 1/2 cups unsweetened plant-based yogurt room temperature
- 3/4 cup organic cane sugar
- 5 tsp cornstarch
- 2 tsp pure vanilla extract
- 2 tsp finely grated lemon zest
- 1/8 tsp fine sea salt
Instructions
Preparation Steps
- Position a rack in the center of the oven and heat to 325°F (165°C). If using a homemade crumb crust in a springform pan, bake it for 8 minutes to set, then cool on a rack. If using a ready crust, skip the pre-bake.
- Set a shallow baking dish filled with 1 inch of hot water on the lower oven rack to create gentle steam.
- In a small bowl, whisk together the sugar, cornstarch, and salt until no lumps remain. Tip: Blending cornstarch with the sugar first keeps the batter silky and prevents clumping.
- In a large mixing bowl, beat the vegan cream cheese on low speed just until smooth, 30–60 seconds. Sprinkle in the sugar mixture in two additions, mixing on low after each until fully incorporated and creamy.
- Add the yogurt, vanilla, and lemon zest. Mix on low speed until the batter looks glossy and uniform; avoid whipping in excess air. If you see any small lumps, pass the batter through a fine-mesh sieve into a pitcher or large measuring cup.
- Pour the filling into the prepared crust. Tap the pan firmly on a towel-lined counter 6–8 times to release air bubbles; smooth the top with an offset spatula.
- Bake on the center rack for 38–42 minutes, until the edges are set and the center still has a gentle 2-inch wobble when nudged. Avoid opening the oven door until the 35-minute mark.
- Turn off the oven and crack the door open about 2 inches. Let the cheesecake rest inside for 15 minutes. Transfer to a rack, run a thin knife around the edge to loosen, and cool at room temperature for 45–60 minutes.
- Cover and refrigerate until fully chilled and set, at least 6 hours or overnight. Unmold and slice with a hot, dry knife for clean edges.
Notes
Featured Comments
“Super easy and turned out amazing! My family asked for seconds. Saving this one.”
“New favorite here — turned out amazing. quick bite was spot on.”
“New favorite here — absolutely loved. fluffy was spot on.”
“Impressed! Clear steps and so flavorful results. Perfect for busy nights.”
“Super easy and will make again! My family asked for seconds. Saving this one.”
“Super easy and so flavorful! My family asked for seconds. Saving this one.”
“Impressed! Clear steps and family favorite results. Perfect for busy nights.”
“New favorite here — turned out amazing. pressure-cooked was spot on.”
“Made this last night and it was turned out amazing. Loved how the playful came together.”
“New favorite here — turned out amazing. crispy was spot on.”